Create your WordPress site with AI in 60 seconds.



























When you switch from another hosting or email provider to FastPanda’s Business Email Hosting service, you may want to transfer your existing emails-including your inbox, sent messages, and custom folders-to your new account without losing any of your email history.
With the Email Migration tool available in the FastPanda Customer Panel, you can transfer your email accounts directly and securely from one server to another without dealing with technical complexities or downloading and uploading backups to your computer.
Follow the steps below to migrate your emails using Email Migration.
- Access the website www.fastpanda.co.uk.
- Click on the “Sign In” button on the opened page, enter your customer panel information, and click the “Log in” button to log in to your account.


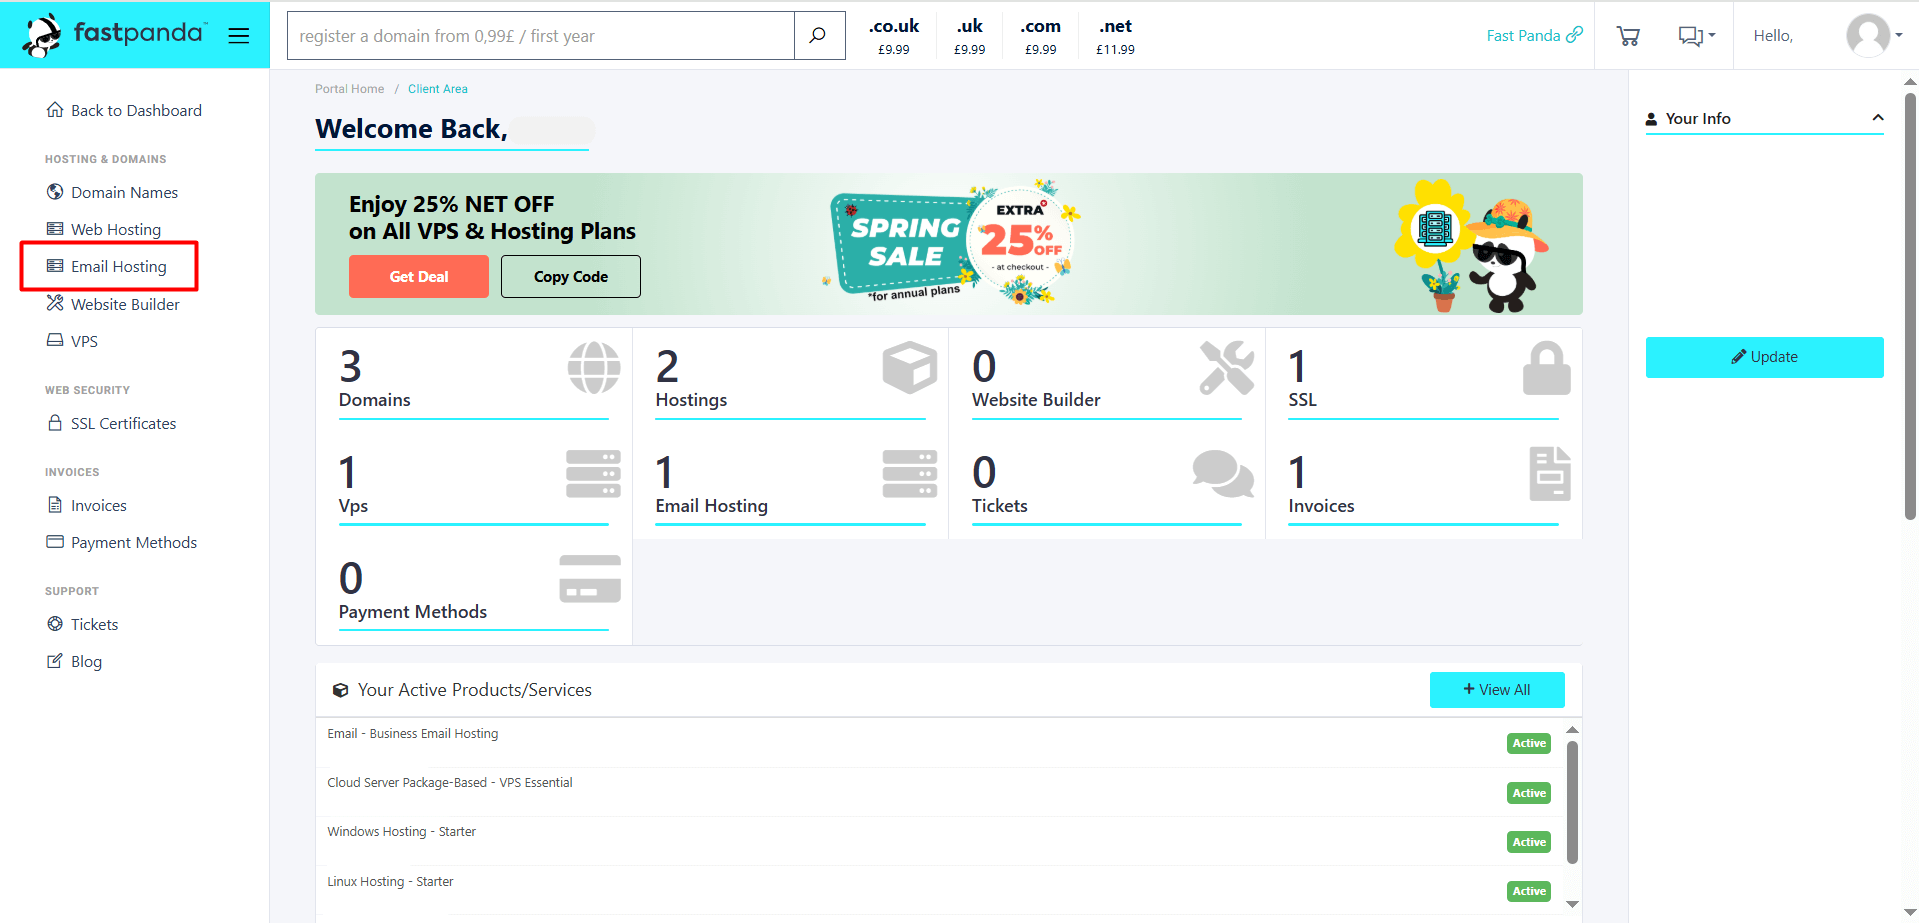
- Click on the “Email Hosting” option in the left menu.
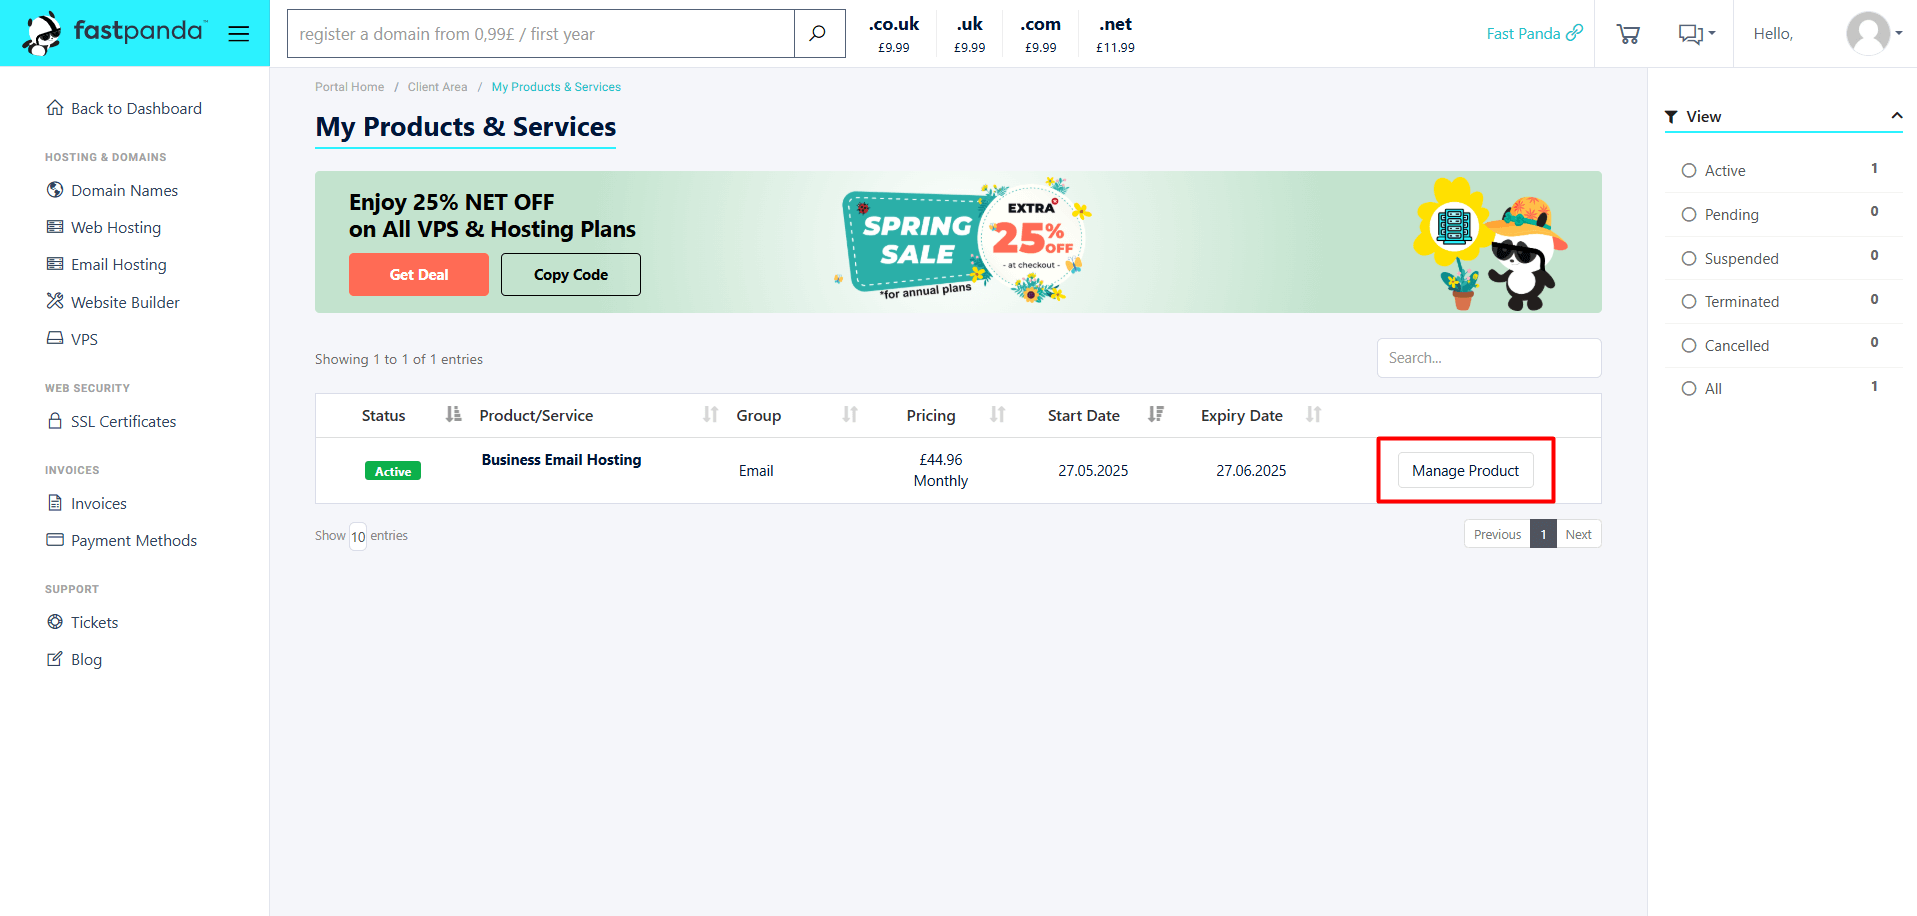
- On the page that opens, you will see your existing Business Email Hosting plans. Click “Manage Product” for the plan you want to migrate emails to.
- Click the “Email Migration” button in the right-hand menu.
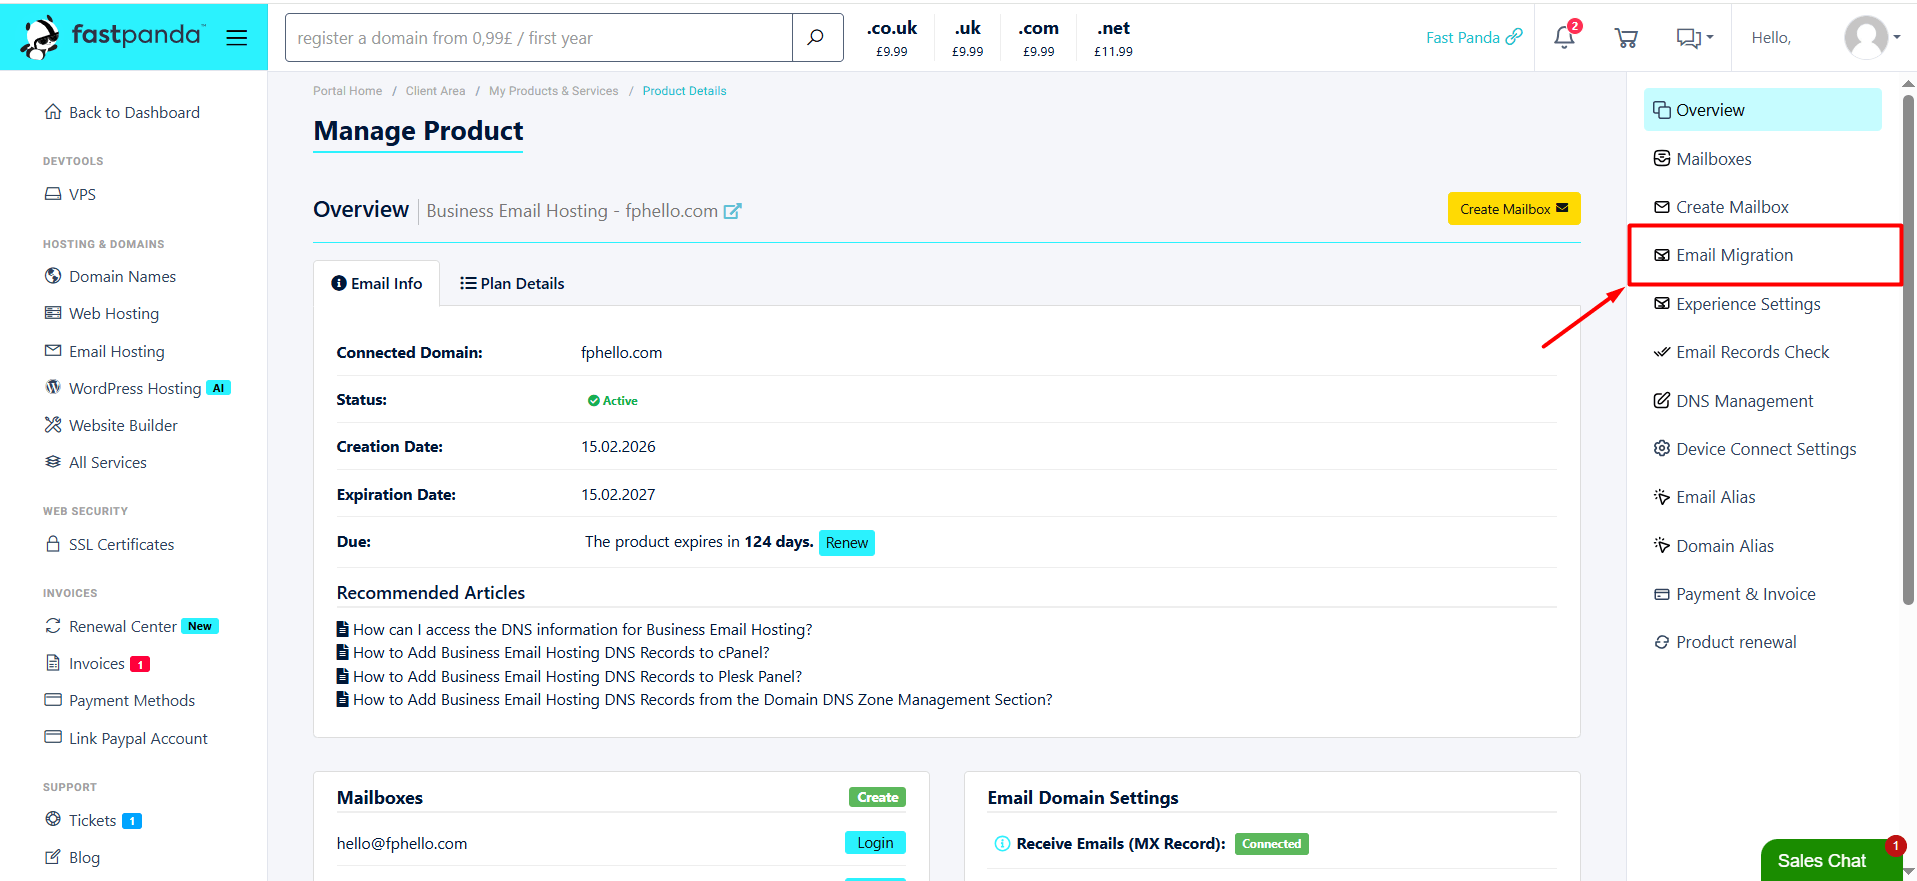
- Source Server
- Method: Select the method that matches your previous email provider’s infrastructure from the drop-down menu (IMAP, POP, or Exchange/EWS).
- Source Server: Enter the server address of your previous email provider (e.g., mail.yourdomain.com or outlook.office365.com).
- Port: Enter the port number appropriate for your selected method and security protocol (IMAP: 993, POP: 995, Exchange: 443).
- Encryption: For a secure connection, SSL/TLS is always recommended.
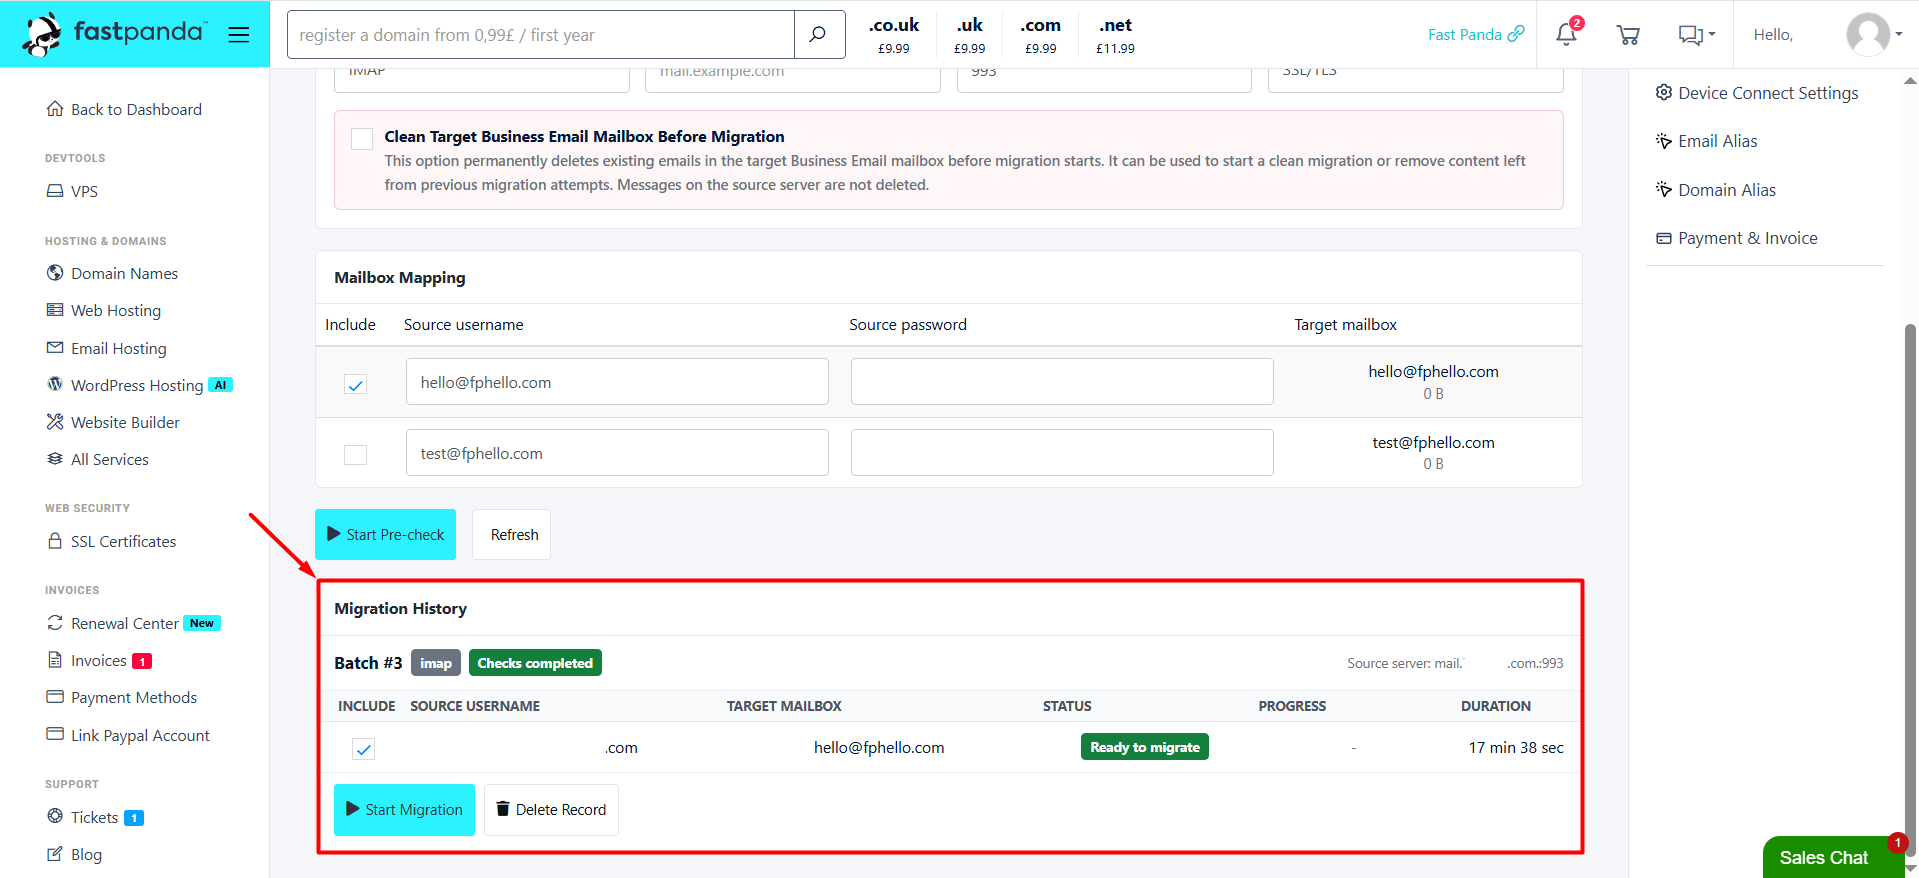
- Carefully review the optional “Clean Target Mailbox” checkbox on the page. If selected, all existing emails in your target mailbox on FastPanda will be permanently deleted before the migration begins, leaving the mailbox empty for a fresh start. This option is useful for removing duplicate emails left behind by previous incomplete migration attempts.
Important: This action does not delete emails from your old (source) server. It only clears the target mailbox. If your new account does not contain any emails yet, you can select this checkbox.
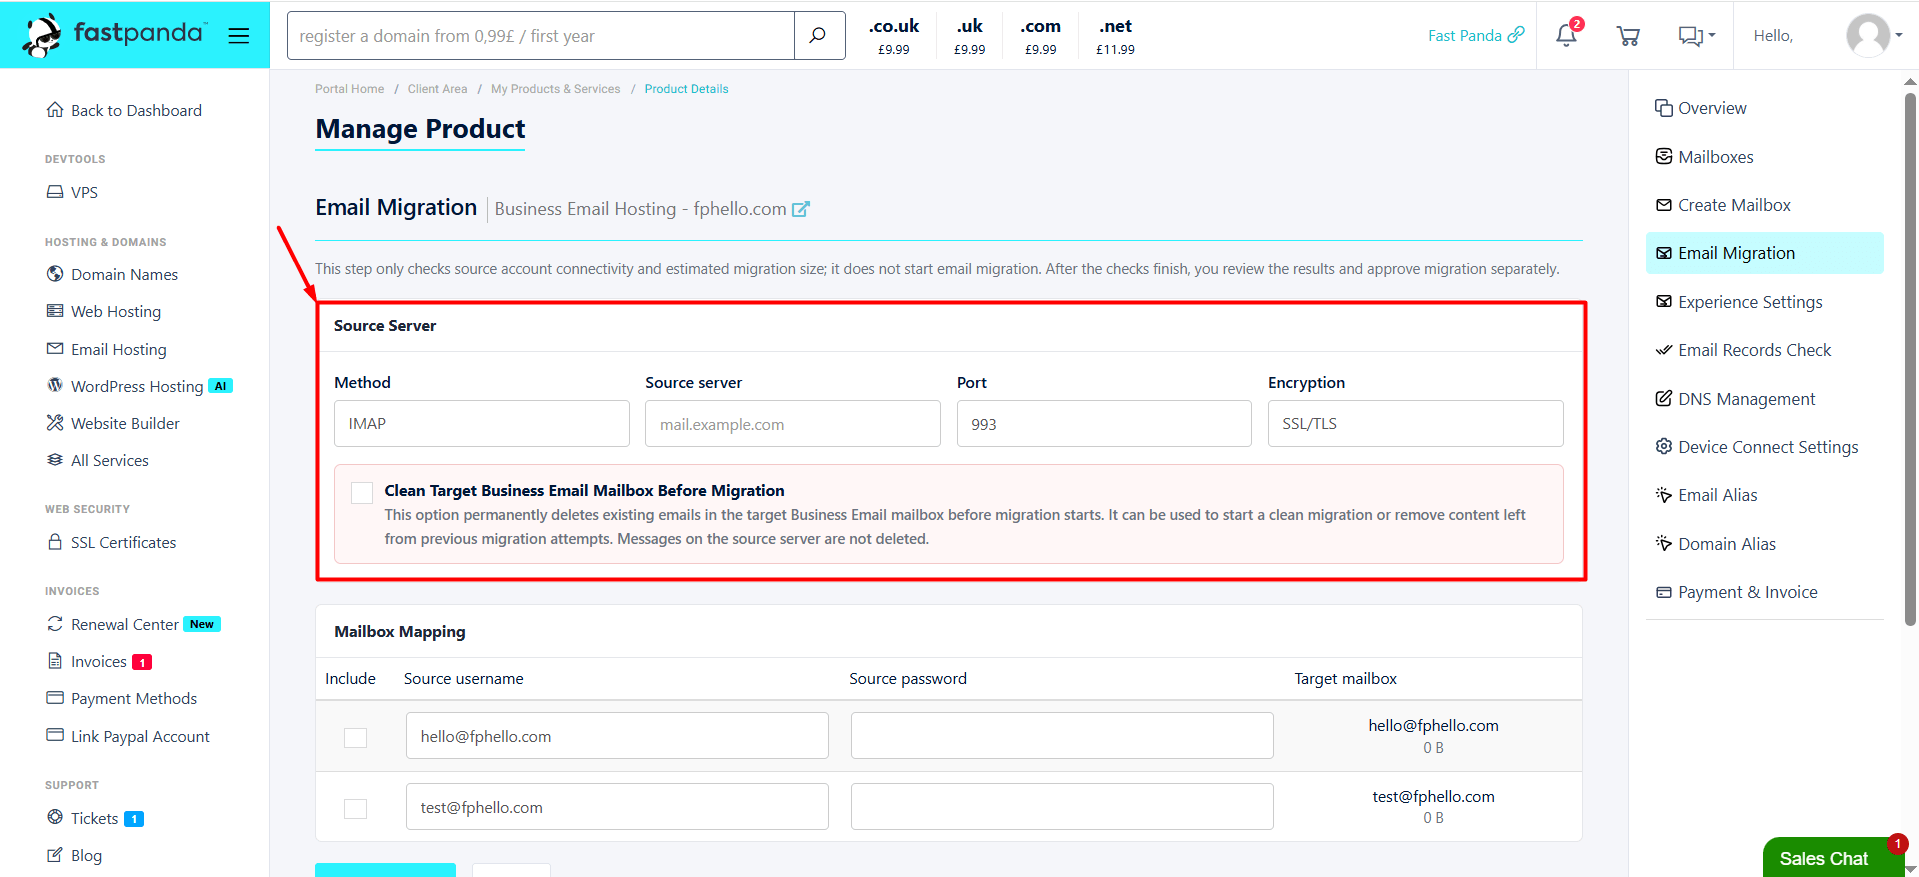
- Mailbox Mapping
- Include (Checkbox): Select the checkbox next to each email account you want to migrate.
- Source Username: Enter the full email address of the account on your old server (e.g., [email protected]).
- Source Password: Enter the current password for this email account on your old server.
- Target Mailbox: The FastPanda destination account where the emails will be transferred (e.g., [email protected]).
- Start Pre-check: After entering all the details, click the “Start pre-check” button at the bottom of the page. No emails are transferred during this step. The system only connects to the old server to verify the login credentials and calculate the total size of the emails to be migrated (in MB/GB).
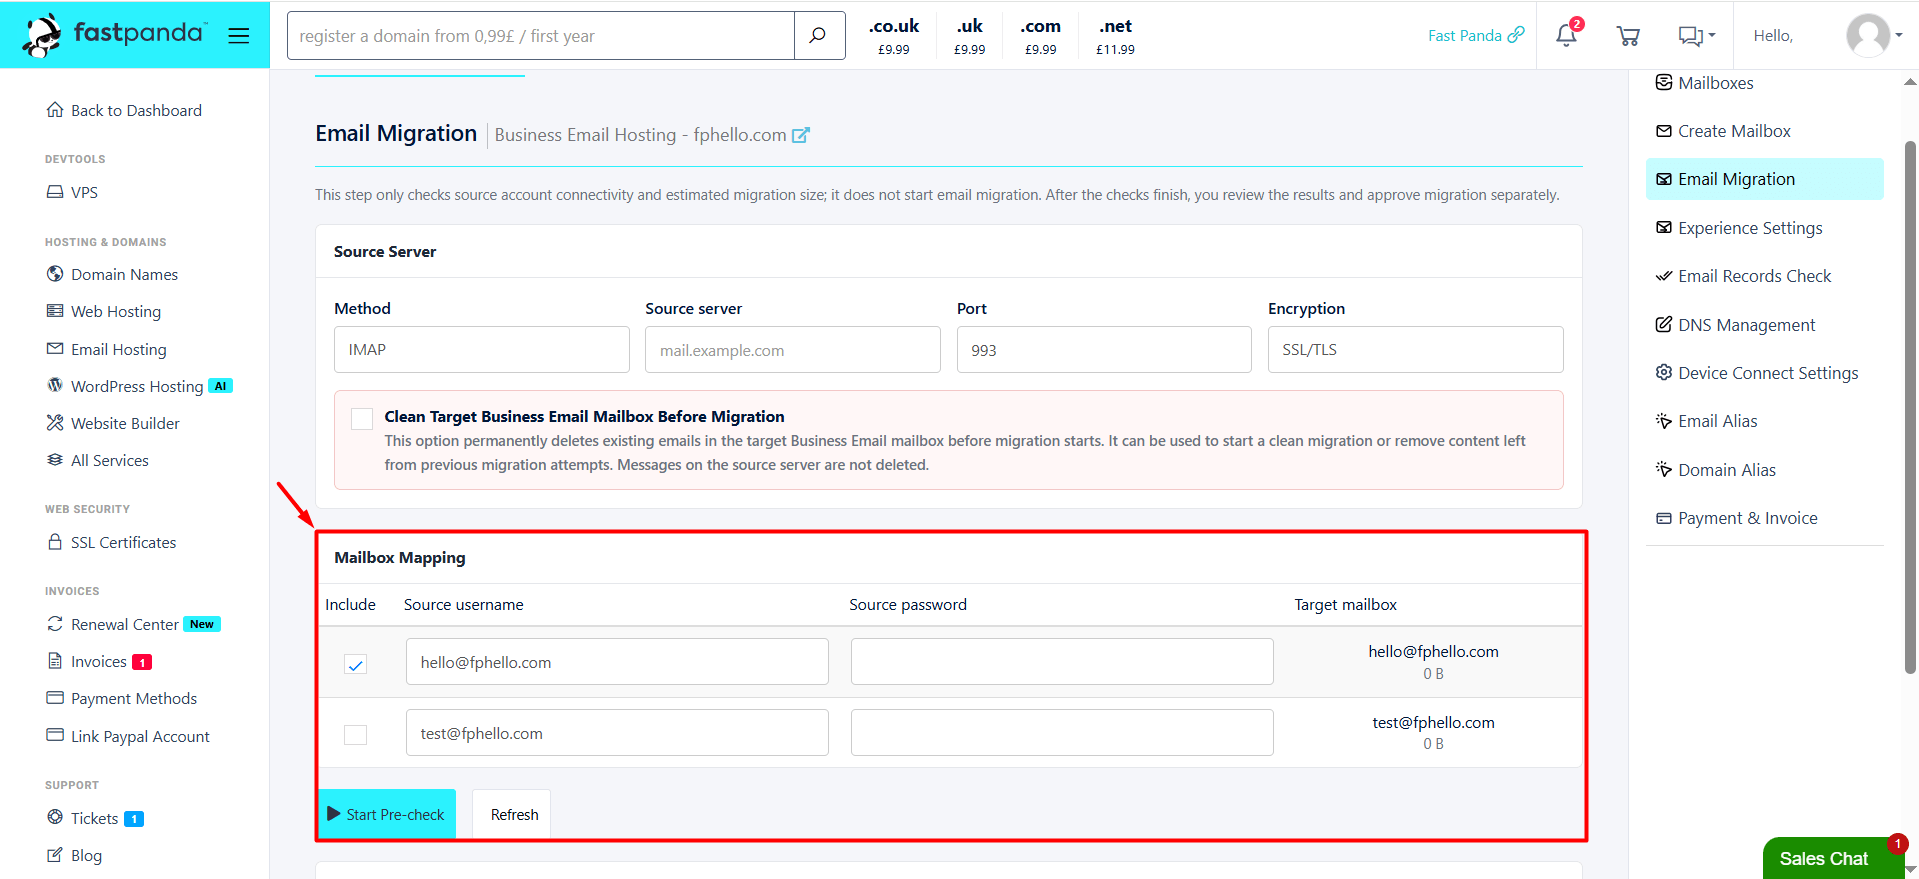
- Migration History
- Click “Start Pre-check” to begin the initial checks. If everything looks good, select the checkbox in the Include column of the table that appears, then click “Start Migration” to begin the actual email transfer process. The migration time may vary depending on the amount of data in your emails. Once the migration is complete, log in to your email account to verify the transferred emails.