Create your WordPress site with AI in 60 seconds.




























It is recommended that you create a recent backup before updating your website, installing a new plugin or theme, or making code changes. In the event of data loss or a system failure, you can use your backups to restore your website to its previous state within minutes.
With your Linux Hosting or WordPress Hosting service purchased through FastPanda, you can create a full backup of your website directly from the Customer Panel, download it to your device, and restore it with a single click, without needing to log in to cPanel separately.
CRITICAL WARNING:A “Full Backup” created through the Customer Panel is not limited to a single website. It is a copy of your entire hosting account. It includes your primary website, all Addon Domains, all subdomains, all MySQL databases, and all email accounts, packaged into a single archive.
If you host multiple websites under the same hosting account and restore a Full Backup from one week ago because only one website is experiencing issues, all your other websites will also revert to their state from one week ago. During this process, new customer orders, recently published blog content, and all incoming and outgoing emails added since that backup was created may be permanently lost.
Follow the steps below to create and restore a full backup of your hosting account.
How to Create and Restore a Full Backup?
- First, log in to the Web Hosting management panel through your FastPanda Customer Panel. For more information on how to access the panel, please refer to our article titled “How to Log In to the Hosting Management Panel?“
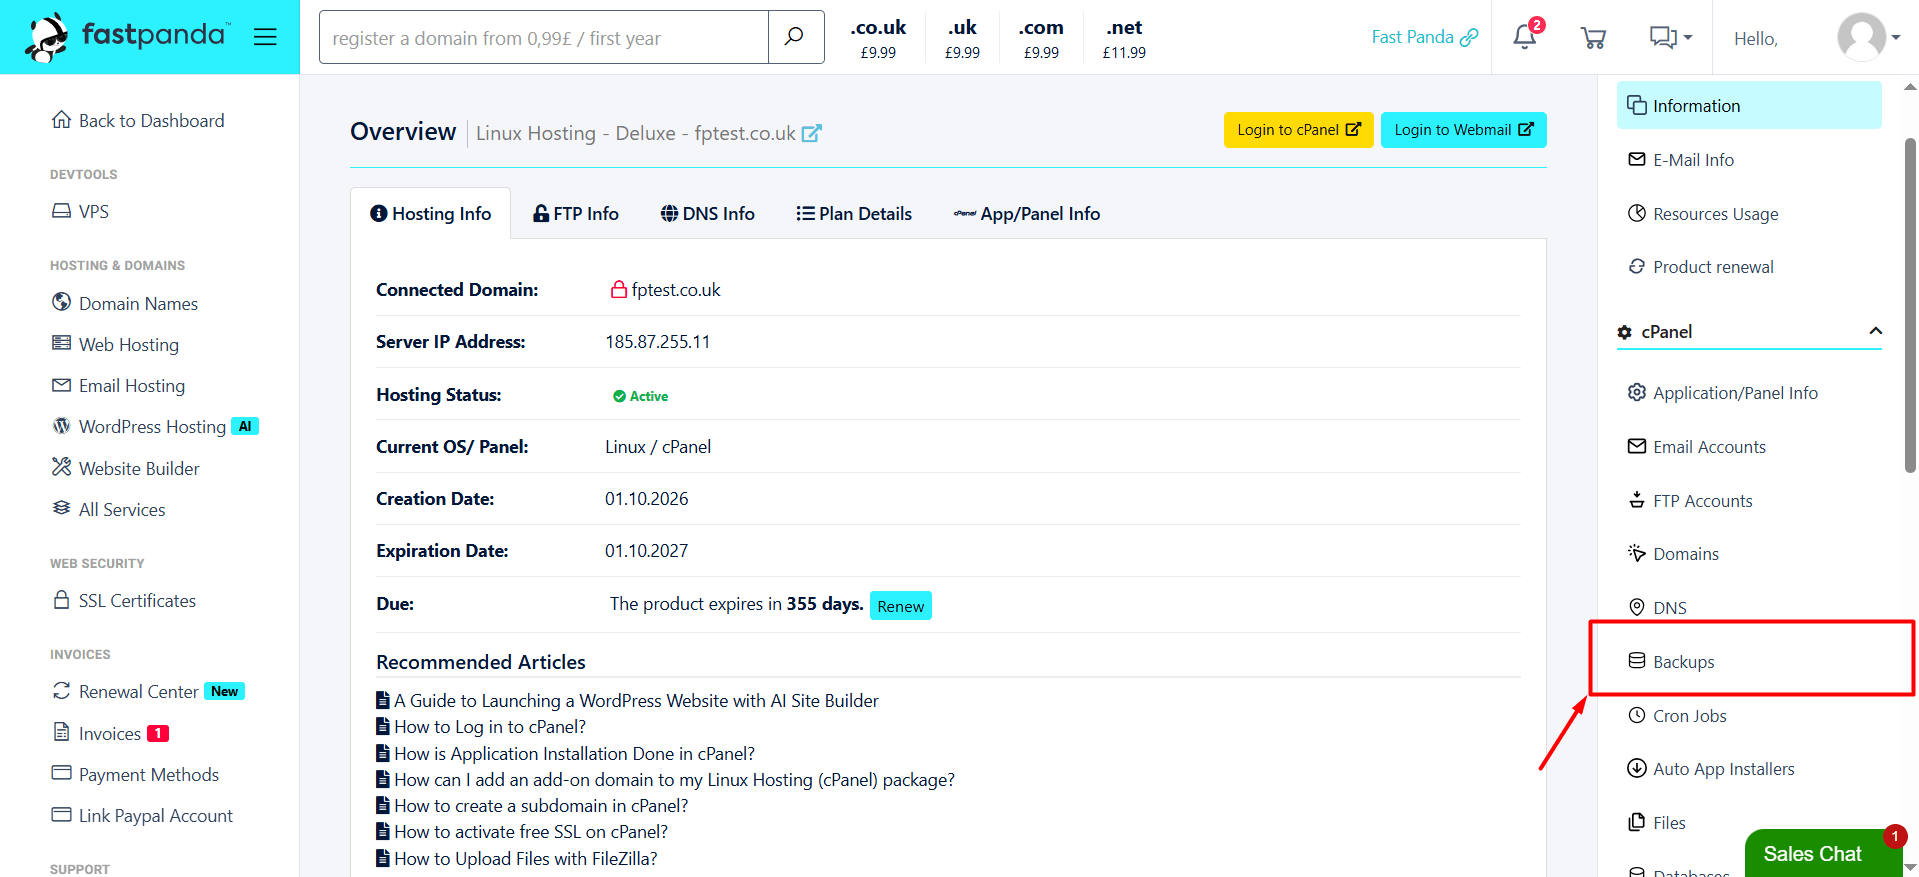
- Once you reach the Web Hosting management panel, click the “Backups” button in the right-hand menu.
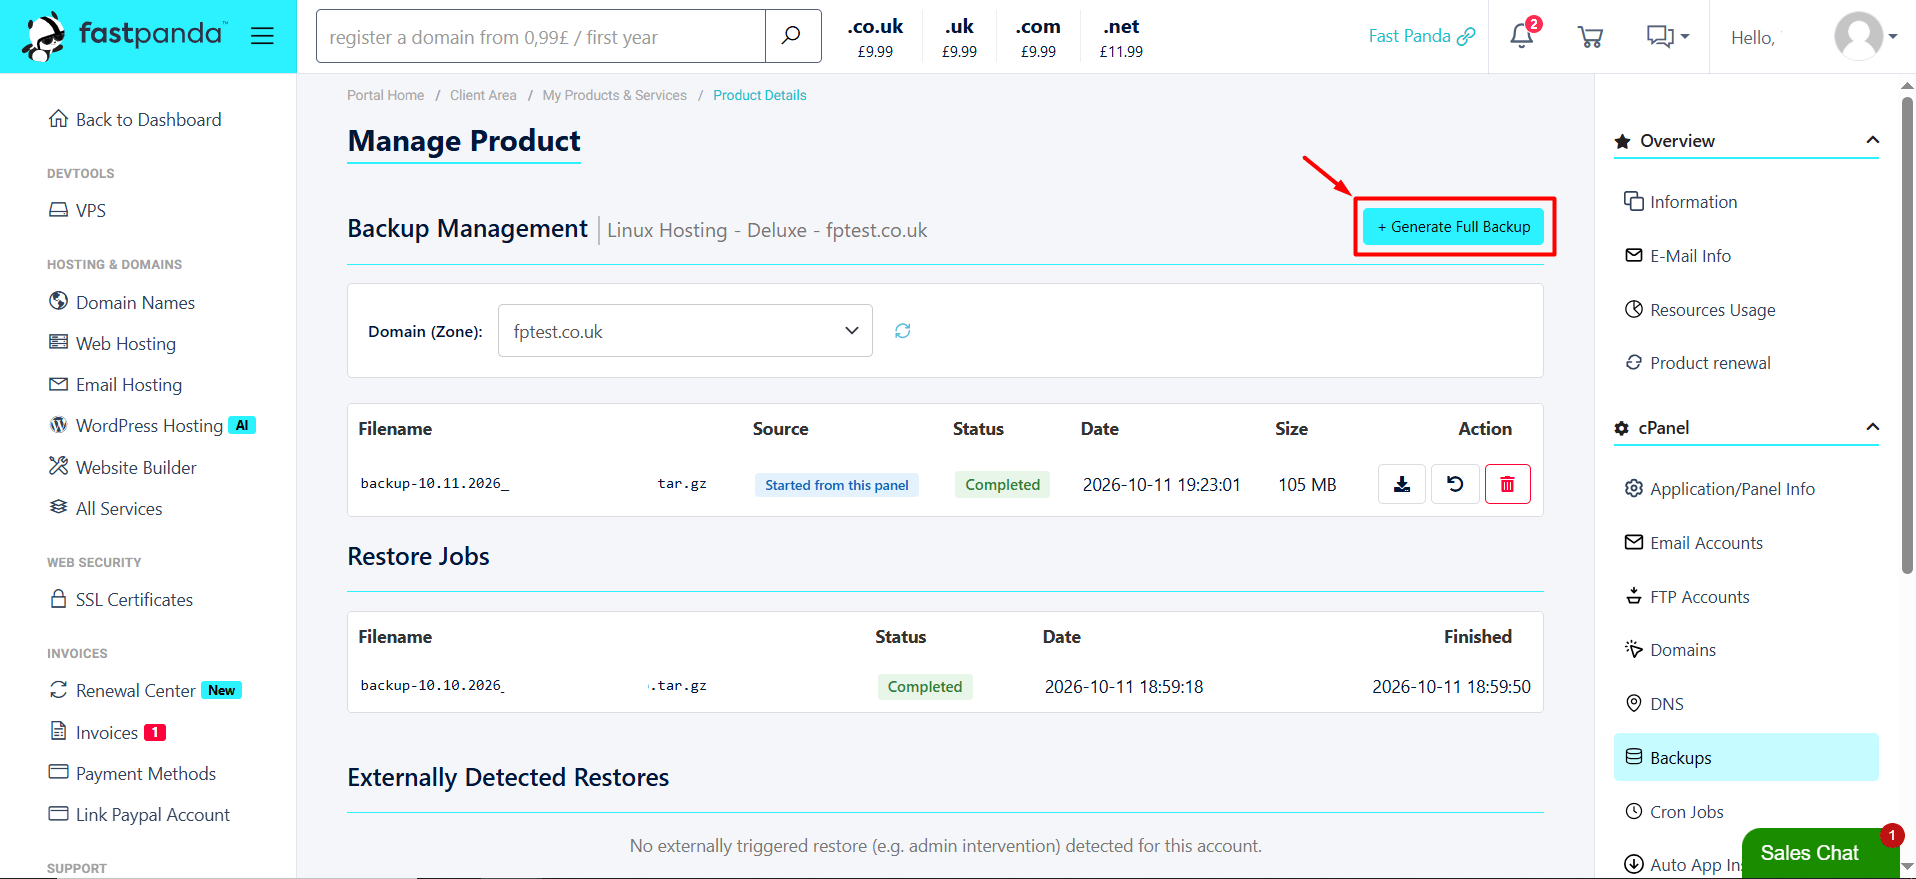
- Once you access the “Backups” page, you will see a control panel where you can manage backups for your hosting account. Click the “+ Generate Full Backup” button in the upper-right corner of the page.
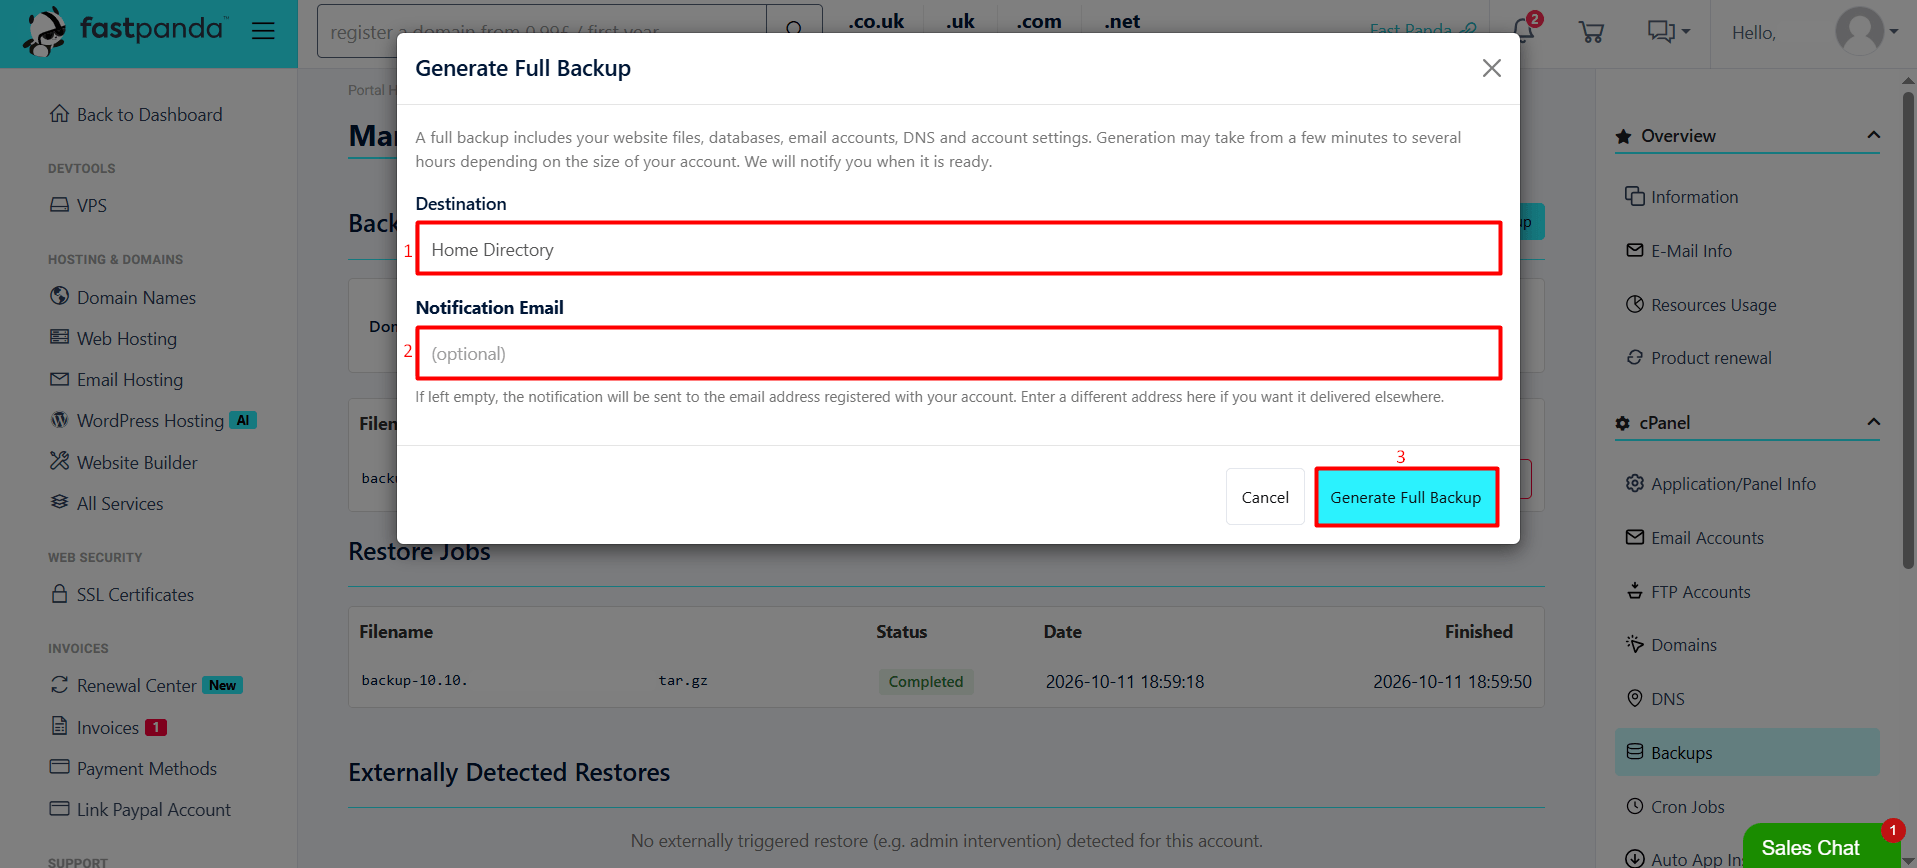
- Configure your backup settings in the window that opens, then click the “Generate Full Backup” button.
- Destination: Select “Home Directory” to create the backup directly in your hosting account. Alternatively, you can send the backup to an external FTP server.
- Notification Email: Enter your email address in this field if you want to receive an email notification when the backup is complete.
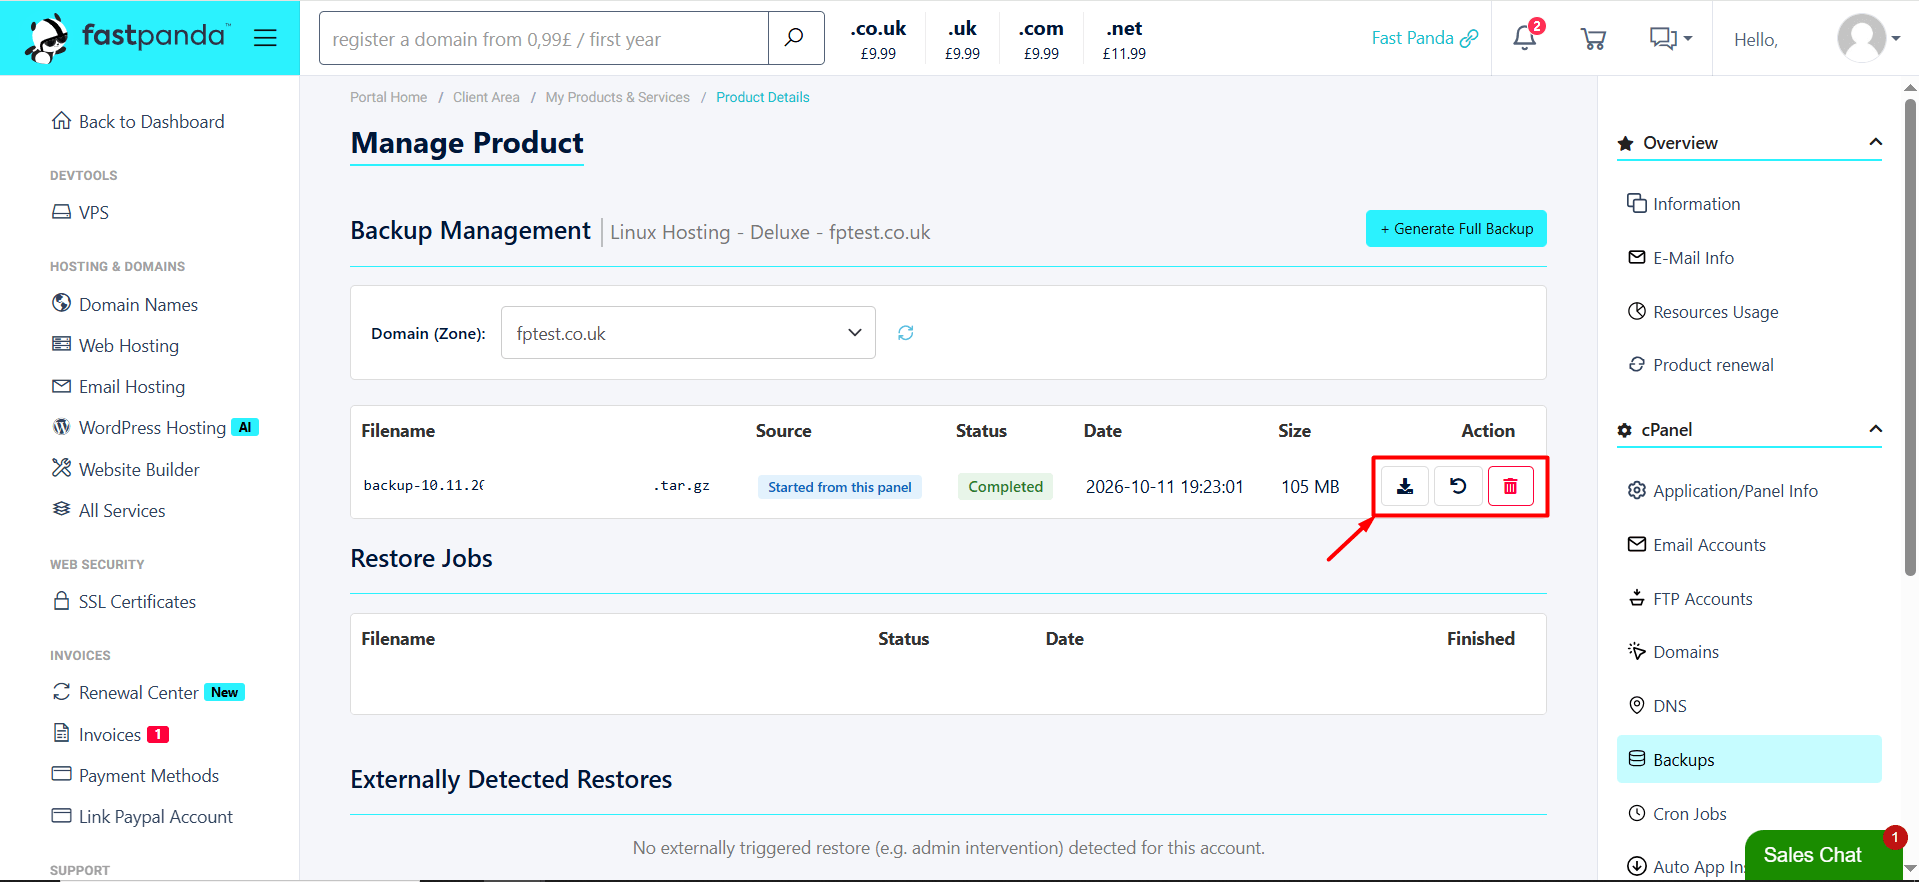
- Once you follow the steps above, the backup process will begin. While the process is running, the status will be displayed as “Running“. Depending on your website’s size, the process may take a few minutes. Once the backup is complete, the status will change to “Completed“. After the backup has been created, you can perform the desired action using the “Action” menu next to the backup:
- Download: Click the download button to save a copy of the backup securely to your computer.
- Restore: If an issue occurs with your website, you can request to restore it using this backup. Once the restoration process begins, you can monitor its progress, completion status, and details in real time from the “Restore Jobs” section on the page.
- Delete: Free up space in your hosting disk quota by deleting old backups that you have already downloaded to your computer.
- You can view the dates, times, and status of previous backup and restoration operations in the “Activity History” section. If there are any externally initiated restoration operations detected at the server level, you can view them in the “Externally Detected Restores” section.