Create your WordPress site with AI in 60 seconds.



























You can share the contact lists you create in Business Email with other users who use the same Business Email service. This allows your team to use shared contact lists. Follow the steps below to share your contact list:
- First, log in to your webmail account to access the Contacts page. You can access your webmail account using the following address:
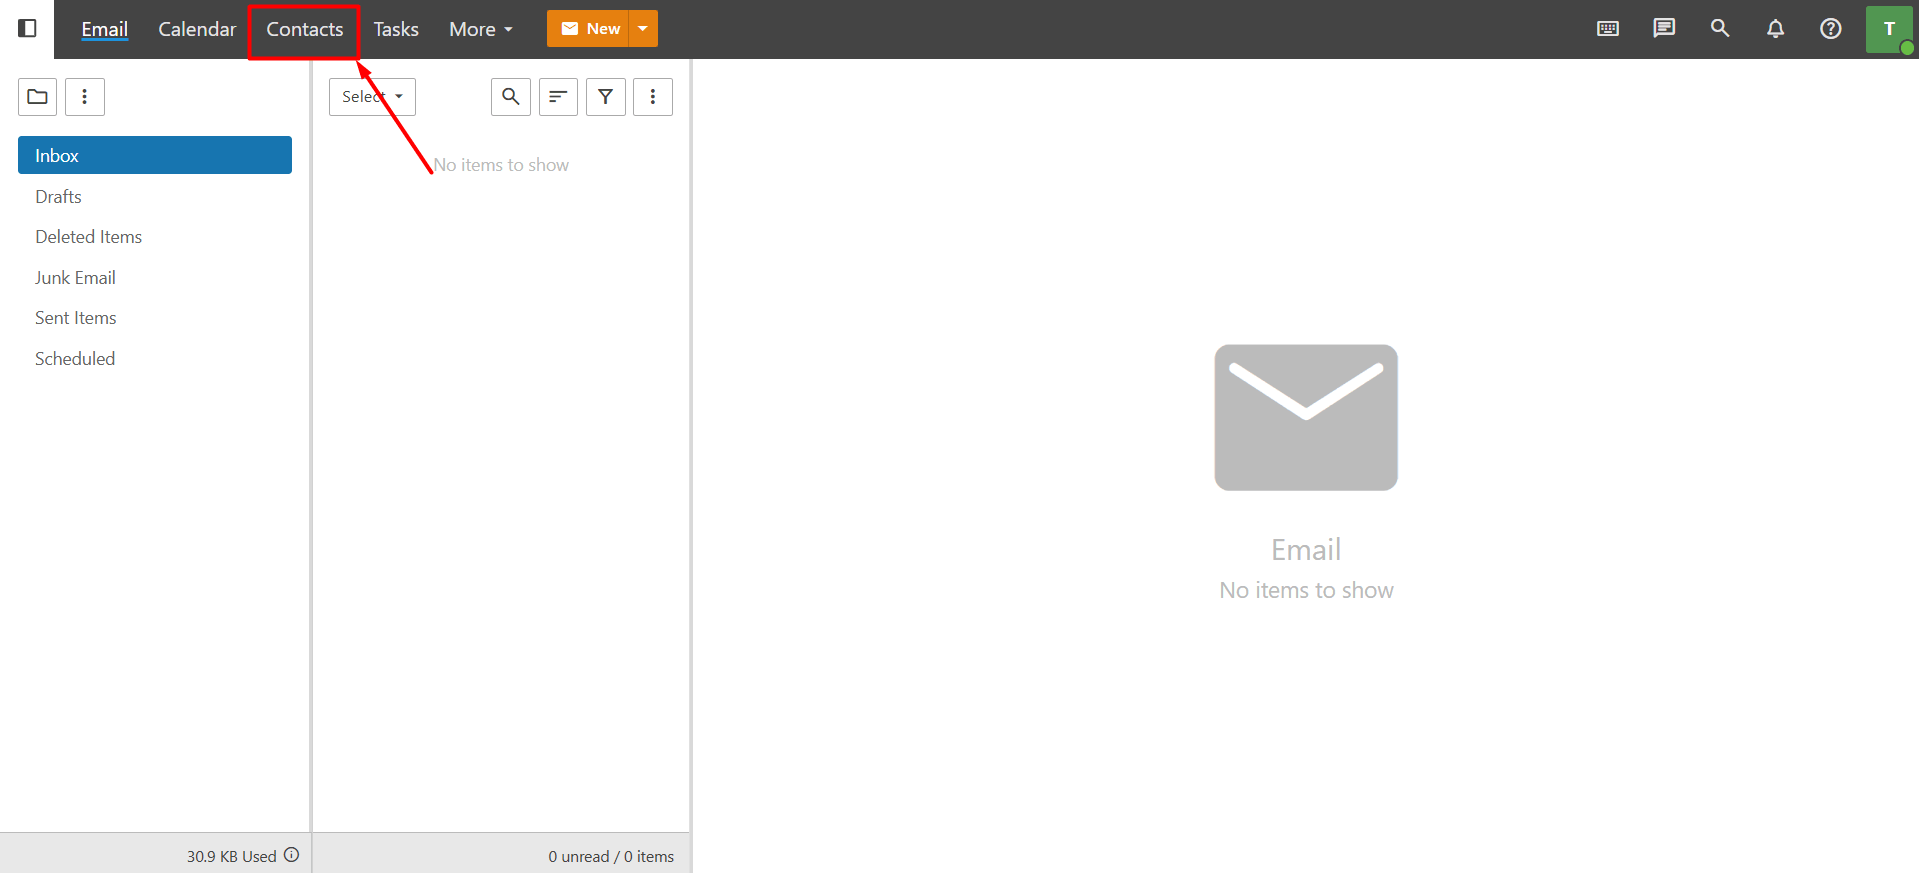
https://webmail.domain.extension (replace this with your own domain name). - After logging in, open the “Contacts” section from the top menu.
Note: If you would like to learn how to create a new contact, please refer to our knowledge base article, “How to Add a Contact in Business Email?”
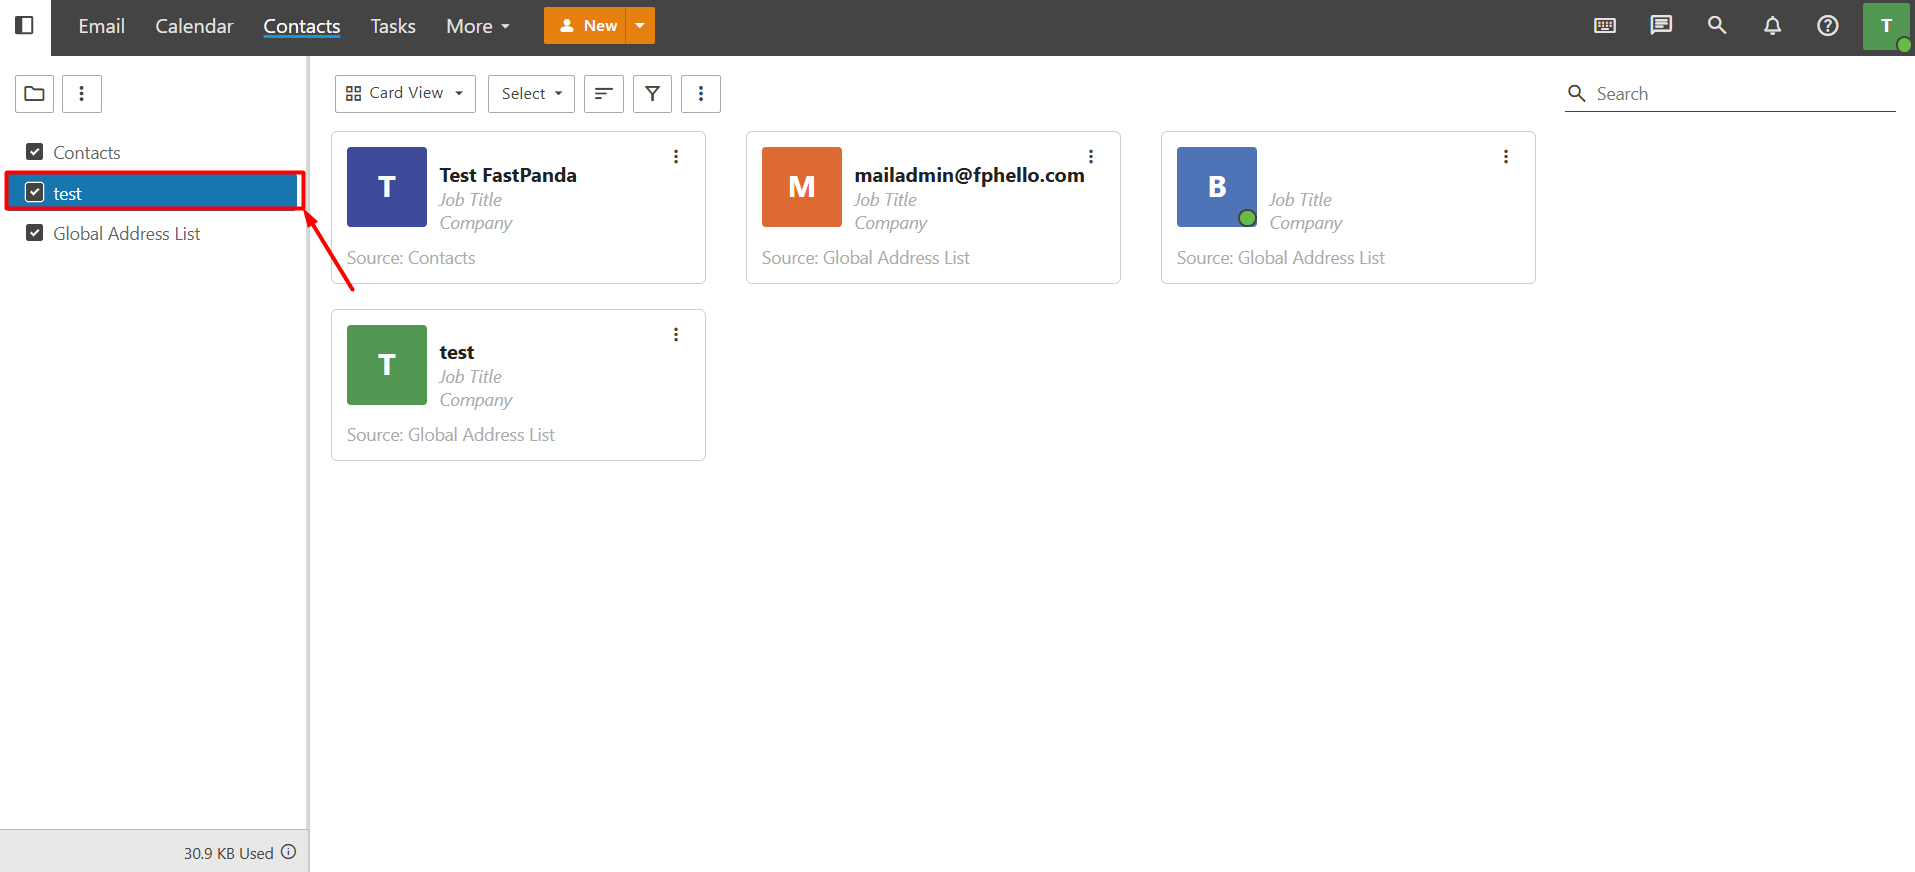
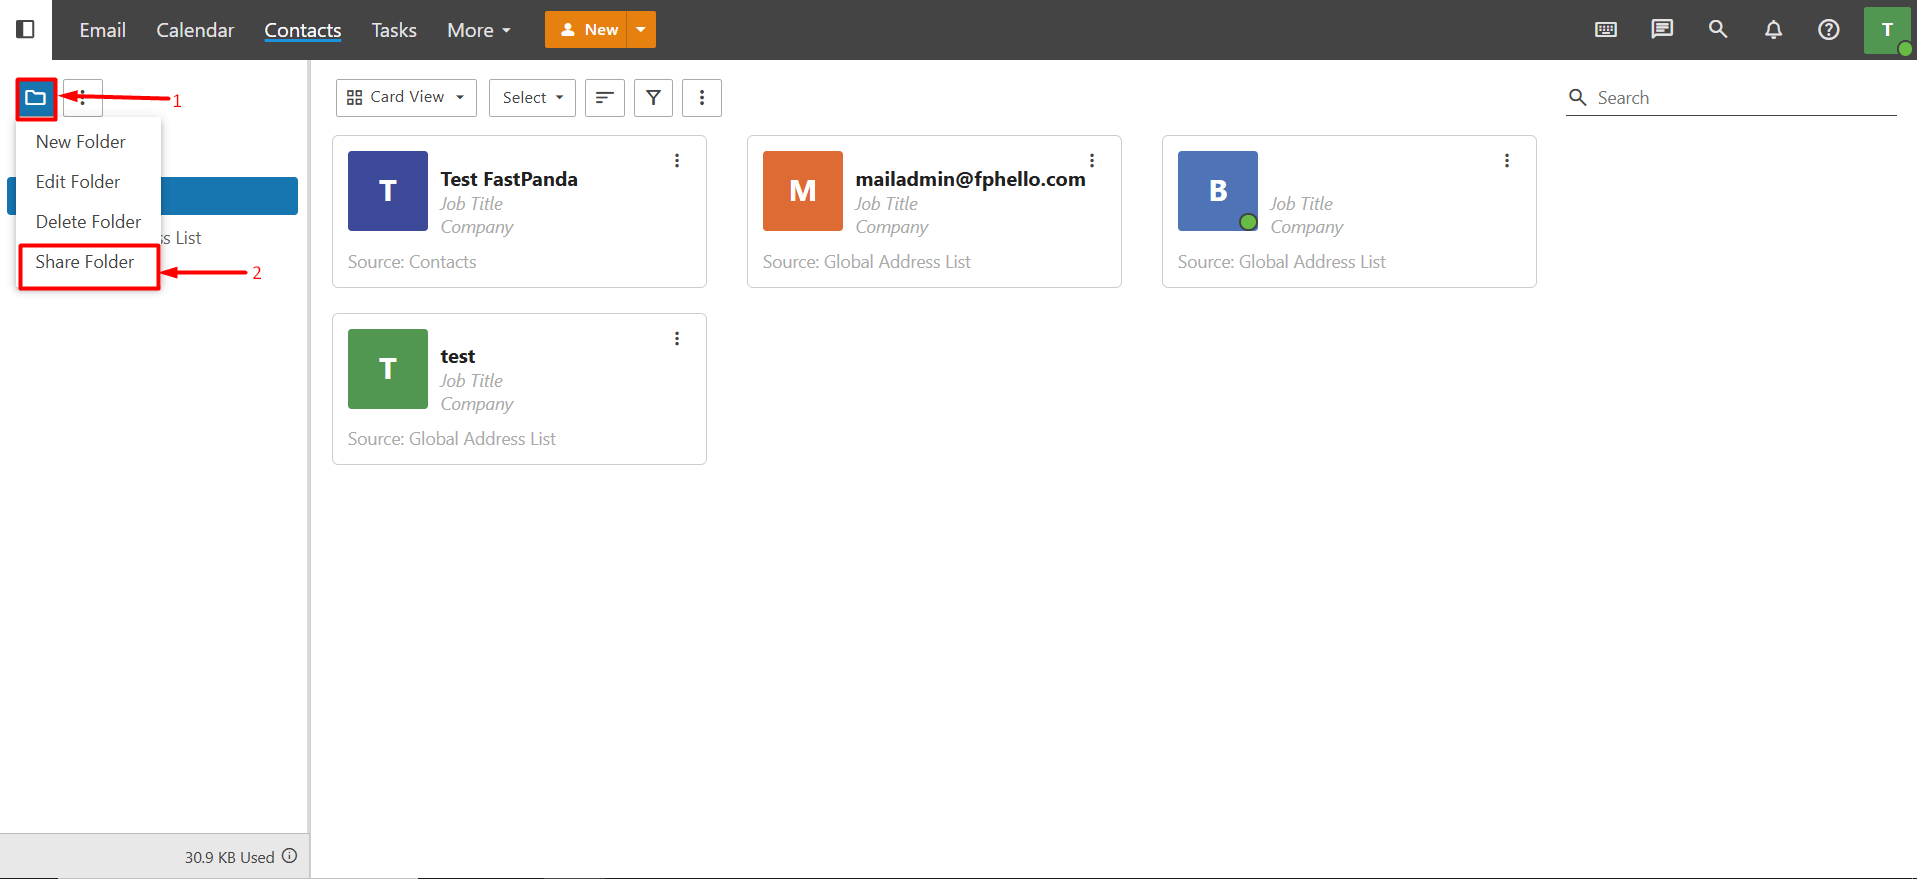
- To share a contact list, select the list you want to share from the left panel. Then, click the “Folder icon” and choose “Share Folder” from the menu.
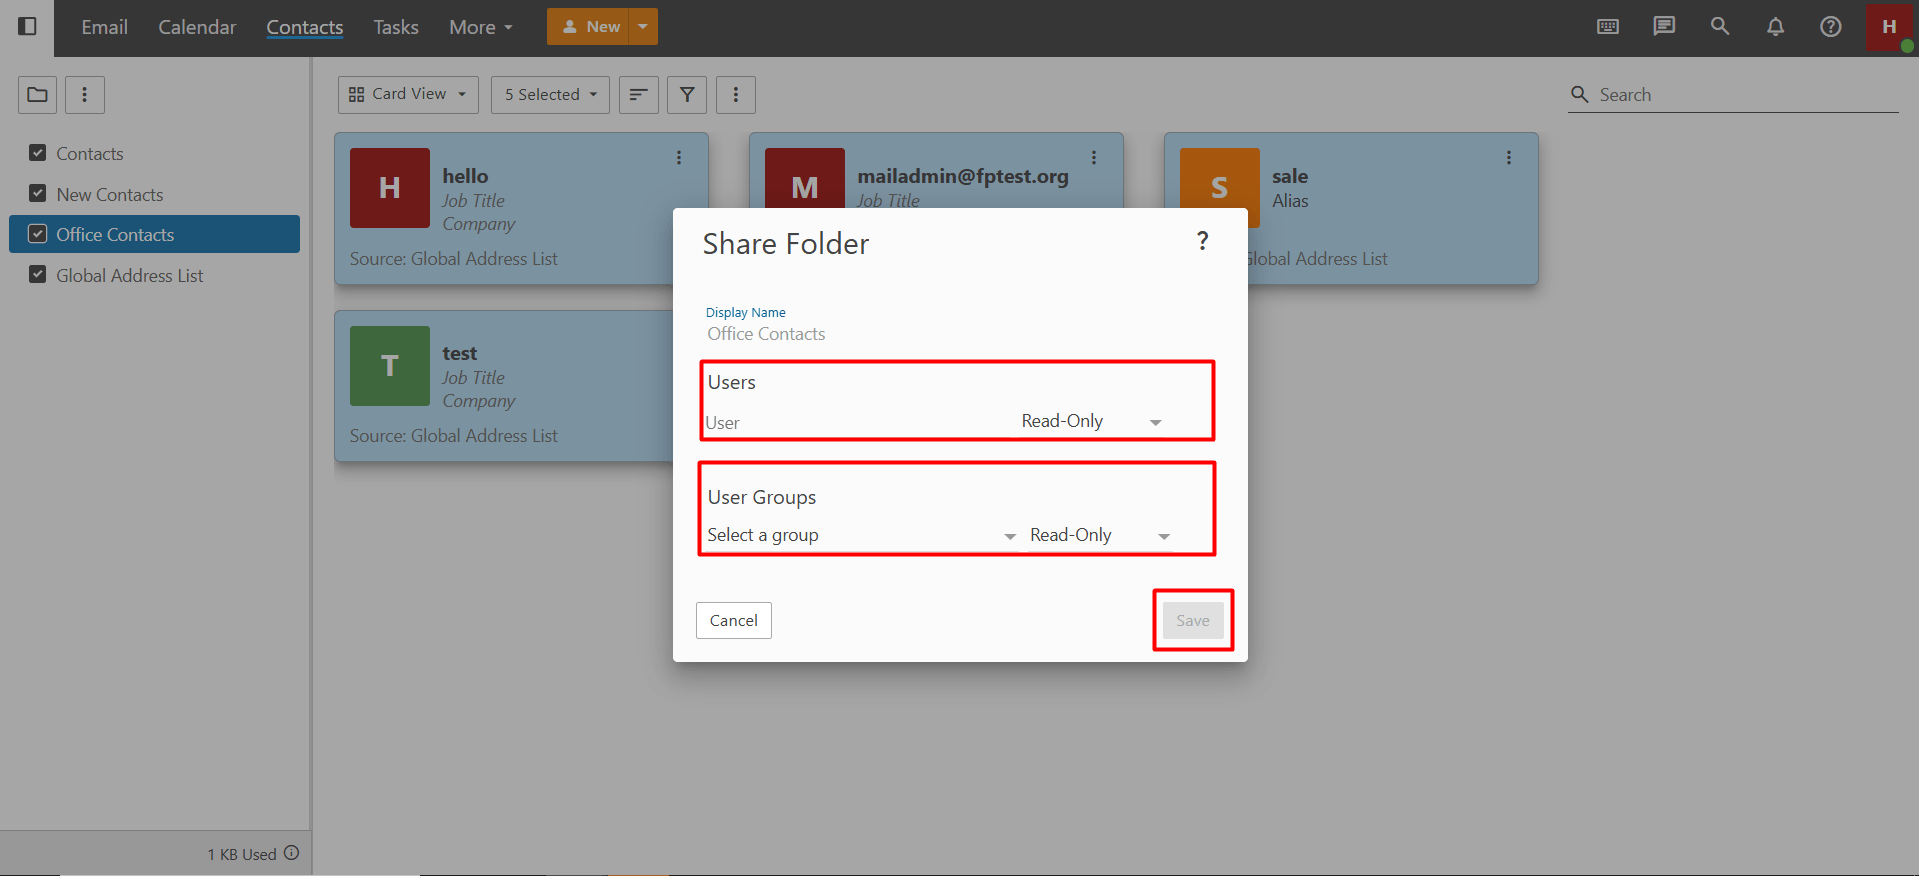
- In the window that opens, select the user and/or group you want to share the contact list with. Then, select the permission level you want to assign to the selected user or group.
- Users: You can share the contact list with one or more users. When you start typing a username, matching users will be listed. You can select the relevant user by clicking on them from the list. You can assign one of the following permission levels to users:
- None: The user does not have access to the contact list.
- Read-Only: The user can view the contact list but cannot make any changes.
- Manage: The user can view and make changes to the contact list.
- Owner: The user has full access and control over the contact list.
- User Groups: You can also share the contact list with a group. From the group options, you can select system-defined groups such as Everyone and Administrator, or groups you have created, and assign the appropriate permission level to the group. The following permission levels are available for groups:
- Read-Only: Group members can view the contact list but cannot make changes.
- Manage: Group members can view and make changes to the contact list.
- Owner: Group members have full access and control over the contact list.
- Users: You can share the contact list with one or more users. When you start typing a username, matching users will be listed. You can select the relevant user by clicking on them from the list. You can assign one of the following permission levels to users:
- After configuring the appropriate access permissions, click the “Save” button. The contact list will then be shared with the selected user or group.
- Once the process is complete, the shared contact list will be displayed on the user’s Contacts page within their own email account.