Create your WordPress site with AI in 60 seconds.




























Your domain must have an active SSL (HTTPS) certificate to ensure visitors can access your website securely and to prevent browsers from displaying the “Not Secure” warning.
FastPanda provides free AutoSSL services powered by Let’s Encrypt™ for all primary and addon domains in your hosting accounts.
With Linux Hosting or WordPress Hosting services purchased through FastPanda, you can check the status of your SSL certificates, review certificate details, and trigger the AutoSSL process with a single click directly from the Customer Panel, without needing to log in to cPanel separately.
Follow the steps below to manage AutoSSL.
- First, log in to the Web Hosting management panel through your FastPanda Customer Panel. For more information on how to access the panel, please refer to our article titled “How to Log In to the Hosting Management Panel?“
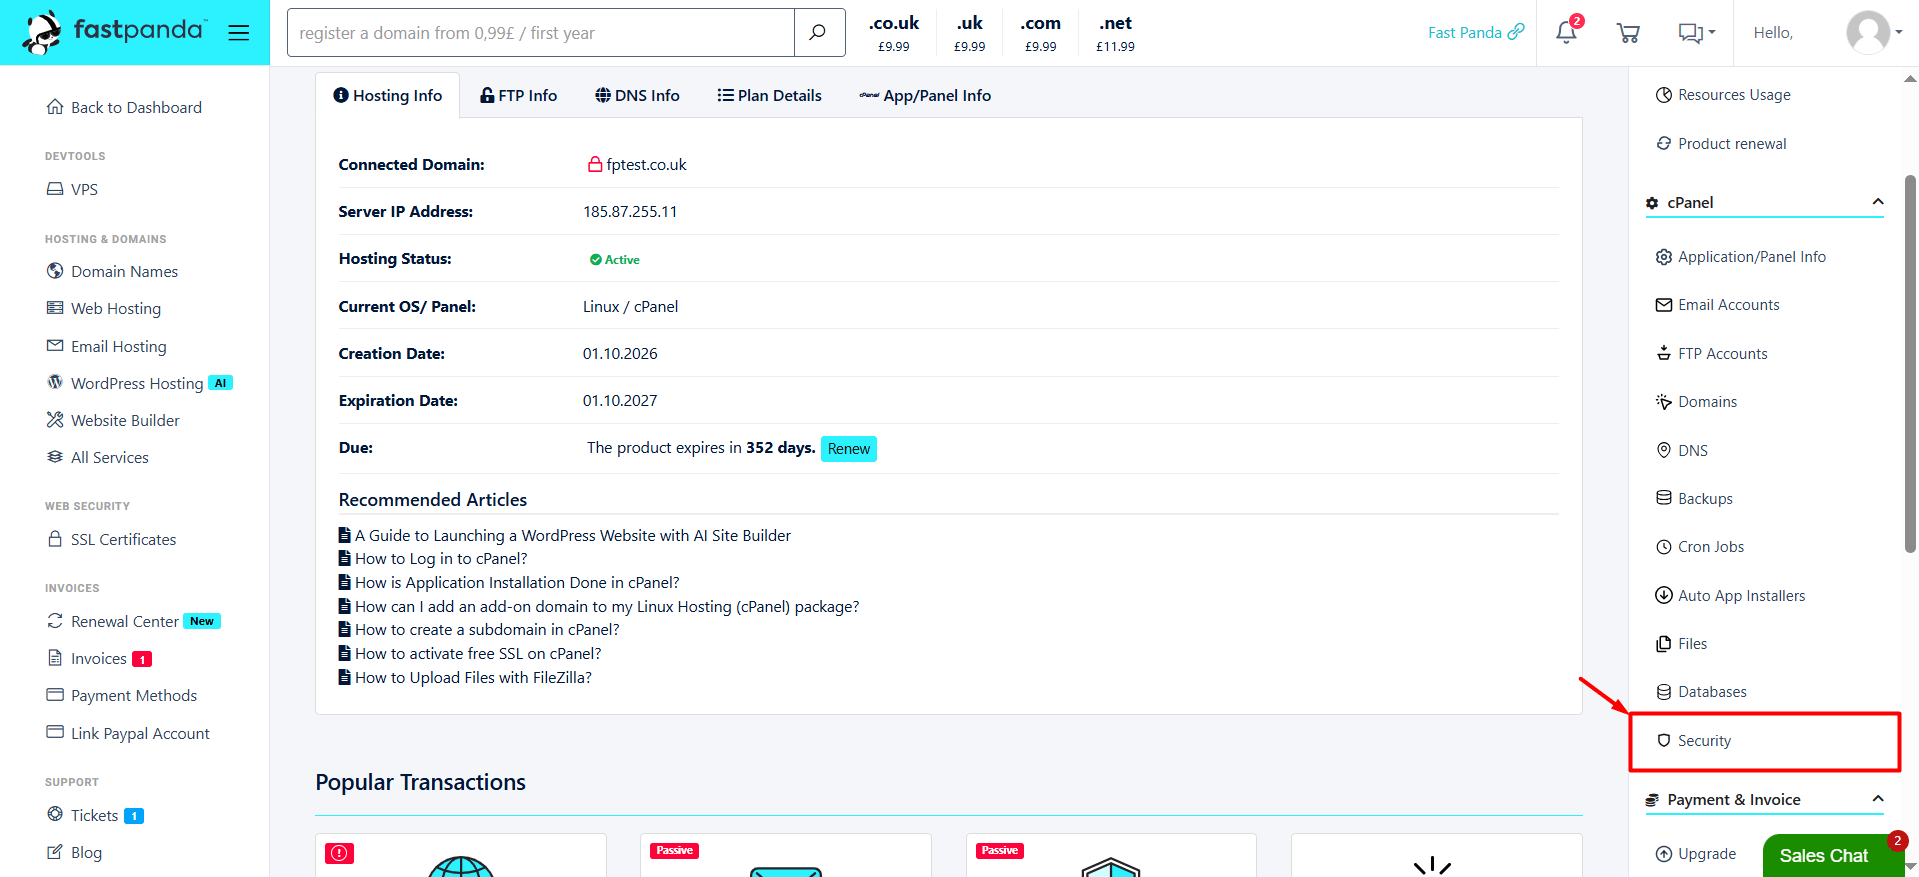
- Once you reach the Web Hosting management panel, click the “Security” button in the right-hand menu.
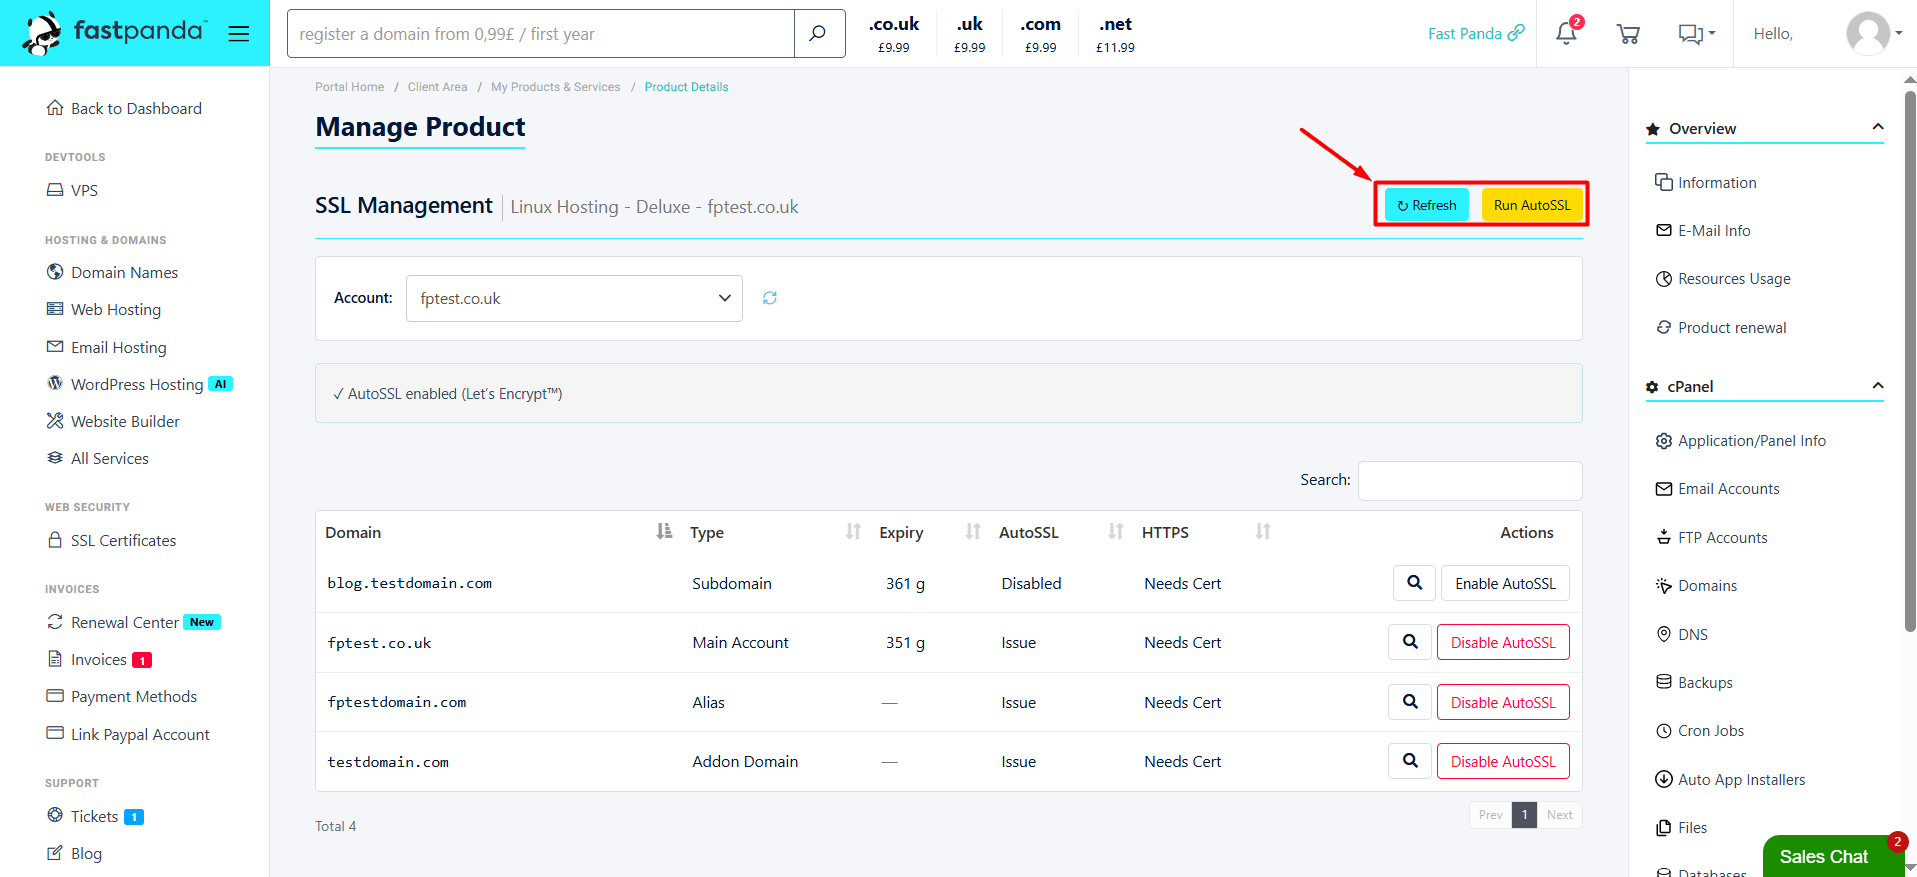
- The table on the page lists your primary domain (Main Account) and any addon domains (Addon Domain) you may have. If you have added a new domain or your website does not yet have a valid SSL certificate, click the “Run AutoSSL” button above the table. The system will verify in the background whether your domain points to the server and automatically install the Let’s Encrypt certificate. After a few minutes, click “Refresh” to check the latest status.
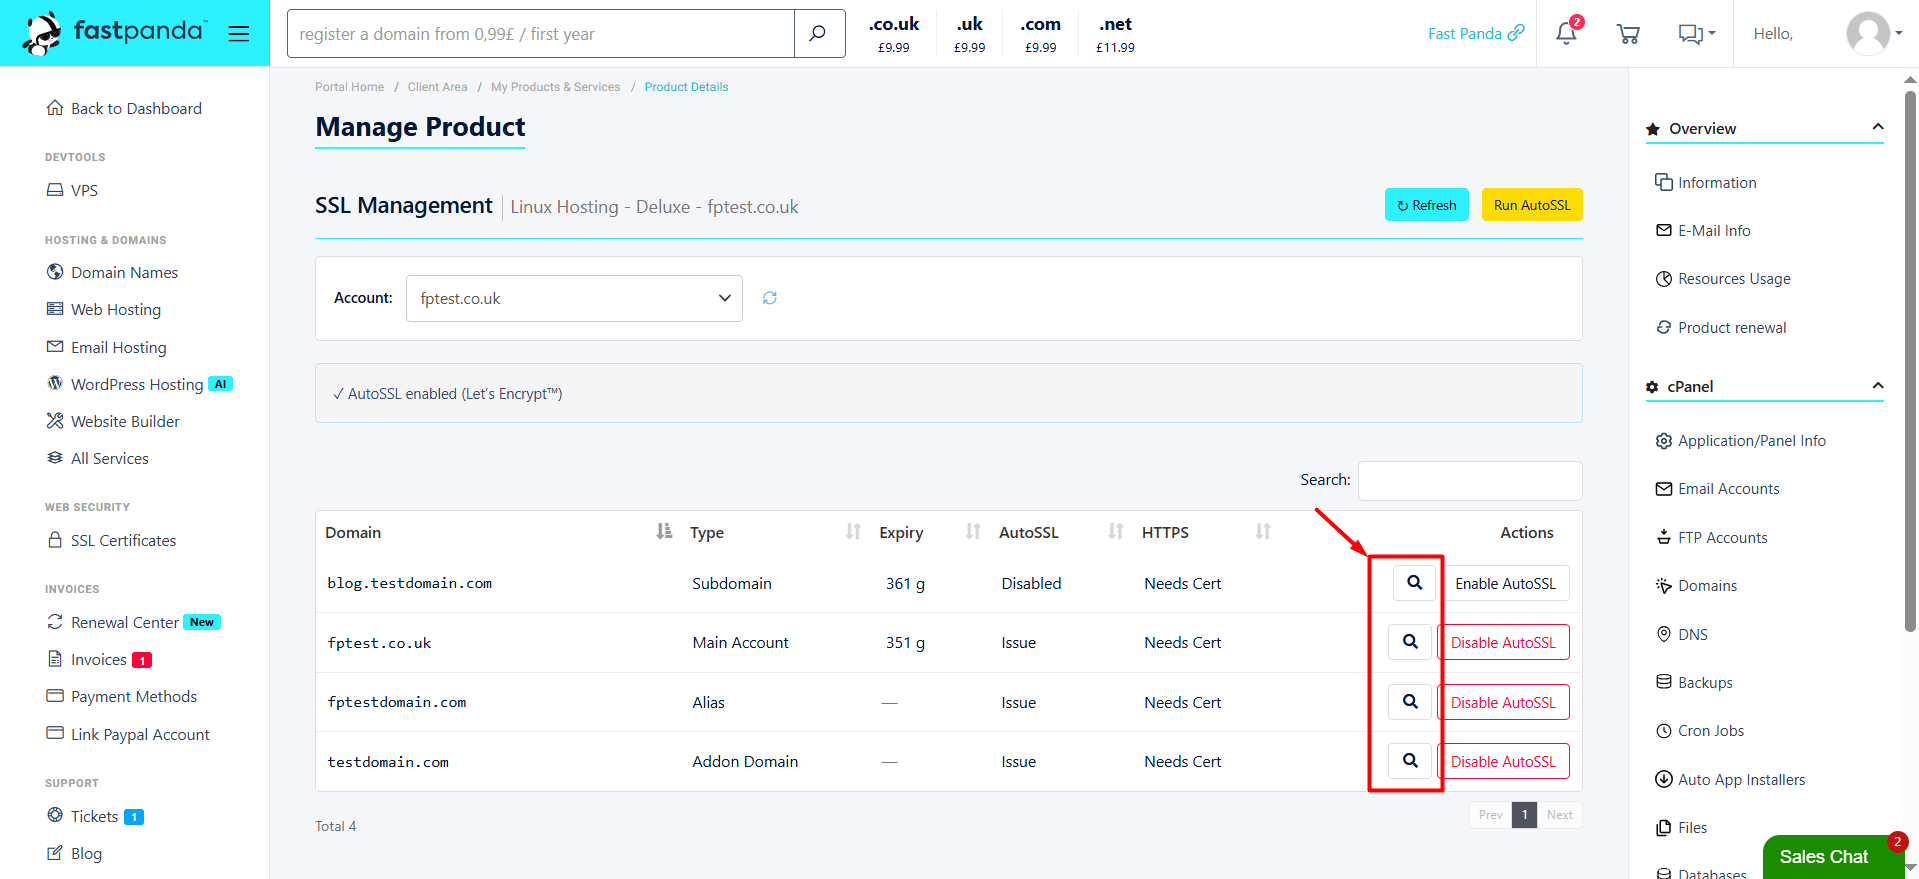
- Click the “magnifying glass (Certificate Details)” icon next to your domain in the table. In the window that opens, you can view all the technical details of your certificate and any errors that may have occurred.
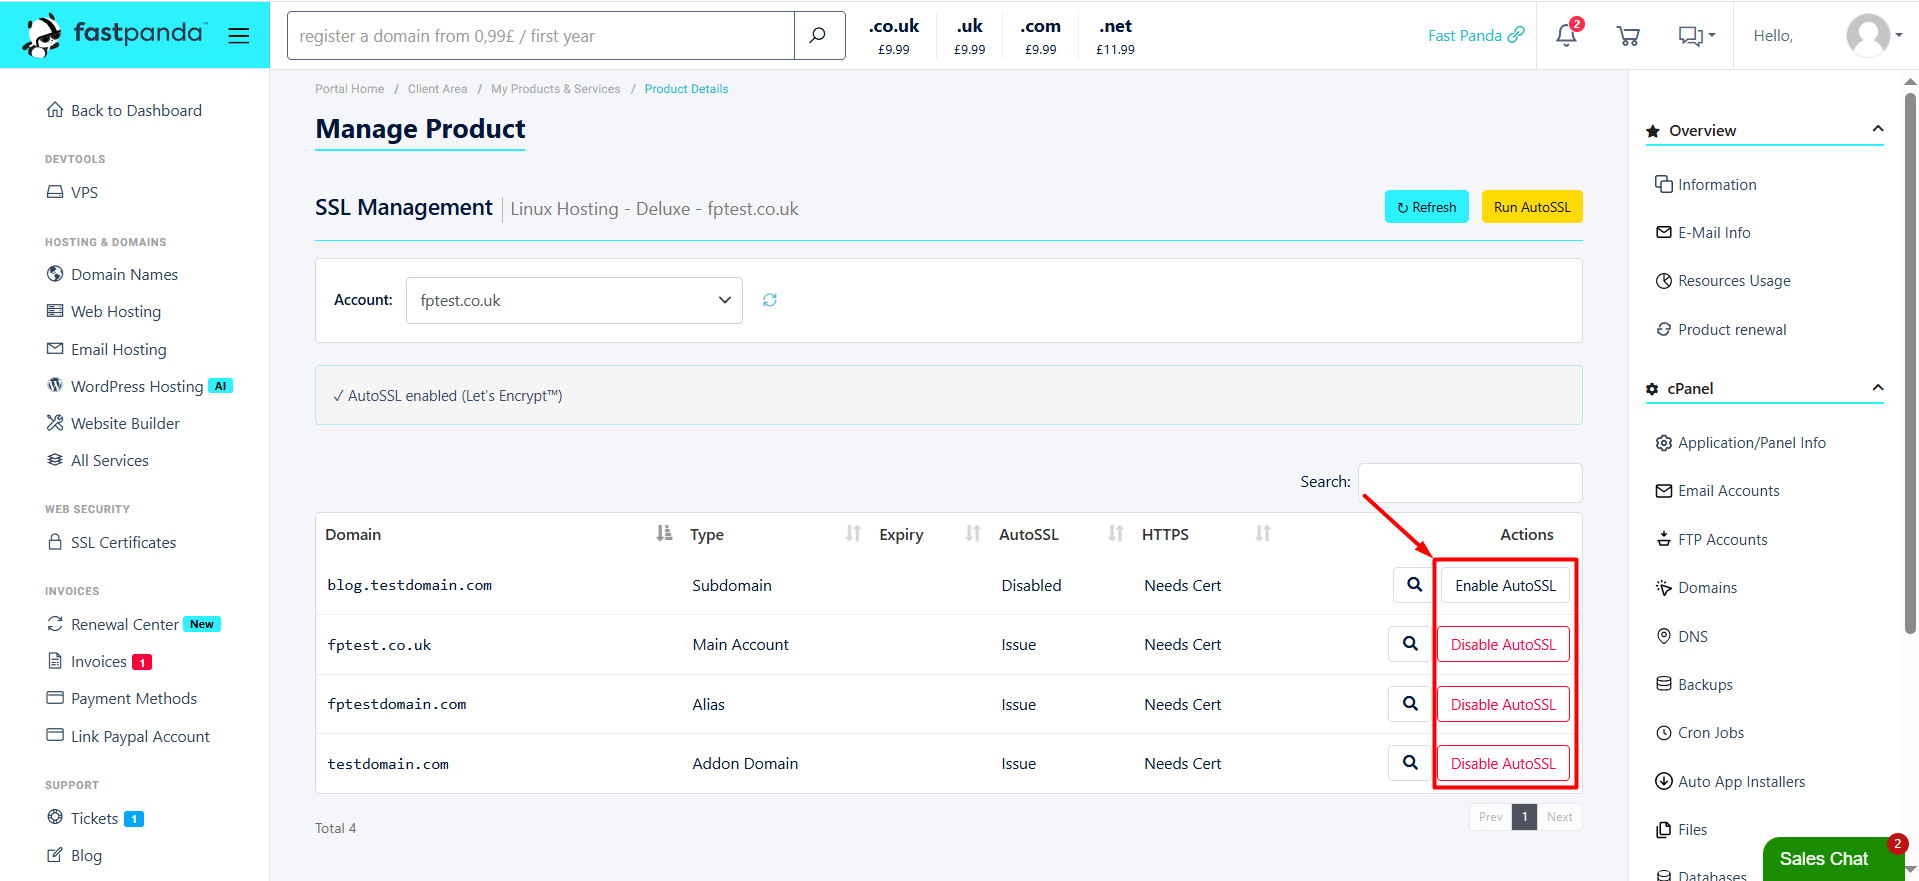
- To stop or re-enable automatic certificate renewal by Let’s Encrypt for a specific domain, click the “Disable AutoSSL” button next to the domain. To add a domain that has AutoSSL disabled back to the automatic renewal process, click “Enable AutoSSL“.