Create your WordPress site with AI in 60 seconds.


























Previously, you could add your Business Email accounts to Gmail using the POP3 method and receive incoming emails directly through Gmail. However, Google is discontinuing Gmail’s feature for receiving emails from third-party email accounts via POP3. Therefore, the POP3 method is no longer available for new setups if you want to use your Business Email account through Gmail.
You can still use SMTP settings to send emails from your Business Email address through Gmail. To view emails sent to your Business Email address in your Gmail account, you can use the automatic email forwarding (Forwarding) feature to forward incoming emails from your Business Email account to your Gmail address.
In the steps below, you can find instructions on how to configure the required SMTP settings to send emails from your Business Email address through Gmail.
Outgoing Mail Settings
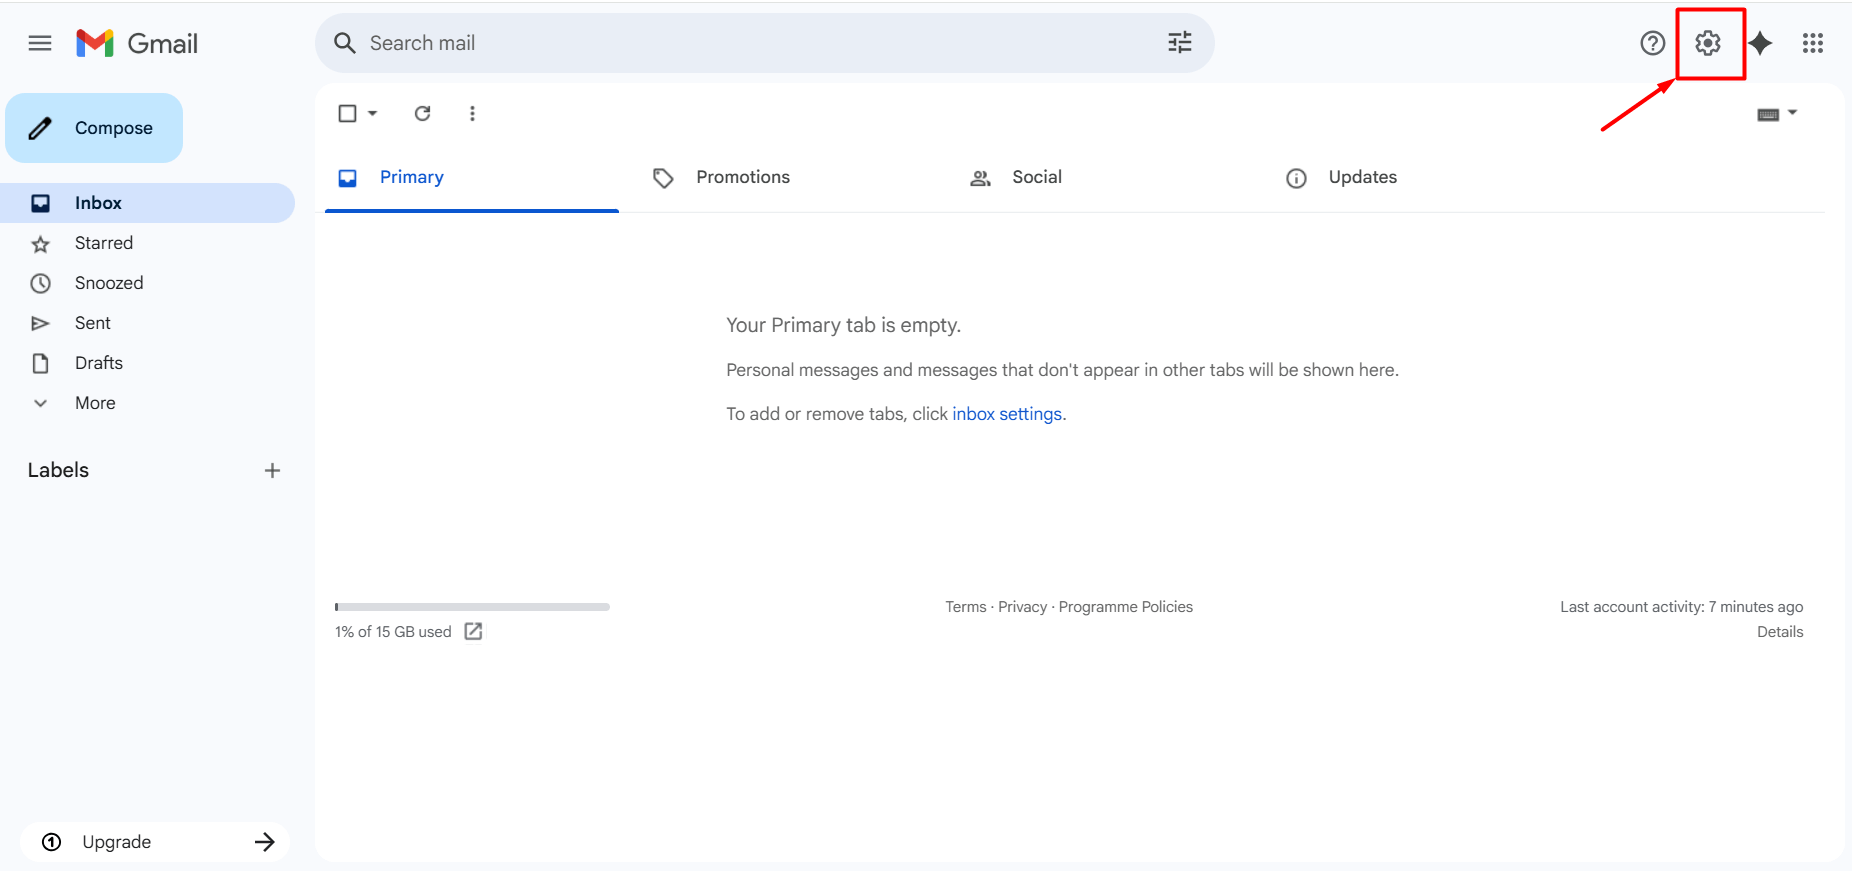
- Log in to your Gmail account and click the gear icon (Settings) in the top right corner.
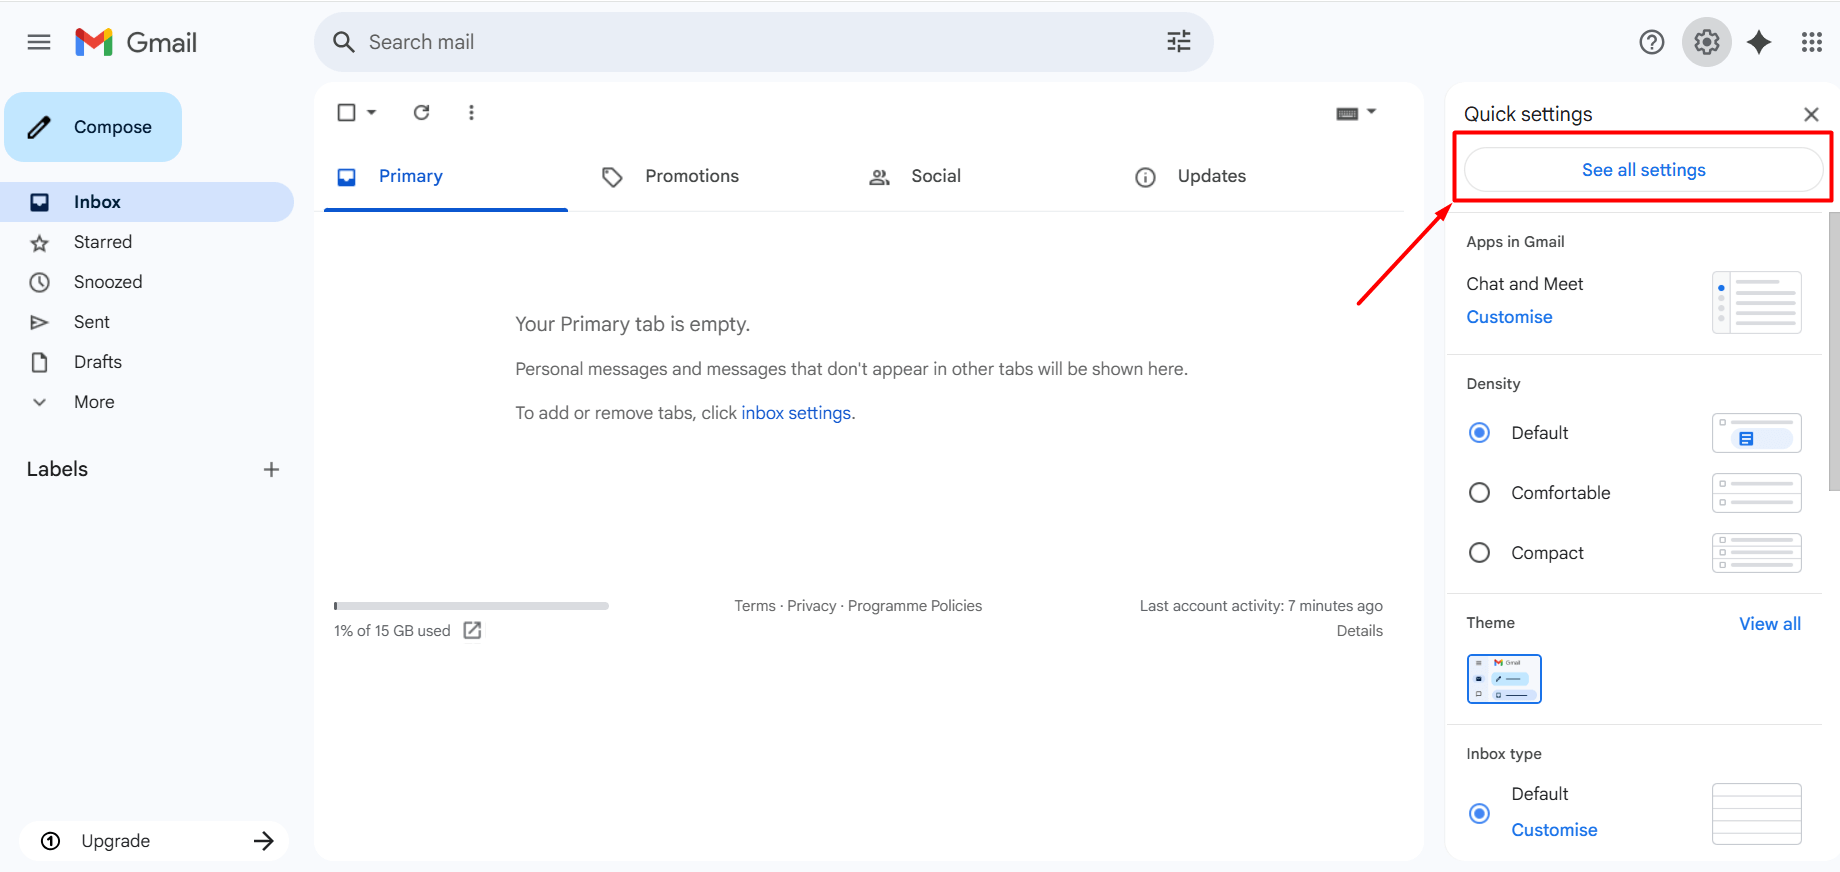
- Click on the “See all settings” button.
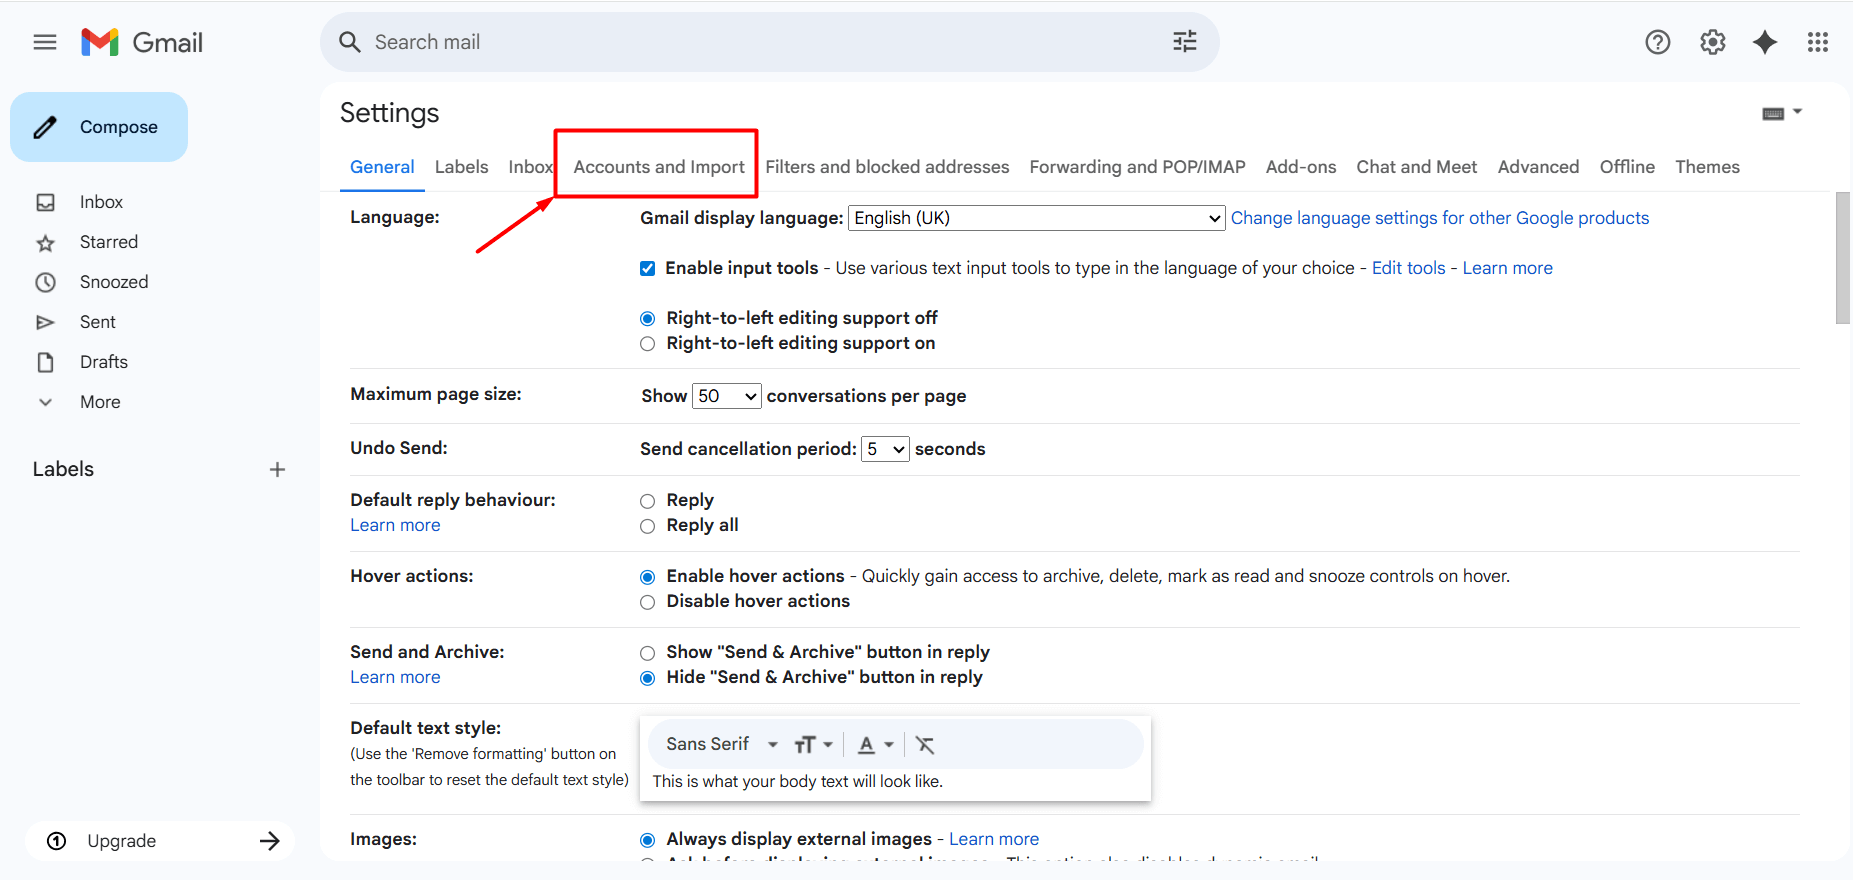
- Go to the “Accounts and Import” tab.
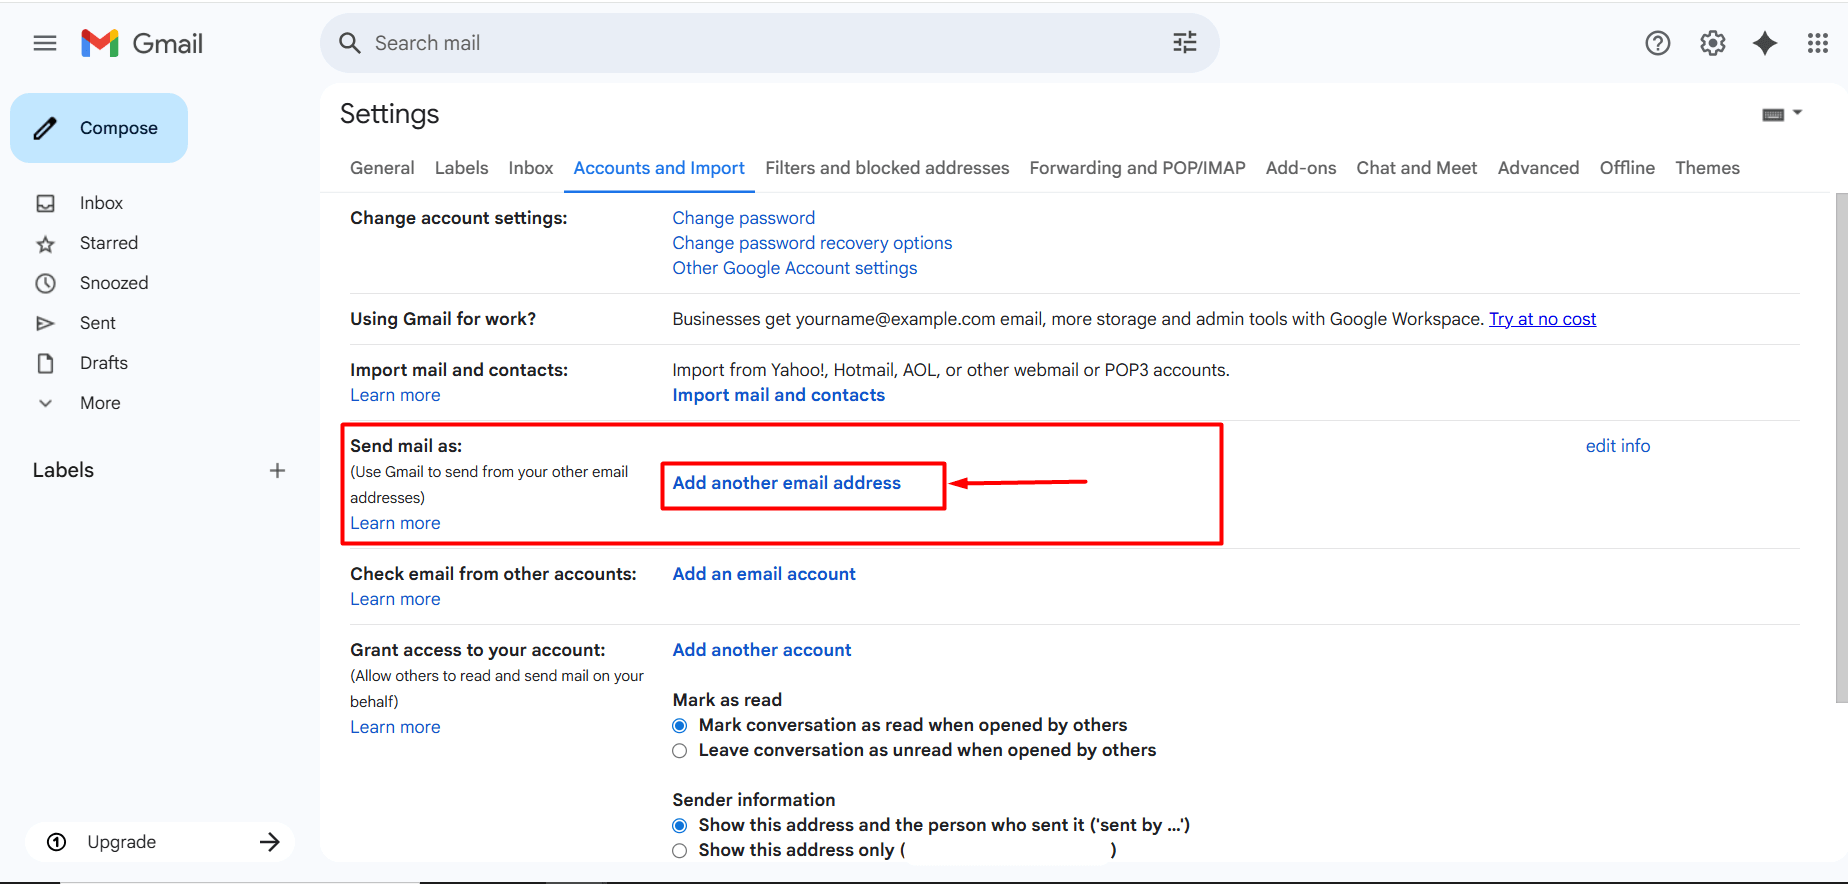
- In the “Send mail as:” section, click the “Add another email address” button.
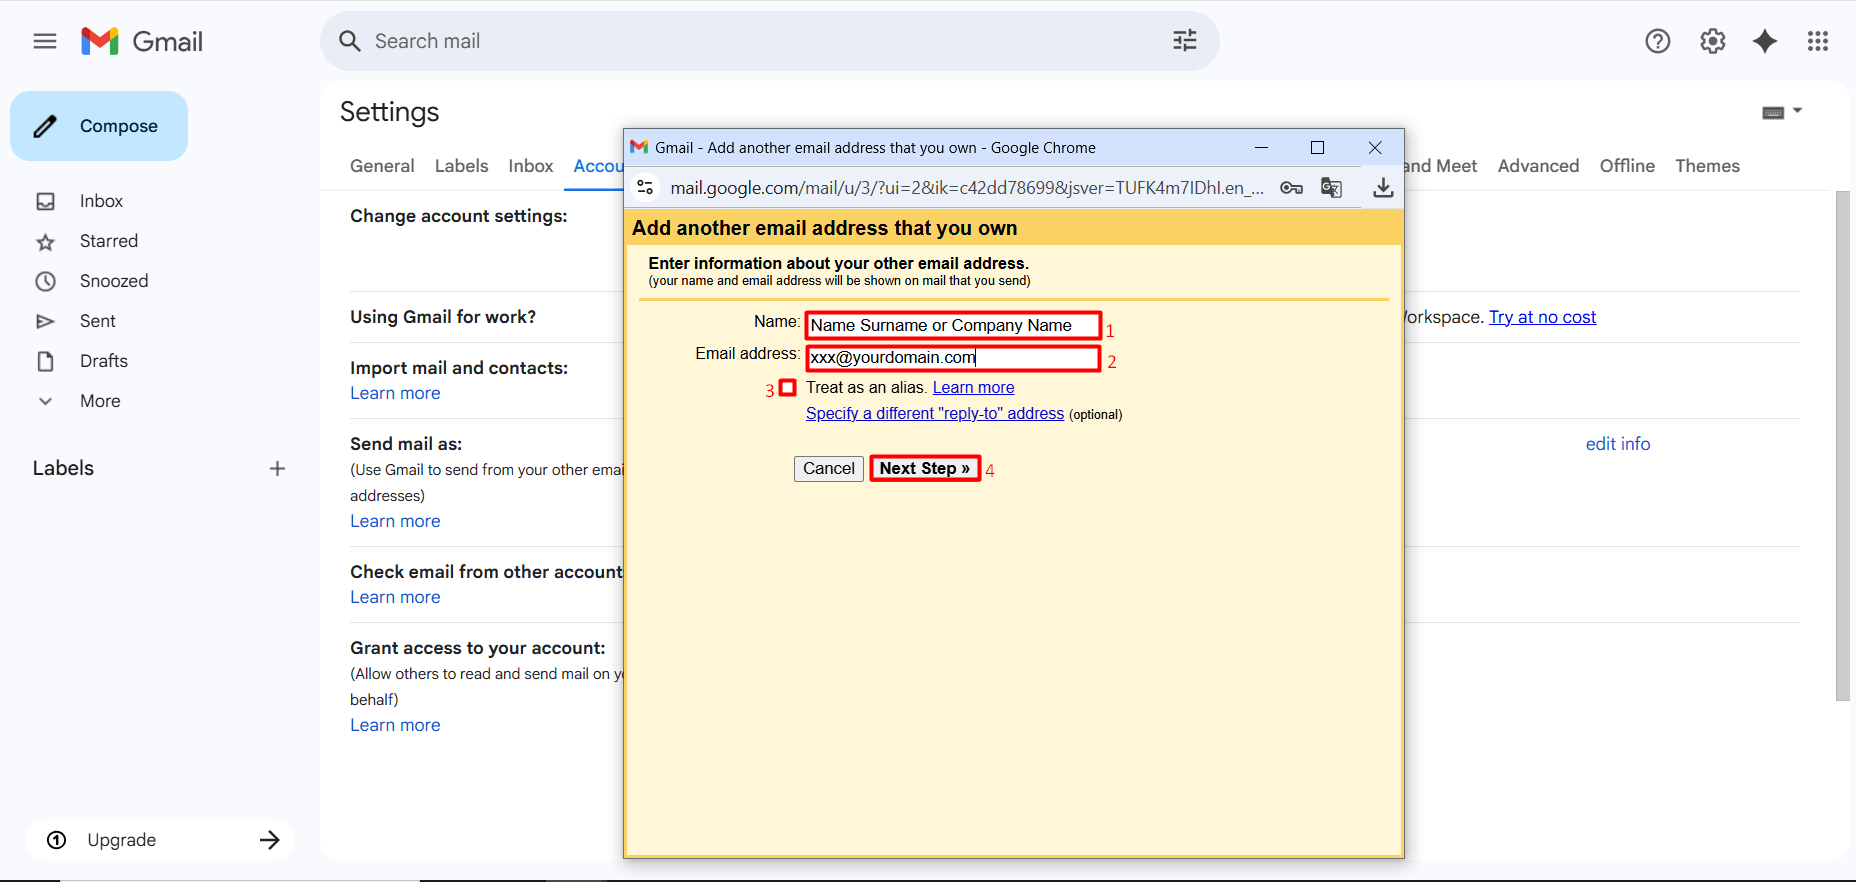
- A window will appear on the screen. In this window, you will need to configure the outgoing mail settings. Incorrectly entered information may cause issues with sending emails. For a correct setup, you can fill in the information as shown below.
- Name: This is the name that recipients will see when you send an email. You can enter your own name, your department, or your company name.
- Email Address: Enter the full email address you want to set up. It is important to include the complete domain after the username. Example: [email protected]
- Treat as an alias: If you want to use it as a real email, uncheck the “Treat as an alias” box. (Recommended)
- After filling in the information, click the “Next Step” button.
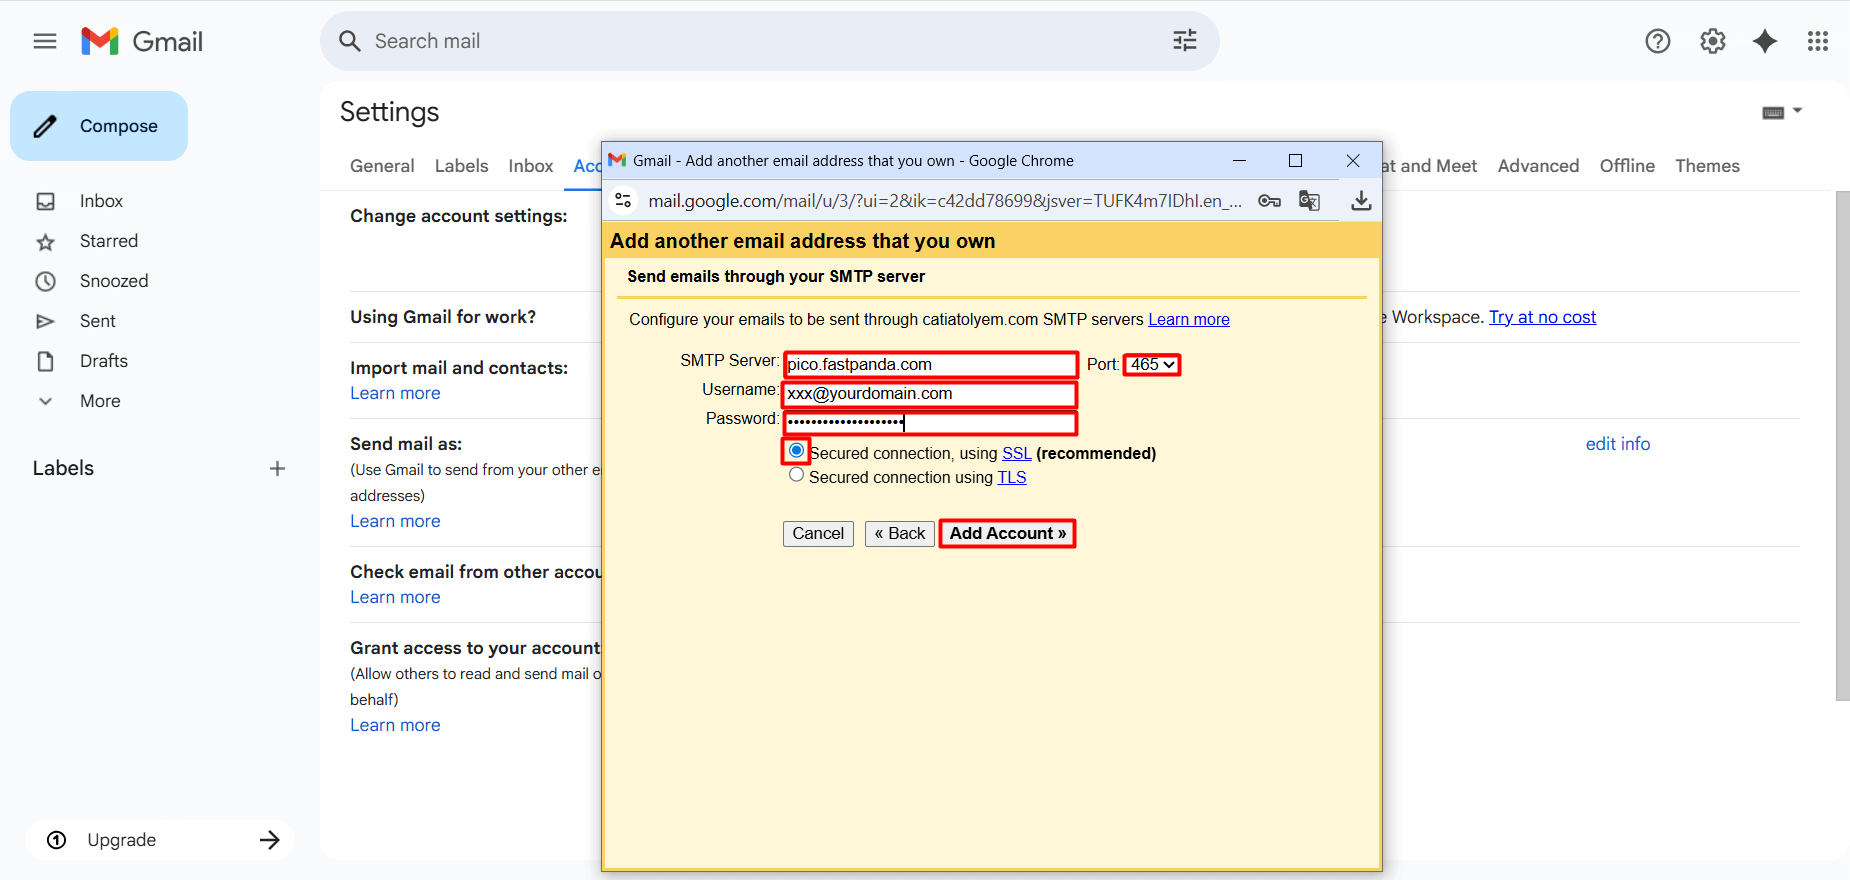
- On the page that opens, you will be asked to enter some information for the outgoing mail settings. Incorrectly entered information may cause issues with sending emails. For a correct setup, you can complete the information as shown below.
- SMTP Server: mail.domain.extension or pico.fastpanda.com (Server names may vary. You can check by logging into your customer panel: Email Hosting > Manage Product > Device Connect Settings > Recommended apps > Gmail > Desktop.)
- Username: Enter the full email address you want to set up. It is important to include the complete domain after the username. Example: [email protected]
- Password: Enter the password for the email account you want to set up.
- SSL / TLS: Select SSL (Secured connection, using SSL)
- Port: Set the port to 465
- After filling in the information, click the “Add Account” button.
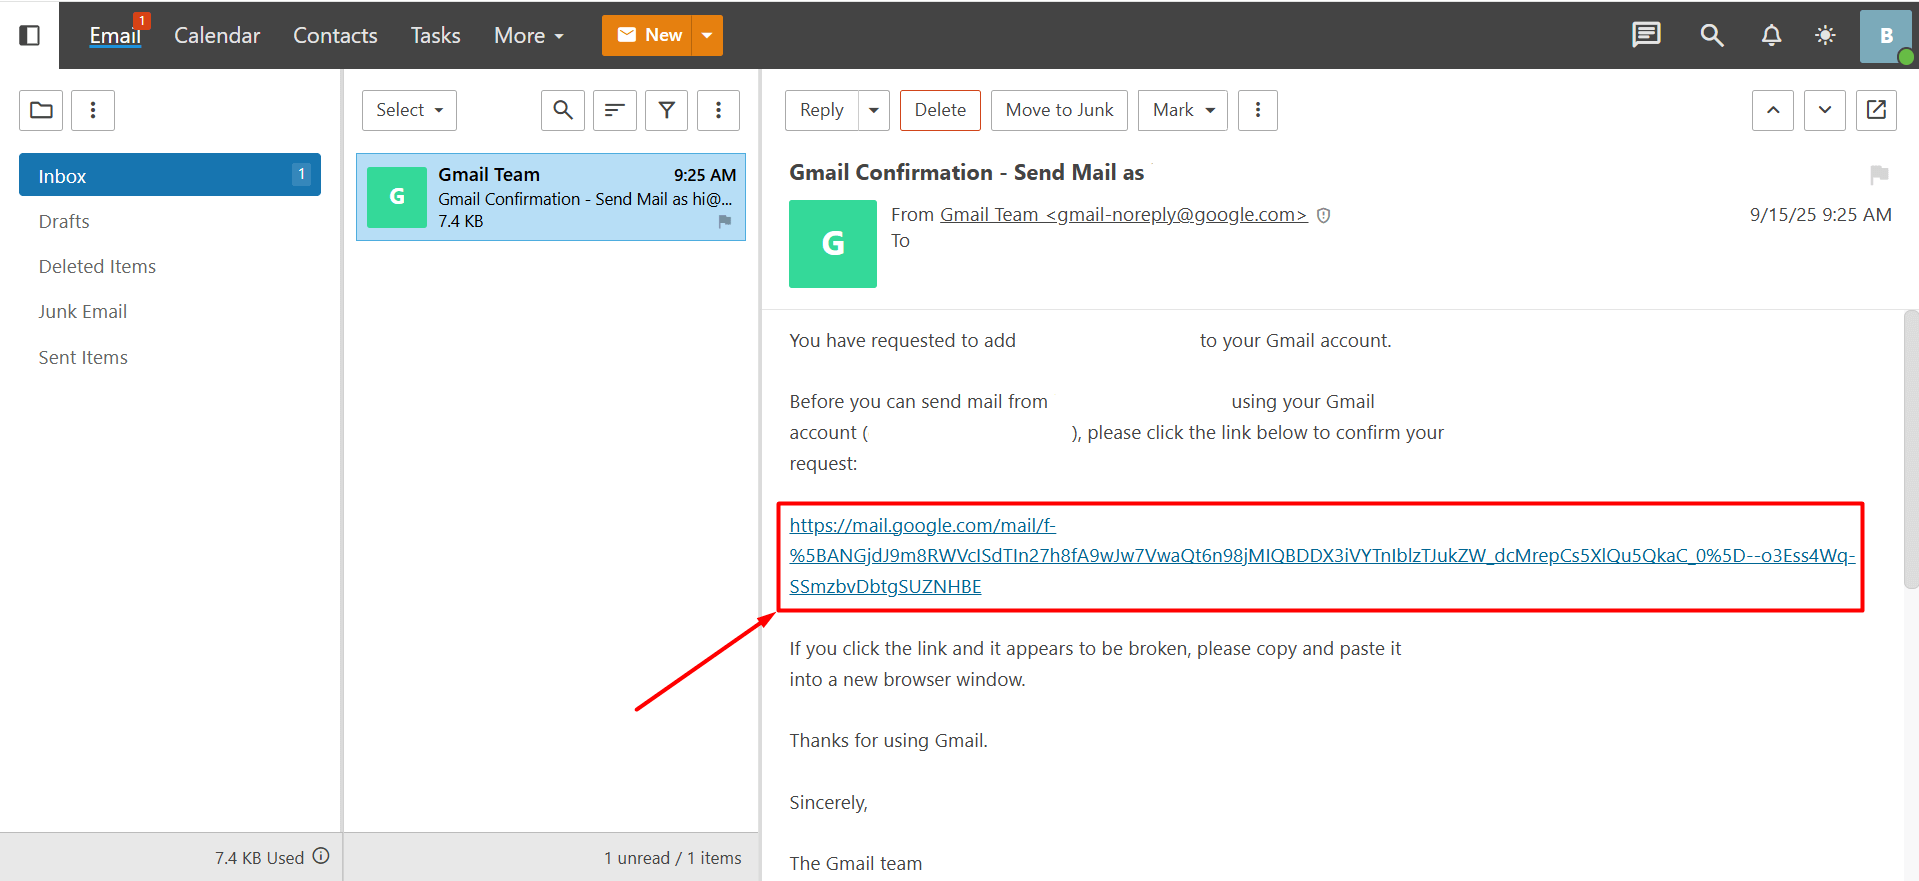
- After completing the steps above, a confirmation email will be sent to the Business Email account you want to add. You need to click the link in this email to confirm. Example:
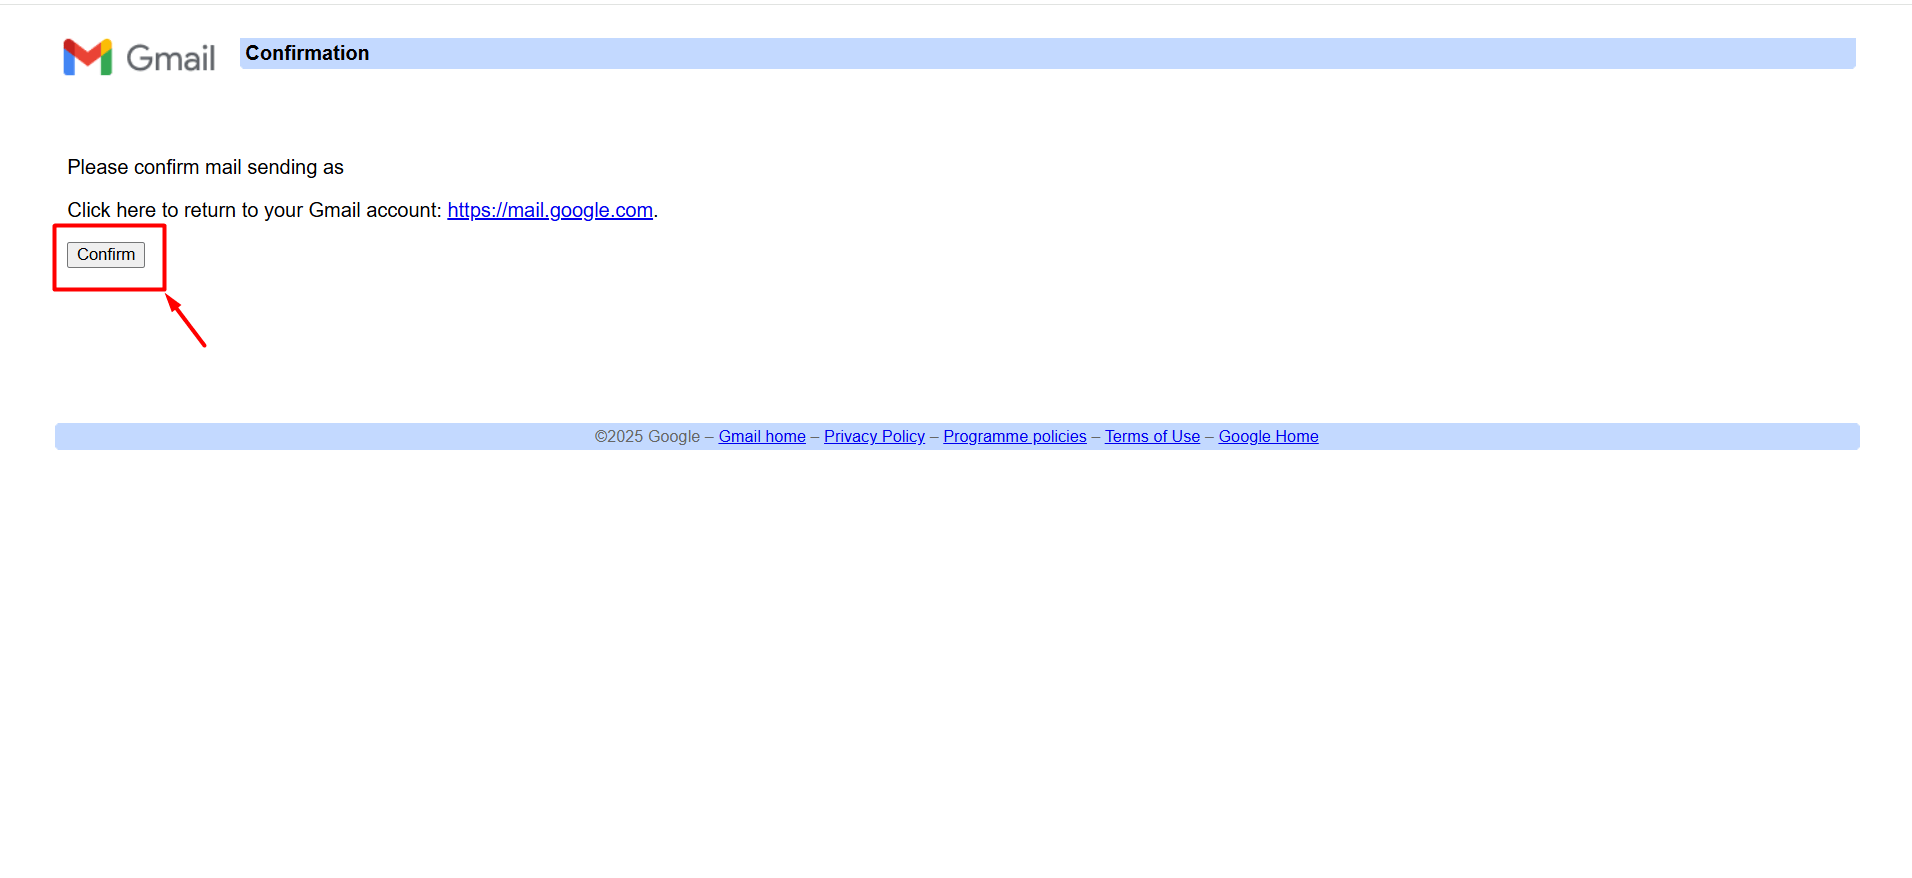
- Once the verification process is complete, the setup will be successfully completed. You can now easily switch between your Gmail address and your Business Email address by clicking the “From” field when composing a new email in Gmail.