
Many individuals consider switching to a new hosting service provider because they face problems with their current one. However, individuals often postpone moving to a more reliable hosting company because they fear making mistakes and potentially damaging their existing website. Resolve issues by migrating your hosting with help from experts, your current hosting service, or independently. While the prospect of handling the migration process independently might initially seem daunting, dedicating a bit of time reveals that hosting migration is a manageable task. When you approach the process correctly, it becomes straightforward and allows for an uncomplicated reversal in case any issues arise.
Concise Overview of Your Hosting Migration Strategy
Plan carefully for a smooth transition between hosting providers. Take your time to select a new hosting provider by conducting thorough research. Pause and reflect on the implications before finalizing your choice. If your move involves a more intricate setup, reach out to the support department of your new hosting provider before making any commitments. Ensure complete compatibility between your website files, databases, and the new hosting environment. Additionally, carefully evaluate the structure of your website. While simple websites may comprise only a few static HTML, CSS, and JavaScript files, most contemporary websites rely on various content management systems. The typical process for hosting migration involves the following steps:
- Copy your website files and databases from your current hosting account.
- Upload these files and databases to your new hosting account.
- Test your website on the new server to ensure everything is functioning correctly.
- Update the domain to point to the new hosting name servers.
- Allow some time for the redirect to take effect.
- Finally, close your old hosting account.


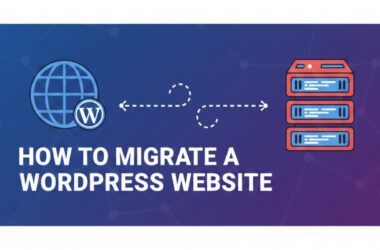
How to Migrate Your Hosting?
Earlier, we gave you a quick overview of the hosting migration process. Now, let’s dive into the details and explore the question: ‘How is hosting migration done?’ Let’s break down the answer.
Step 1: Back Up Your Website Files
Before you migrate, you must back up everything on your website. Incorporate this as a standard part of your WordPress security measures and perform it before implementing any major changes. Are you wondering how to back up your website? WordPress offers several plugins for backup, and we highly recommend WPvivid. WPvivid provides a multitude of powerful backup options, including scheduling, file filtering, remote storage compatibility, and multi-site support. If you prefer a manual approach, you can use a file transfer tool (FTP) like FileZilla (for PC) or Transmit (for Mac). After installing the tool, use SFTP credentials from your web hosting account to connect to your website’s server. Once connected, choose and download all files under your website directory, including the hidden .htaccess file.
Step 2: Export WordPress Database
Exporting your database is a simple process. Begin by logging in to your web host’s cPanel account. Once inside, access phpMyAdmin, locate your WordPress installation database, and navigate to the ‘Export’ tab. The default settings, including quick export and SQL format, are adequate for most cases. Click on ‘Go’ to initiate the export process and save the file to your local computer. After completing both the database export and FTP transfer of your files, you can move on to the next step.
Step 3: Create the WordPress Database on Your New Hosting Server
Before migrating, create an environment for WordPress installation on your new web hosting. Log in to your new web hosting using the provided user credentials, access cPanel, and use the MySQL Databases application. Follow these simple steps:
- Open MySQL Database and create a new database with a suitable name for your website.
- Create a new MySQL user with a secure password.
- Add this user account to the new database and grant all privileges.
- Type in the database name, new MySQL username, and password.
Step 4: Edit Wp-config.php File
Locate the ‘wp-config.php’ file in the folder where you downloaded your website files on your local computer. Make a copy of this file for backup. Open the original file with a text editor and make the following changes:
- Change the Database Name: Find and replace ‘DB_NAME’ with the name of the new database you just created.
- Change Database Username: Find and replace ‘DB_USER’ with the new username you created.
- Change Database User Password: Replace ‘DB_PASSWORD’ with the secure password you created for the MySQL user.
- Save the ‘wp-config.php’ file and close it.
Step 5: Import Your WordPress Database
With a new database ready, begin the import process. Launch phpMyAdmin from cPanel on your new server, select your new database, go to the ‘Import’ tab, choose the SQL file you exported earlier, and click ‘Go.’ The duration of the import process depends on your database size. Once the import is complete, you’ll receive a confirmation message.
Step 6: Upload WordPress Files to Your New Hosting
After preparing the new database and editing the ‘wp-config.php’ file, you should upload your website files. Connect to your new web hosting using your FTP program or cPanel, browse to the folder where you plan to keep your website, and upload the backup to ‘/public_html/’ on your new hosting. Keep these files on your local computer until you complete the final steps; this process, like the download, may take some time.
Step 7: DNS Changes
Point your domain to your new hosting provider by changing the nameservers. You can accomplish this through your domain registrar.
Step 8: Cancel Your Old Hosting Account
After successfully transferring your website to the new hosting provider, wait at least a day or two before canceling your old hosting account. Contact the customer service of your old hosting account and inform them of your decision to close the account. Ensure that you close your account and prevent automatic renewal. Considering all the factors mentioned, [email protected] can serve as a highly efficient hosting service provider for your website, just as it does for many others. For any questions about hosting migration, [email protected] has a technical team ready to assist you. Contact us to decide on the best hosting package, and we’ll guide you through the process.