Create your WordPress site with AI in 60 seconds.




























With your Linux Hosting or WordPress Hosting service purchased through FastPanda, you can add and manage DNS records directly from Customer Panel > Hosting Management, without needing to log in to cPanel.
Follow the steps below to add or manage your DNS records.
- First, log in to the Web Hosting management panel through your FastPanda Customer Panel. For more information on how to access the panel, please refer to our article titled “How to Log In to the Hosting Management Panel?“
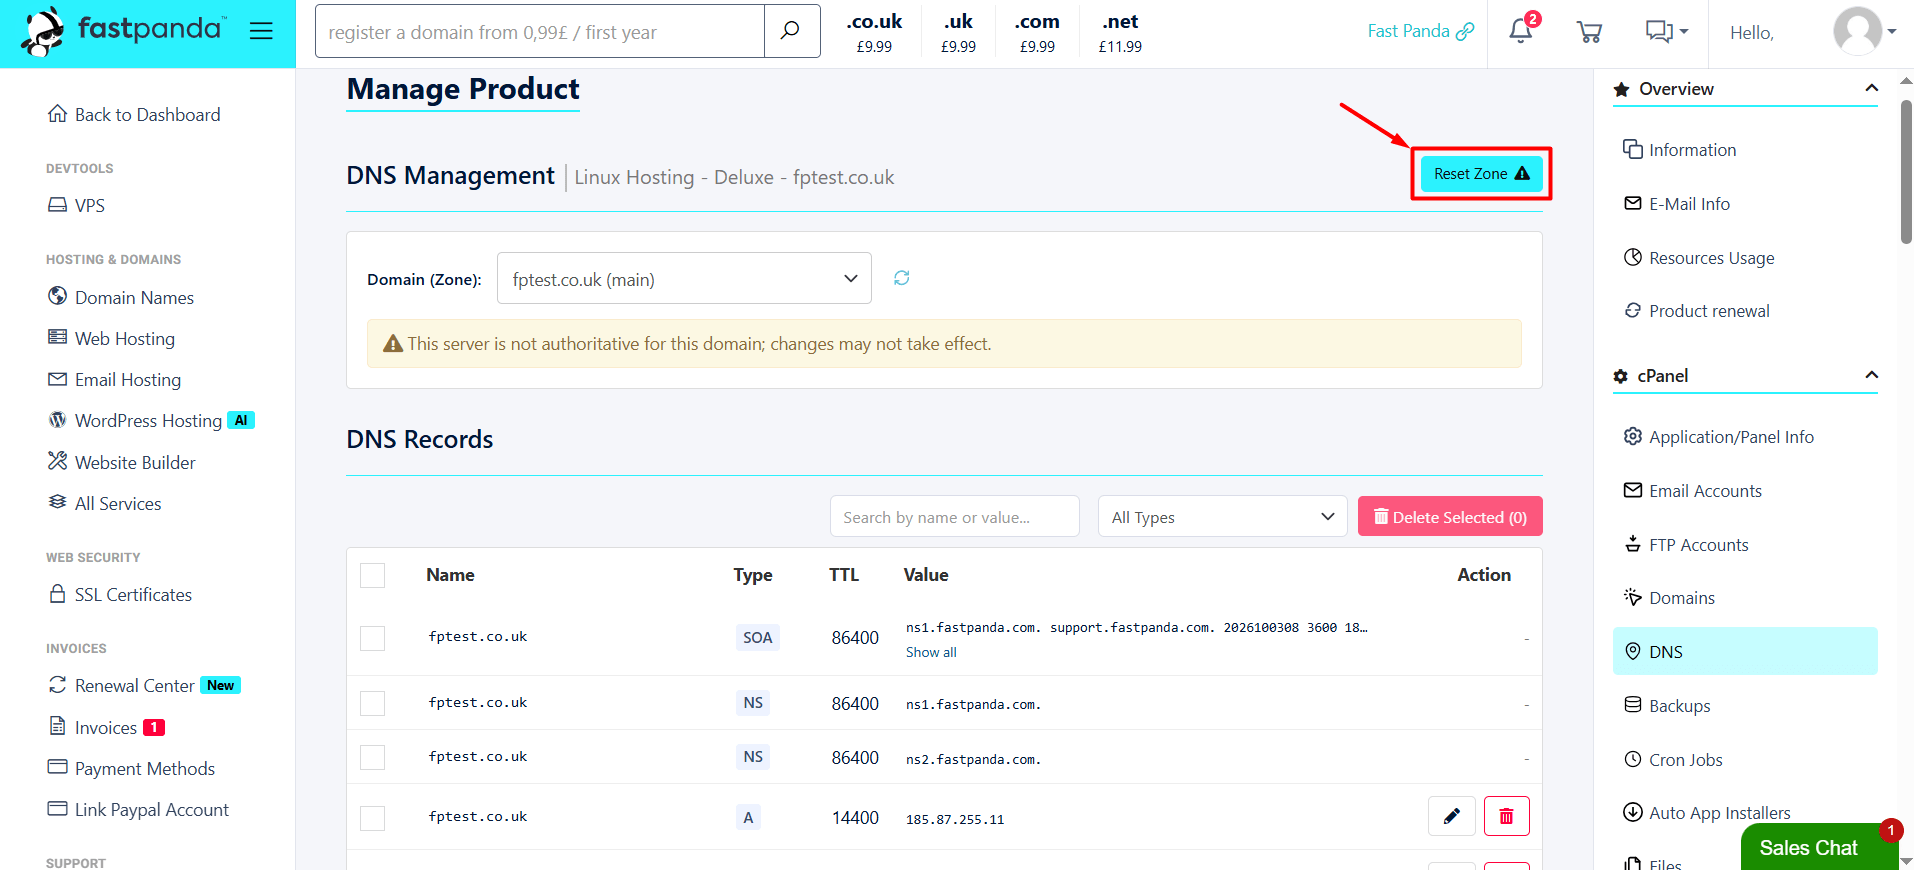
- Once you reach the Web Hosting management panel, click the “DNS” button in the right-hand menu.
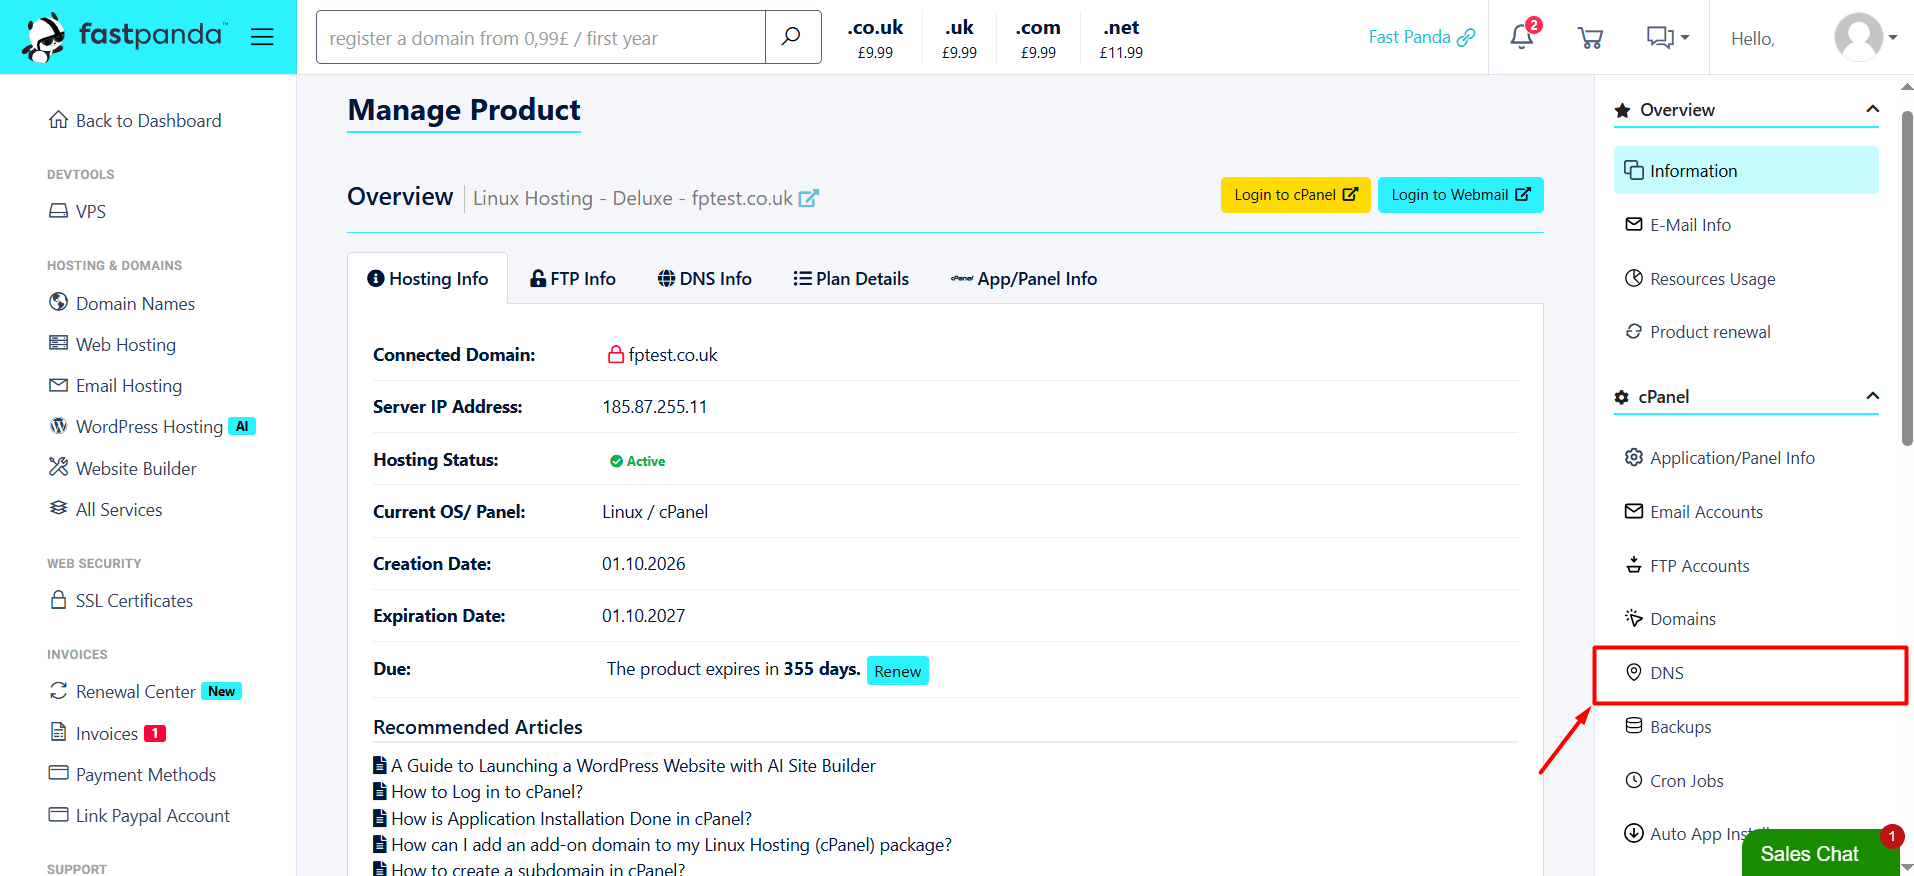
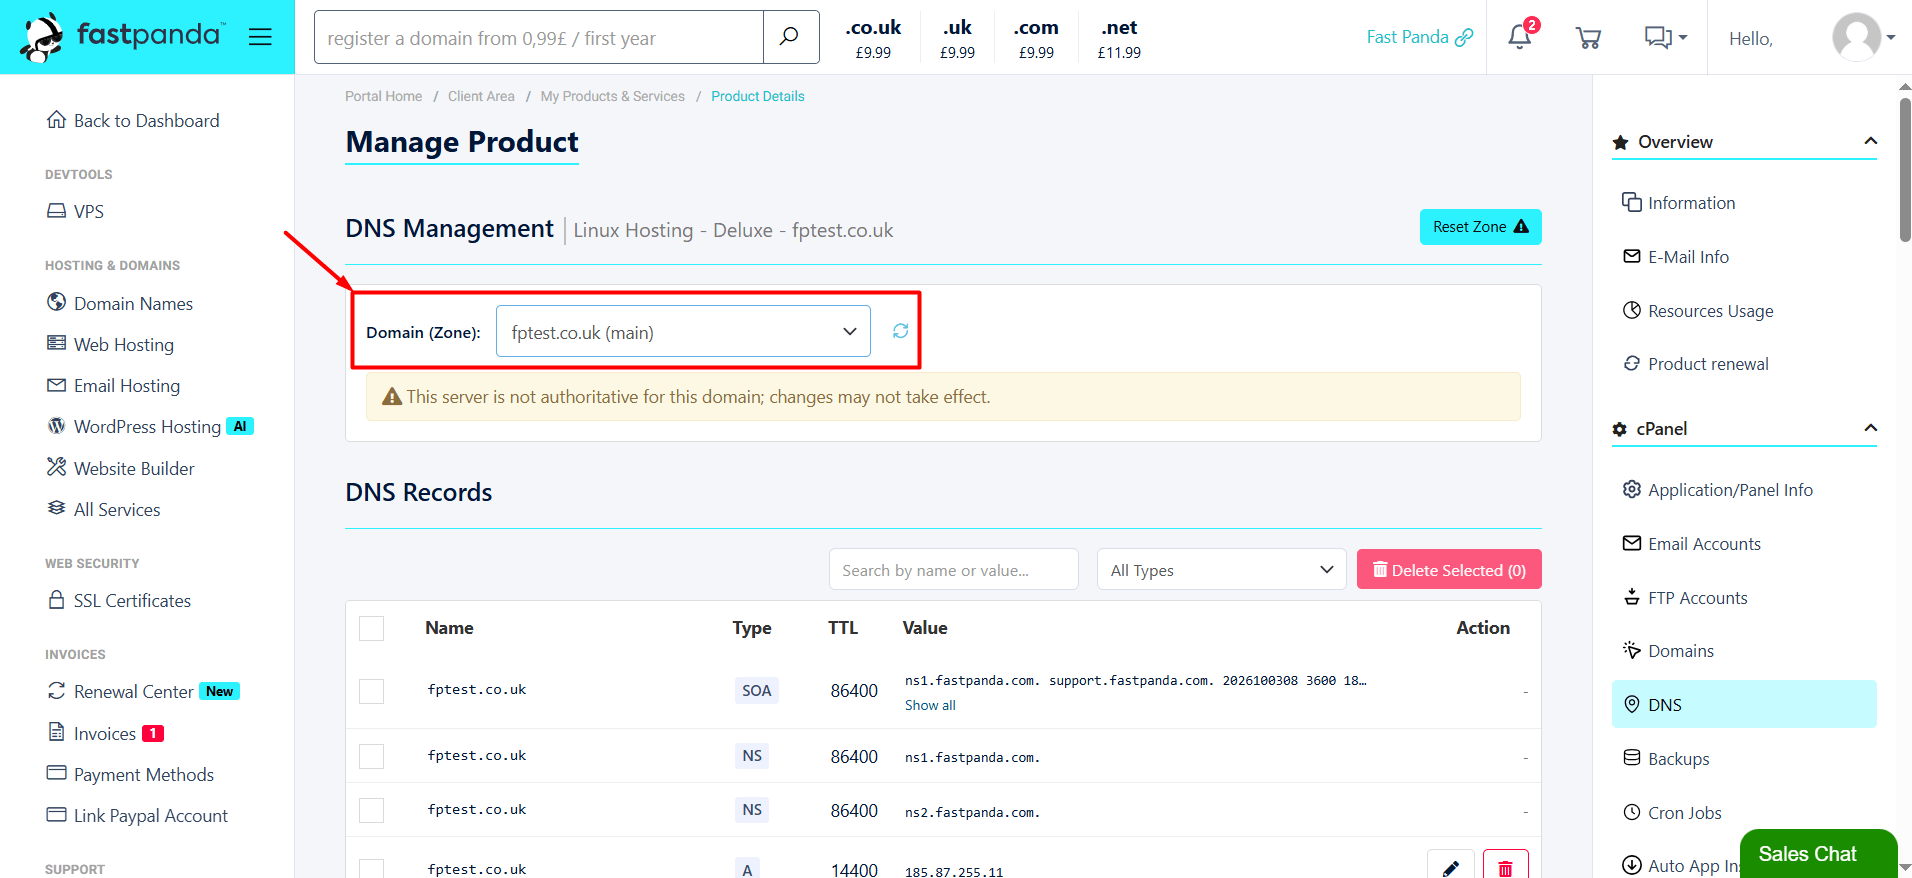
- On the page that opens, select the domain you want to manage DNS records for from the “Domain (Zone)” drop-down list. In the “DNS Records” section, all existing DNS records associated with the selected domain (such as A, AAAA, CNAME, MX, and TXT records) will be displayed in a table.
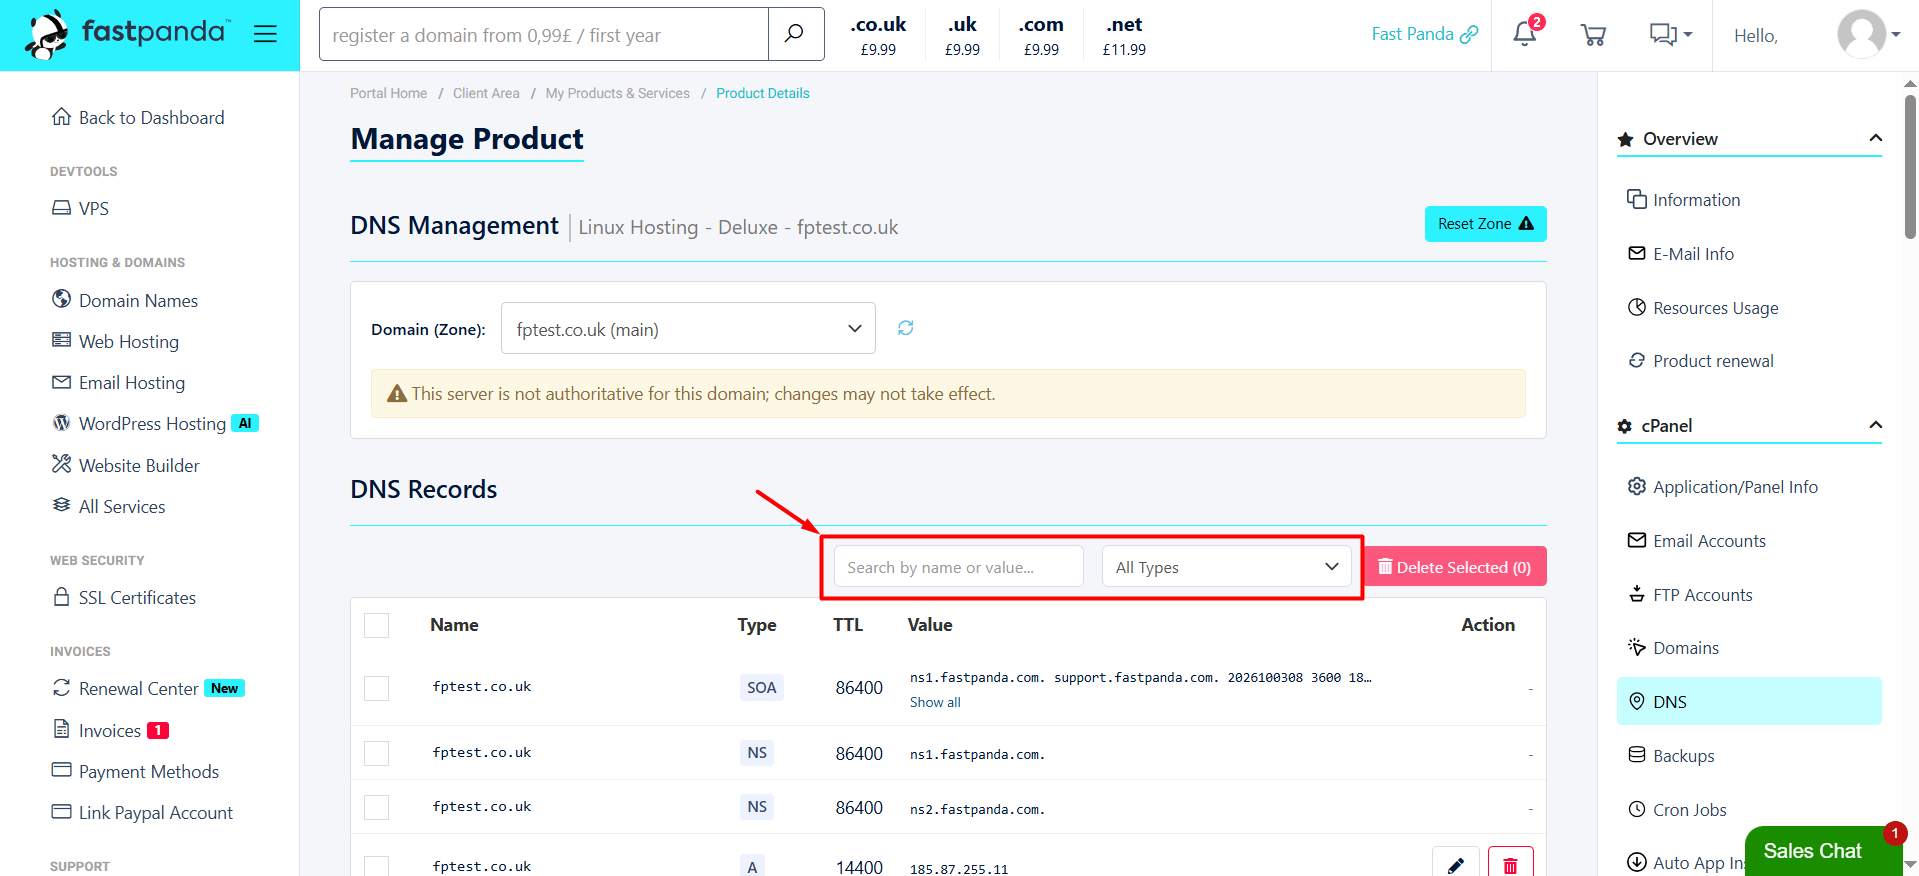
- To find a specific record in the DNS records table, enter the domain prefix, destination IP address, or target server hostname in the search box. You can also filter DNS records by type. For example, select the MX filter to view only email records, A to view IP address mappings, or TXT to list verification records.
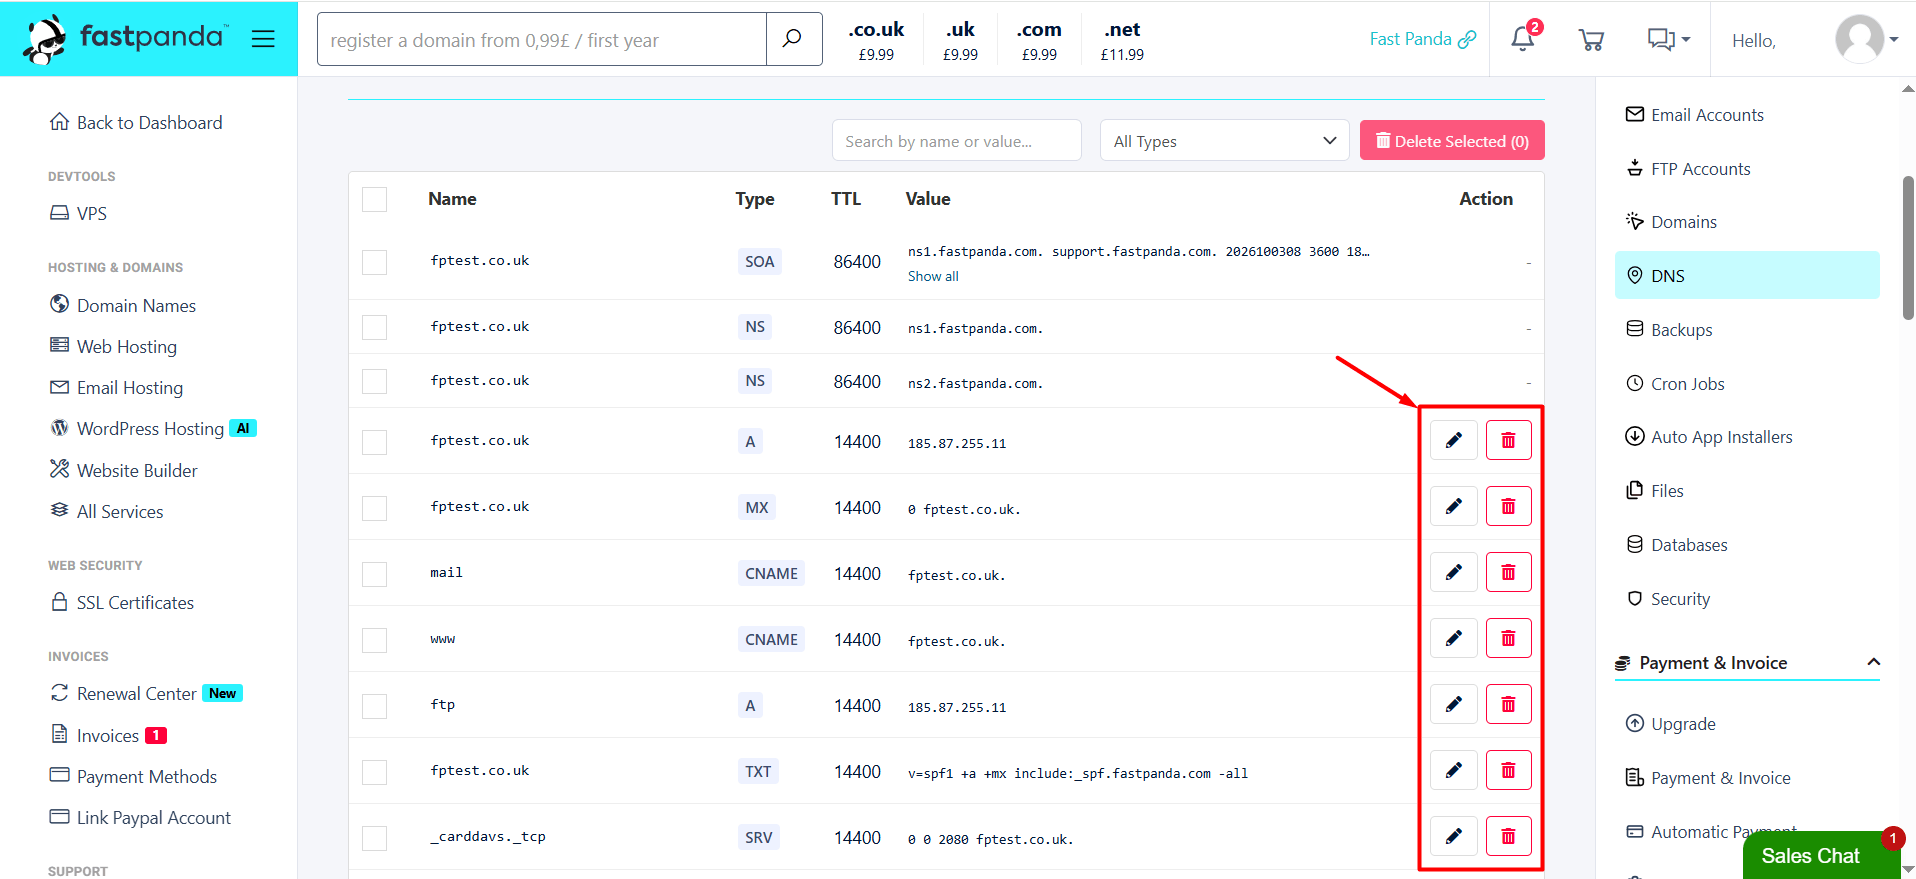
- To update an existing record, click the “Edit (pencil icon)” button next to the record. Update the IP address, destination, or TTL value as needed, then save your changes. If a record is no longer needed, you can remove it immediately by clicking the “Delete (trash can icon)” button next to the record.
- If your website or email services stop working due to incorrect configurations and you cannot identify which records are causing the issue, you can use the “Reset Zone” feature. To do this, click the “Reset Zone” button at the top of the page. The system will remove all externally added and modified records and restore your domain’s DNS zone to the default settings that were in place when your FastPanda hosting service was first set up. The “Reset Zone” operation deletes all custom records you have added, including Google Workspace MX records, A records pointing to external servers, and email verification records. Use this feature only when you want to completely reset your DNS settings. If you have any custom records, make sure to note them down before proceeding.
- To add a new record, use the “Add New Record” section at the bottom of the page to create a new DNS record, such as an MX, A, or CNAME record. Important Information:
- For changes made through this section of the Customer Panel to take effect, your domain must be pointed to FastPanda’s nameservers. If you use a different DNS provider (such as Cloudflare or another nameserver), you must manage your DNS records through that platform instead.
- Avoid adding multiple CNAME records for the same subdomain or conflicting A records, as this may cause website accessibility issues.
- DNS updates propagate gradually as internet service providers worldwide refresh their caches. This process typically takes 2 to 24 hours.
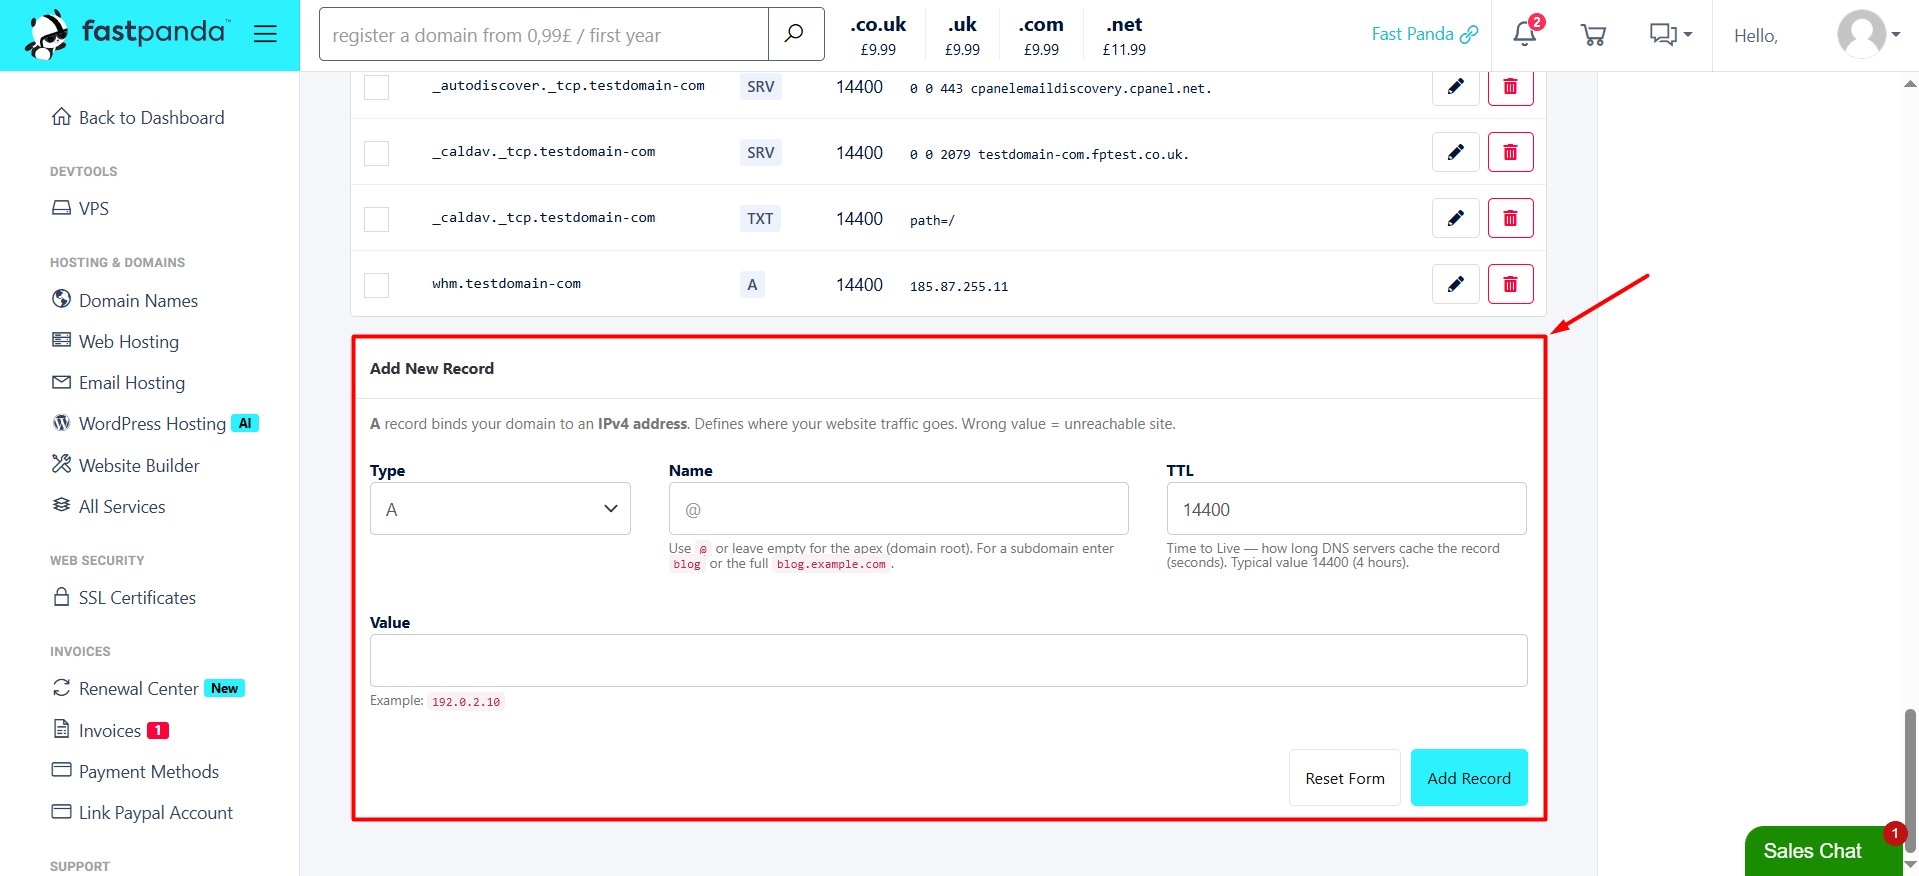
Example of Adding a DNS Record
- Adding an A Record: An A record is used to point your website or a subdomain to a specific server IP address.
- Type: A
- Name: Enter your domain name or subdomain (e.g., blog or @).
- TTL: You can leave the default value as 14400 or 3600. If the record you are using from another provider has a different TTL value, you can enter that value instead.
- Value: Enter the IPv4 address of the server you want to point to (e.g., 192.168.1.1).
- After filling in the required fields, click the “Add Record” button.
- Adding a CNAME Record: A CNAME record is used to point a subdomain to another domain name (e.g., www or cname.domain.com).
- Type: CNAME
- Name: Enter www or the prefix you want to point to another domain.
- TTL: You can leave the default value as 14400 or 3600. If the record you are using from another provider has a different TTL value, you can enter that value instead.
- Value: Enter the target domain name (e.g., domain.com. or an external hostname).
- After filling in the required fields, click the “Add Record” button.
- Adding an MX (Mail Exchanger) Record: An MX record specifies the mail servers responsible for receiving email messages for your domain.
- Type: MX
- Name: Usually enter @, or specify a name if required for your DNS record.
- TTL: You can leave the default value as 14400 or 3600. If your email provider specifies a different TTL value, you can enter that value instead.
- Priority: Enter the priority value provided by your email service provider (e.g., 0, 5, or 10).
- Mail Server: Enter the mail server hostname (e.g., mail.domain.com or aspmx.l.google.com).
- After filling in the required fields, click the “Add Record” button.
- Adding a TXT Record: TXT records are used for purposes such as Google Search Console verification and email security protocols, including SPF, DKIM, and DMARC.
- Type: TXT
- Name: Enter the subdomain to be verified or @ for the root domain.
- TTL: You can leave the default value as 14400 or 3600. If your provider specifies a different TTL value, you can enter that value instead.
- Value: Enter the verification string provided by your service provider (e.g., v=spf1 +a +mx ~all).
- After filling in the required fields, click the “Add Record” button.
The steps above demonstrate how to add a sample DNS record. Select the appropriate record type based on the DNS record provided by your service provider, then add it to your domain.