Create your WordPress site with AI in 60 seconds.




























FTP is used to quickly and securely upload your website files, themes, plugins, or backups to your server. If you work with an external web developer or agency, you can create a restricted FTP account that grants access only to a specific directory without sharing your main account password.
With your Linux Hosting or WordPress Hosting service purchased through FastPanda, you can create and manage FTP accounts directly from the Customer Panel without needing to log in to cPanel. Follow the steps below to create a new FTP account or manage your existing FTP accounts.
- First, log in to the Web Hosting management panel through your FastPanda Customer Panel. For more information on how to access the panel, please refer to our article titled “How to Log In to the Hosting Management Panel?“
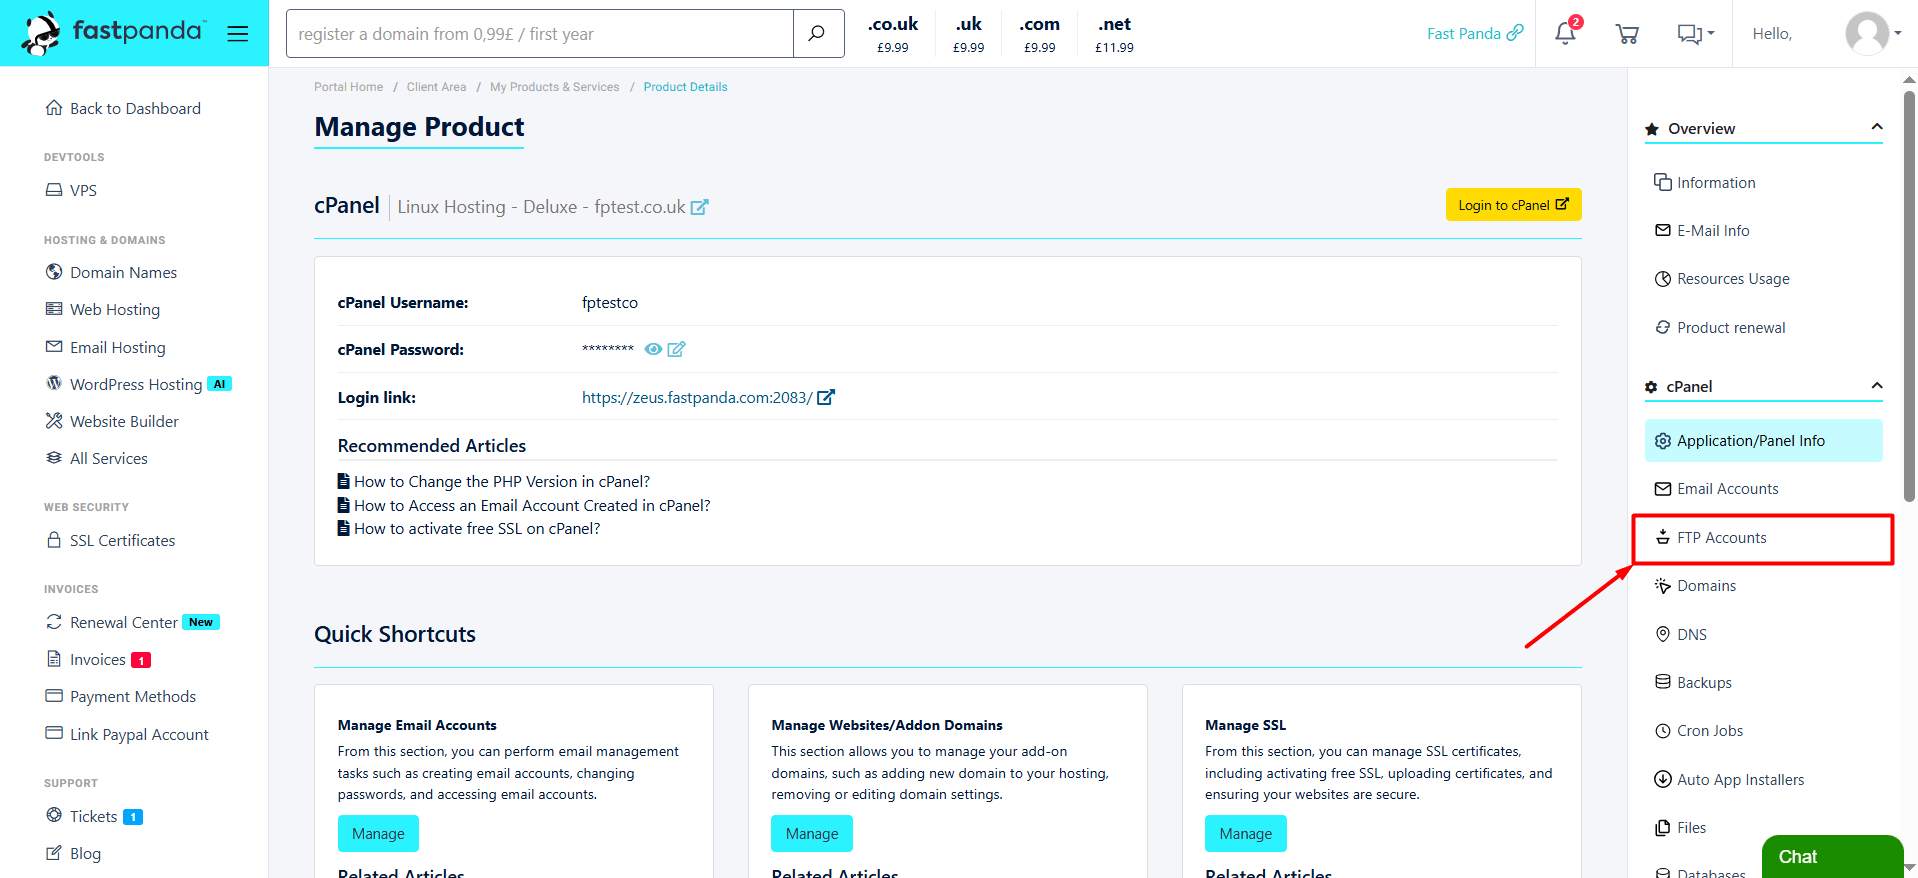
- Once you reach the Web Hosting management panel, click the “FTP Accounts” button in the right-hand menu.
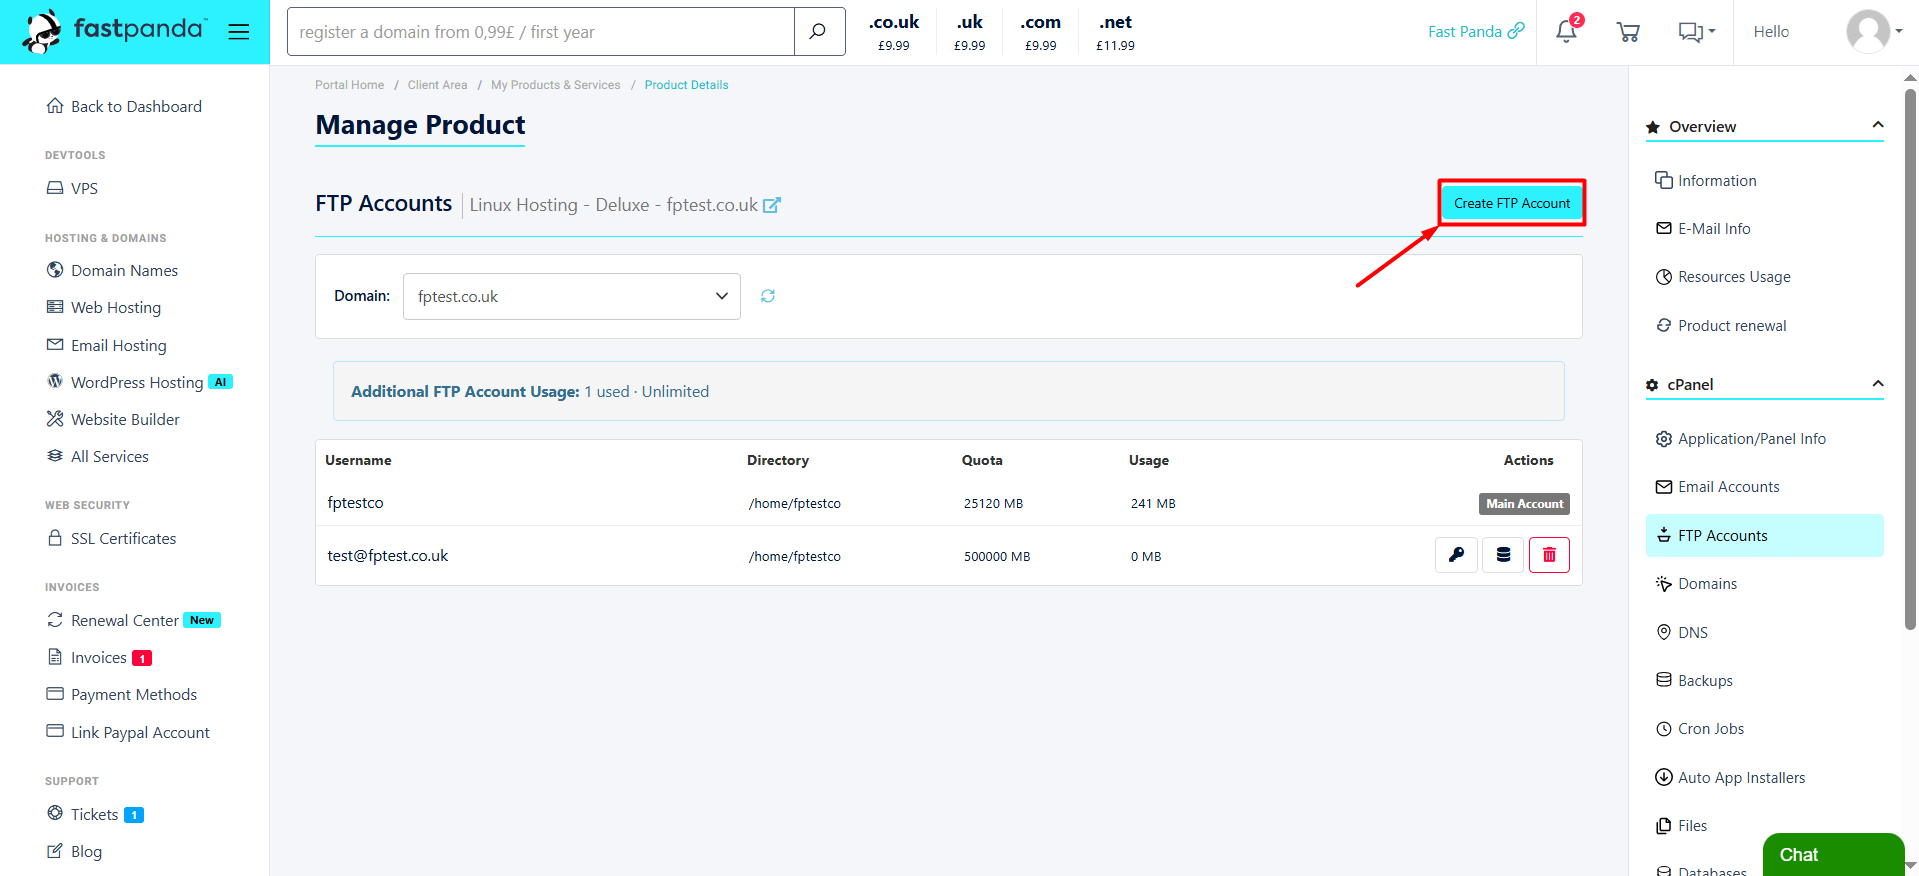
- In the “FTP Accounts” section, you can view your previously created FTP accounts and their details. To create a new FTP account, click the “Create FTP Account” button.
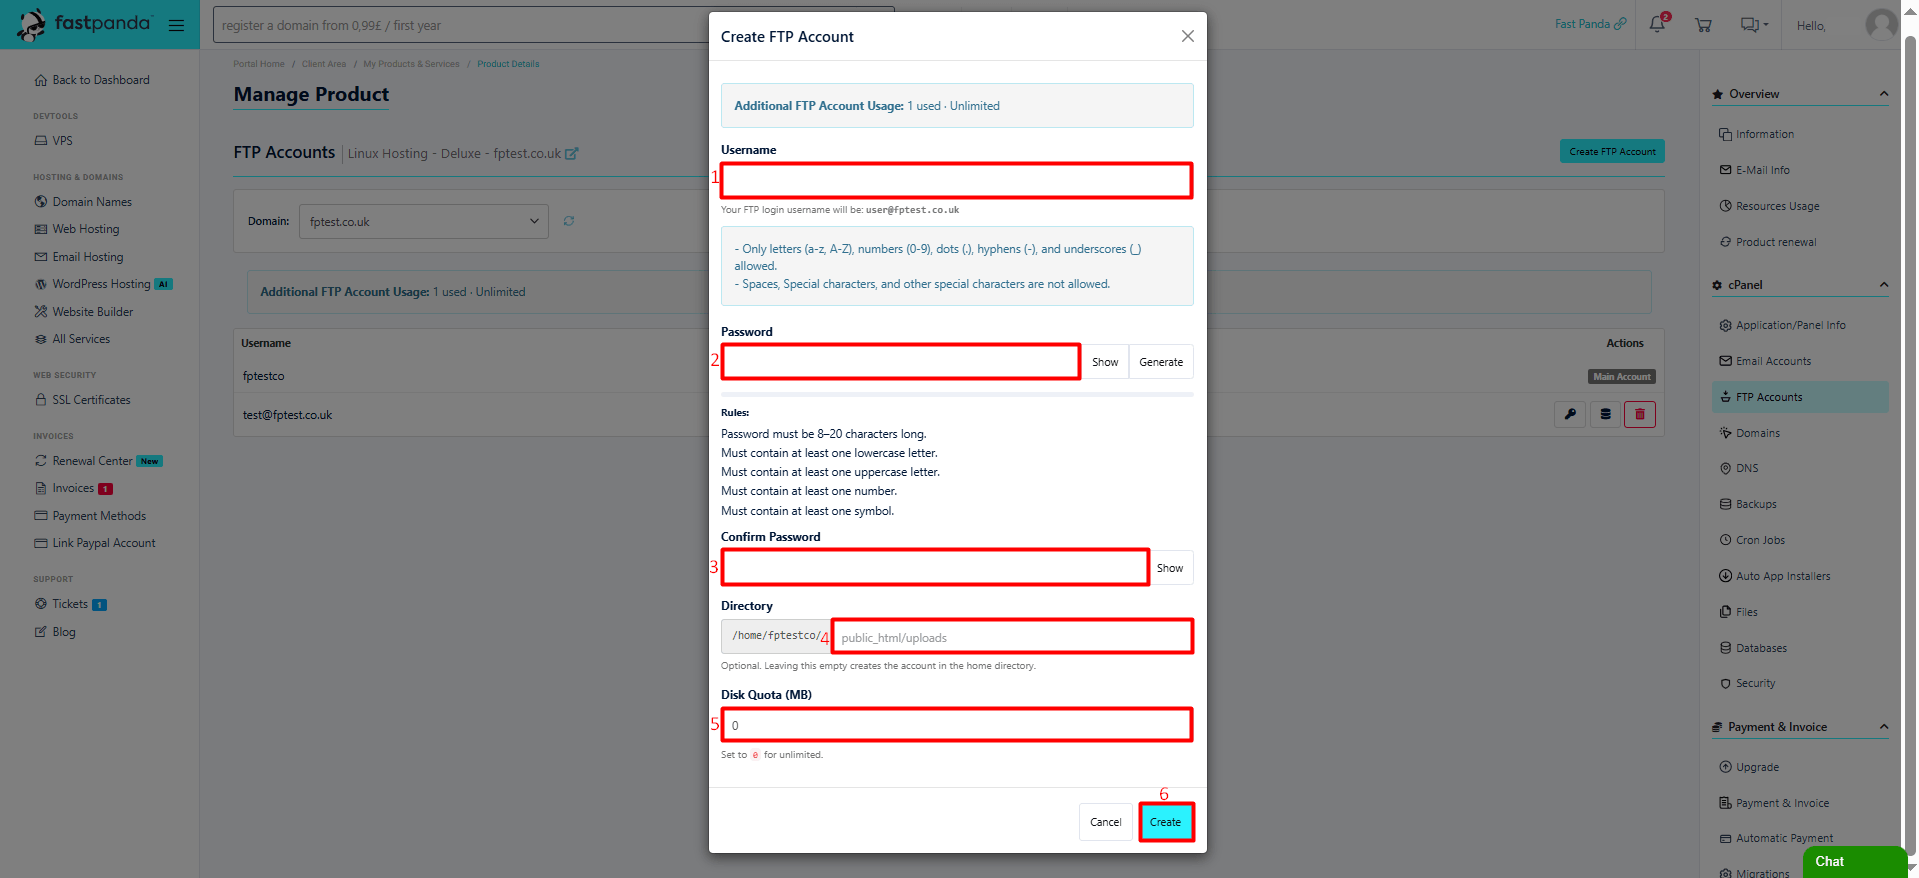
- Fill in the required information on the page that opens, then click the “Create” button.
- Username: Enter the username you want to use for your FTP account.
- Password: Set a password for your FTP account. You can use the “Generate” button to automatically generate a strong password.
- Confirm Password: Re-enter the password you set.
- Directory: Specify the directory path that the FTP account will have access to.
- Disk Quota (MB): Set the disk space quota for the FTP account in megabytes (MB).
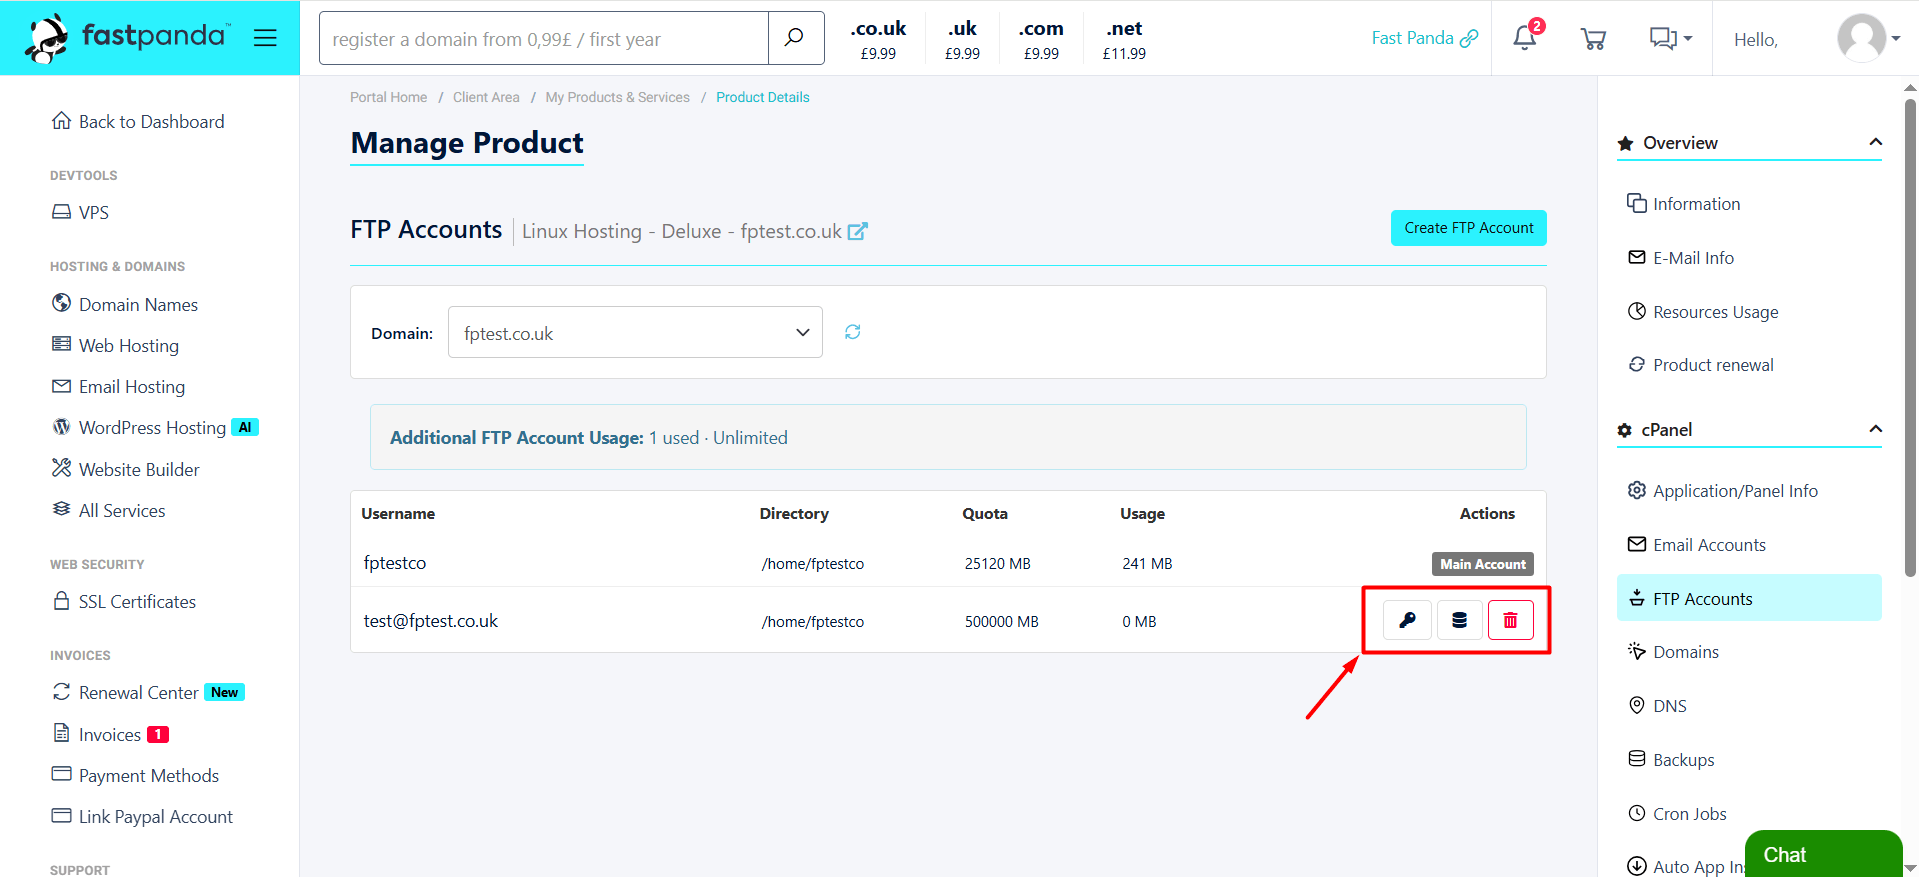
- Once your FTP account has been created, you can use the options next to the account to change its password or disk quota, or delete the FTP account when necessary.
Important: The Main Account cannot be modified or deleted.