Create your WordPress site with AI in 60 seconds.



























WordPress, e-commerce platforms, and dynamic web applications require a MySQL database to store their content, user data, and settings.
With Linux Hosting or WordPress Hosting services purchased through FastPanda, you can view and manage your MySQL databases and create new databases and database users directly from the Customer Panel, without needing to log in to cPanel separately.
Follow the steps below to create a database.
- First, log in to the Web Hosting management panel through your FastPanda Customer Panel. For more information on how to access the panel, please refer to our article titled “How to Log In to the Hosting Management Panel?“
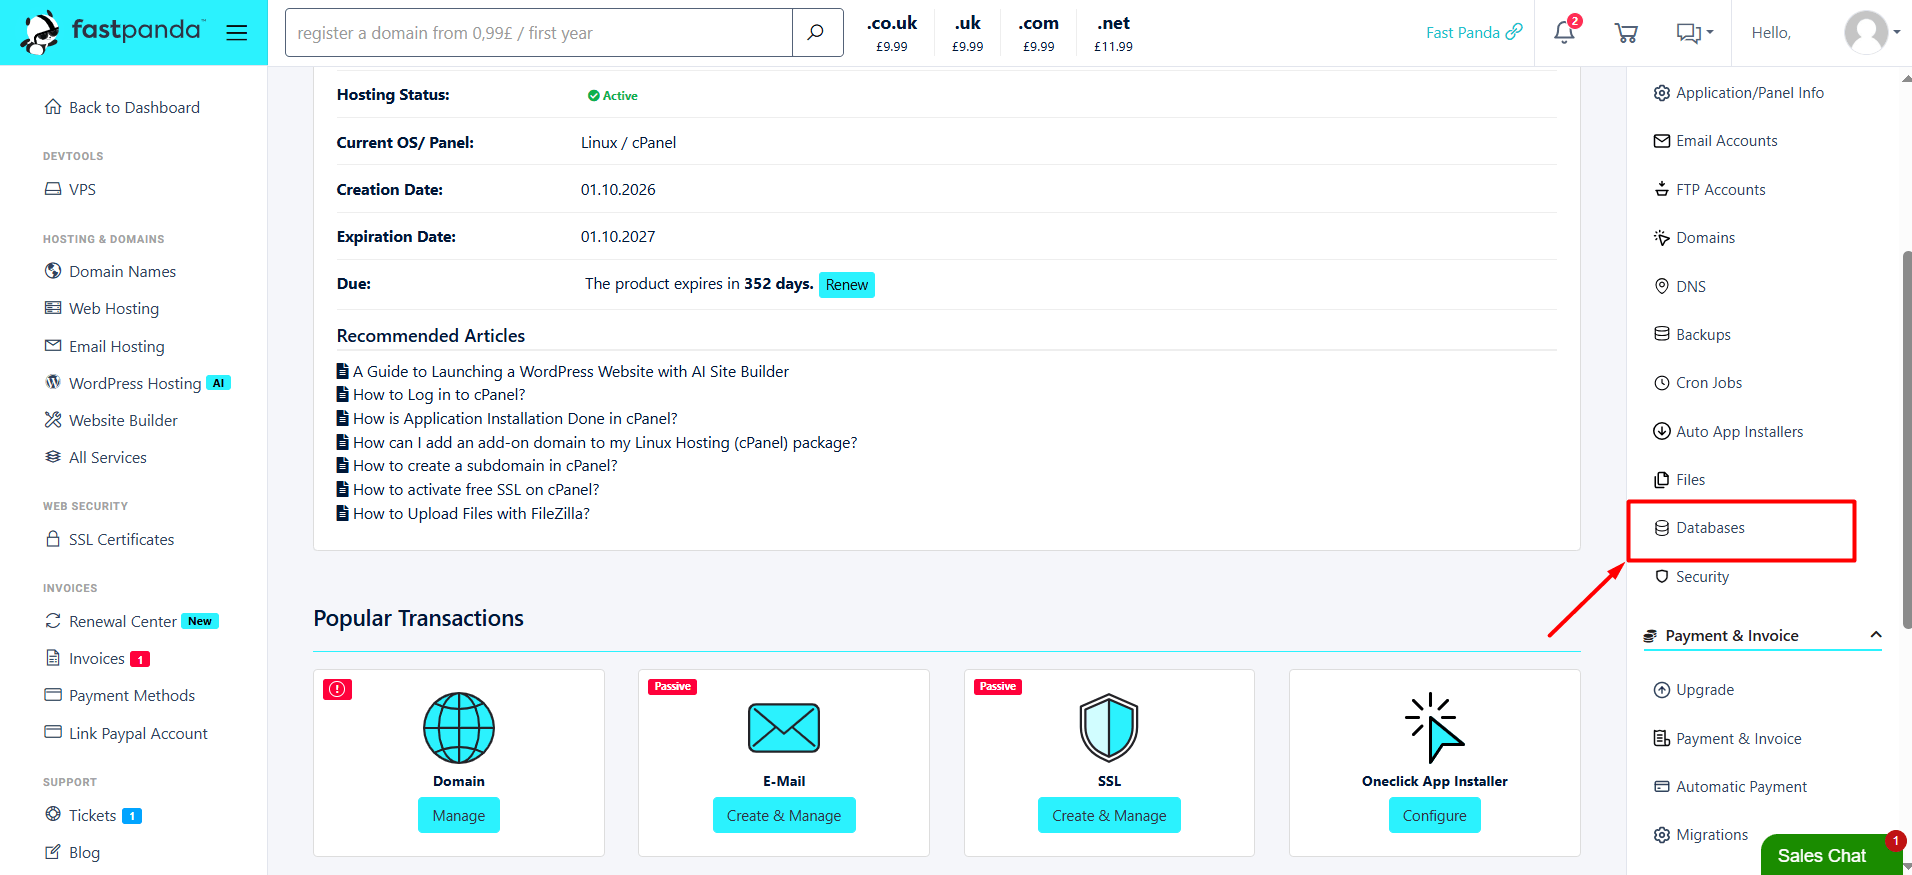
- Once you reach the Web Hosting management panel, click the “Databases” button in the right-hand menu.
Manually Adding a Database and User
- Create a New Database
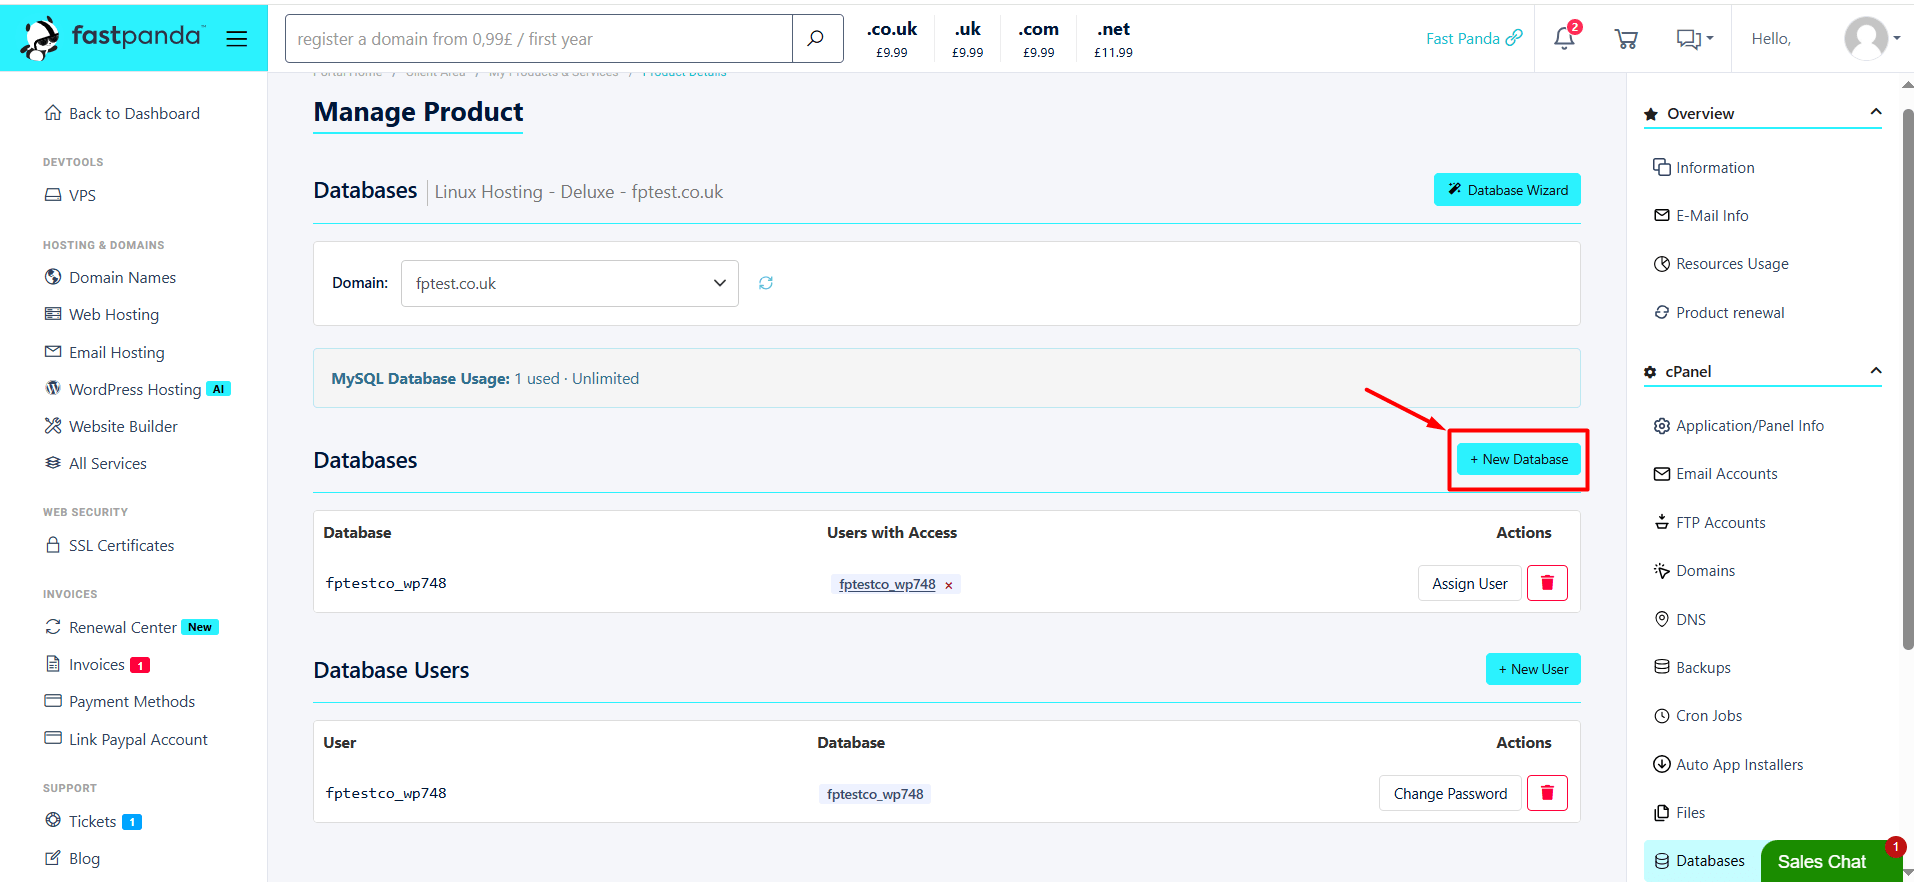
- To create a database, click the “+ New Database” button on the page.
-
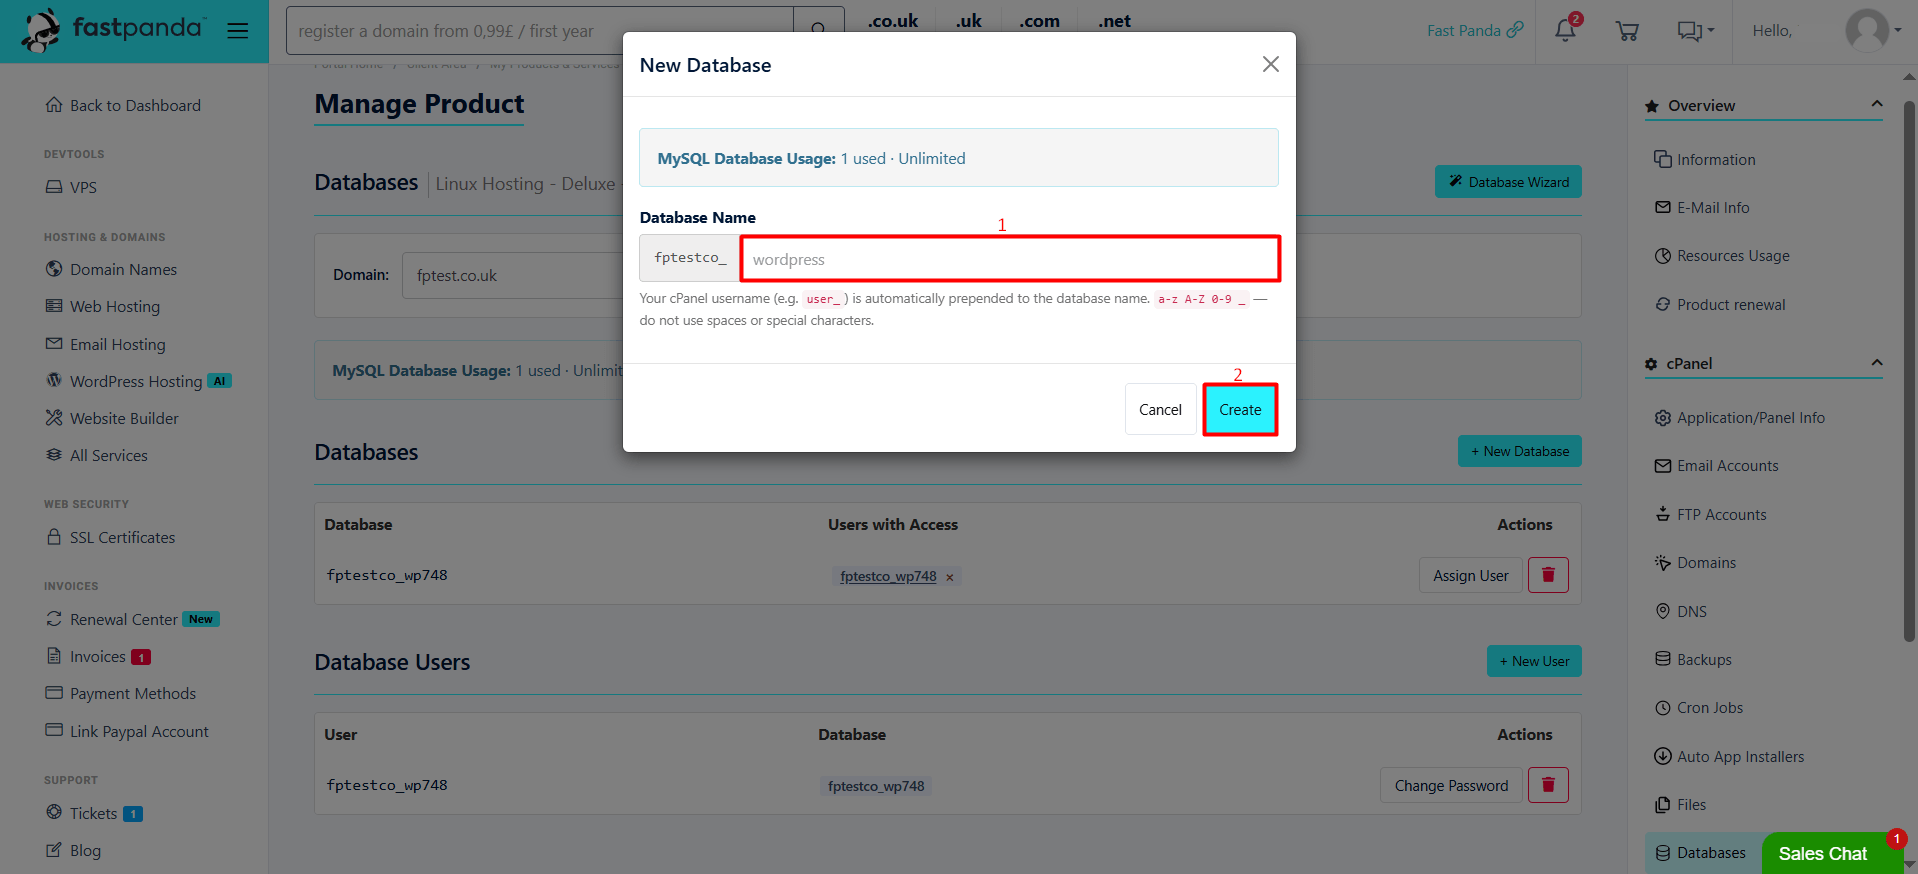
- Enter the name you want to use for your database in the “Database Name” field, then click “Create” to create the database.
- Create a New User
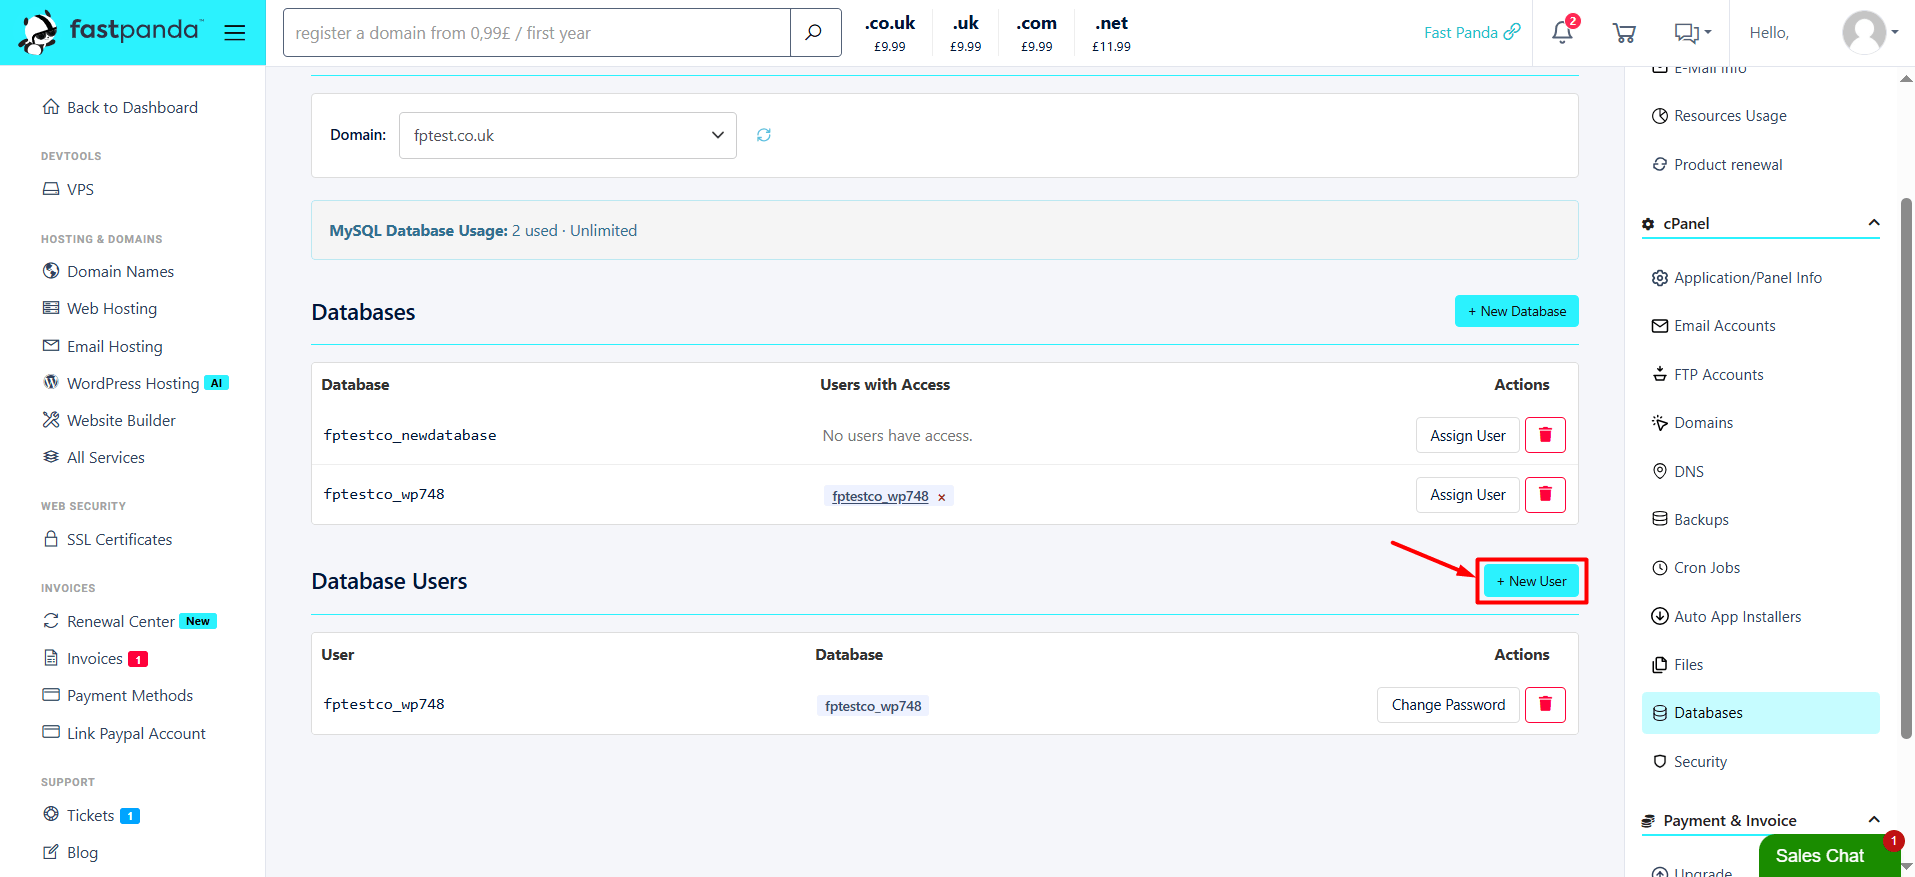
- To create a database user, click the “+ New User” button on the page.
-
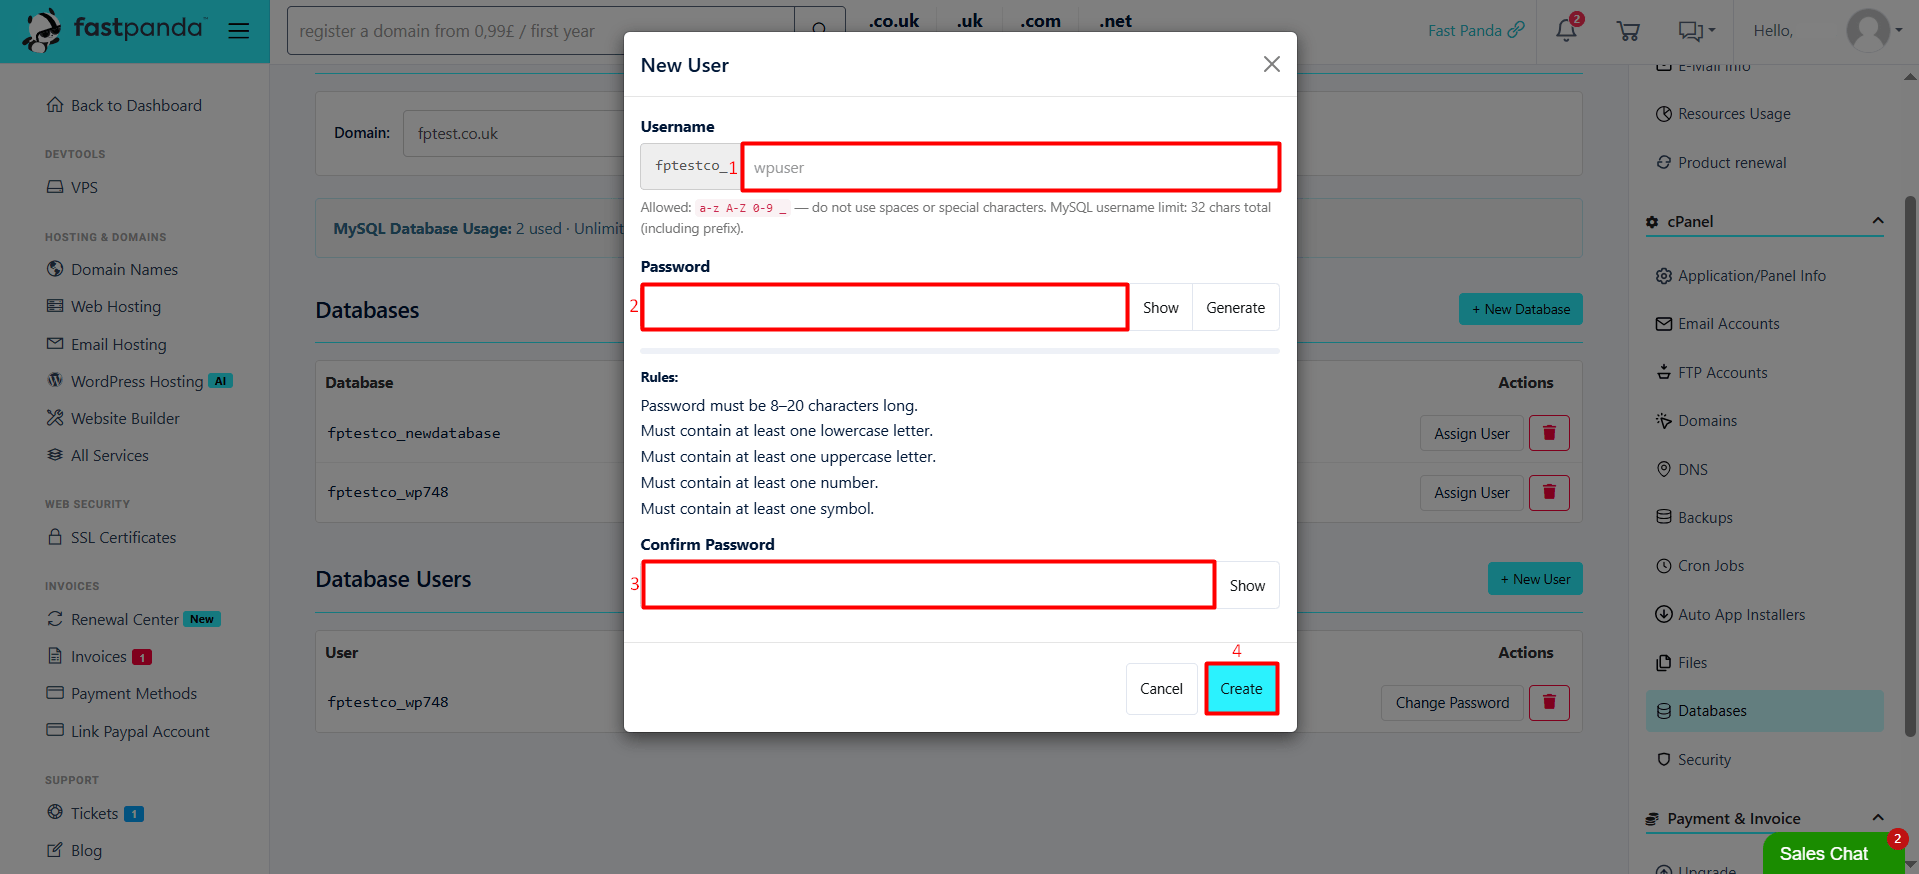
- Fill in the required information on the page that opens, as follows:
- Username: Enter your database username.
- Password: Create a password for the database user.
- Confirm Password: Enter your password again.
- After filling in all the fields, click the “Create” button.
- Fill in the required information on the page that opens, as follows:
- Assigning a User to a Database
Since the MySQL database and database user are created separately by following the steps above, you need to assign the user to the database to link them. To do this:
-
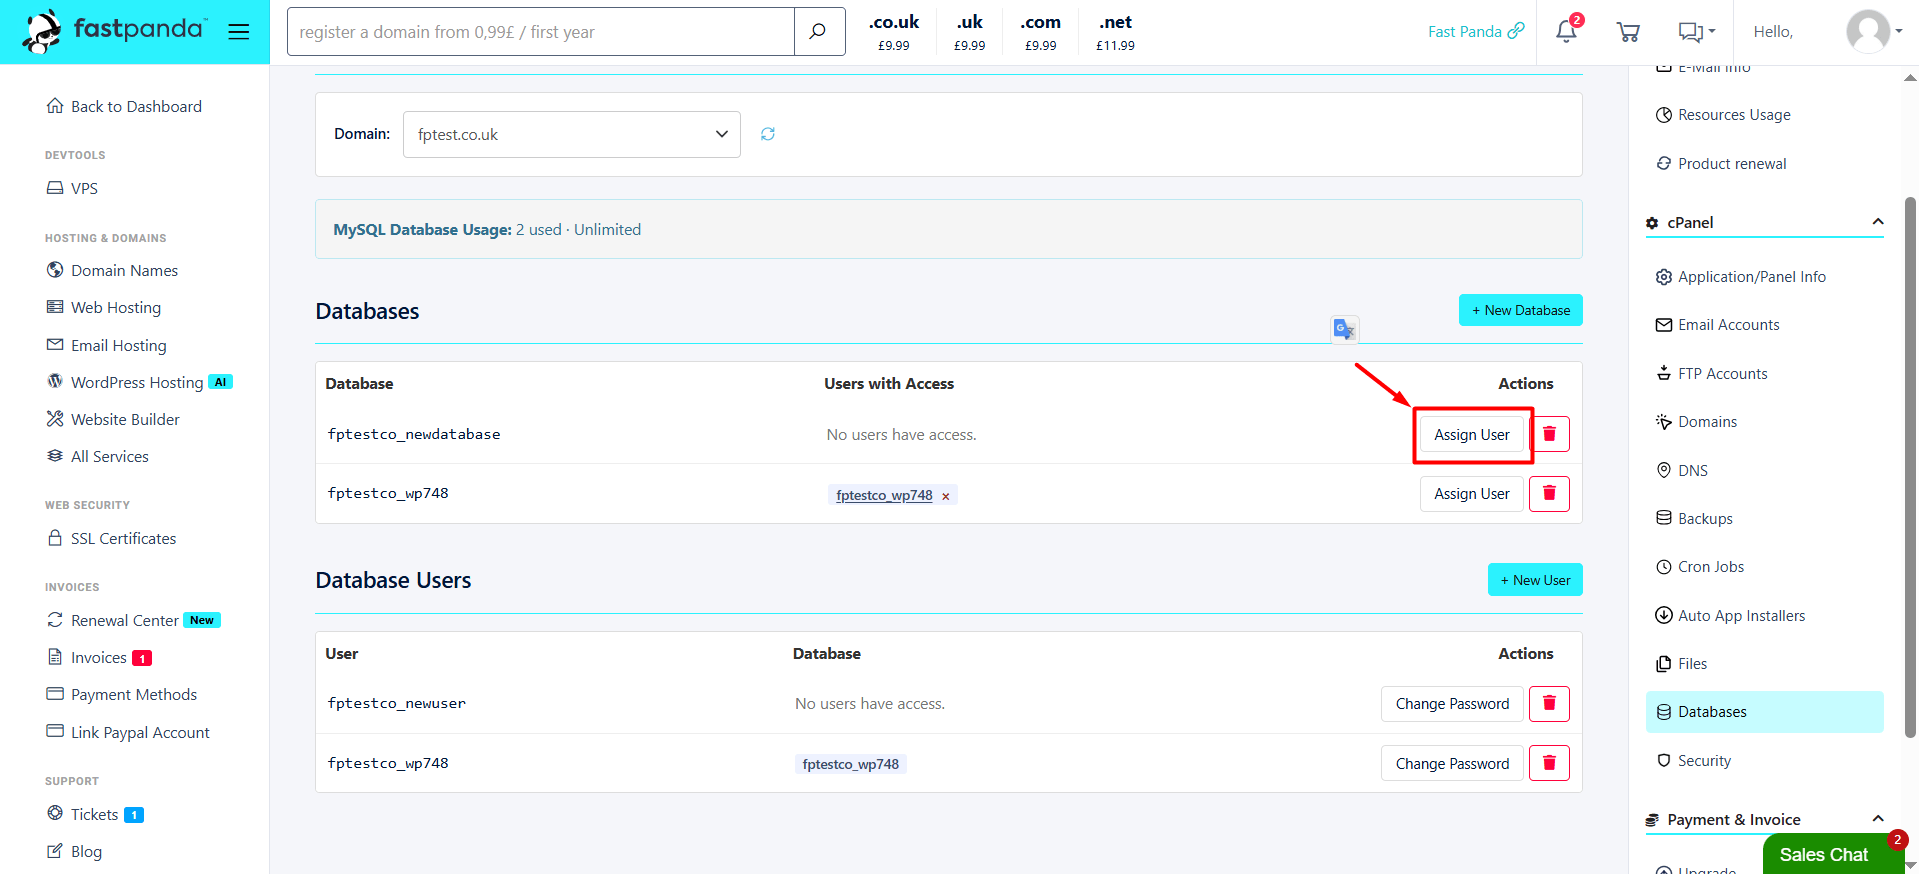
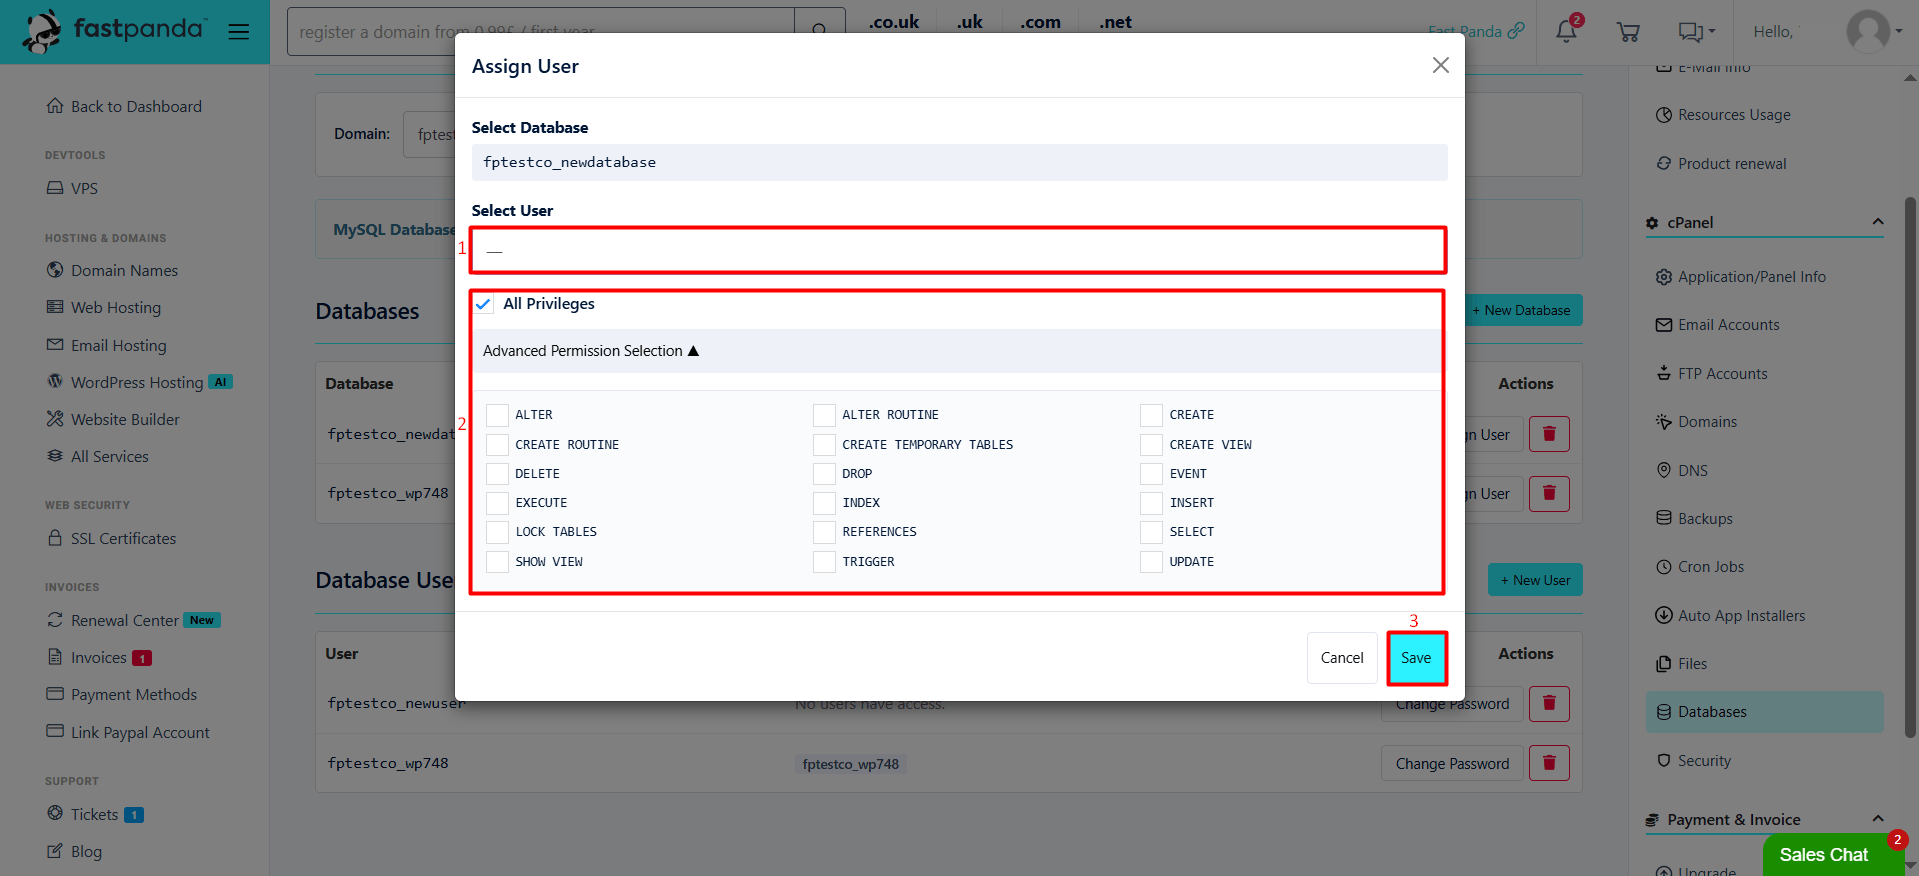
- Click the “Assign User” button next to the relevant database in the Databases table.
- Select the user you created from the “Select User” drop-down list and configure the user’s privileges. After configuring the user and their privileges, click “Save” to save your changes. The database and user will then be linked.
Quick Setup in 3 Steps with the Database Wizard
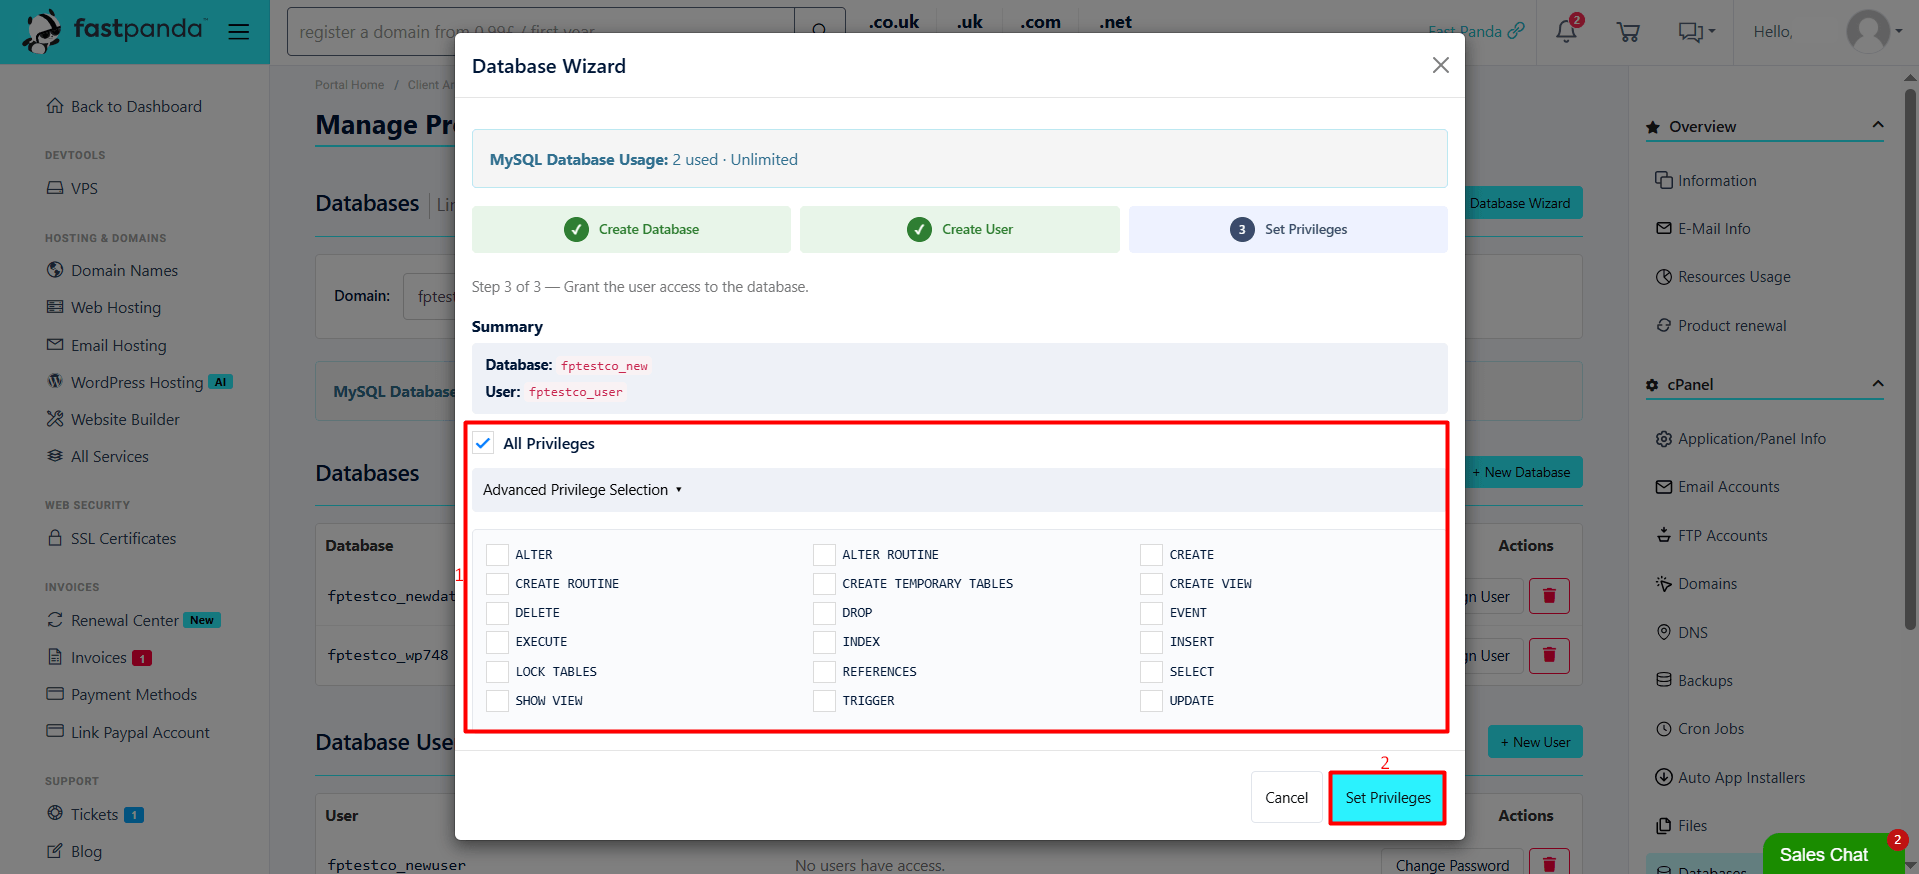
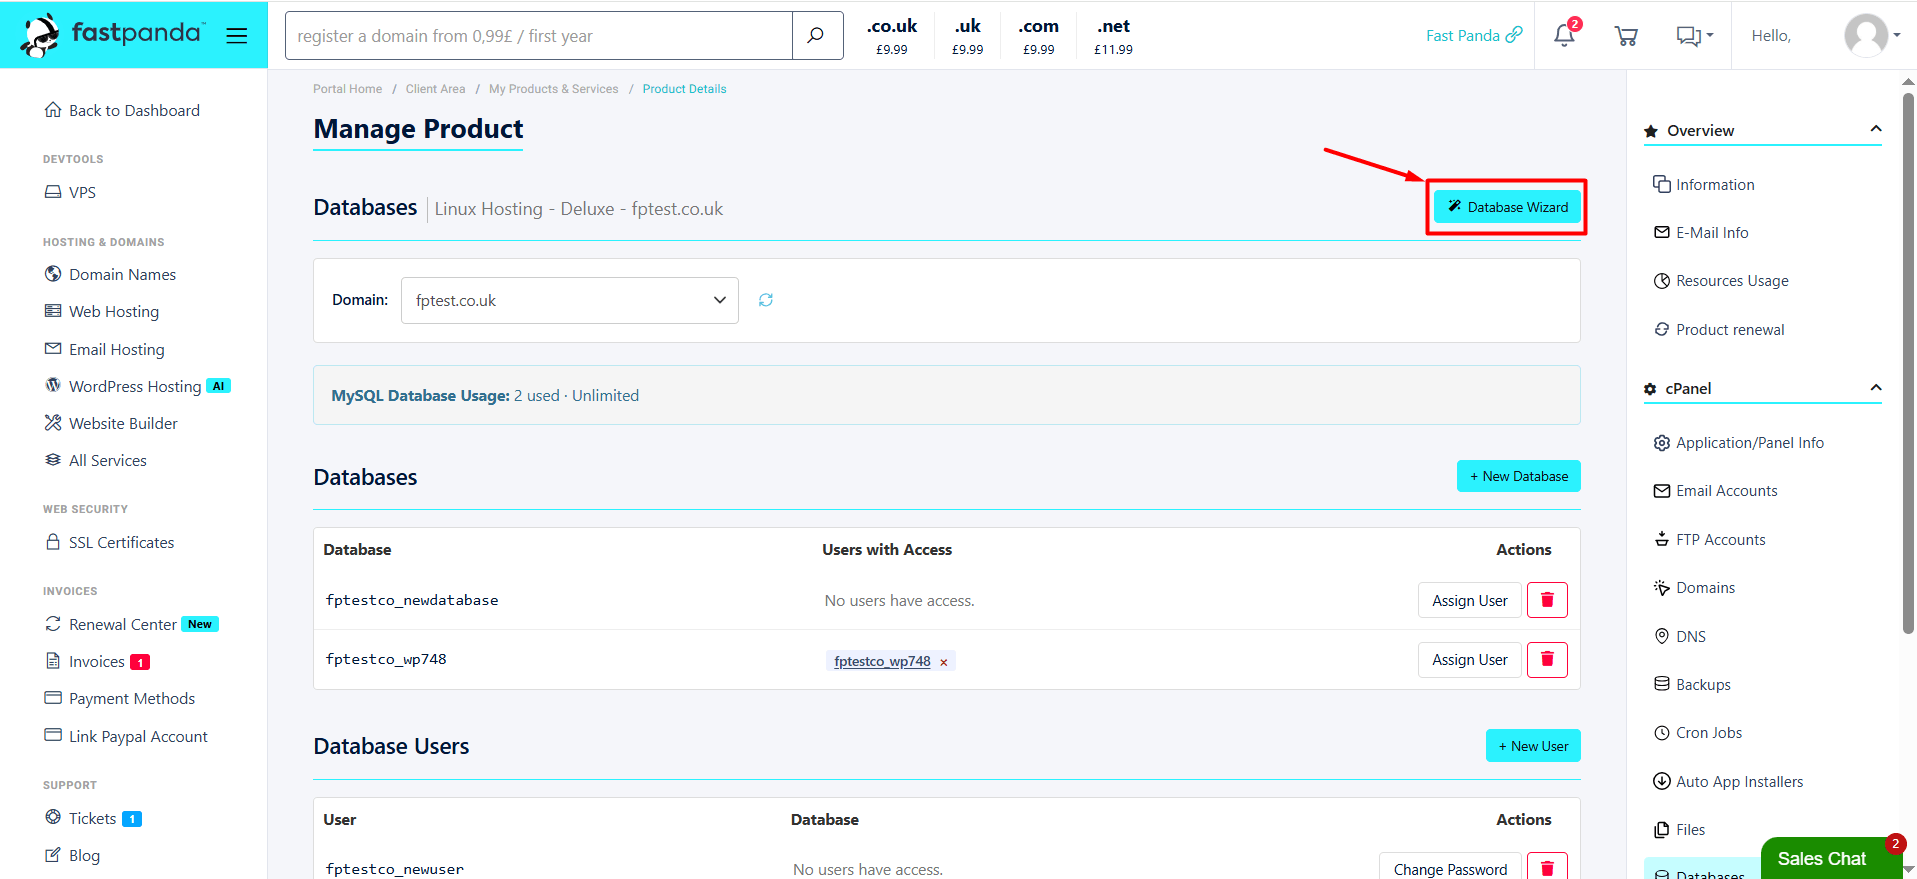
- To access the setup wizard, click the “Database Wizard” button in the panel.
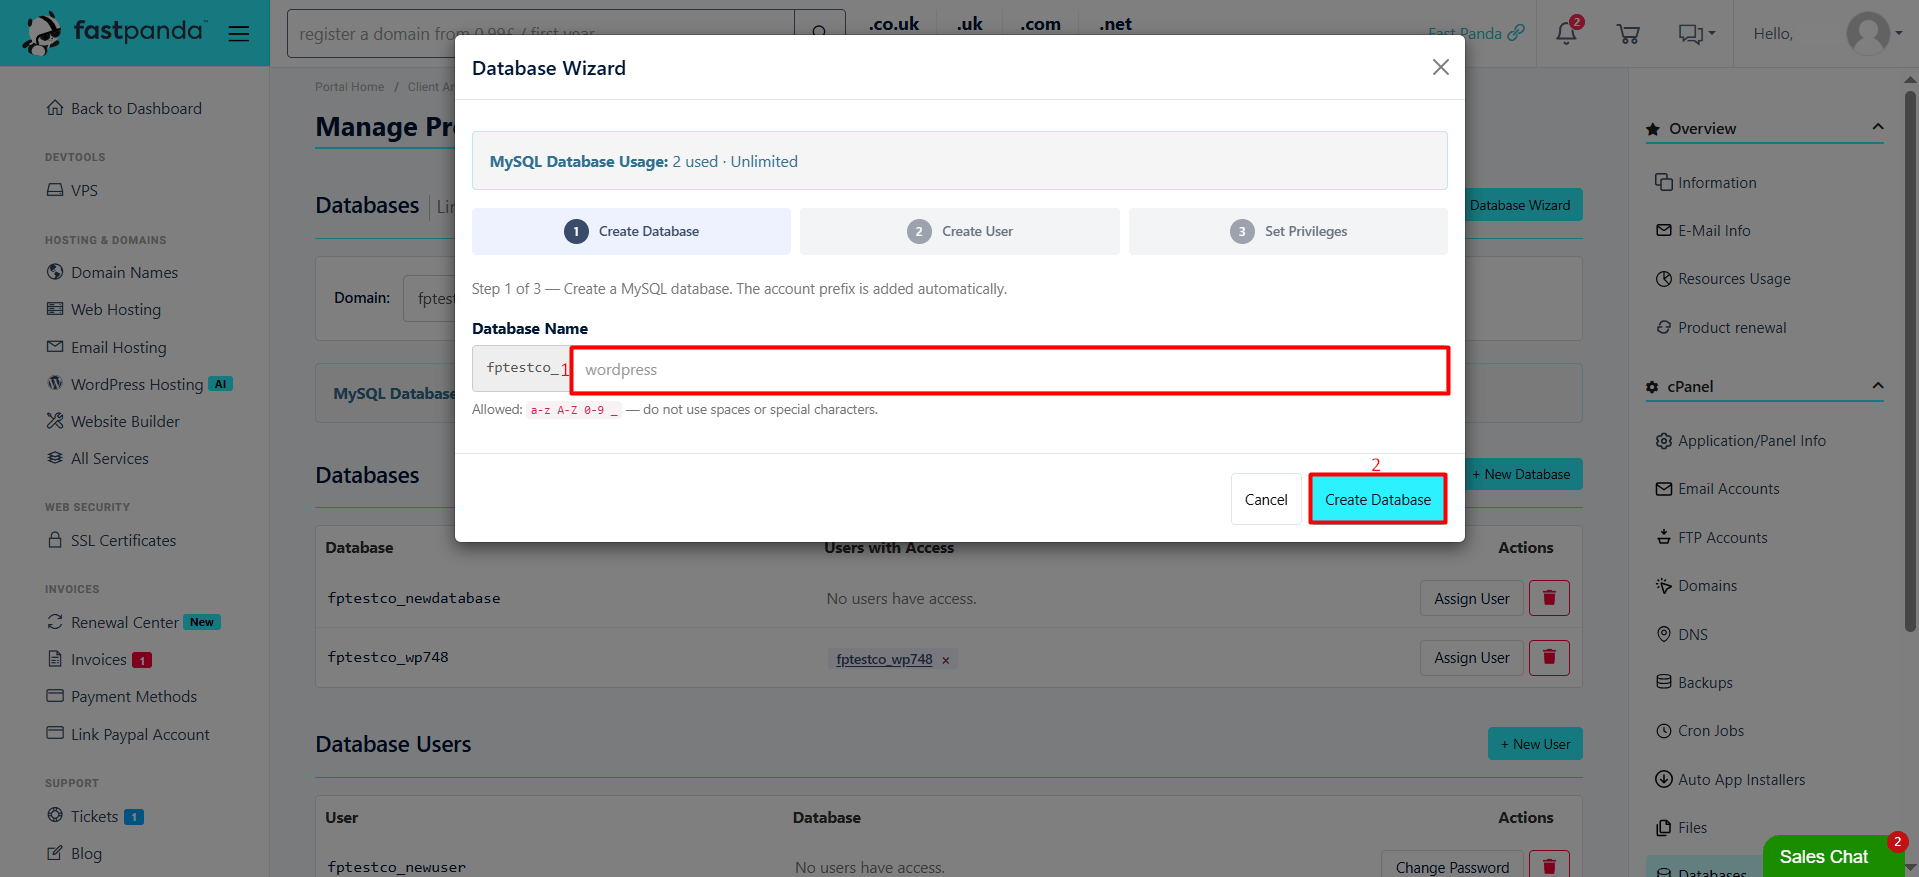
- On the page that opens:
- Enter a name for your database in the “Database Name” field, then click “Create Database” to proceed to Step 2.
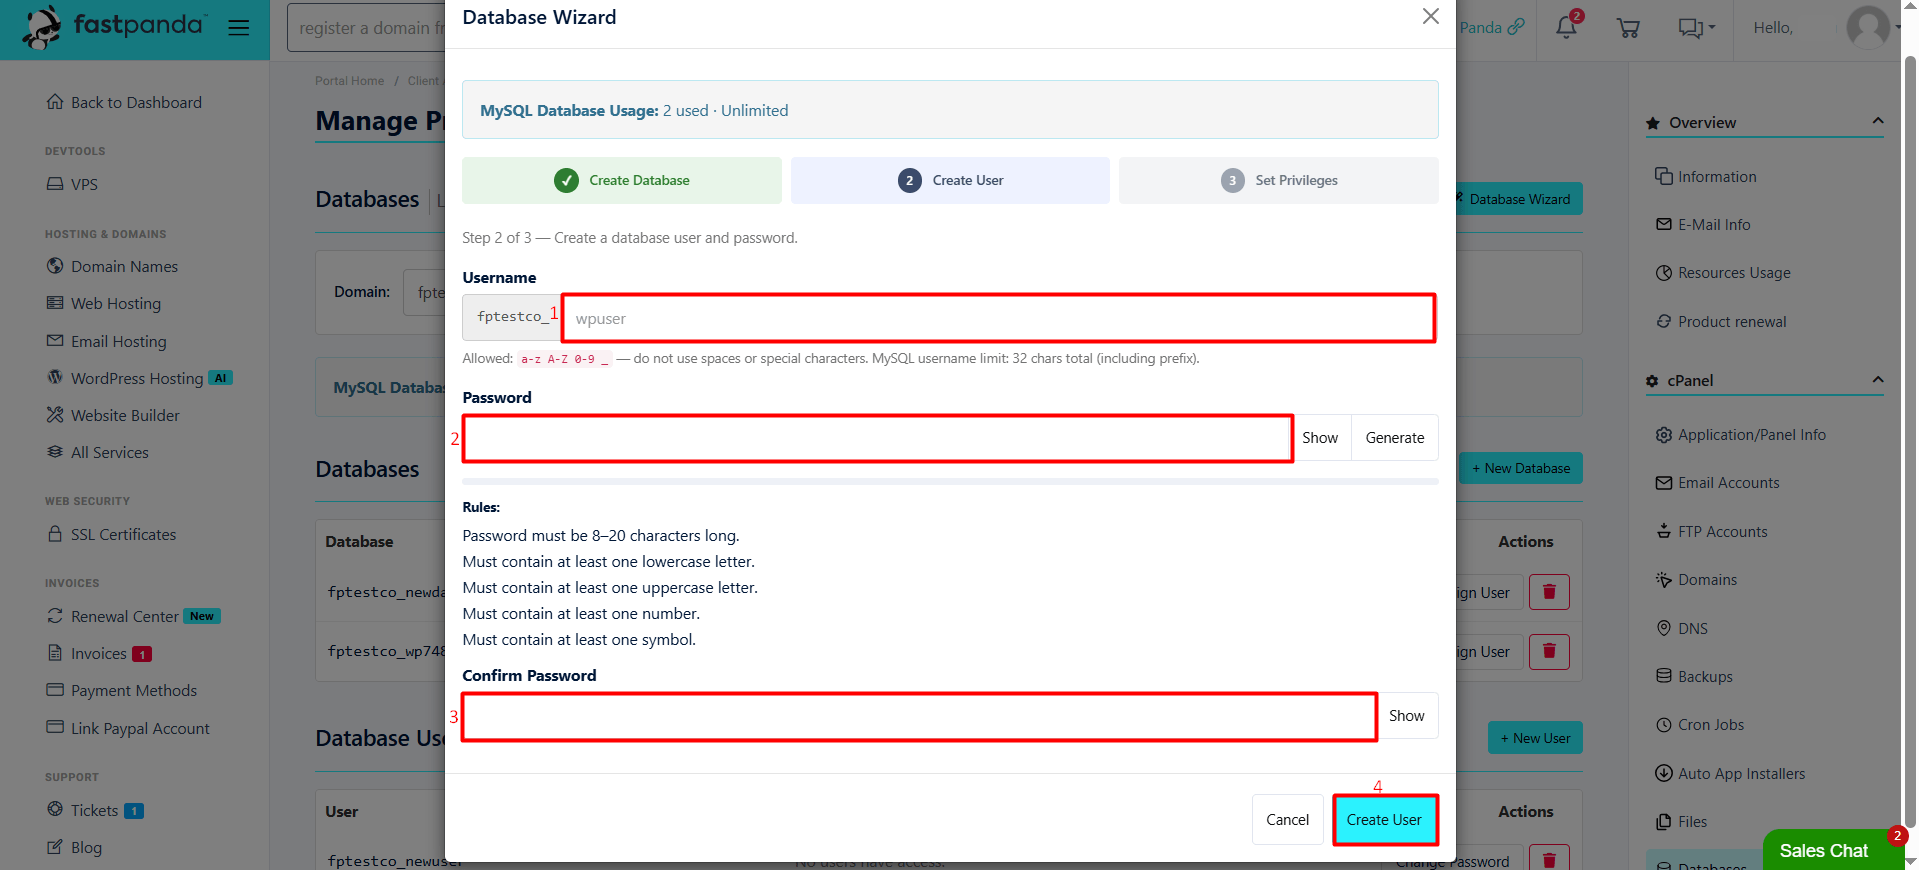
- Set the “Username” and “Password” for the user who will access the database. Re-enter the password in the “Confirm Password” field, then click “Create User” to proceed to the final step.
- A screen will appear where you can assign privileges to the user you created, allowing them to perform operations on the database. Select the privileges you want to grant, then click “Set Privileges” to complete the wizard. Your database and user are now linked and ready to use.