Create your WordPress site with AI in 60 seconds.



























You may want certain tasks on your website to run automatically at specific times. Cron Jobs allow you to automate these tasks. For example, you can create a Cron Job to run a script at regular intervals or schedule specific processes on your website.
With your Linux Hosting or WordPress Hosting service purchased through FastPanda, you can view and edit your existing Cron Jobs and create new ones directly from the Customer Panel, without needing to log in to cPanel separately.
Follow the steps below to create and manage Cron Jobs.
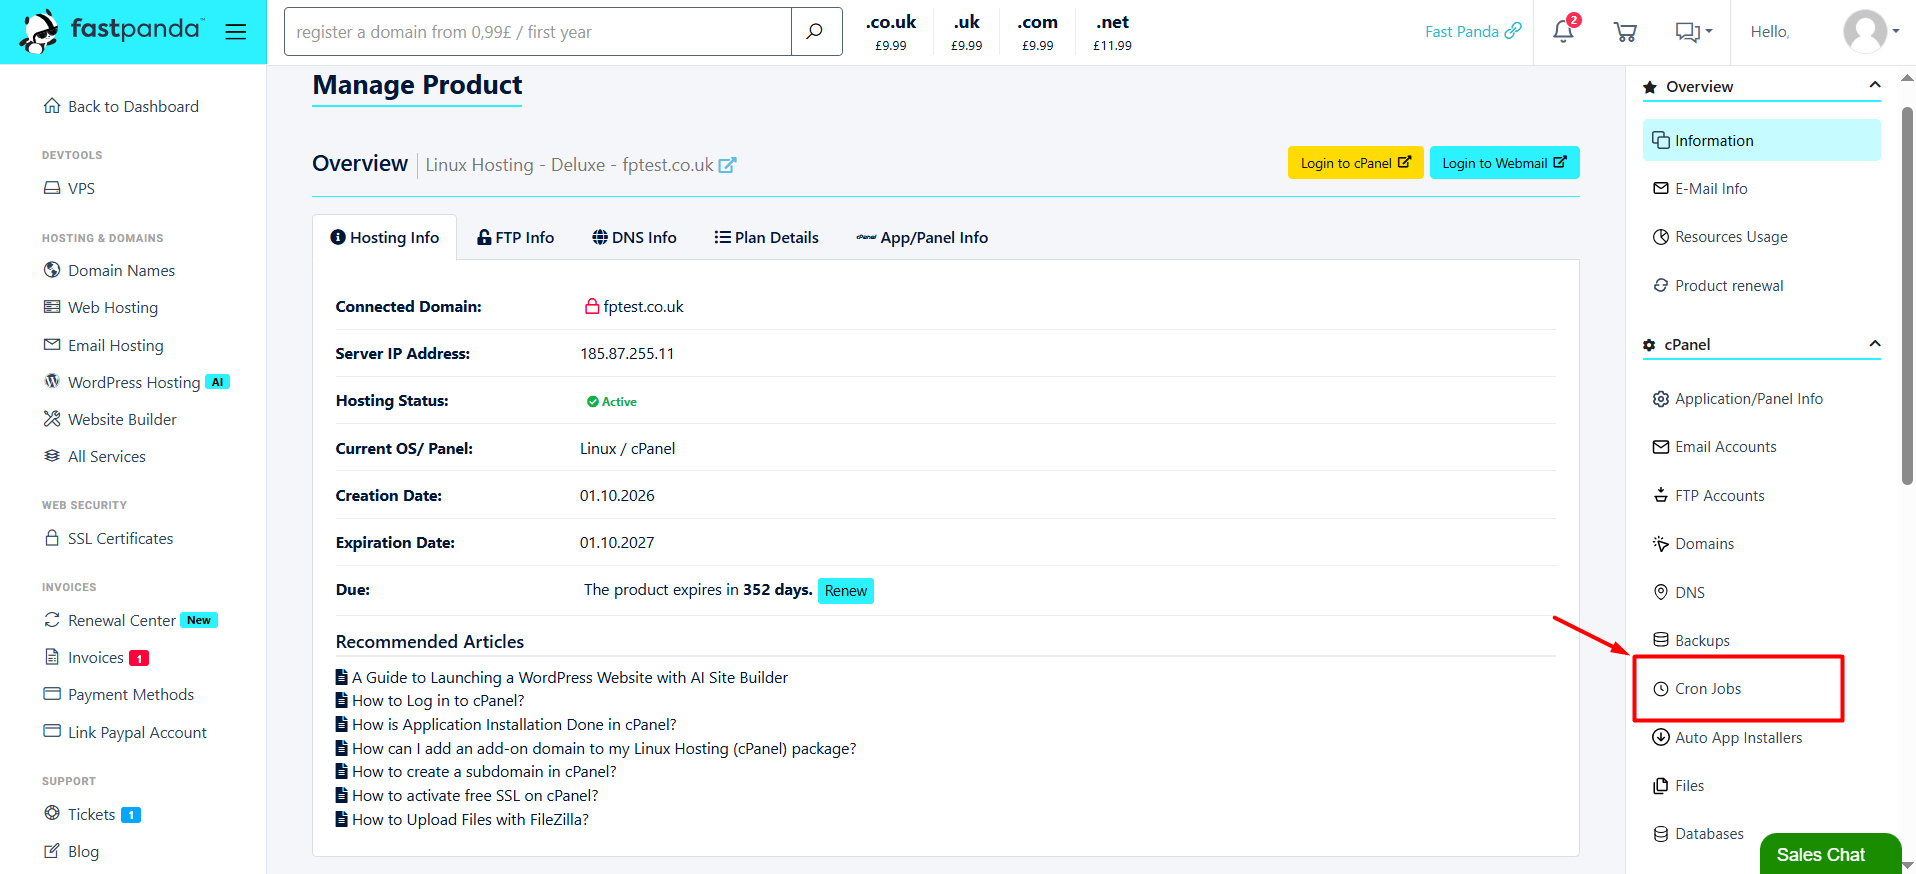
- First, log in to the Web Hosting management panel through your FastPanda Customer Panel. For more information on how to access the panel, please refer to our article titled “How to Log In to the Hosting Management Panel?“
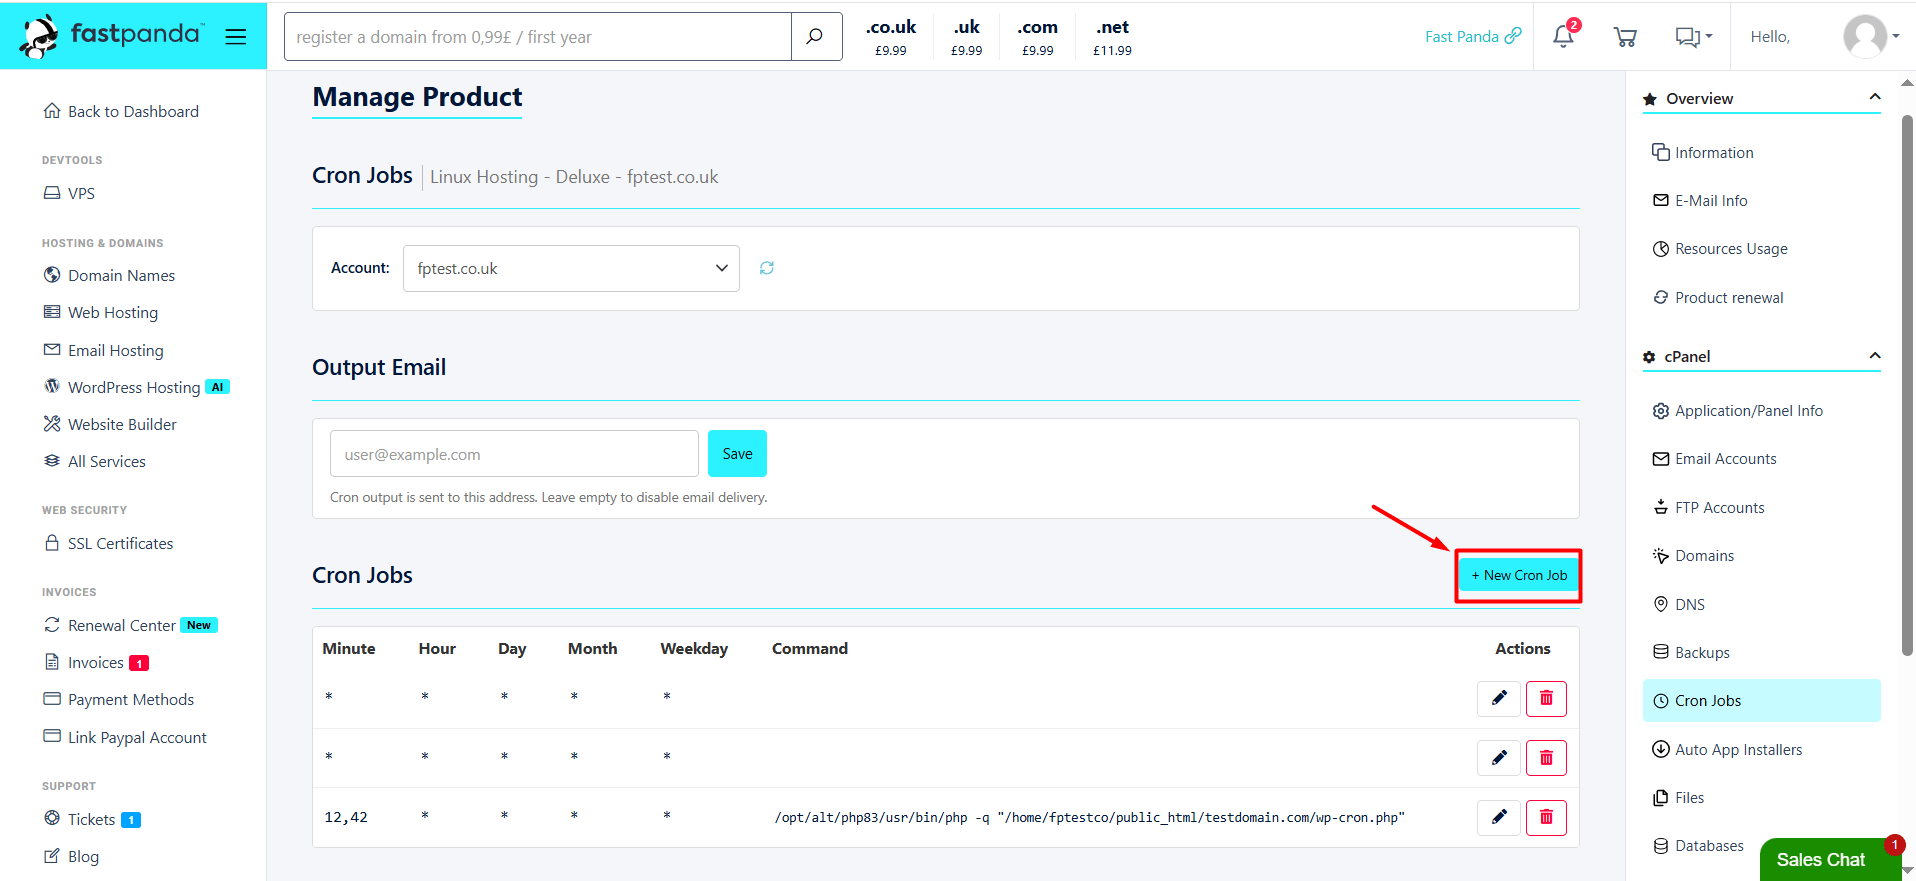
- Once you reach the Web Hosting management panel, click the “Cron Jobs” button in the right-hand menu.
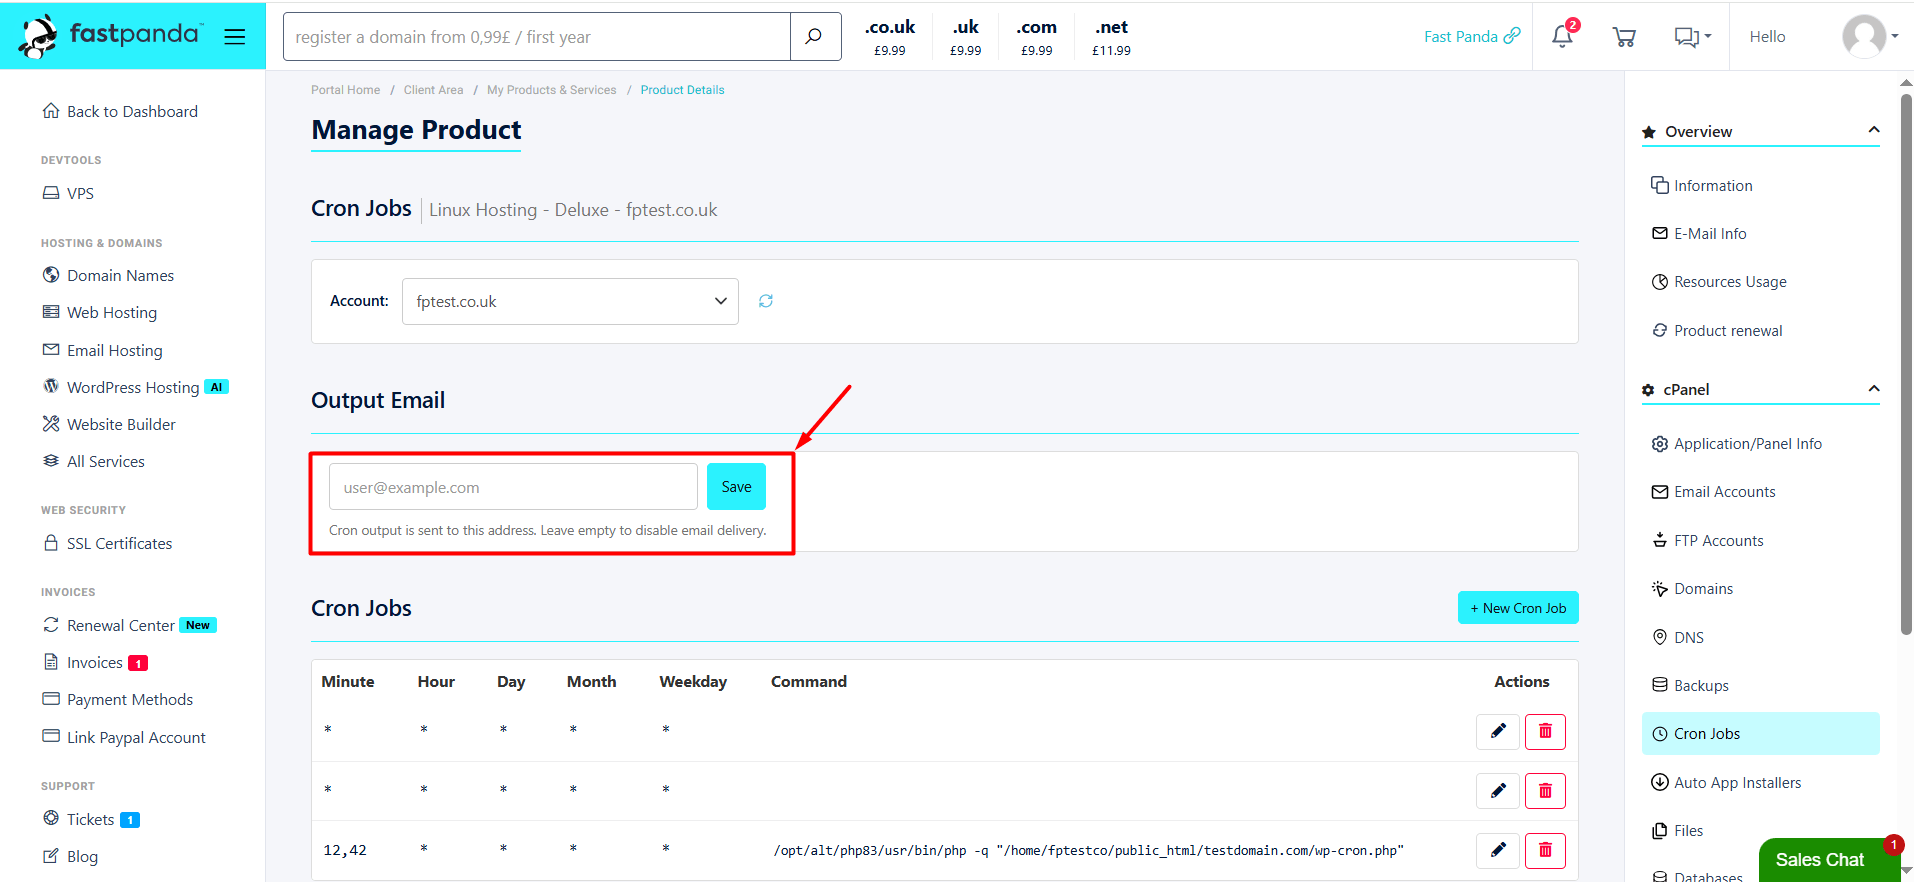
- In the “Output Email” field at the top of the “Cron Jobs” page, you can enter the email address where you want to receive the output of your Cron Jobs. Then, click “Save” to save your changes. If you do not want Cron Job output to be sent to your email address, you can leave this field blank.
- To create a new scheduled task, click the “+ New Cron Job” button.
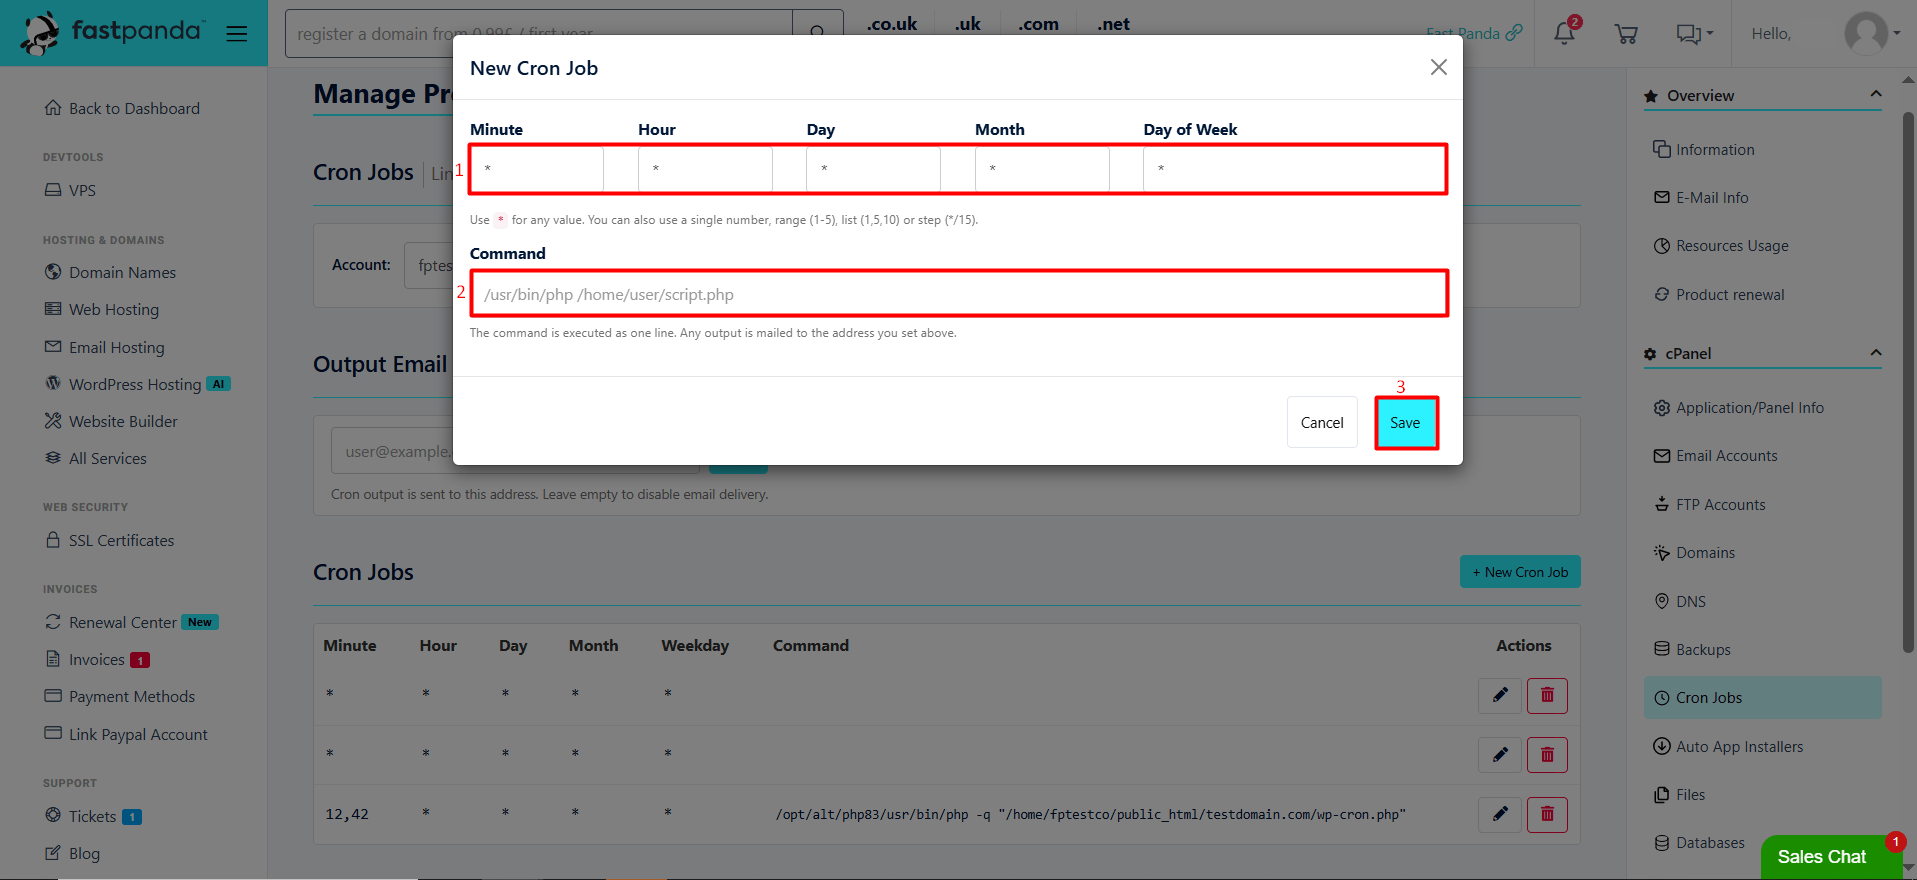
- In the form that opens, configure the task’s schedule and specify the command to execute.
- Schedule Fields: A Cron Job schedule consists of five fields that determine when the task will run:
- Minute: Specifies the minute. Accepts values from 0-59.
- Hour: Specifies the hour. Accepts values from 0-23.
- Day: Specifies the day of the month. Accepts values from 1-31.
- Month: Specifies the month of the year. Accepts values from 1-12.
- Day of Week: Specifies the day of the week. Accepts values from 0-6, where 0 represents Sunday.
- Cron Expressions
- * (Asterisk): Represents all possible values for the field. For example, entering * in the Minute field runs the task every minute.
- 1-5 (Range): Represents a range of values. For example, entering 1-5 in the Hour field runs the task at the start of each hour from 01:00 through 05:00.
- 1,5,10 (List): Specifies individual values. For example, entering 12,42 in the Minute field runs the task at the 12th and 42nd minutes of every hour.
- */15 (Step): Specifies a recurring interval. For example, entering */15 in the Minute field runs the task every 15 minutes.
- Command Field: In the “Command” field, enter the full server path to the script or file you want to execute. The command must be entered on a single line.
- Schedule Fields: A Cron Job schedule consists of five fields that determine when the task will run:
- After filling in all the fields, click “Save” to create your Cron Job. To cancel the operation, click “Cancel“.
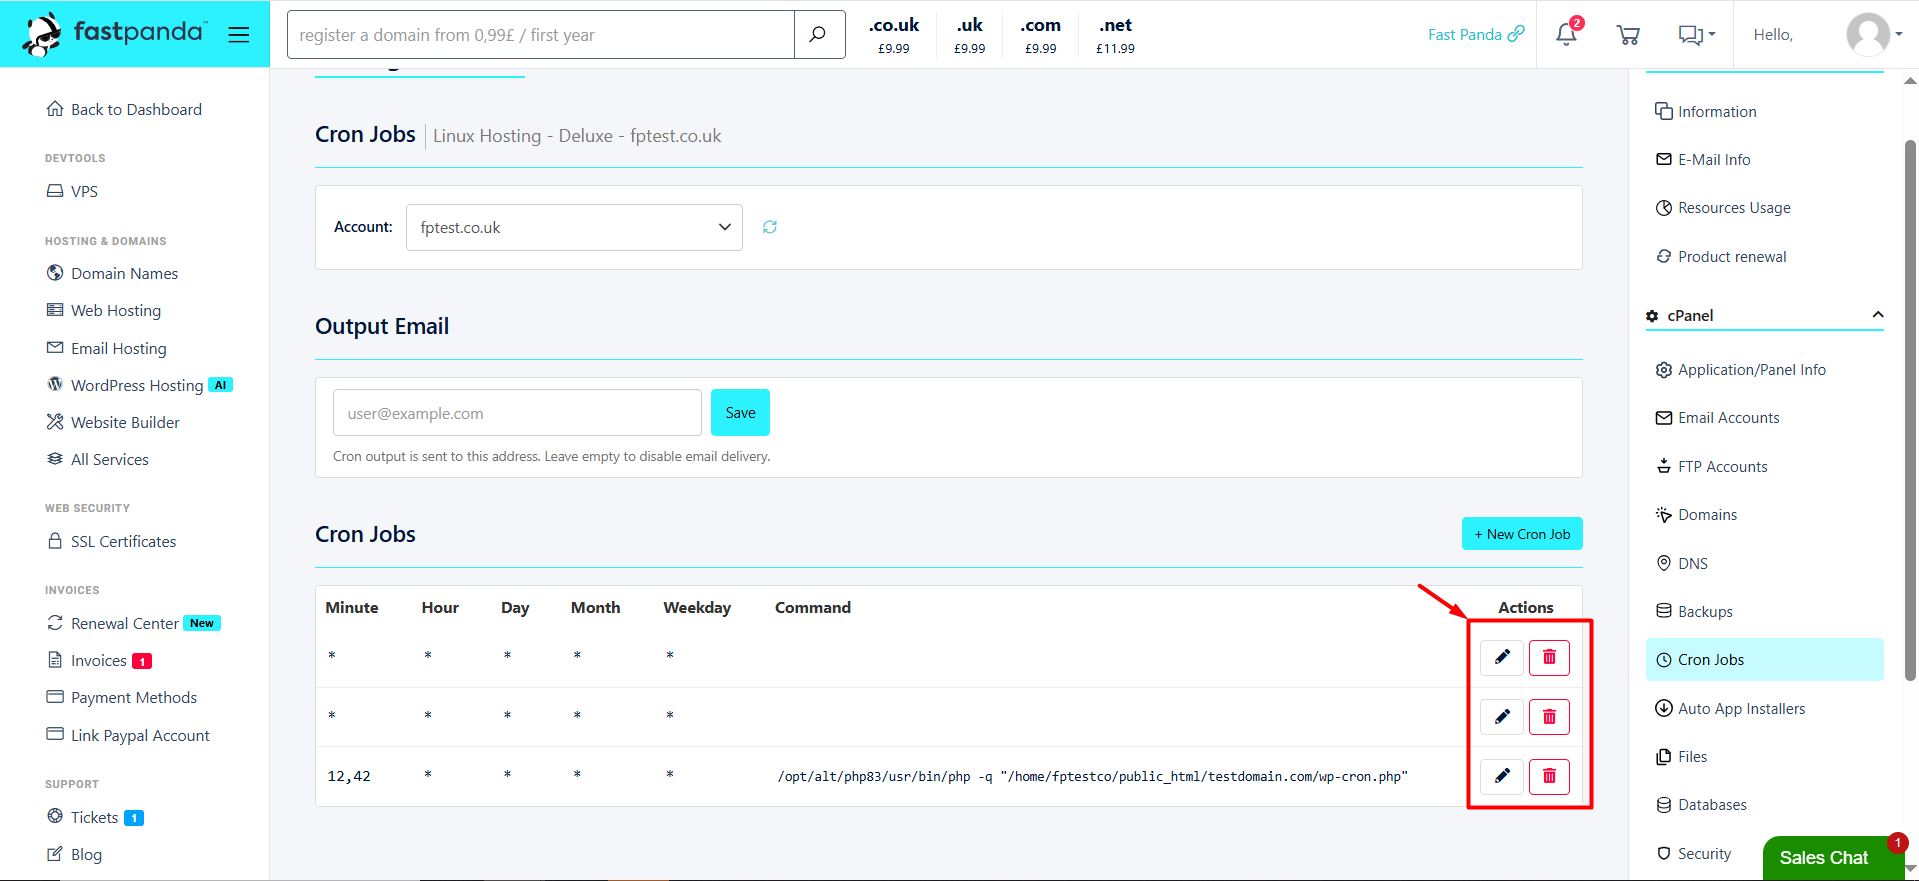
- The tasks you save are listed in the Cron Jobs table. In this table, you can view each task’s schedule expressions, the commands it executes, and the available options in the Actions section.
You can use the “Edit” button to modify an existing task’s schedule settings or command. To delete a Cron Job you no longer need, click the “Delete” button.