




























- First, connect to your Windows Server to begin the IIS installation. For more information about connecting to a Windows Server, you can refer to our article “How to Connect to a Windows Server?”.
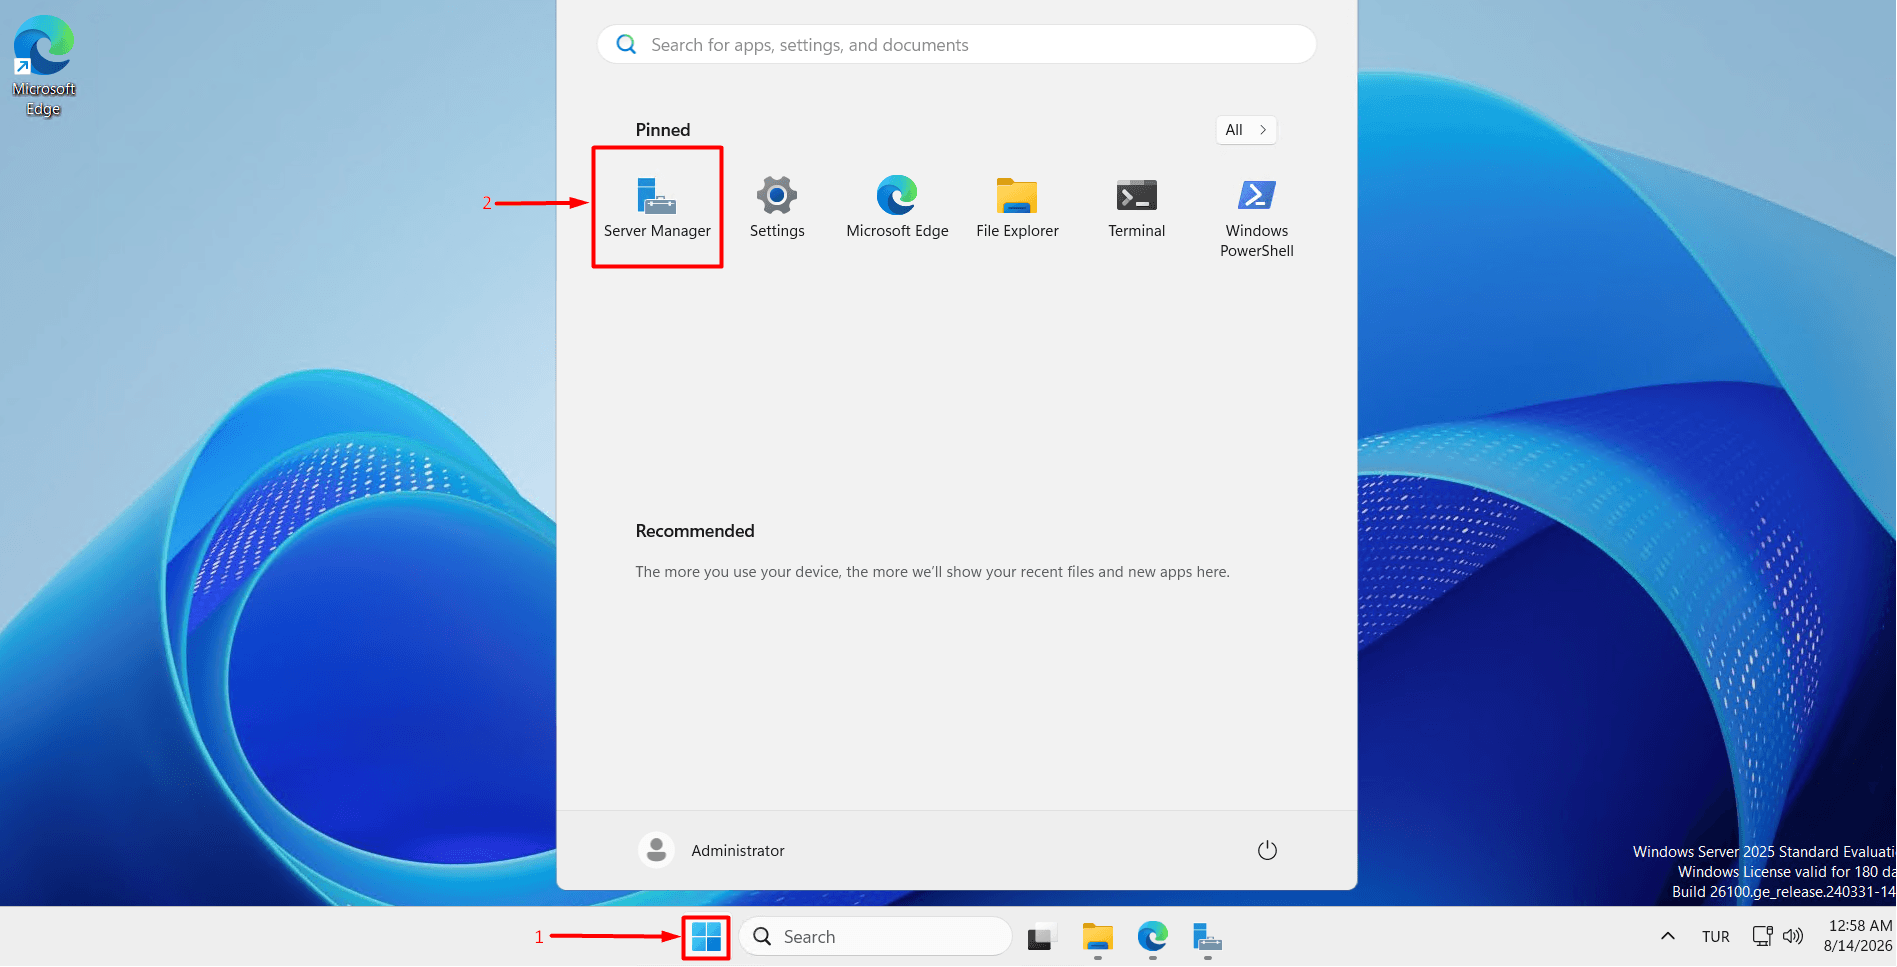
- After connecting to the Windows Server, open “Server Manager” from the “Start” menu.
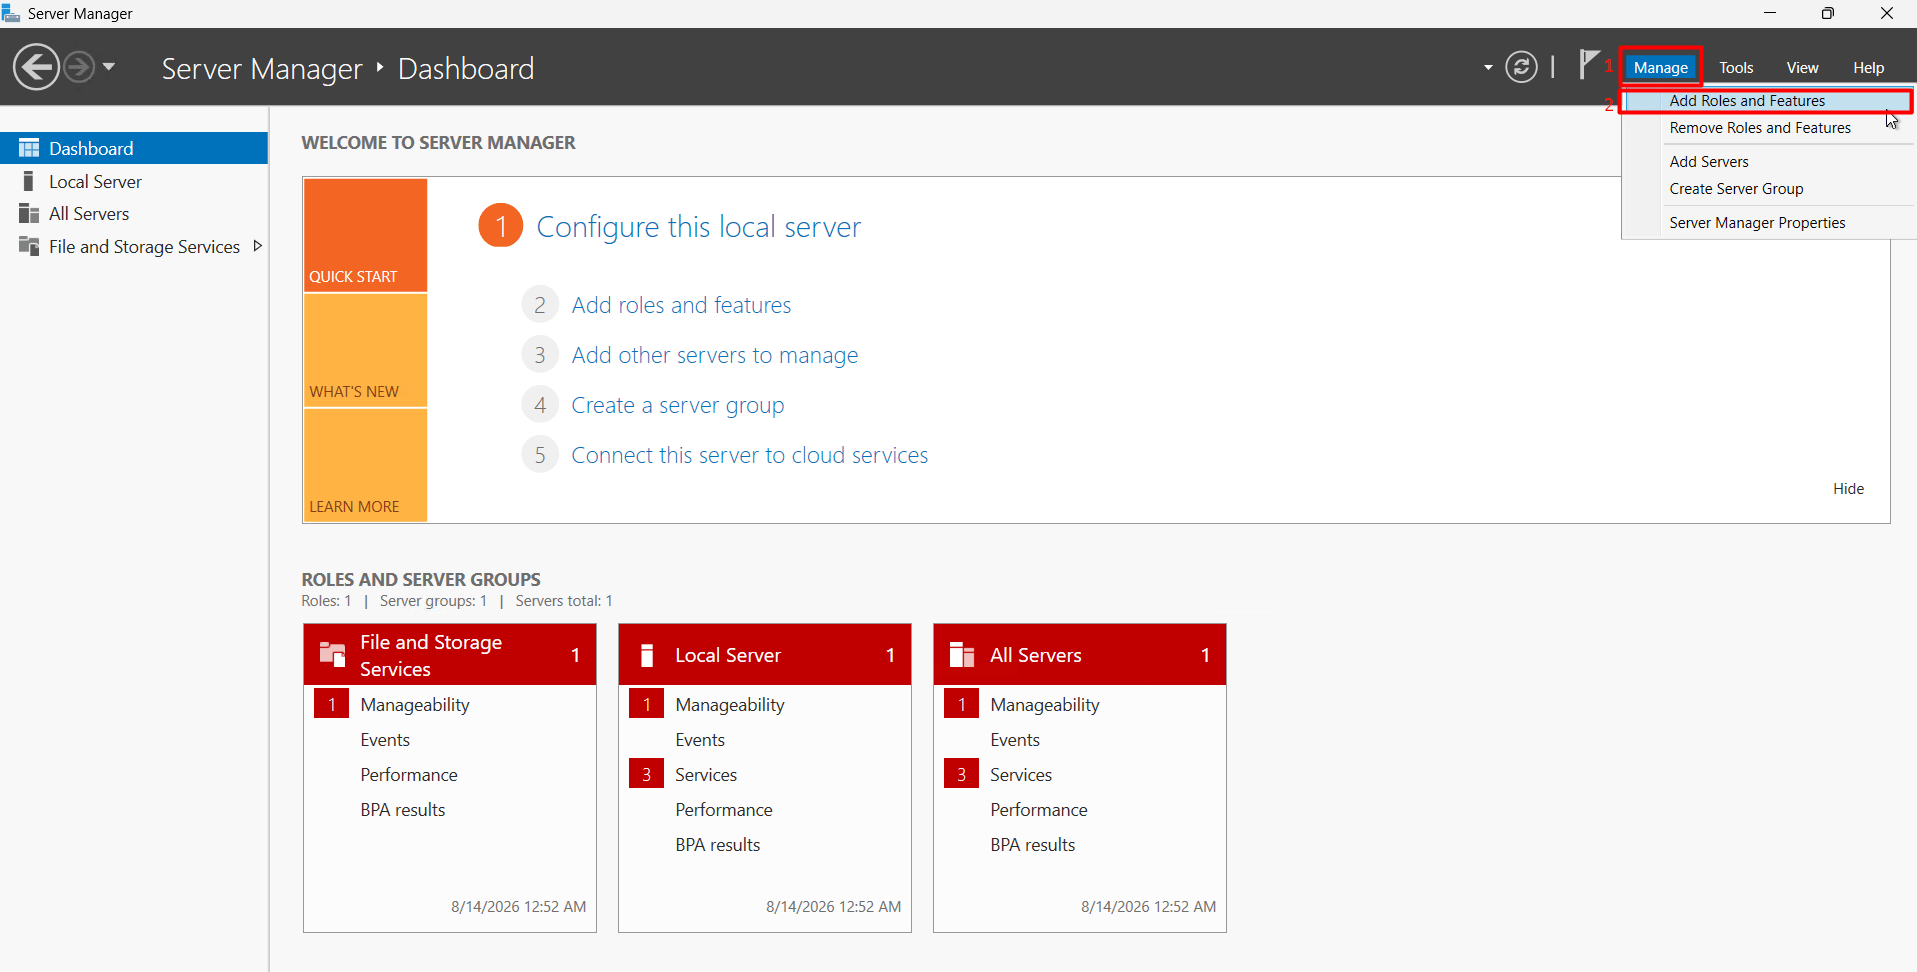
- Click “Manage” in the upper-right corner, then select “Add Roles and Features” from the drop-down menu.
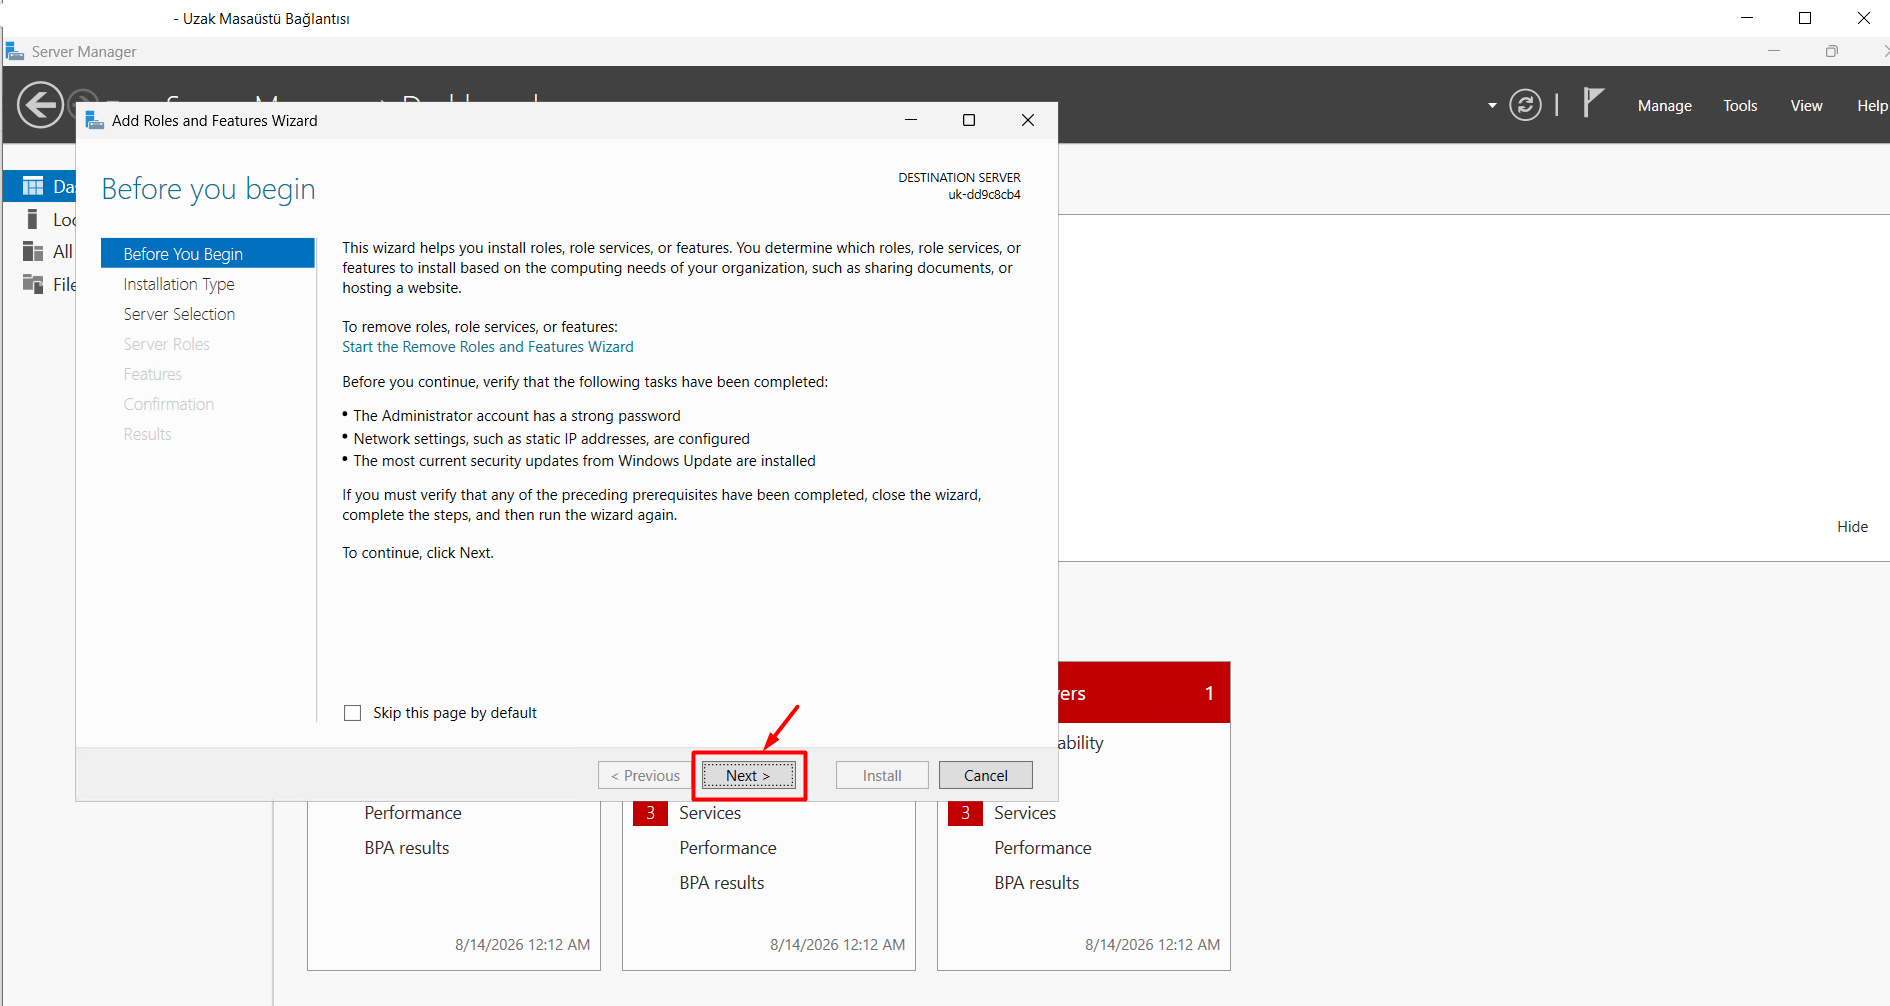
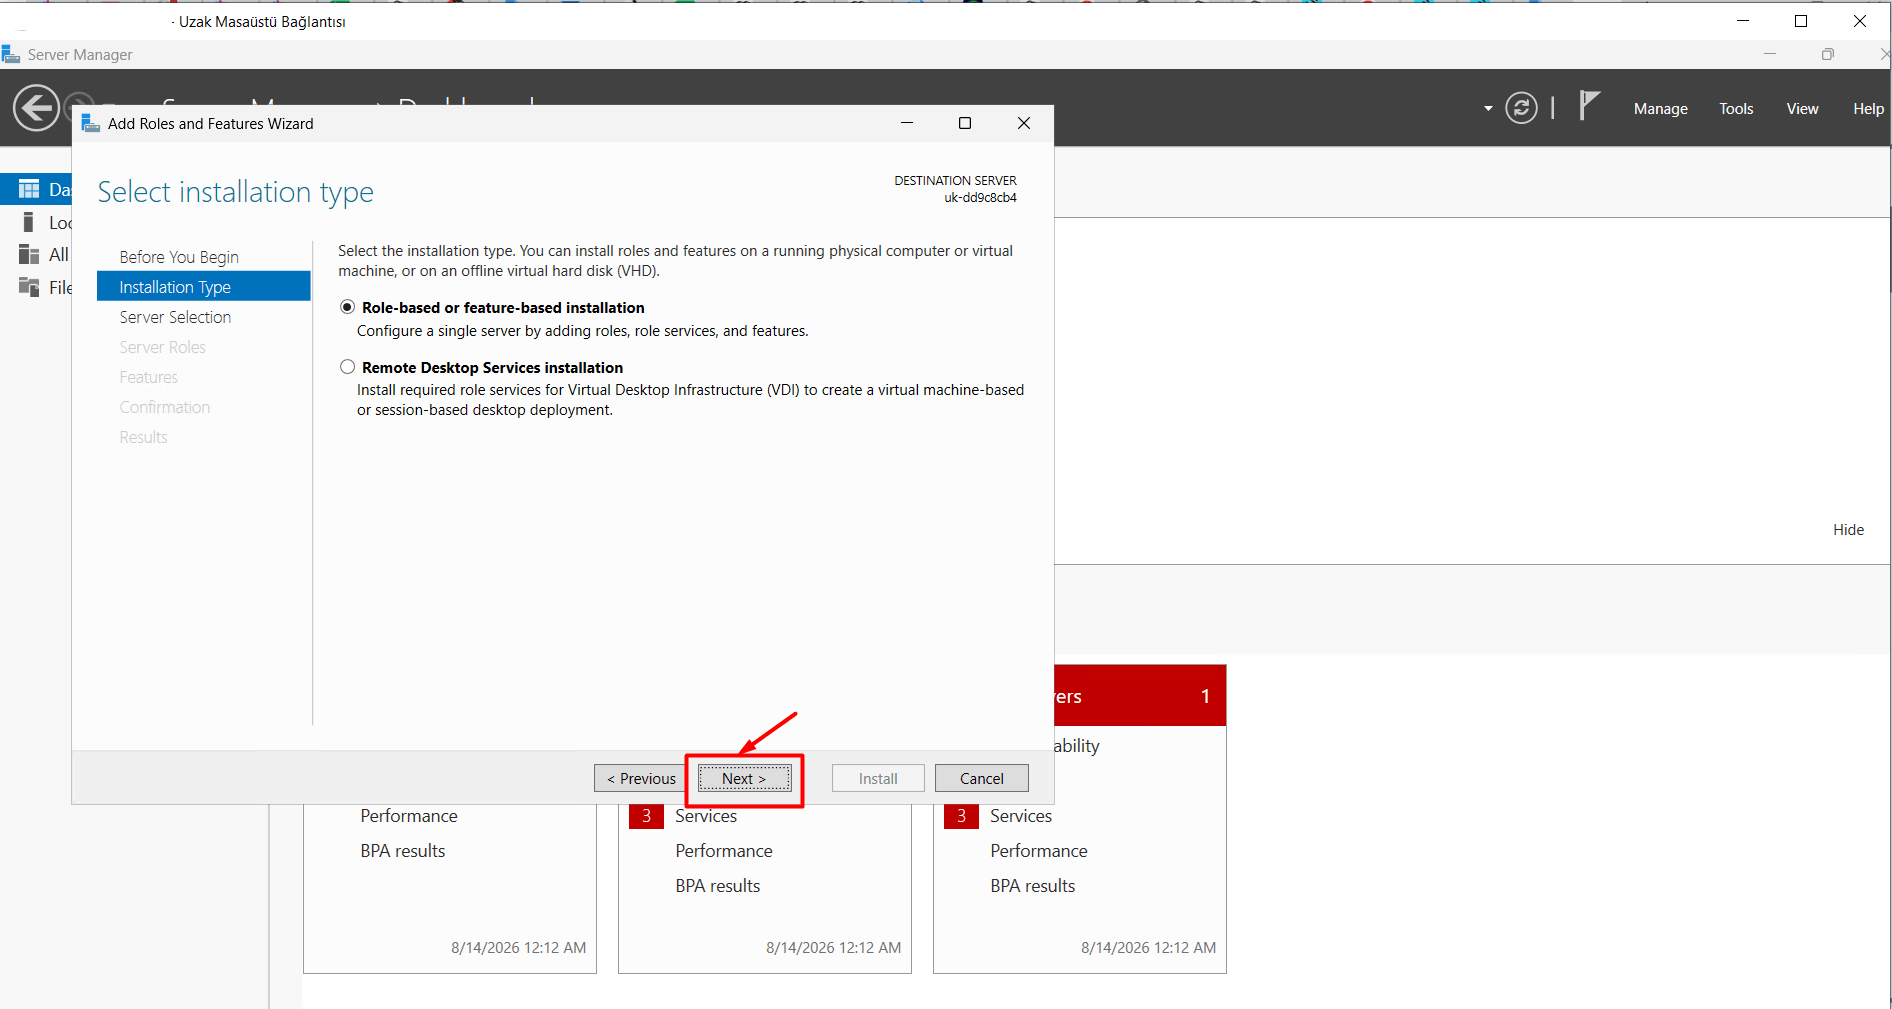
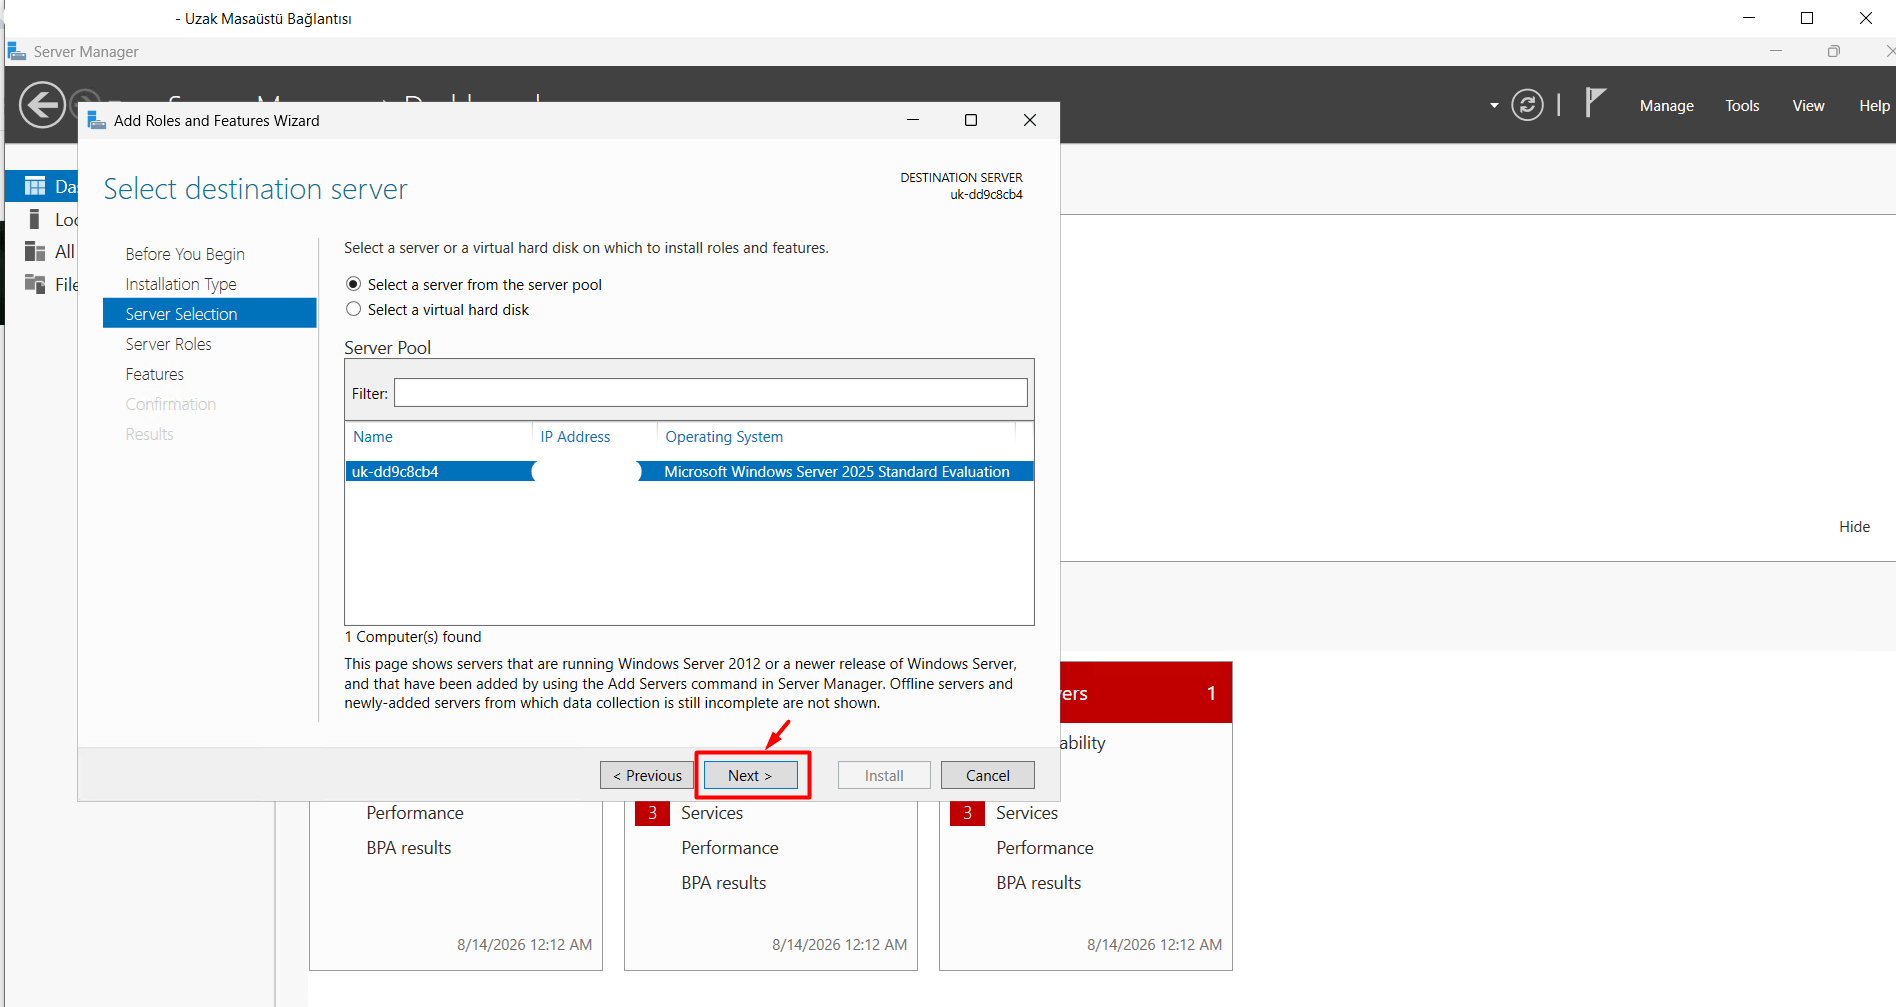
- In the following windows, click the “Next” button in the bottom-right corner until you reach the screen displaying the installation options in a list.
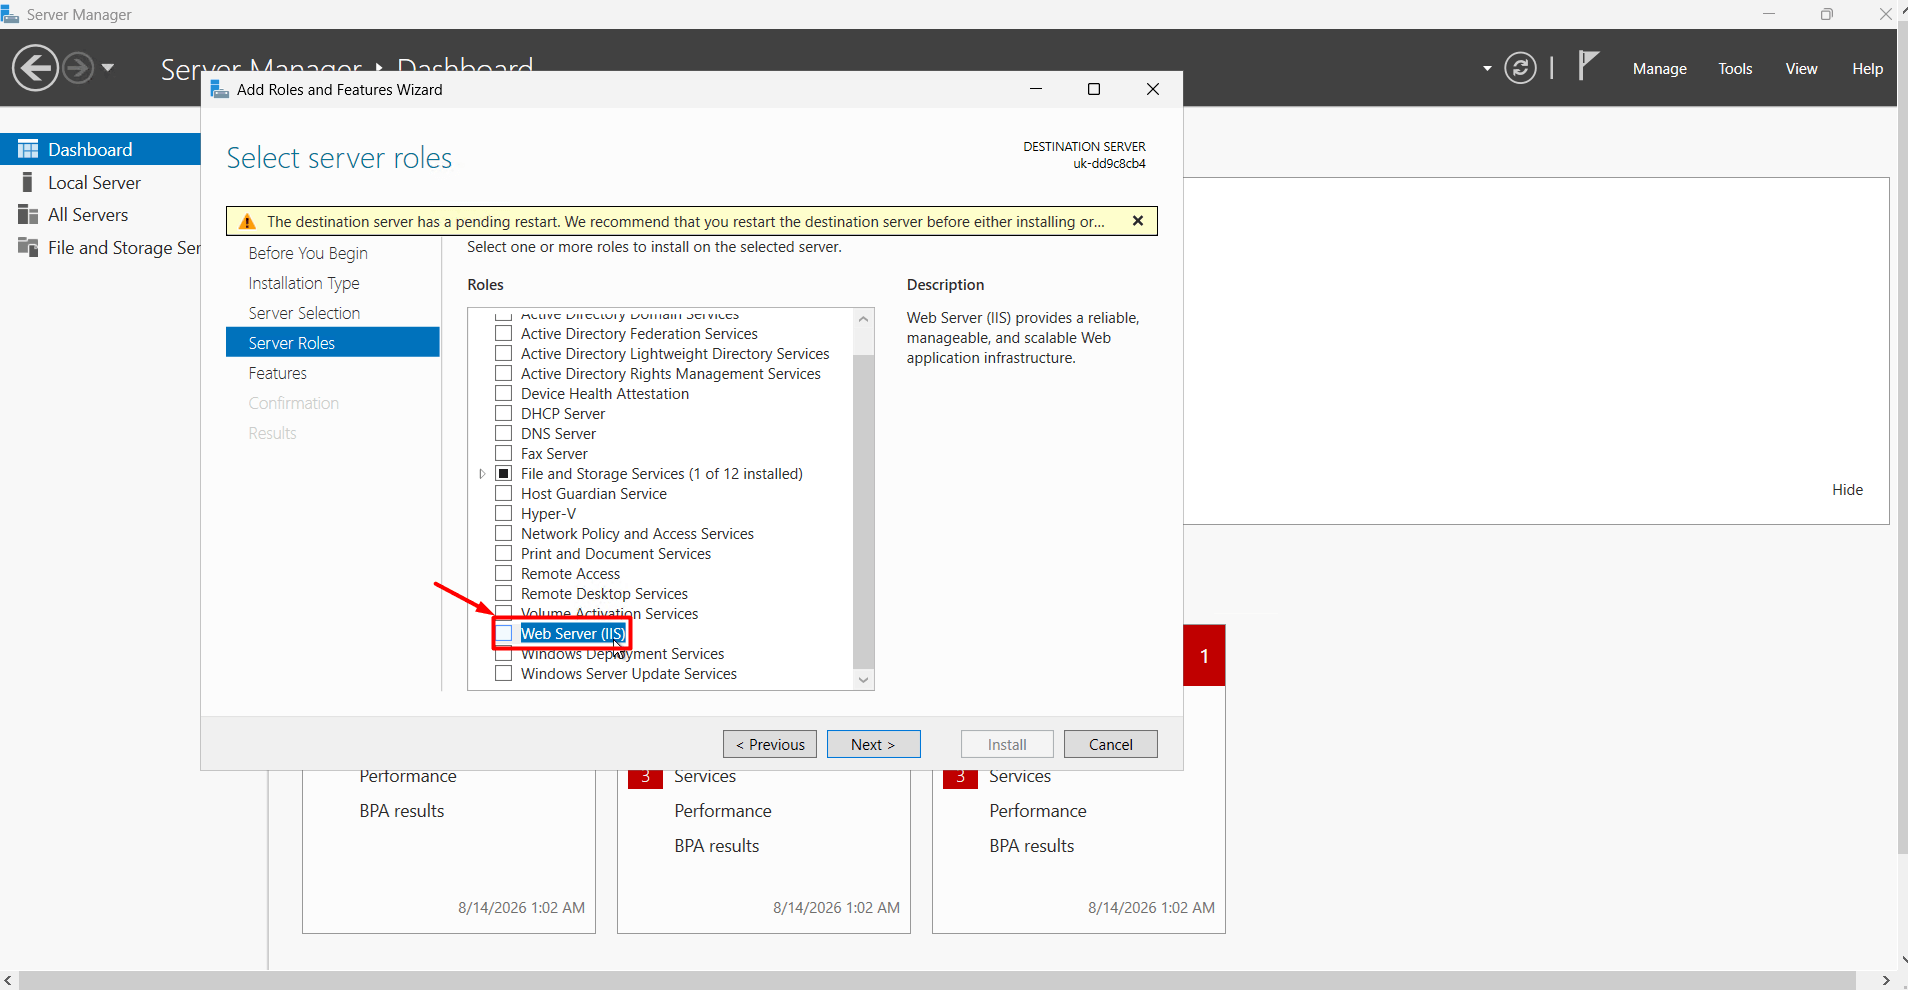
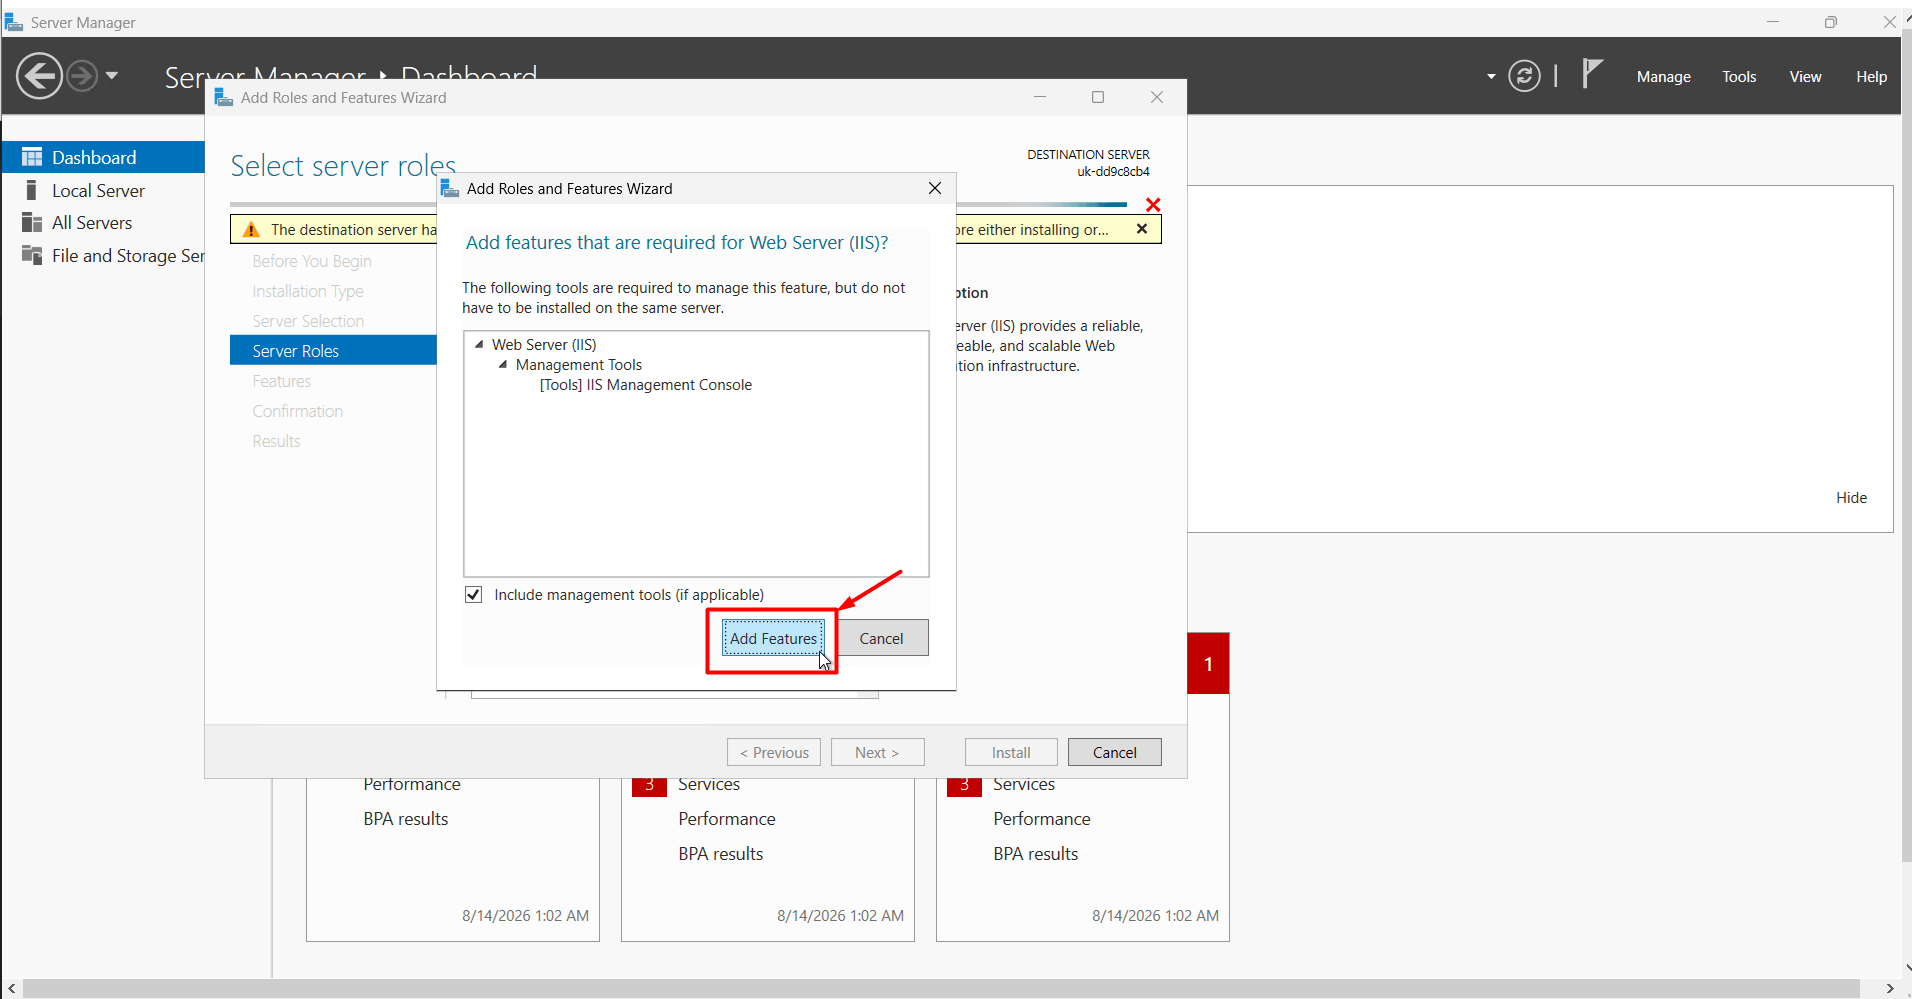
- When the list appears, find the “Web Server (IIS)” option and check the box next to it. If a small window appears after selecting it, click “Add Features“.
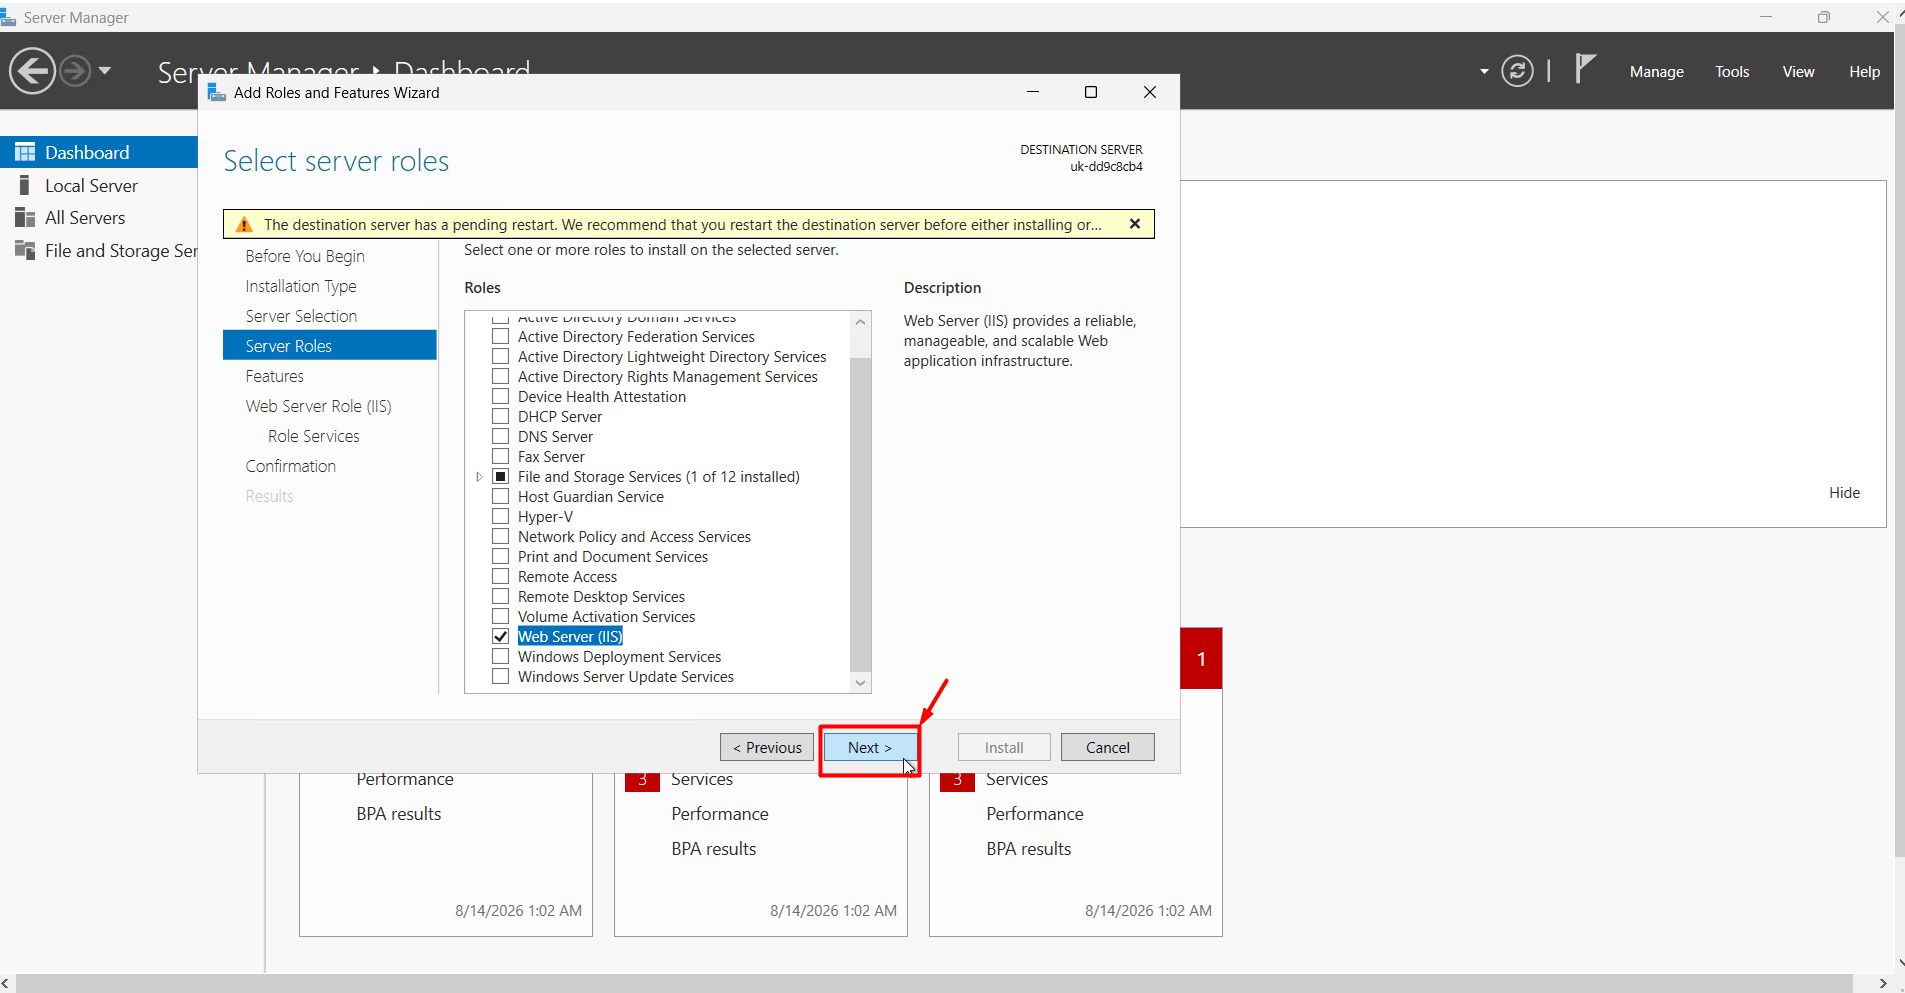
- Click “Next” until the “Install” button appears. Once you see the “Install” button, click it. (You may encounter an error during the installation. If this happens, close Server Manager and open the Run window. Type services.msc in the search field and press Enter. In the Services window that opens, find Windows Remote Management (WS-Management) and double-click it. Set the Startup type to Automatic. Then, under Service status, click the Start button to start the service. Once the service is running, restart the IIS installation.)
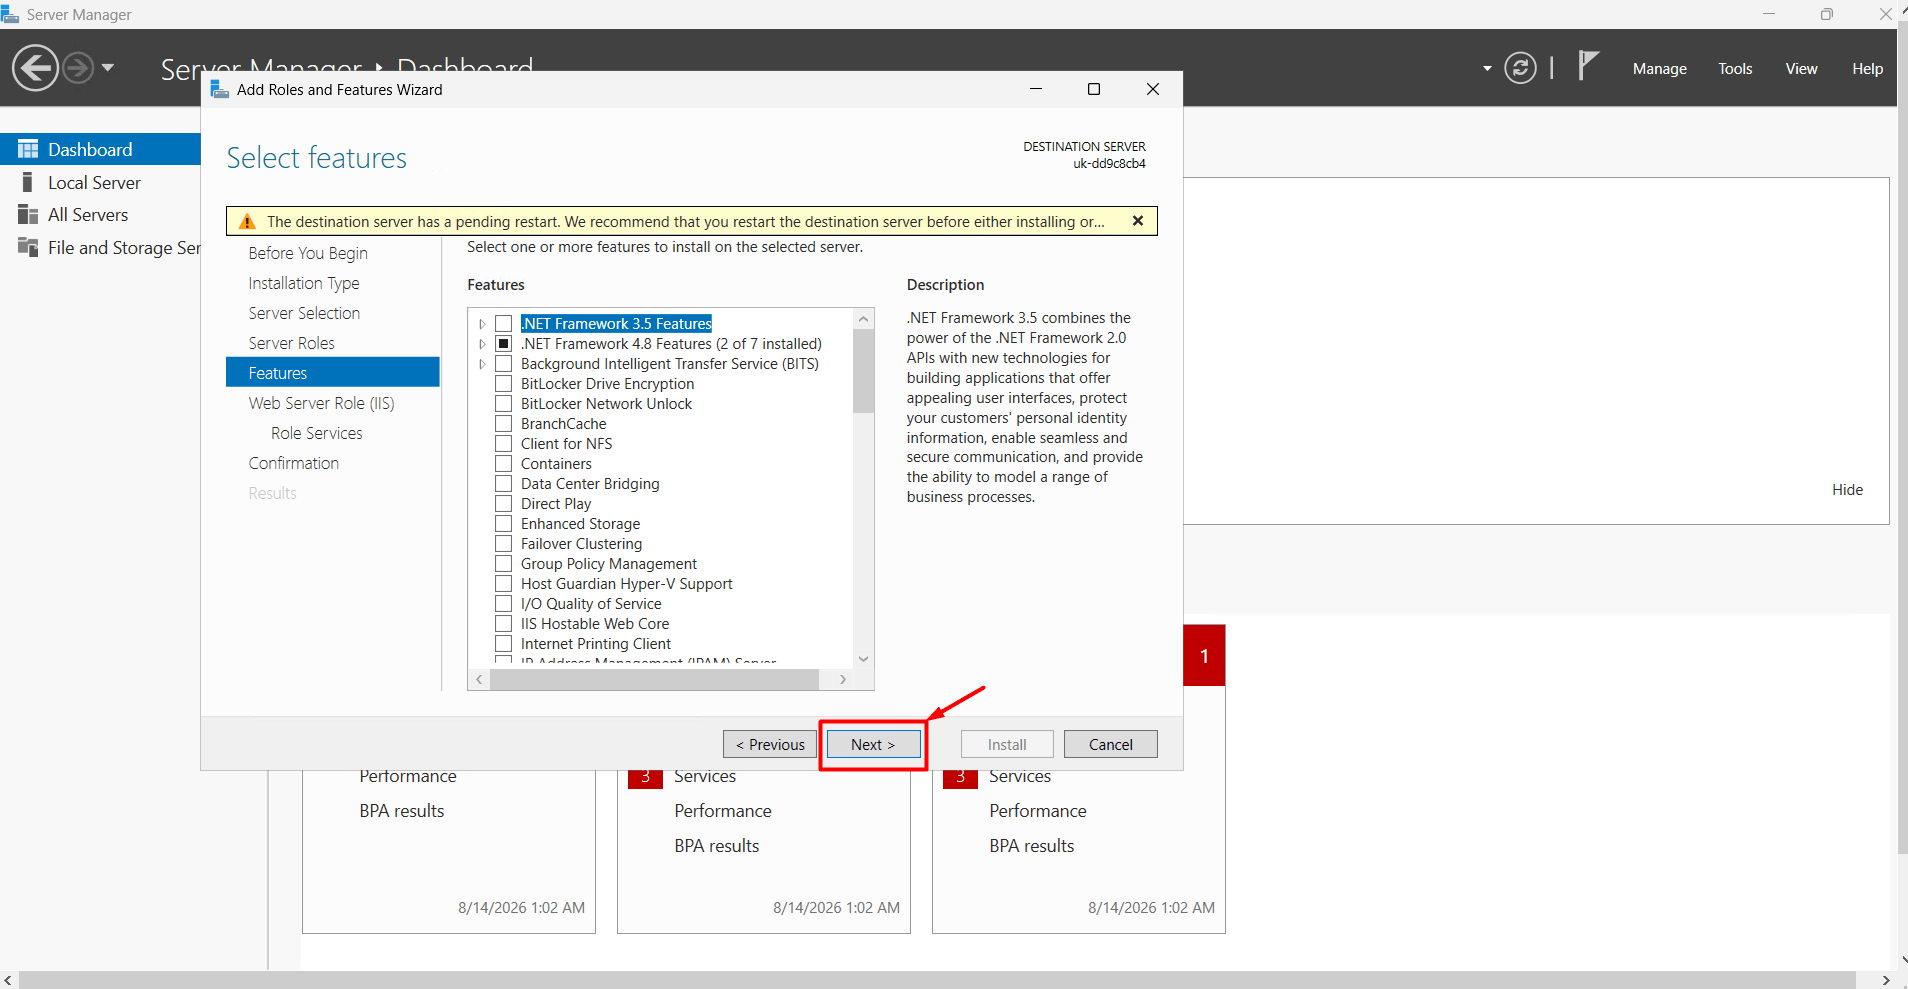
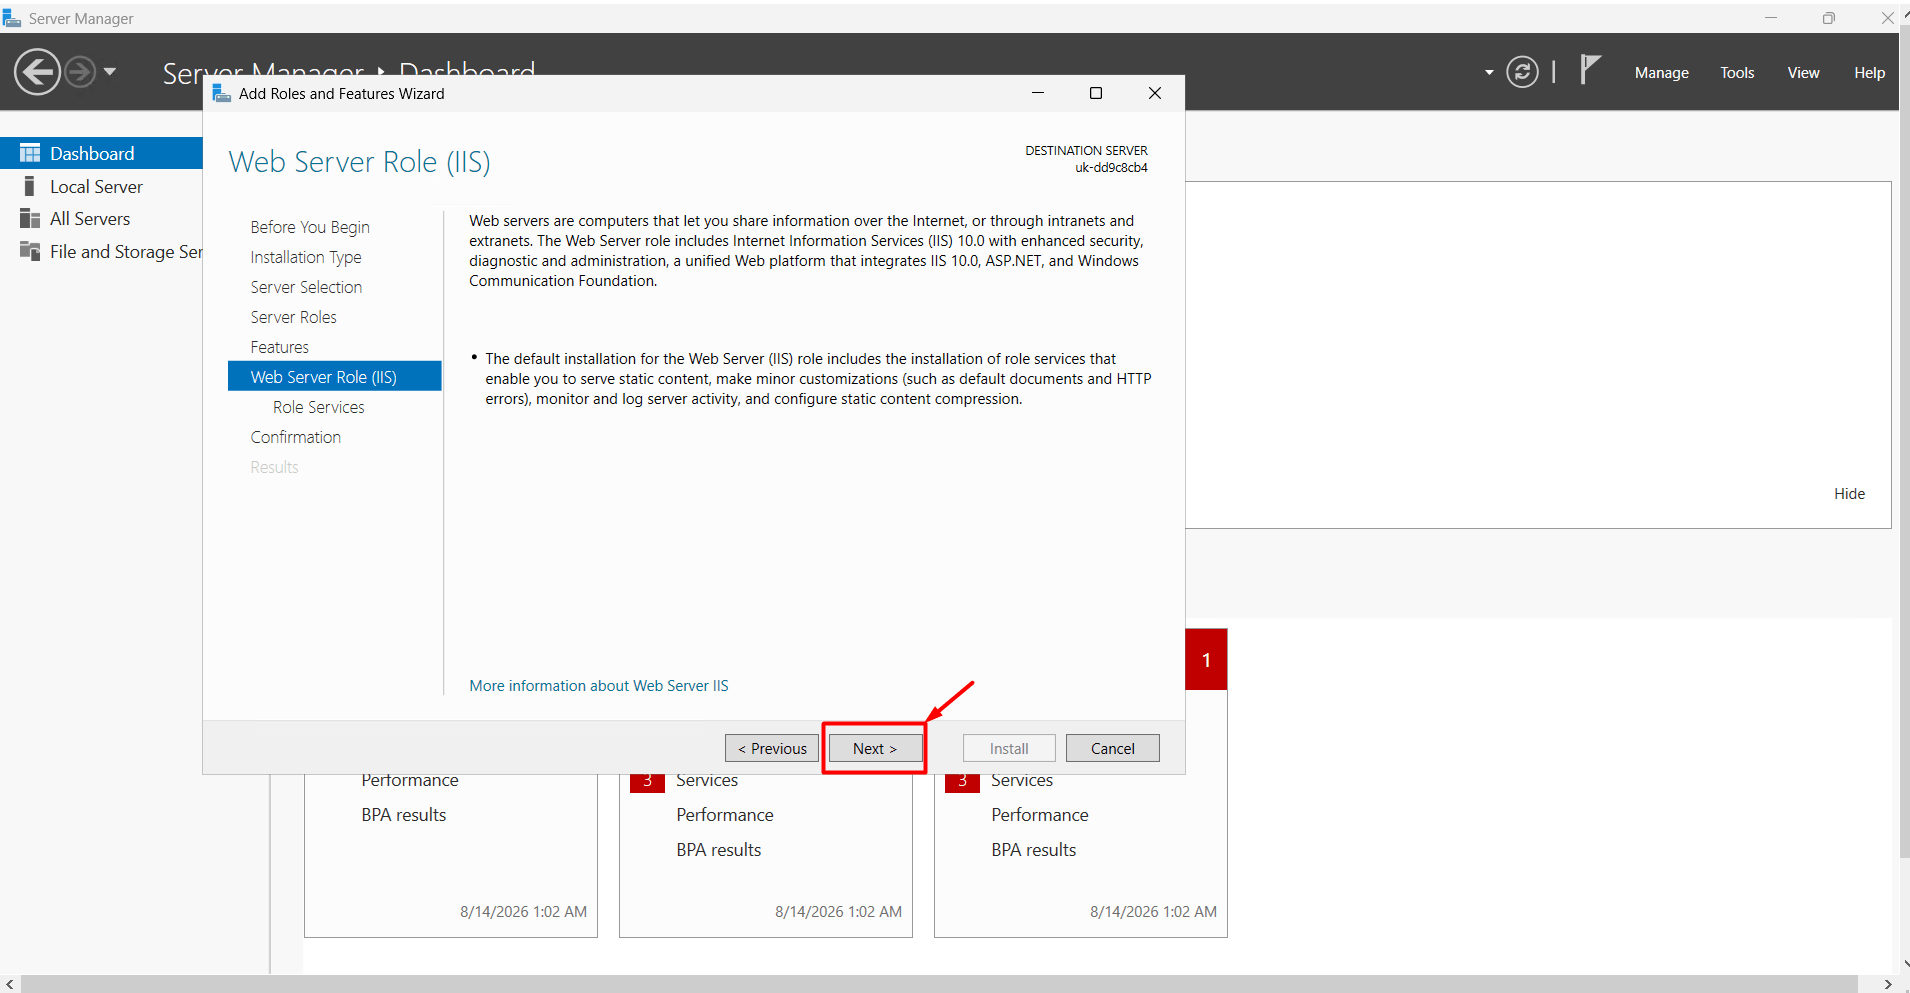
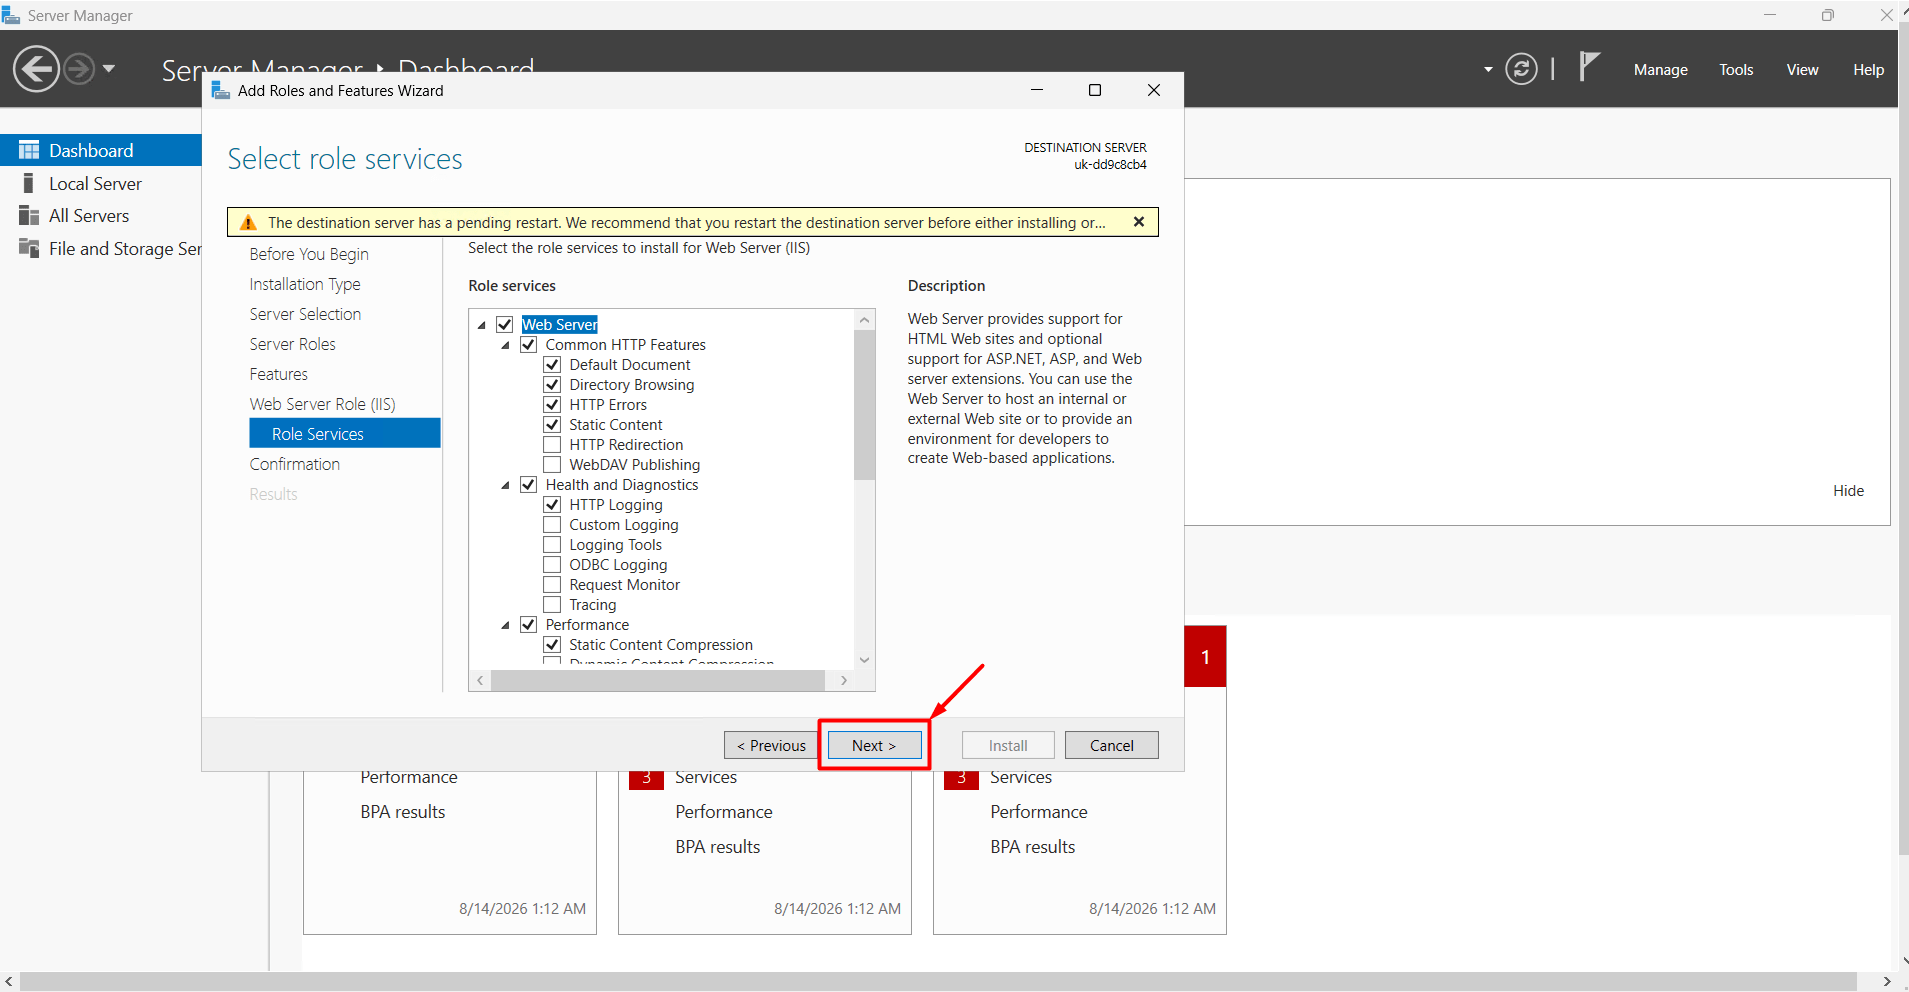
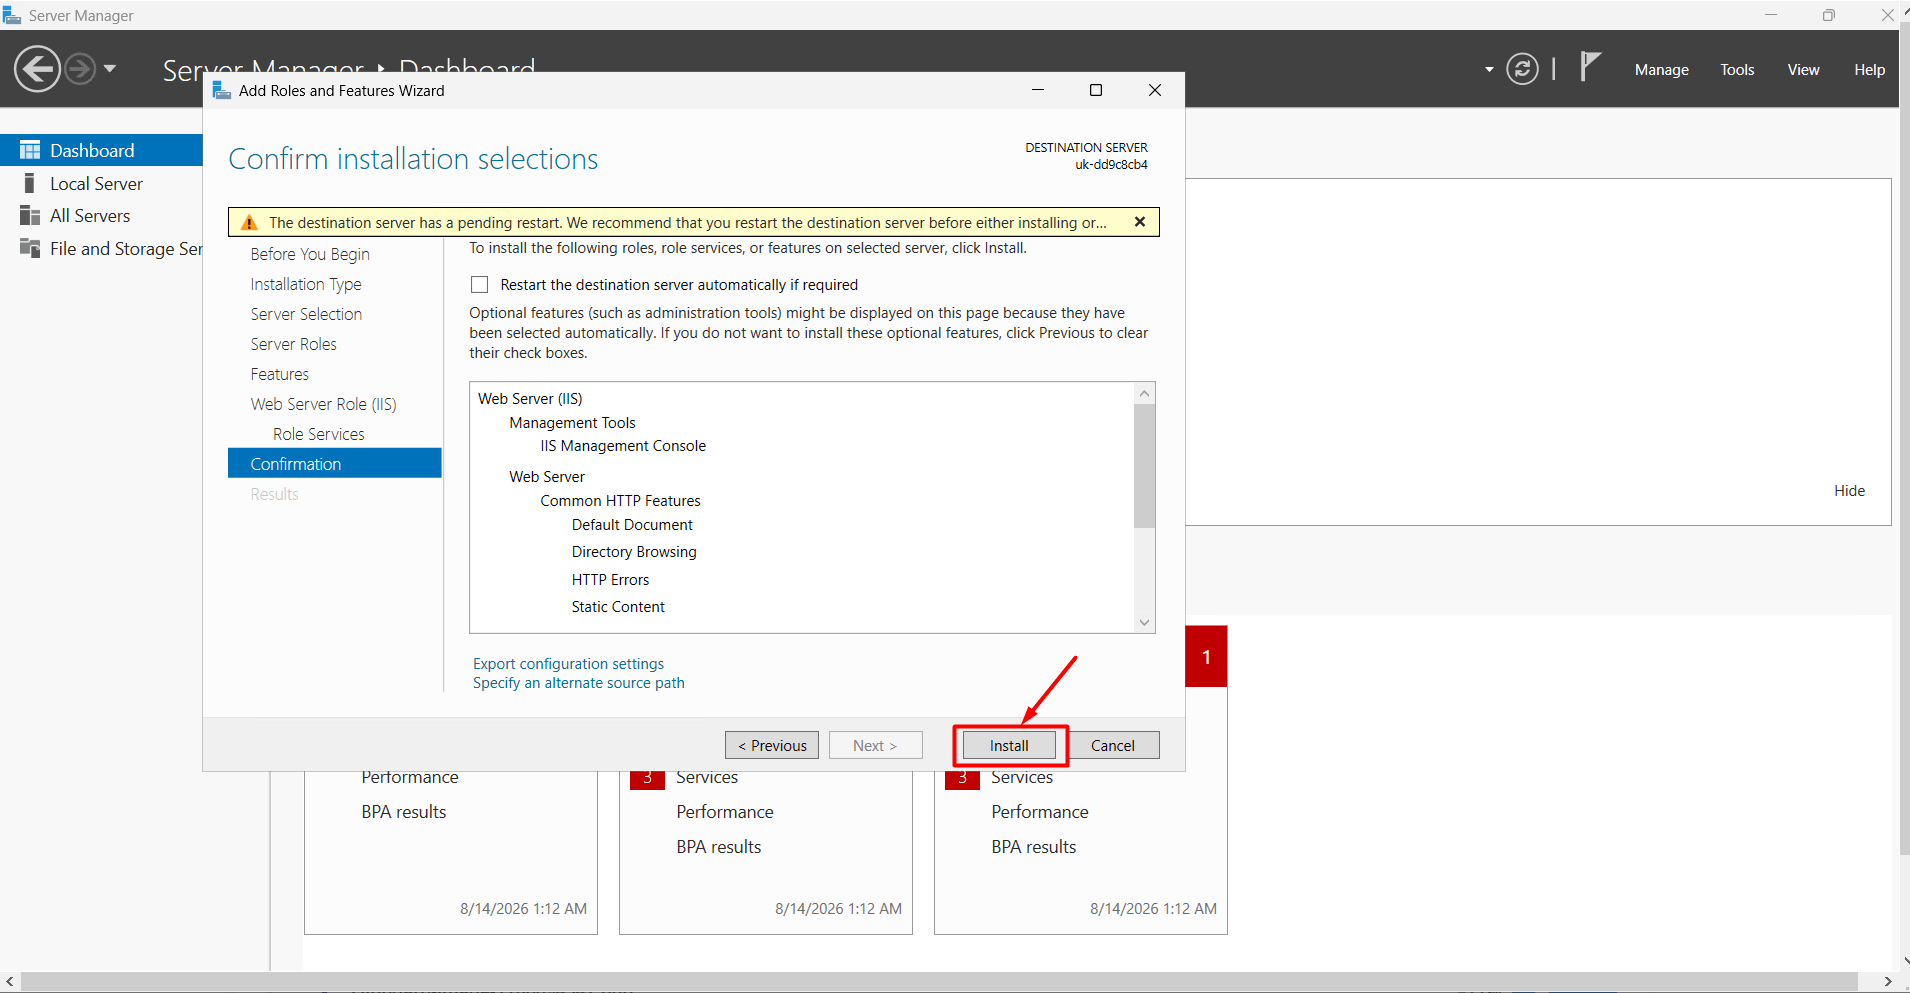
- Once the installation is complete, click the “Close” button.
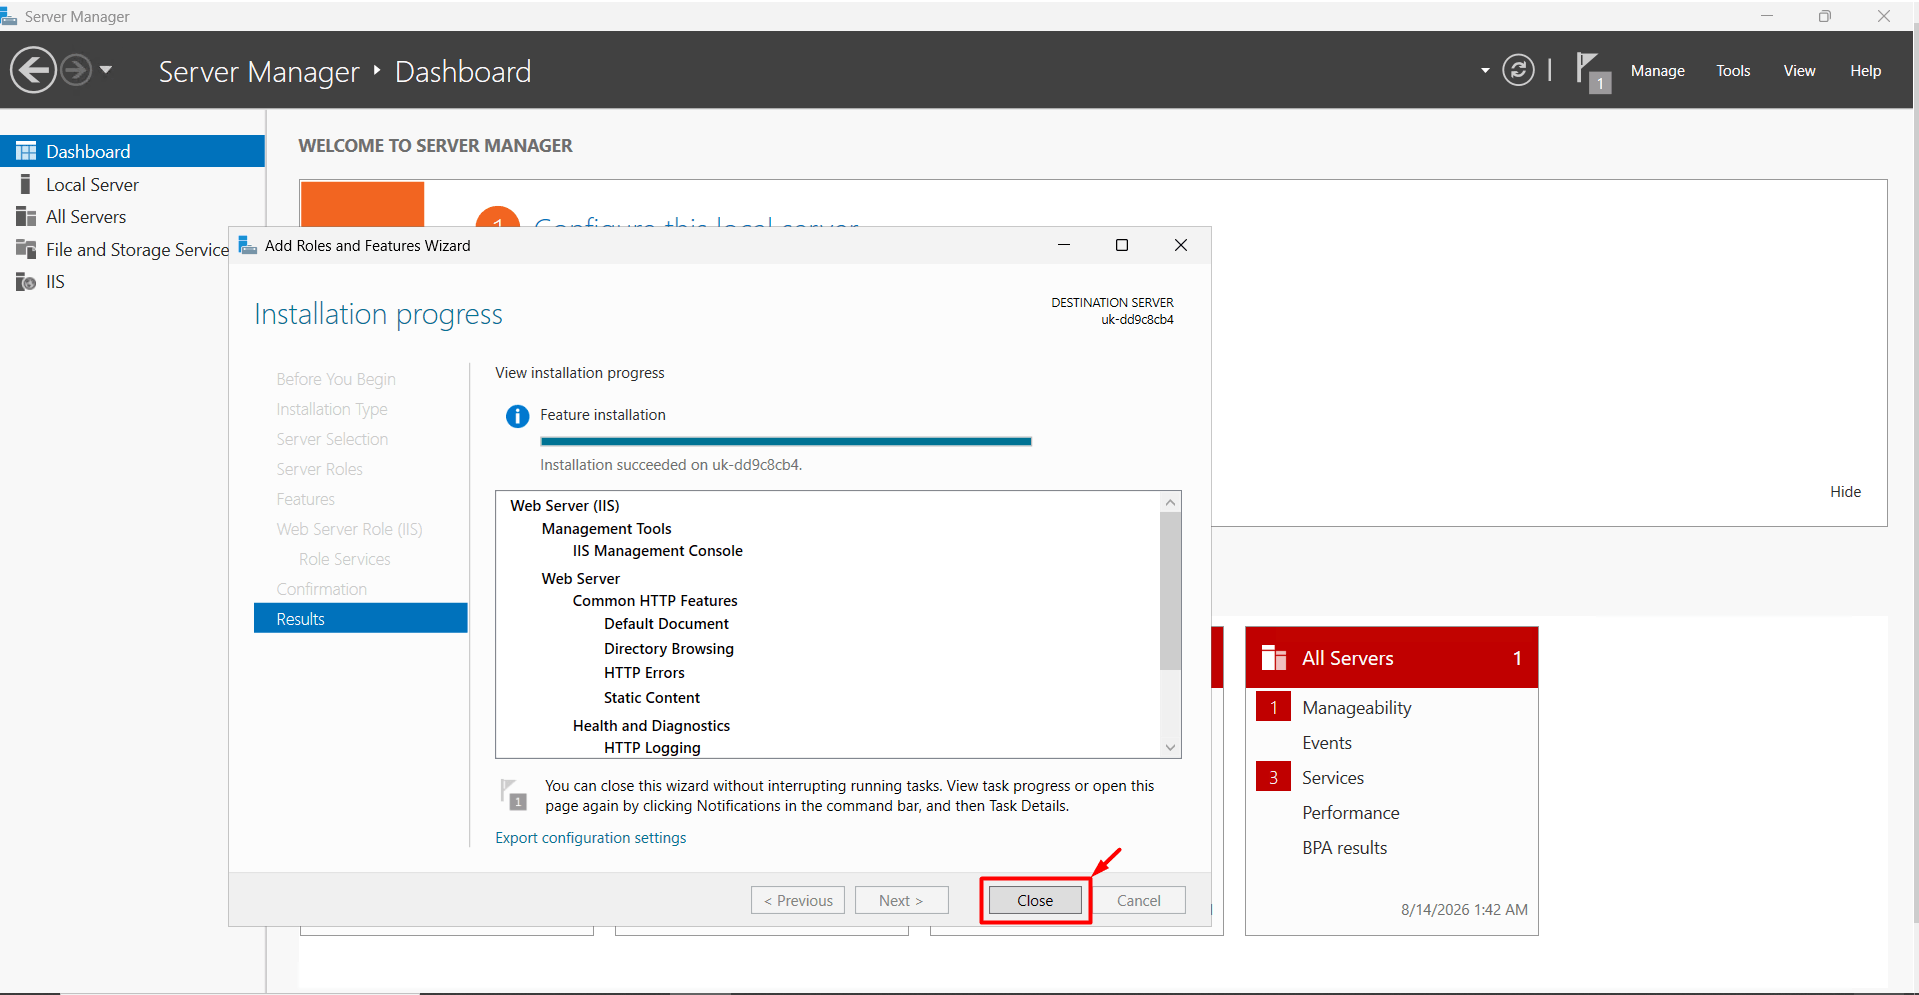
- This completes the IIS installation.
 Create your WordPress site with AI in 60 seconds.Discover Now