MySQL is a database management system used to store, manage, and query data in an organized manner. MySQL is supported by popular content management systems such as WordPress, Joomla, and Drupal, and is widely used around the world. To create a MySQL database in Plesk Panel, you can follow the steps below.
- Log in to the Plesk Panel. If you need support to access the Plesk panel, click here to check our article.
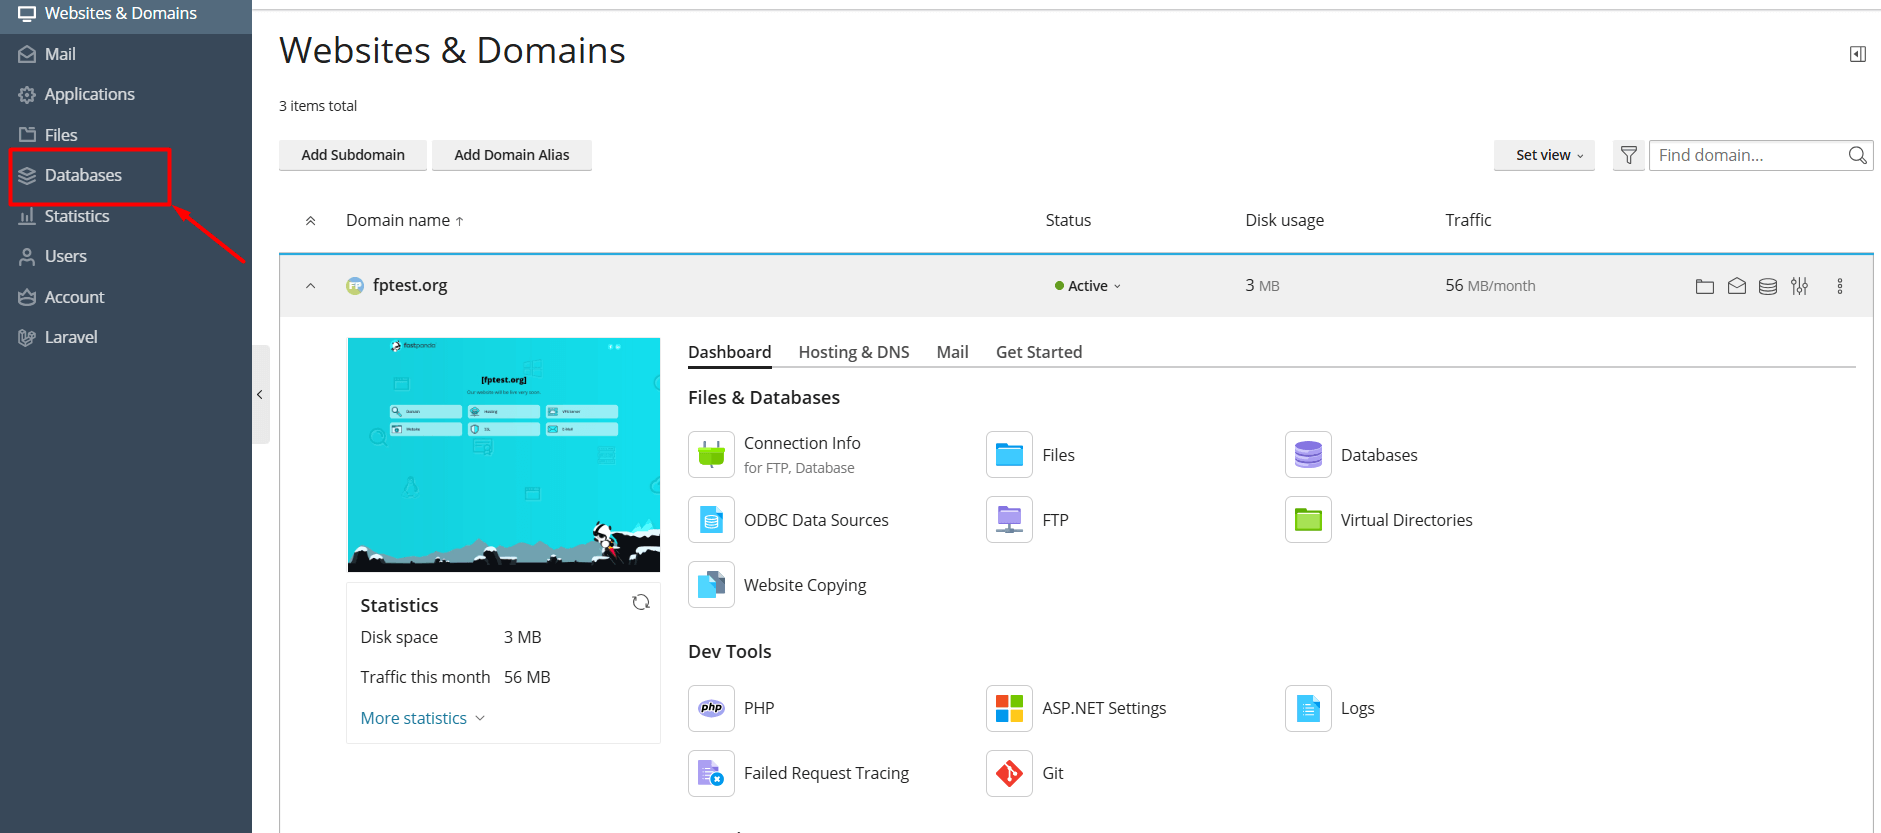
- Once you access the Plesk panel, click the “Databases” button in the menu on the left.

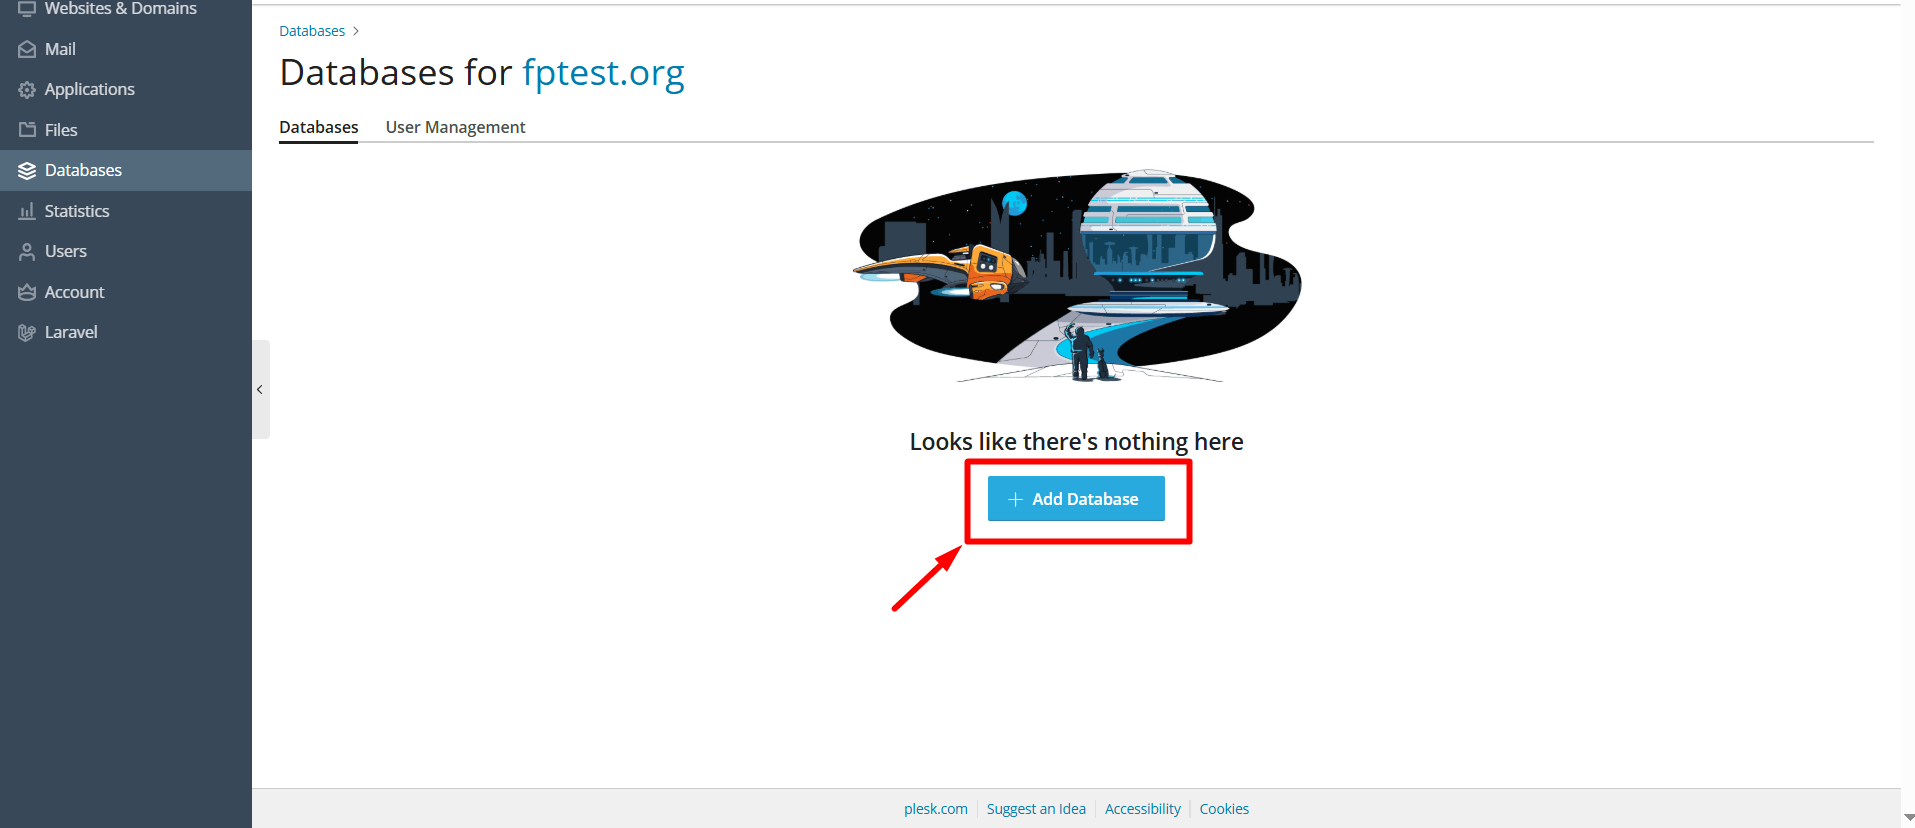
- Click the “Add Database” button.

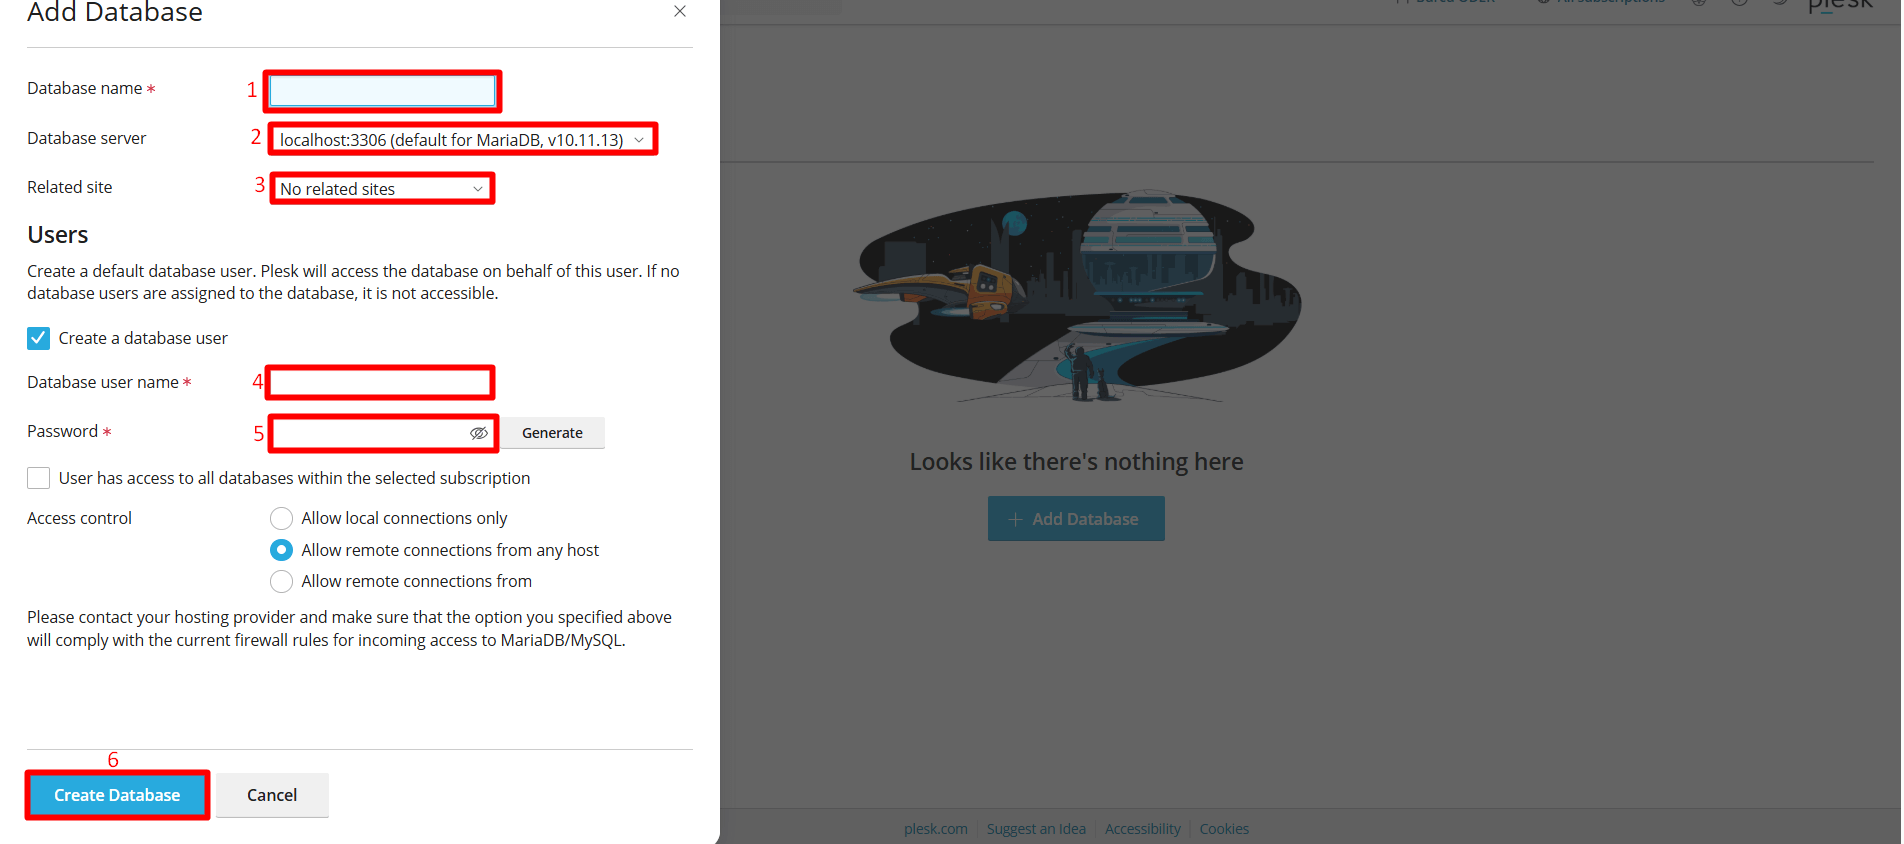
- The window that opens will request some information. You can follow the steps below:
- Database name: Enter a name for the database.
- Database server: Select MySQL from the dropdown menu.
- Related site: You can choose the website where the database will be used. This field is optional, as the connection between the database and the site is established through the software code.
- Database user name: Define a username to access the database. (If you cannot see this information, you need to check the “Create a database user” box. Once checked, you will be able to see it.)
- Password: Define a password to access the database. If you haven’t created a new password, you can click the “Generate” button to automatically create one.
- Finally, click the “Create Database” button.

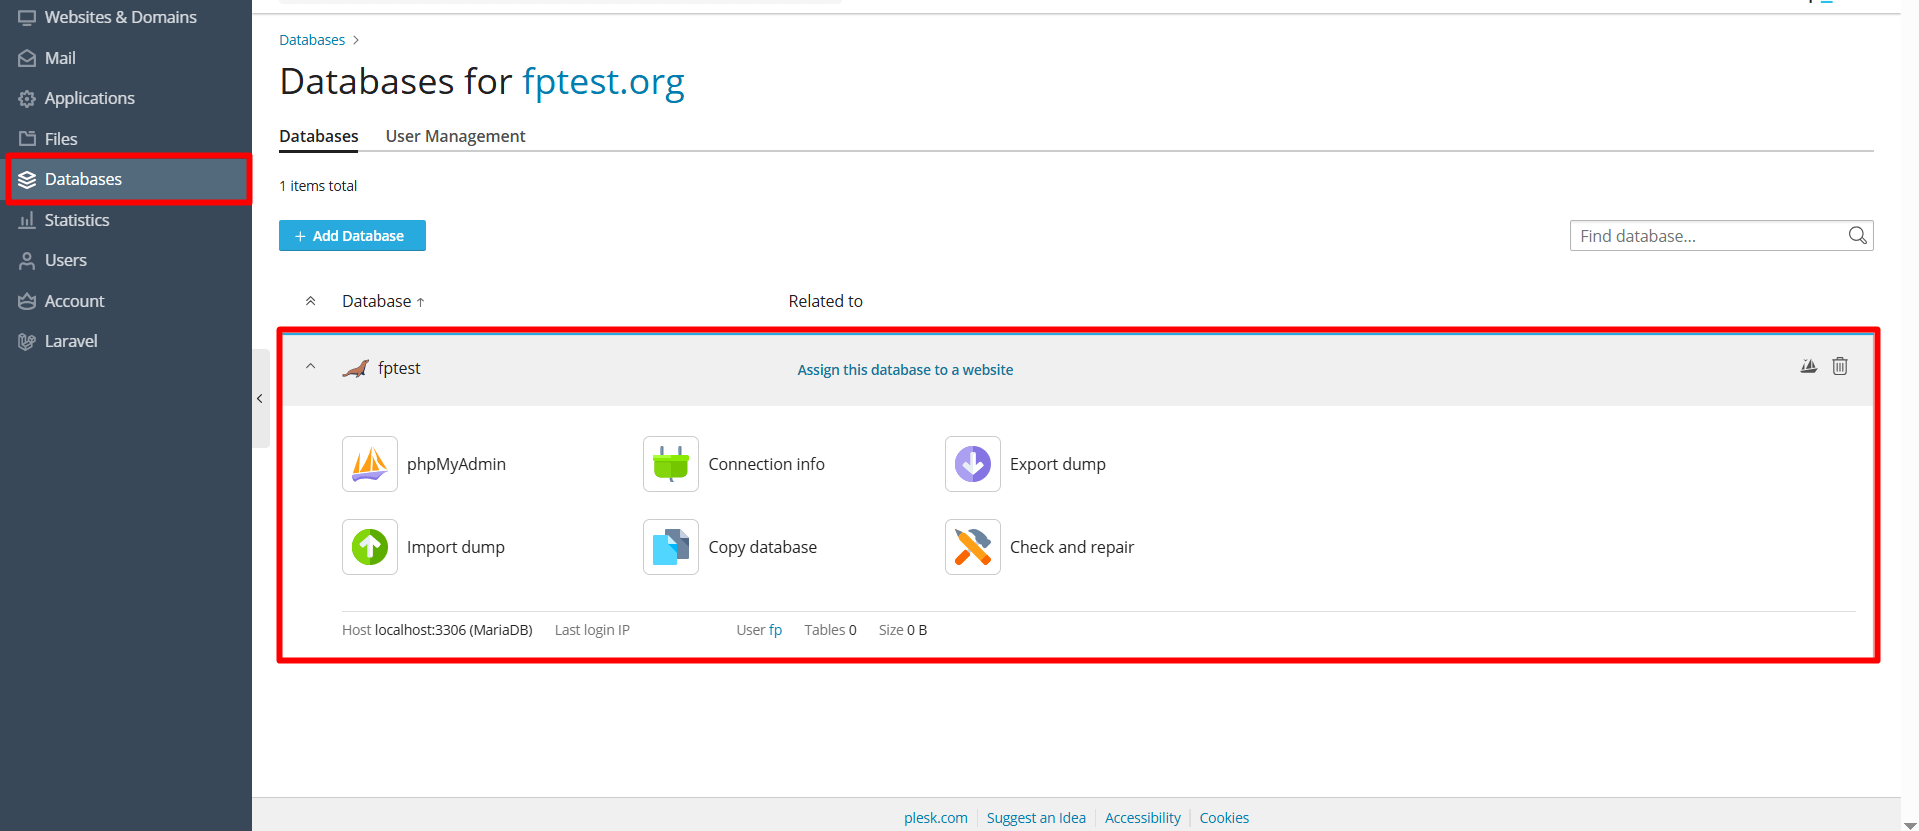
- Once you have completed the steps above, your database will be created. You can see the database you created on the Plesk panel’s database page and access its interface by clicking the phpMyAdmin button.


 .CO.UK Domain
 Linux Hosting
 Windows Hosting