Create your WordPress site with AI in 60 seconds.















PHP-based websites such as WordPress and Joomla require a database to store user information, content, and website settings. One of the most commonly used database management systems for this purpose is MySQL.
Through the cPanel you can create MySQL databases and database users, assign the necessary privileges to users, and manage your existing databases.
To perform these operations, first log in to your cPanel. To learn how to log in to cPanel, you can refer to our article, “How to Log in to cPanel?”
Creating a MySQL Database
You can use two different methods to create a MySQL database through cPanel.
Method 1: Quick Setup Using the MySQL Database Wizard
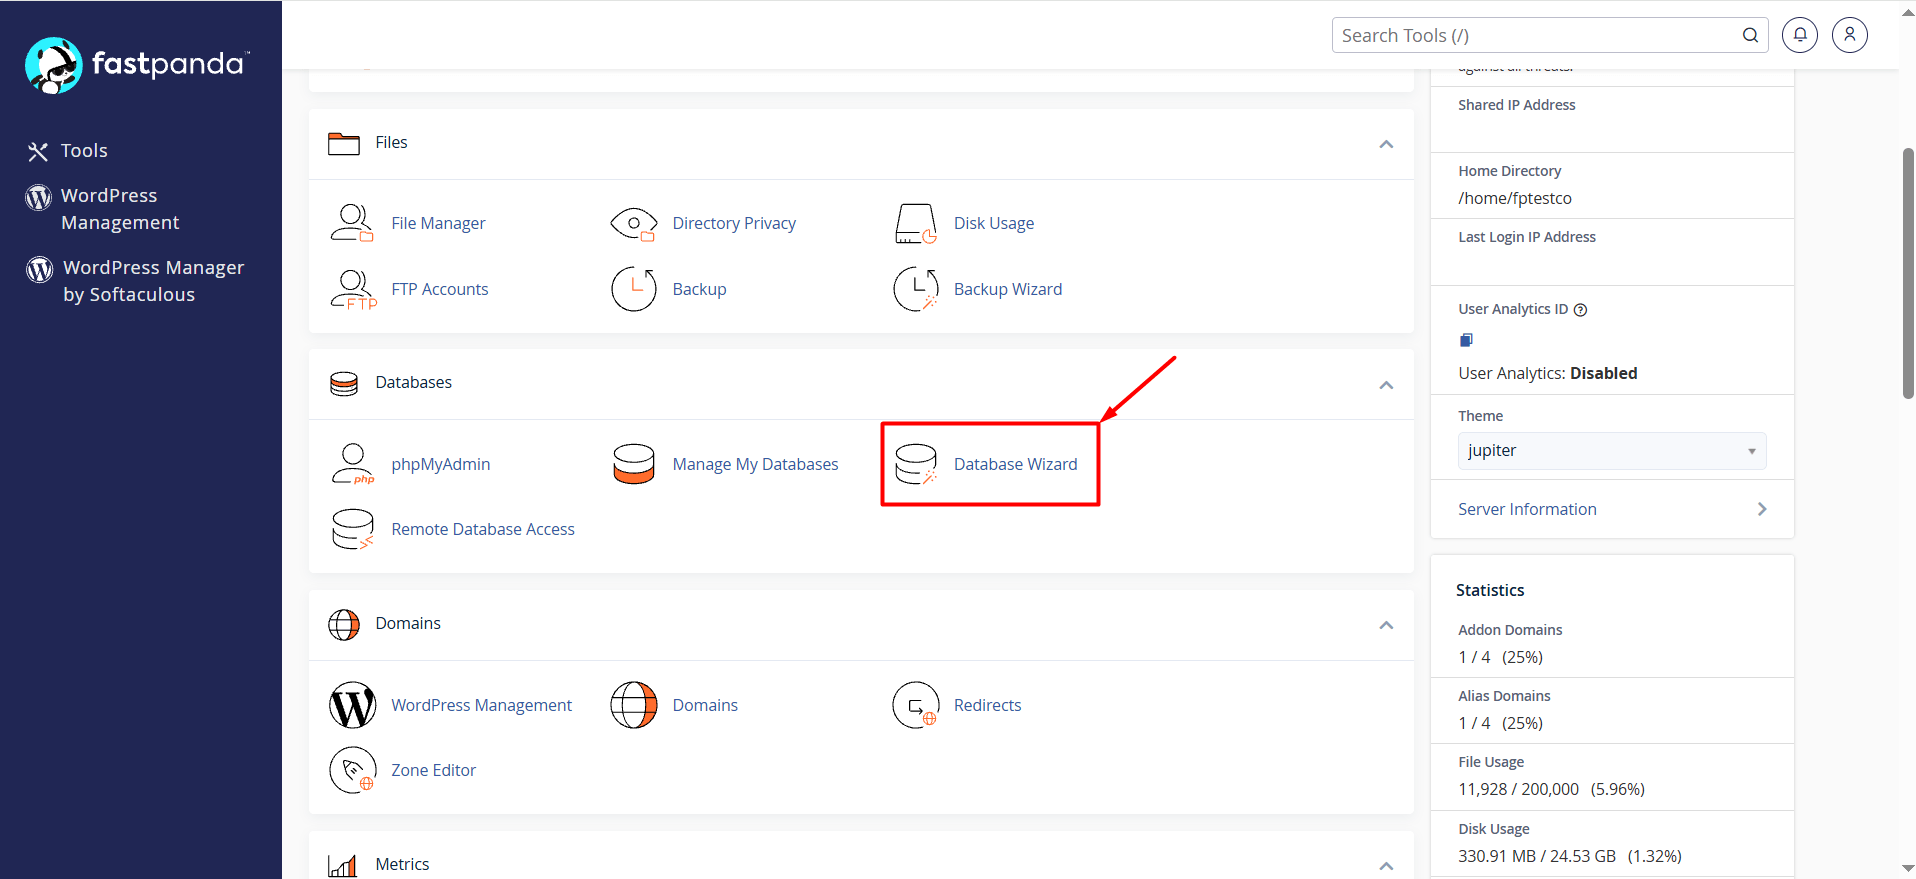
- On the cPanel homepage, click the “Database Wizard” button under the Databases section.
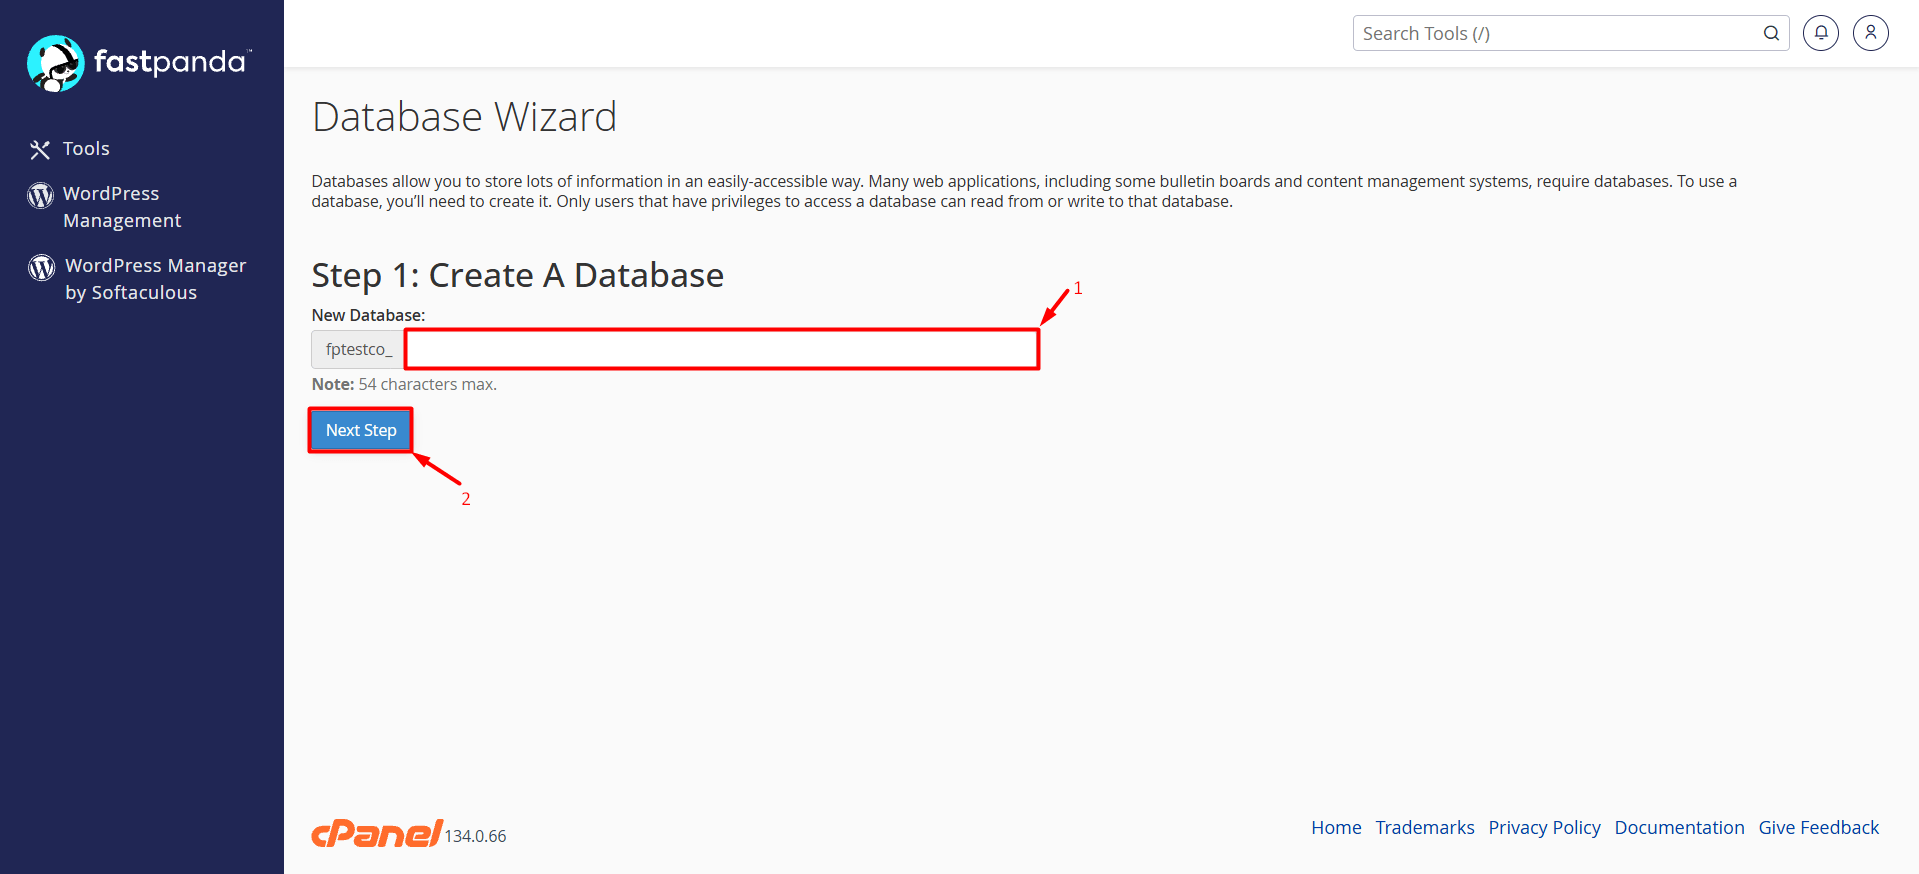
- On the page that opens, enter the desired database name in the “New Database” field and click the “Next Step” button. (54 characters max.)
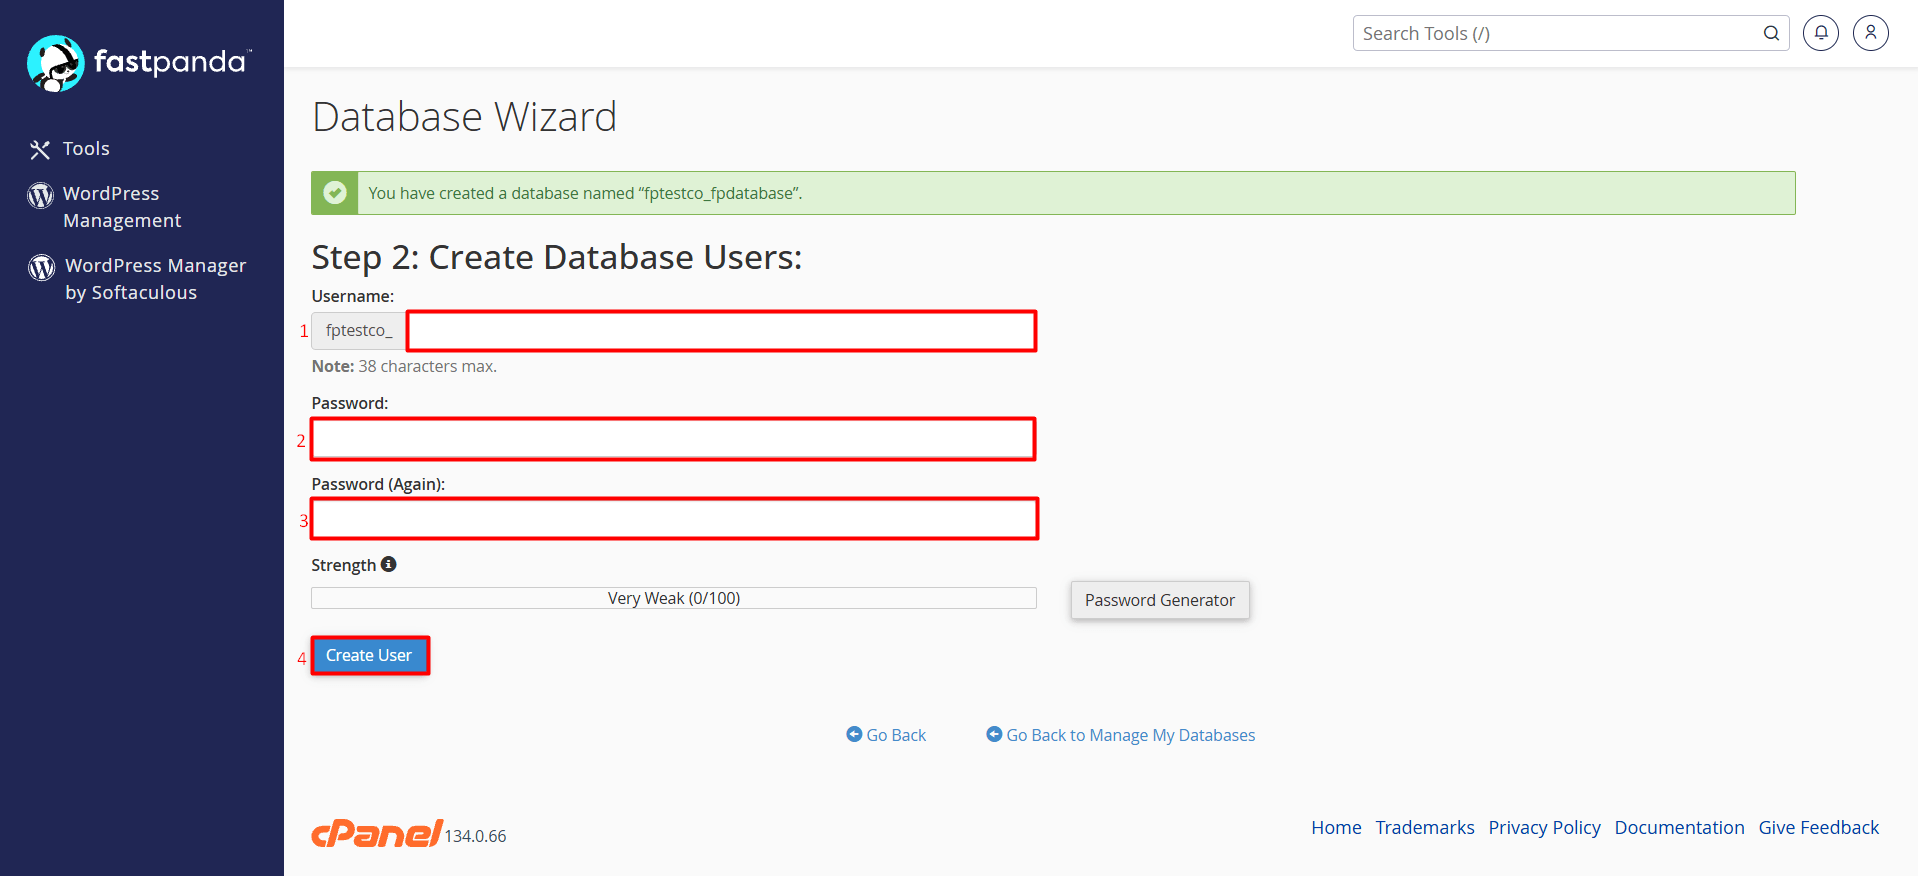
- On the page that opens, you will be asked to provide some information for the database user. Fill in the fields as follows to proceed with creating the user:
- Choose a “username” for the user who will connect to the database. (38 characters max.)
- Enter a strong password in the “Password” field. If you wish, you can use the Password Generator tool to create a secure password.
- Re-enter the password in the “Password (Again)” field.
- After filling in the required information, click the “Create User” button.
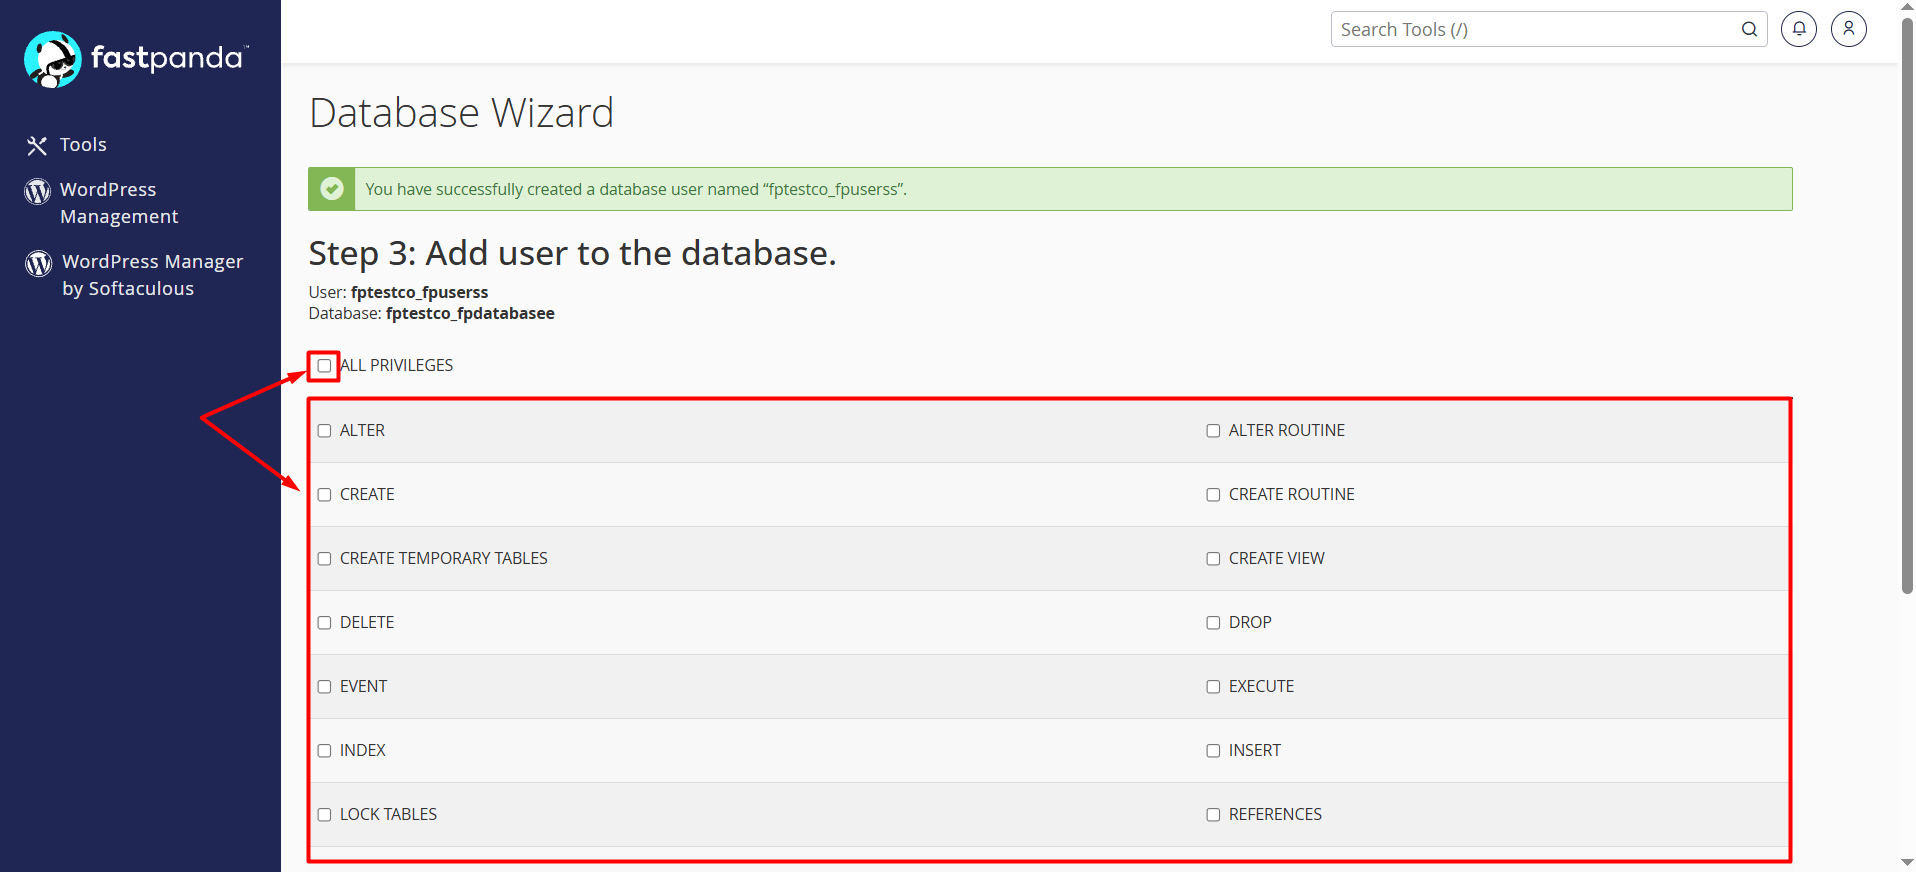
- On the privileges screen that opens, select the permissions you want to assign to the user. To grant all privileges, check the “ALL PRIVILEGES” option.
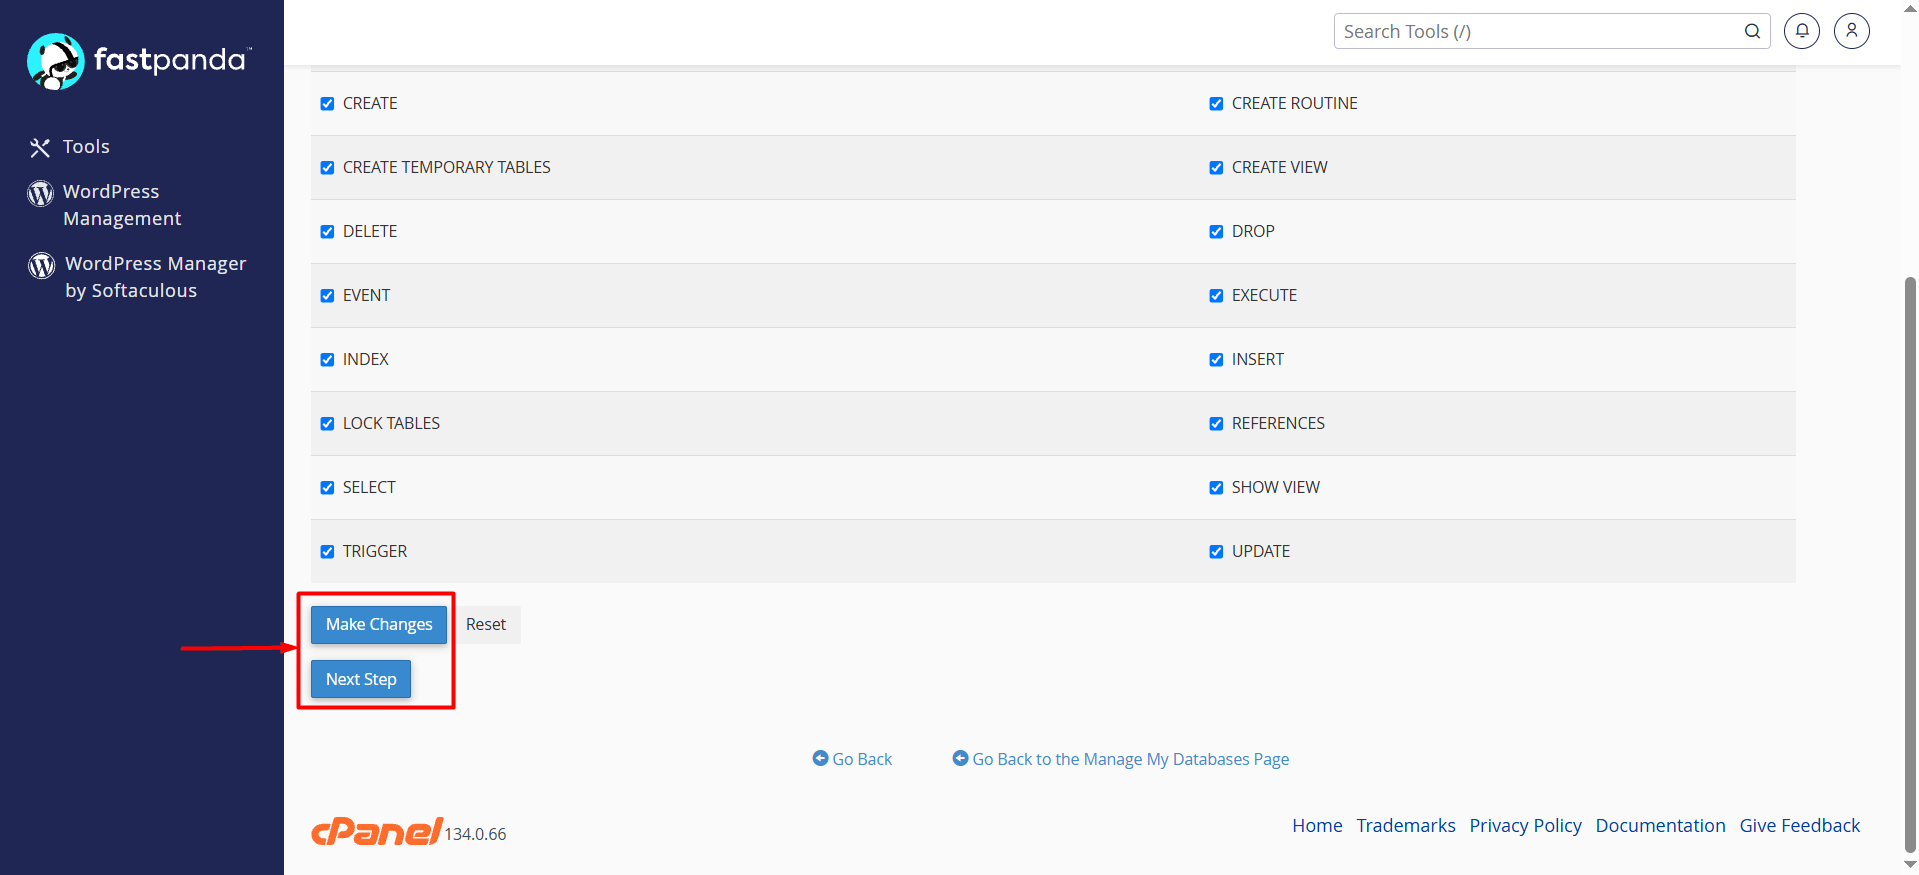
- Click the “Make Changes” or “Next Step” button to complete the process. Once completed, your MySQL database and database user will have been created, and the selected privileges will have been assigned to the user.
Method 2: Manually Creating a MySQL Database and User
If you want to create the database and its user separately, follow the steps below.
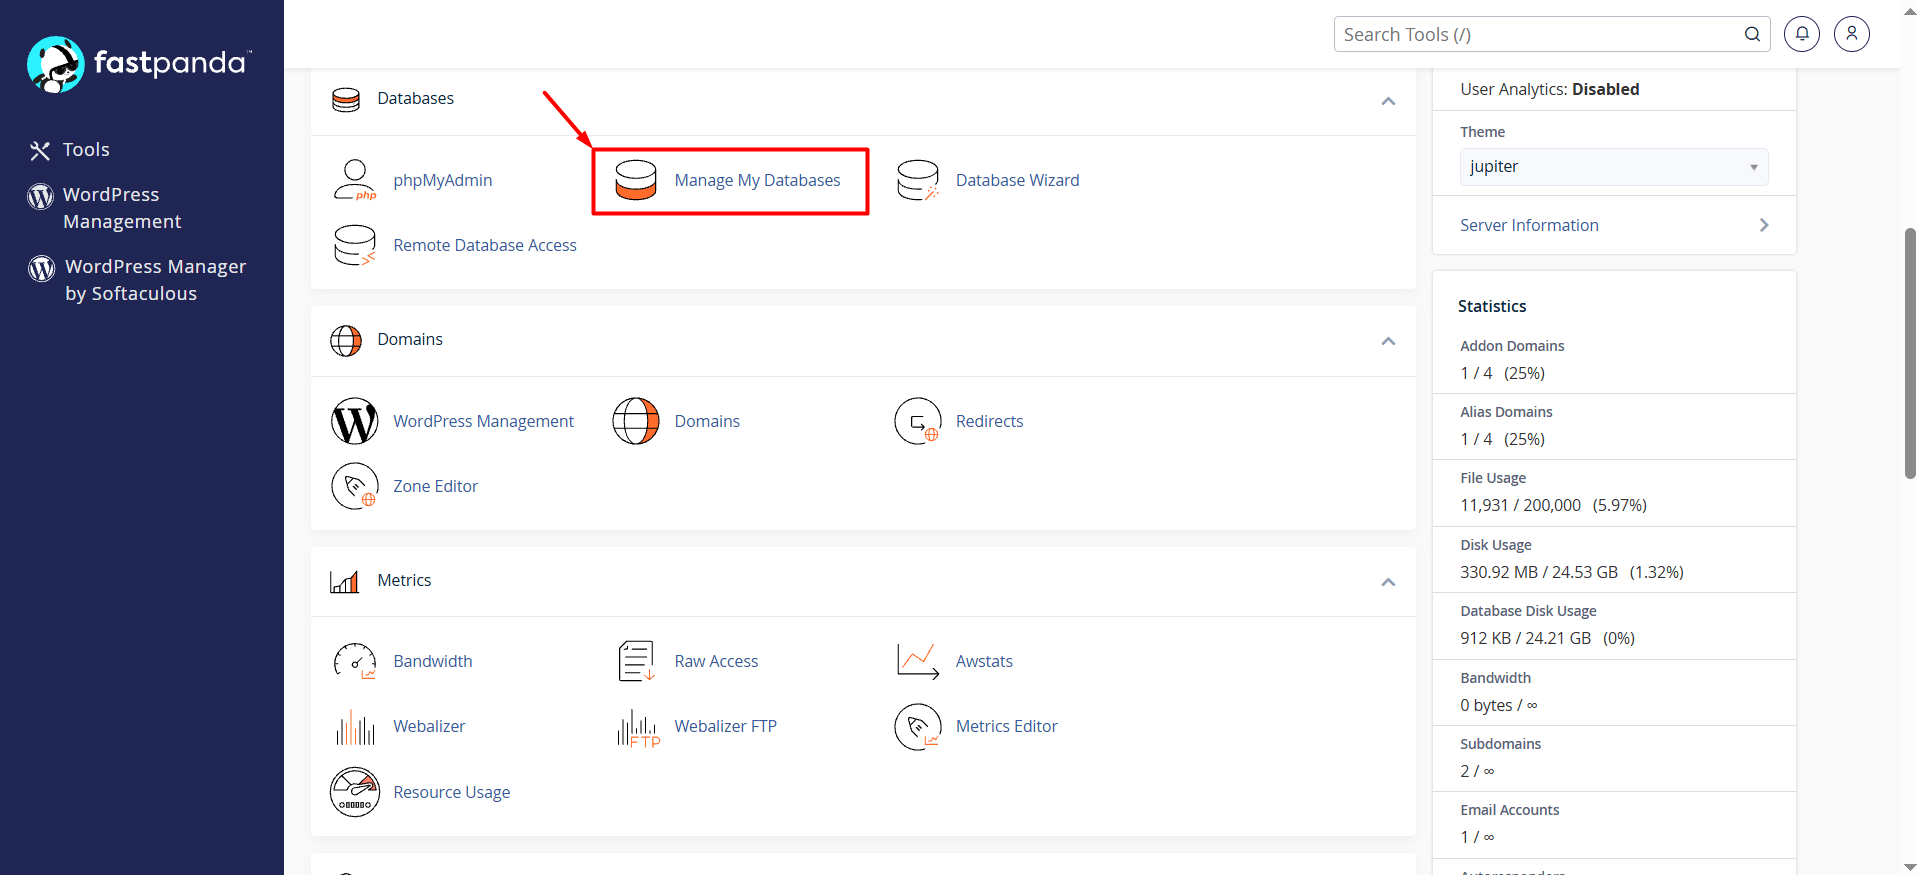
- On the cPanel homepage, click the “Manage My Databases” button under the Databases section.
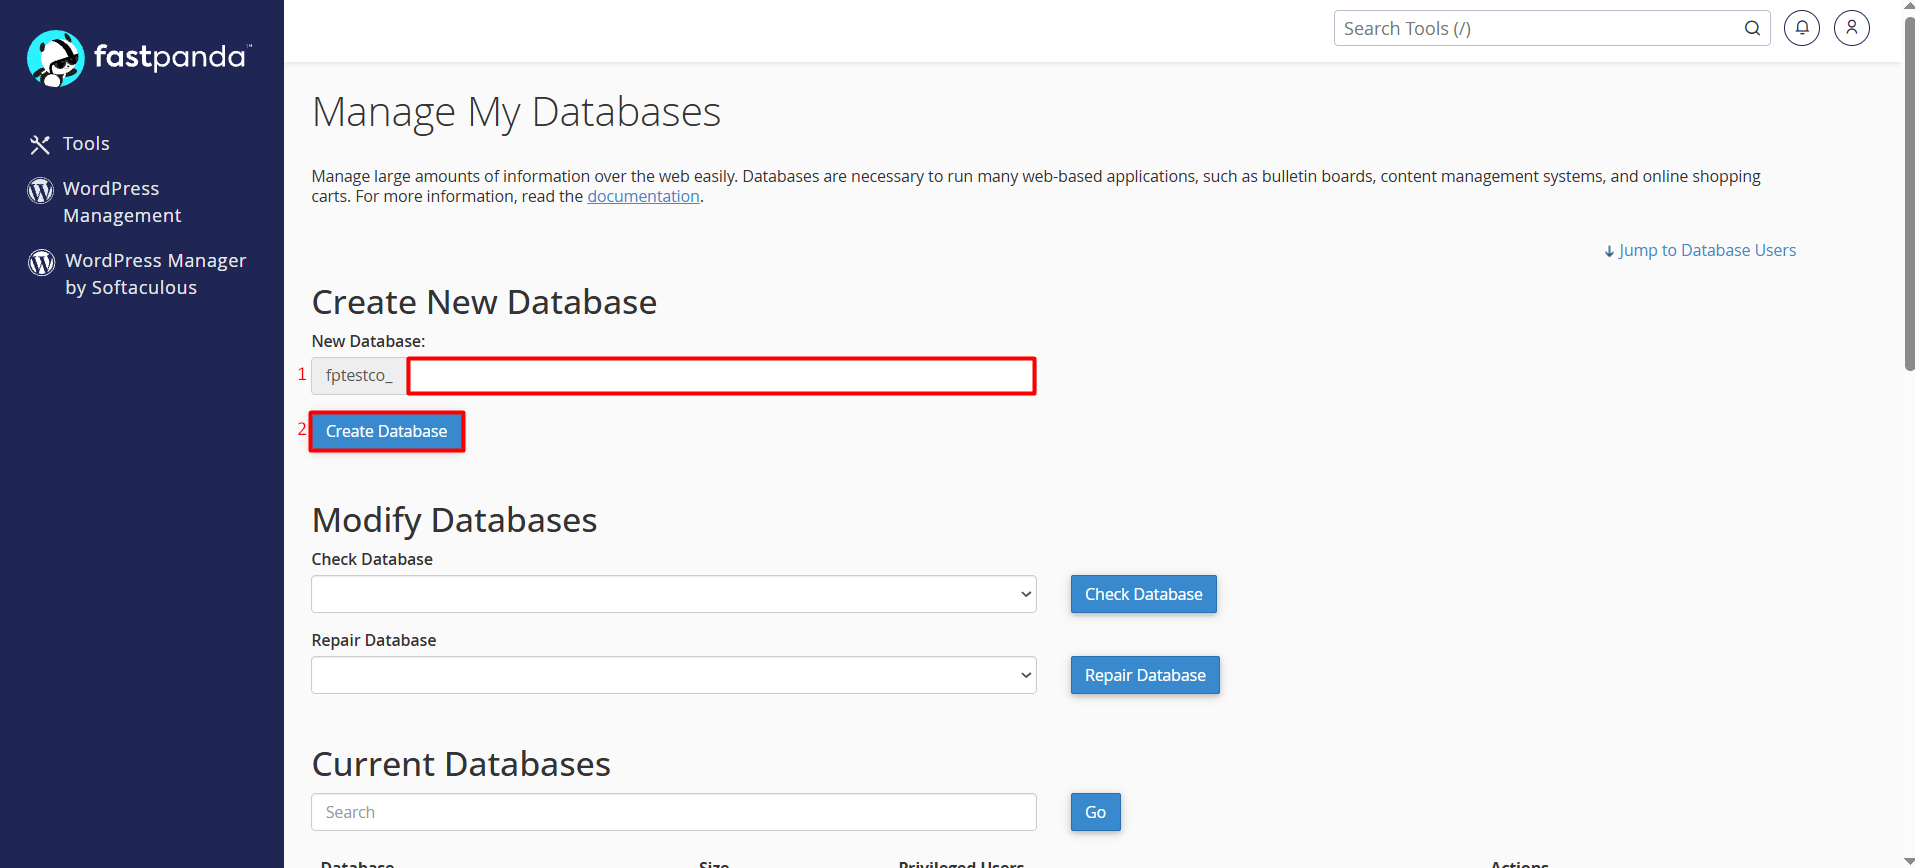
- In the “Create New Database” section, enter a name for your database in the field provided and click the “Create Database” button.
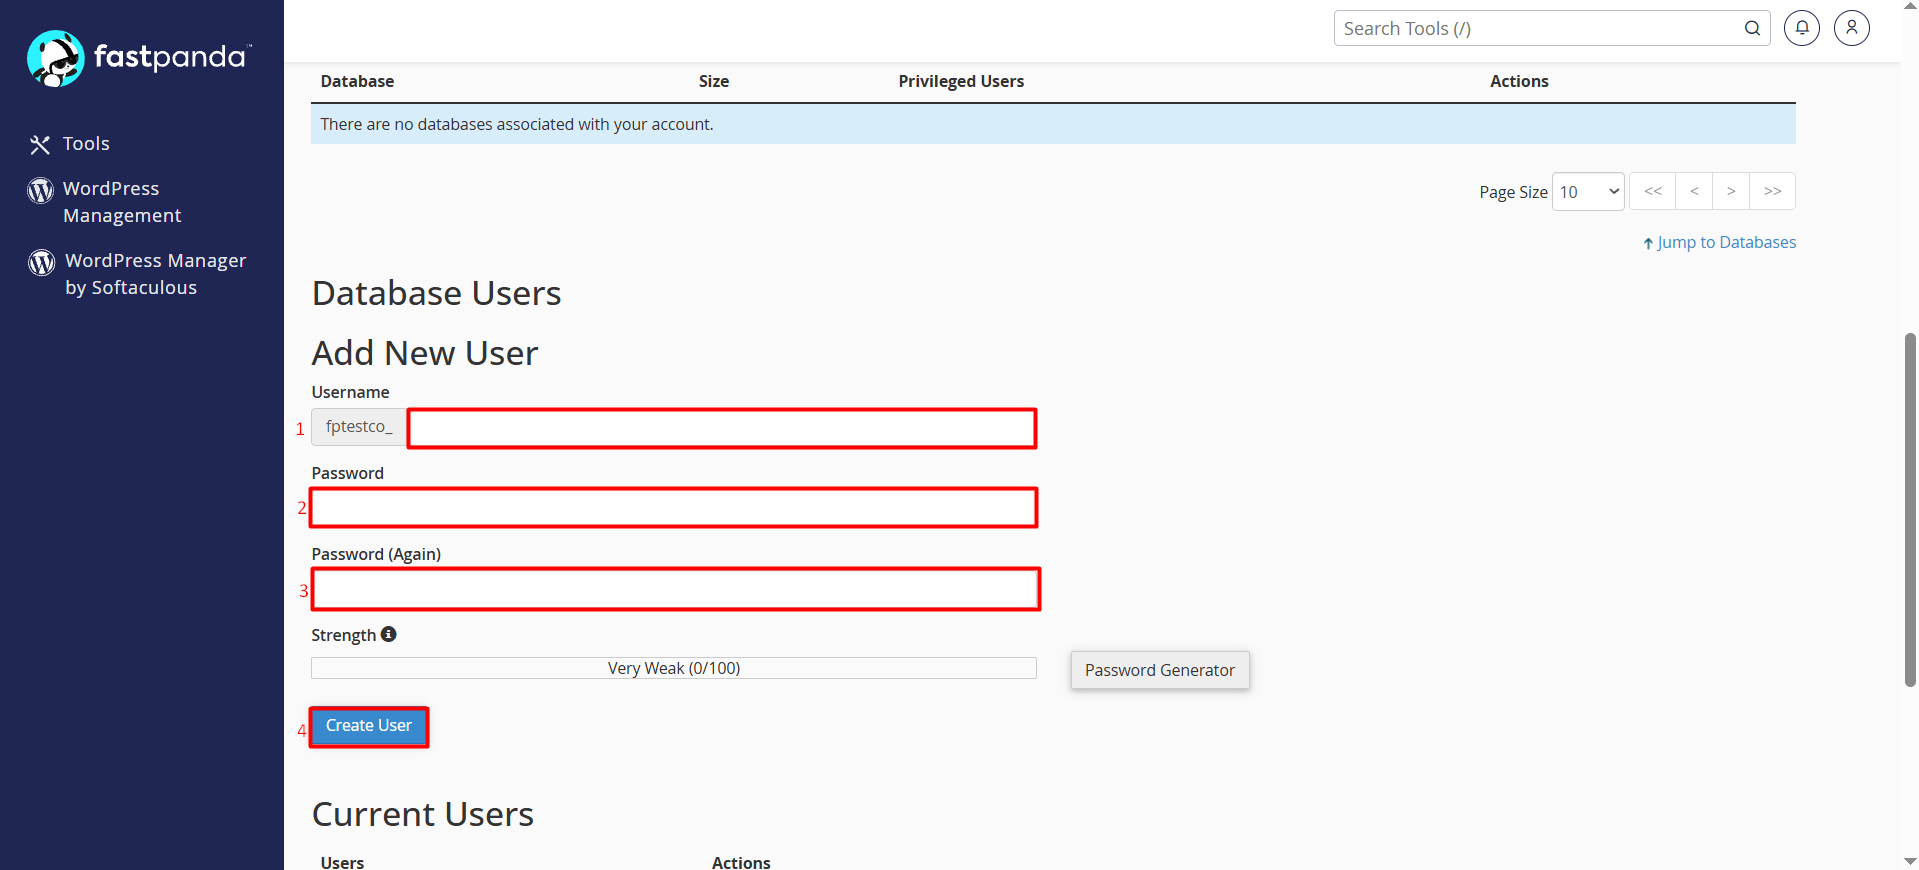
- Scroll down to the “Database Users” section on the same page. Enter the desired username and set a strong password for the user. Then click the “Create User” button.
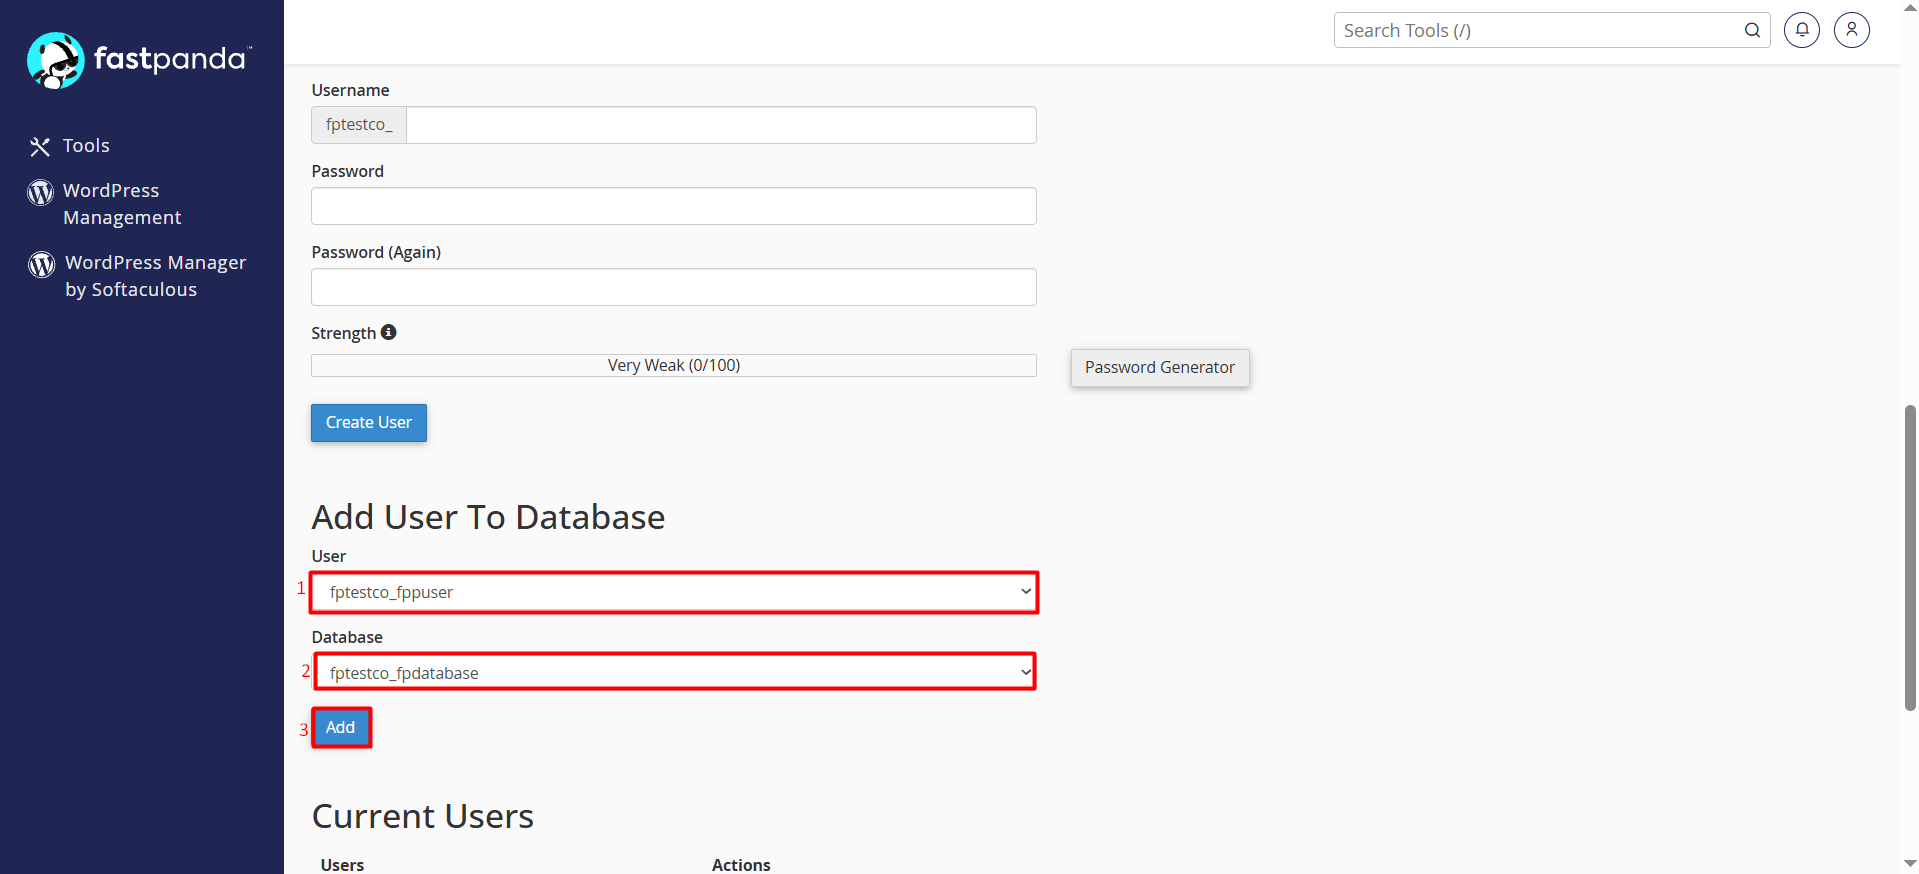
- After creating the database and user, go to the “Add User To Database” section and select the user you created and the corresponding database. Then click the “Add” button.
- On the privileges screen that opens, select the permissions you want to assign to the user. To grant all privileges, check the “ALL PRIVILEGES” option.
- Click the “Make Changes” or “Next Step” button to complete the process. Once completed, your MySQL database and database user will have been created, and the selected privileges will have been assigned to the user.
MySQL Database Management
Managing Databases with phpMyAdmin
You can access the database management interface by clicking the “phpMyAdmin” icon on the cPanel homepage. Through phpMyAdmin, you can view database tables, browse, edit, and delete records, and execute SQL queries.


Manage My Databases
You can perform the following operations by navigating to the “Manage My Databases” menu under the Databases section on the cPanel homepage:
- Create new databases, view existing databases, rename databases, and delete databases.
- Create new database users, view existing users, change their passwords, rename them, and delete them.
- View the users assigned to a database, remove assigned users, add new users to a database, and update user privileges by clicking on the assigned user.
- Perform database check and repair operations.
Database Backup and Restoration
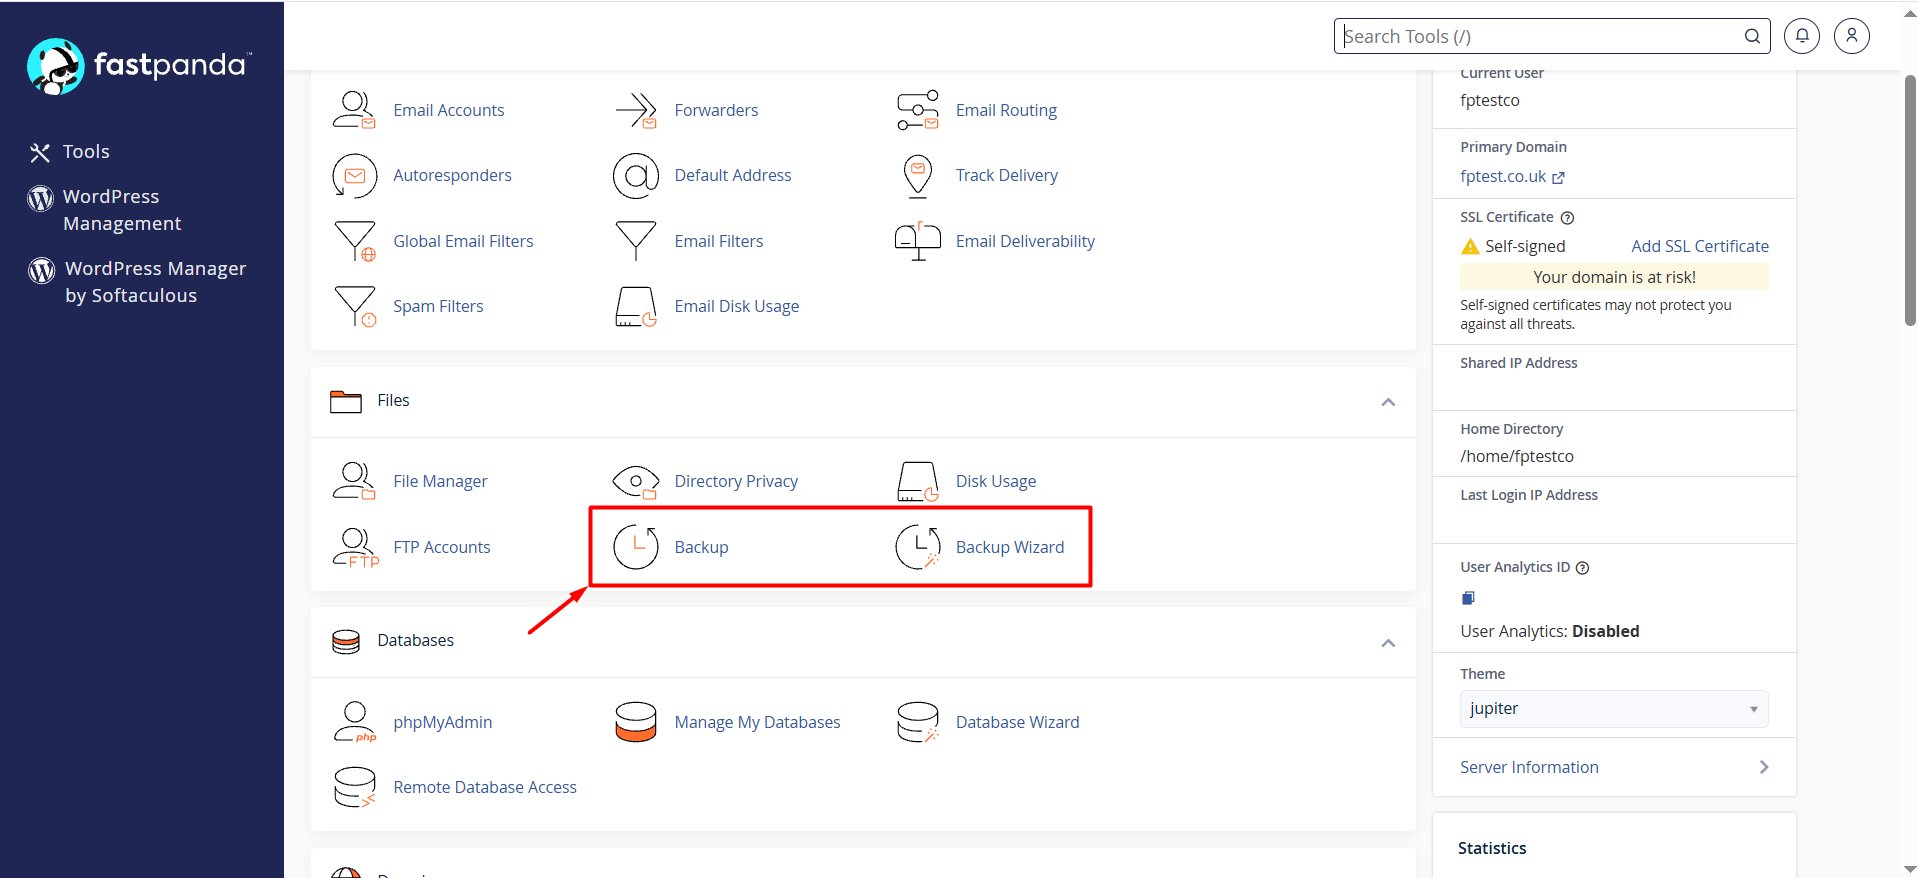
You can back up your MySQL databases and restore them whenever needed. To perform these operations, you can use the “Backup” or “Backup Wizard” tools in cPanel.