- Open the Outlook application
- Click the “File” button.
- Click the “Add Account” button.
- In the window that opens, enter your email address (including the domain and extension) in the “Email Address” field.
- Check the “Advanced options > Let me set up my account manually” box.
- Click the “Connect” button.
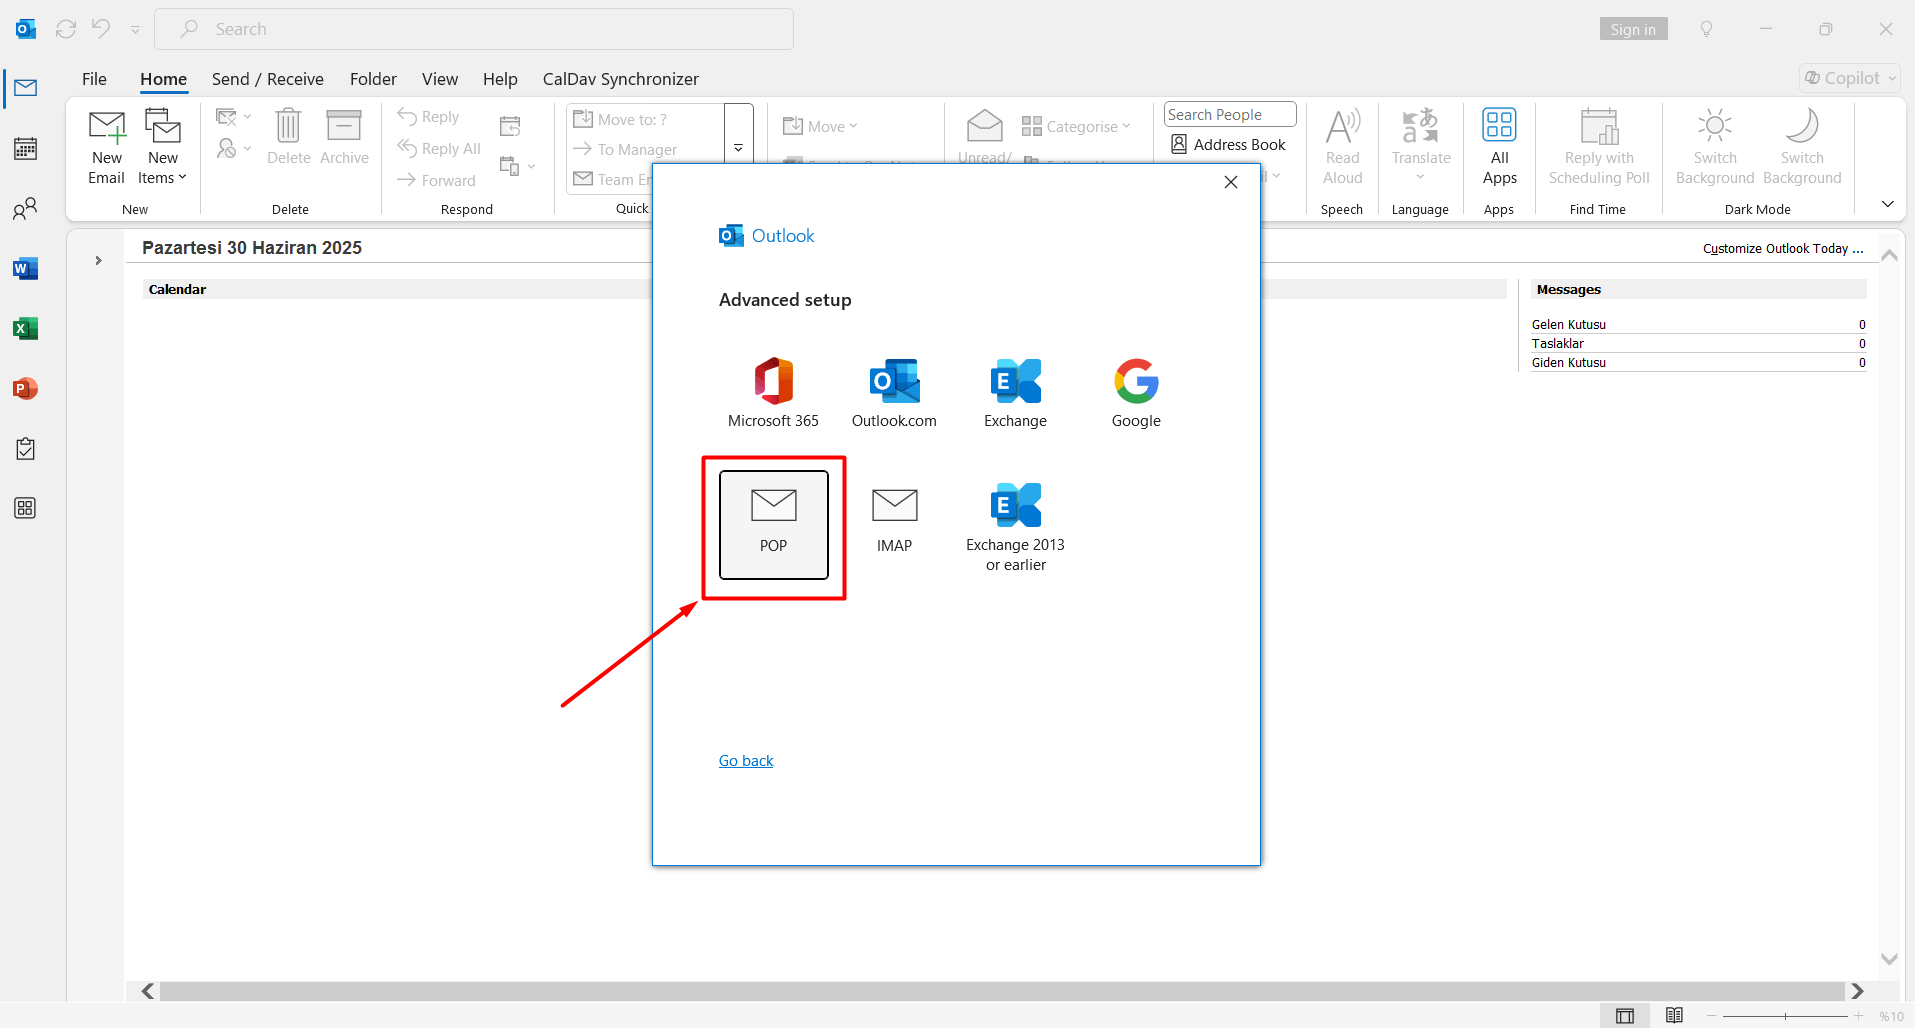
- Click on the “POP” option.
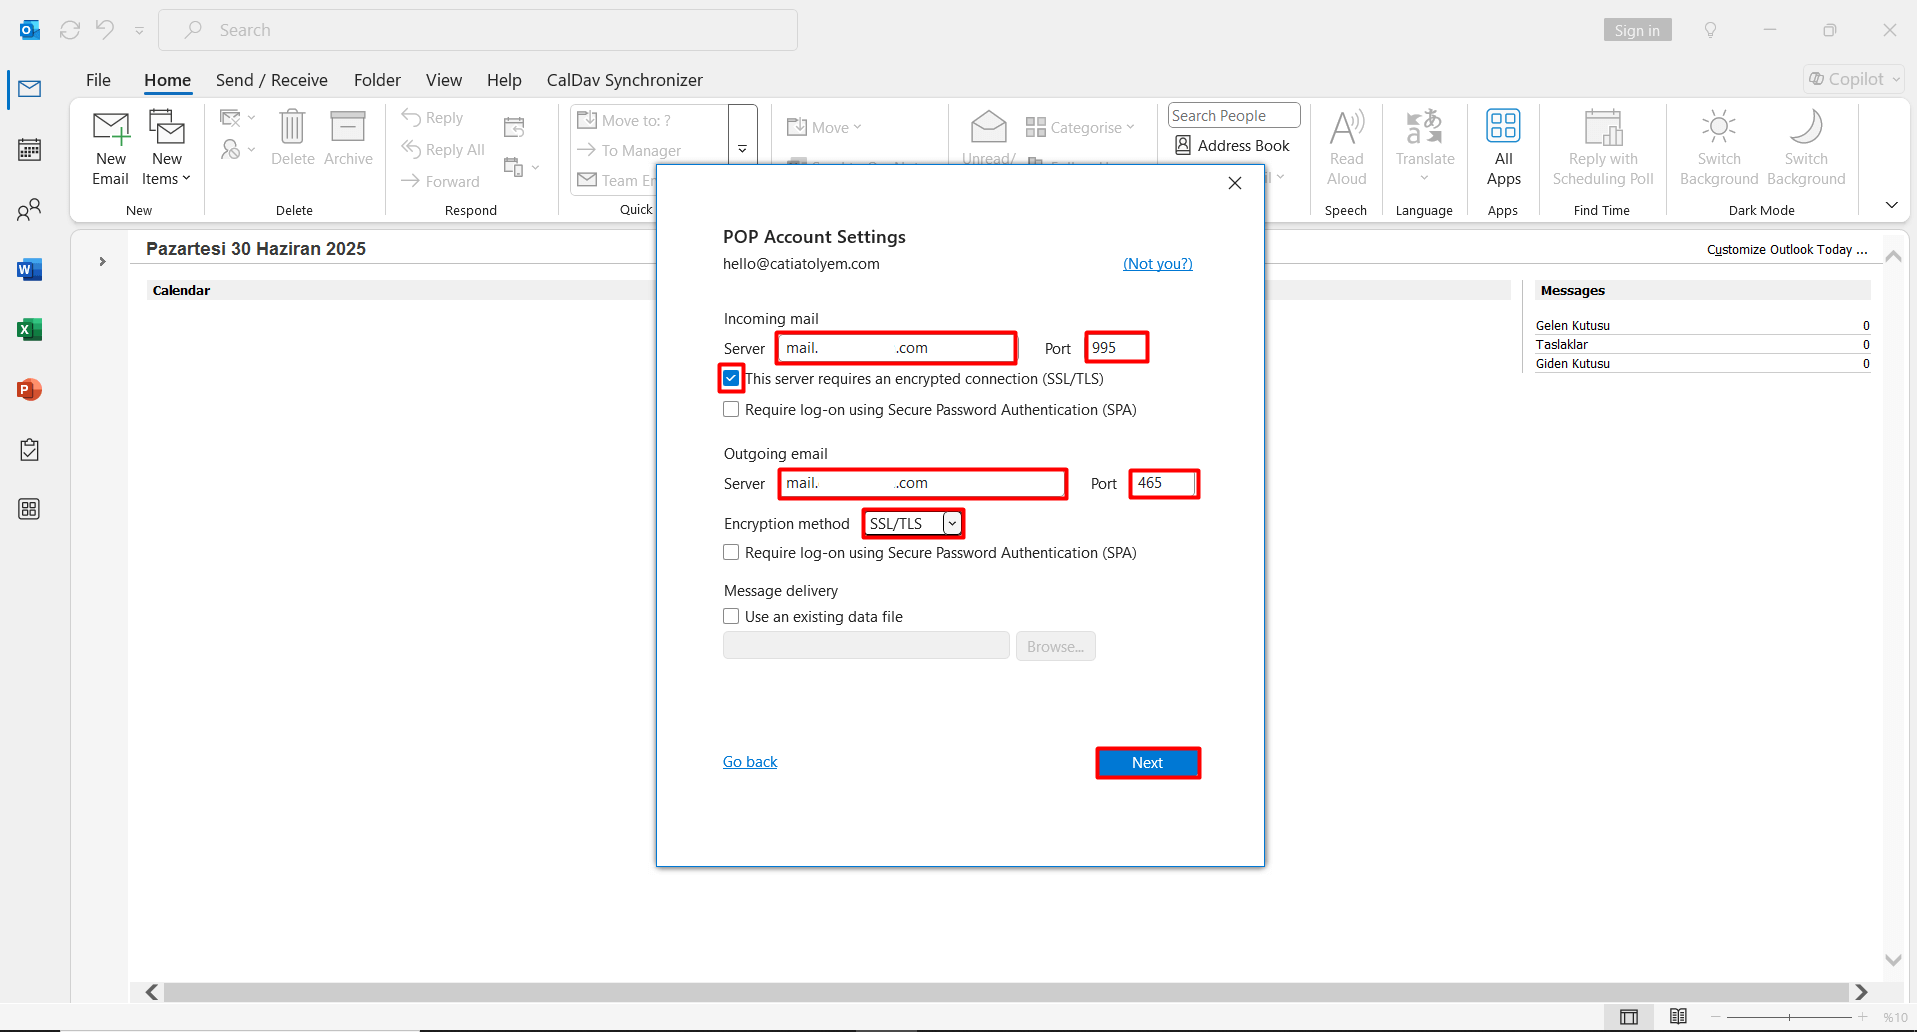
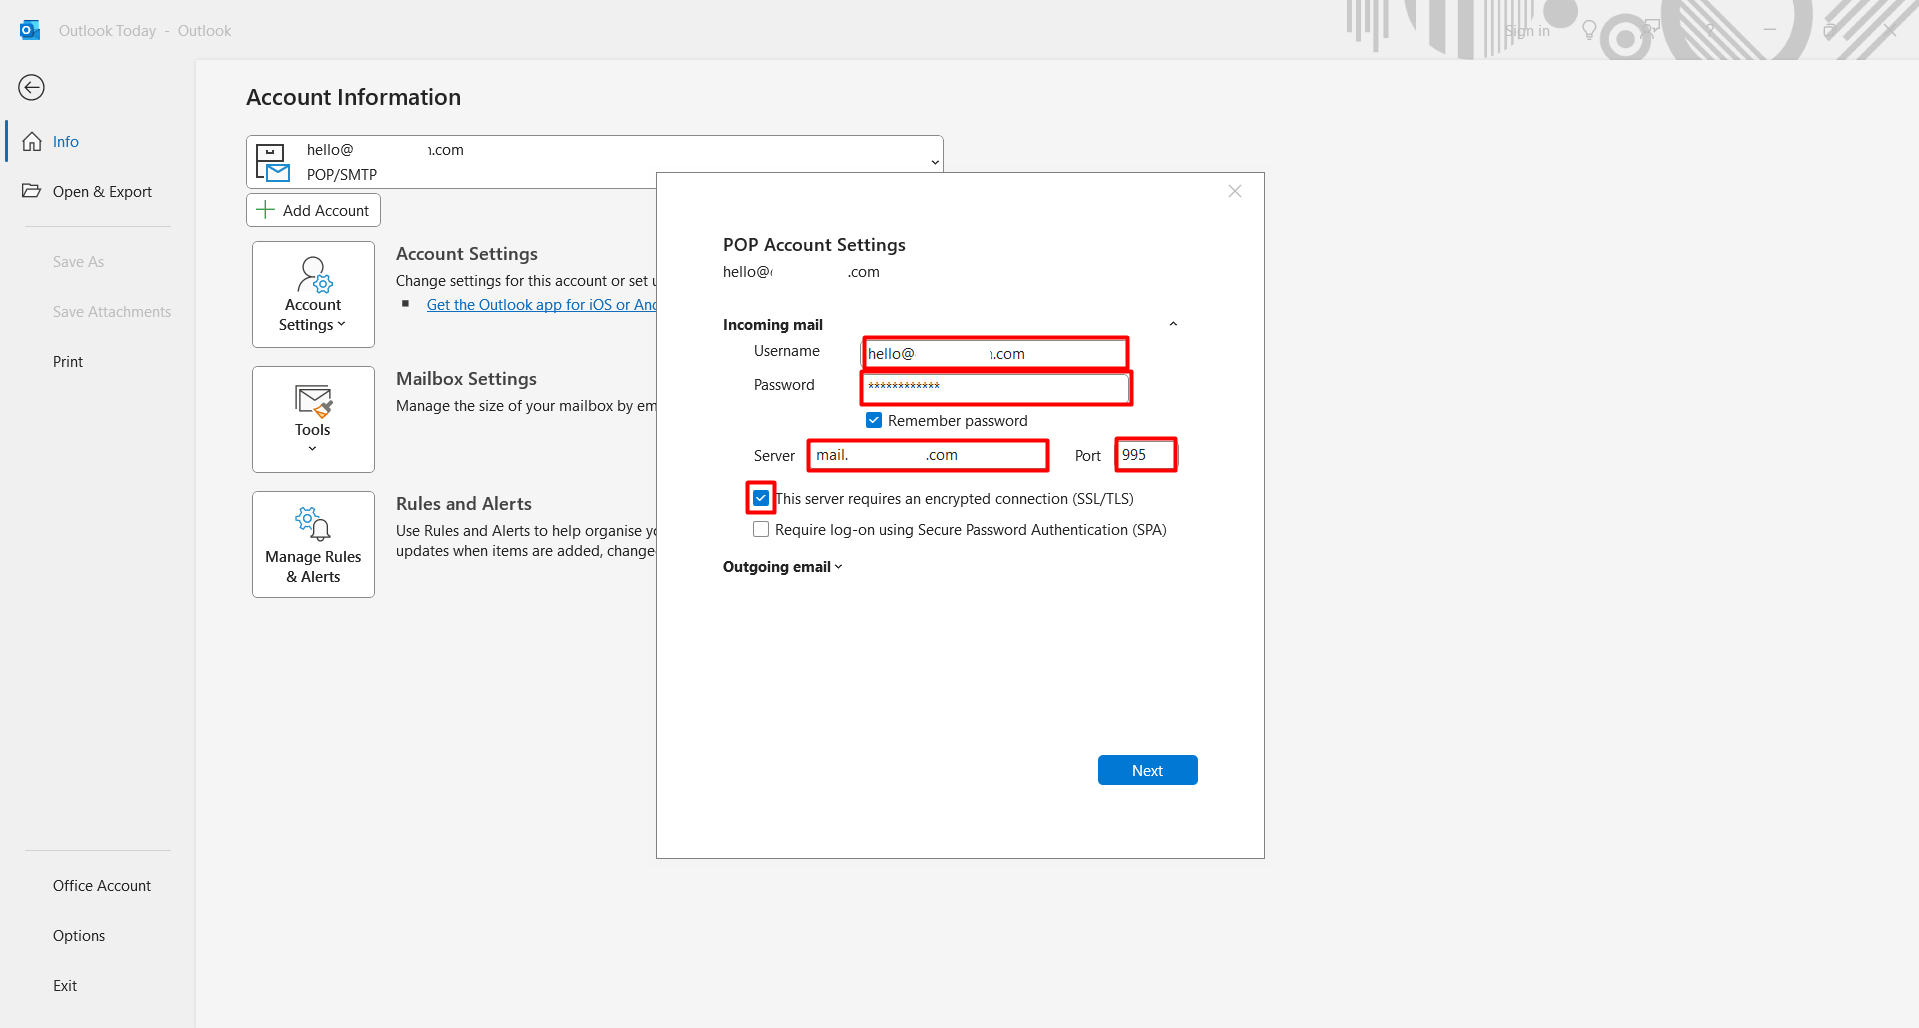
- In the window that opens, you will be asked for some information. Enter the information as shown below.
- The Incoming Mail settings are as follows:
- Server: mail.domain.extension
- Port: 995
- Encryption method: SSL/TLS
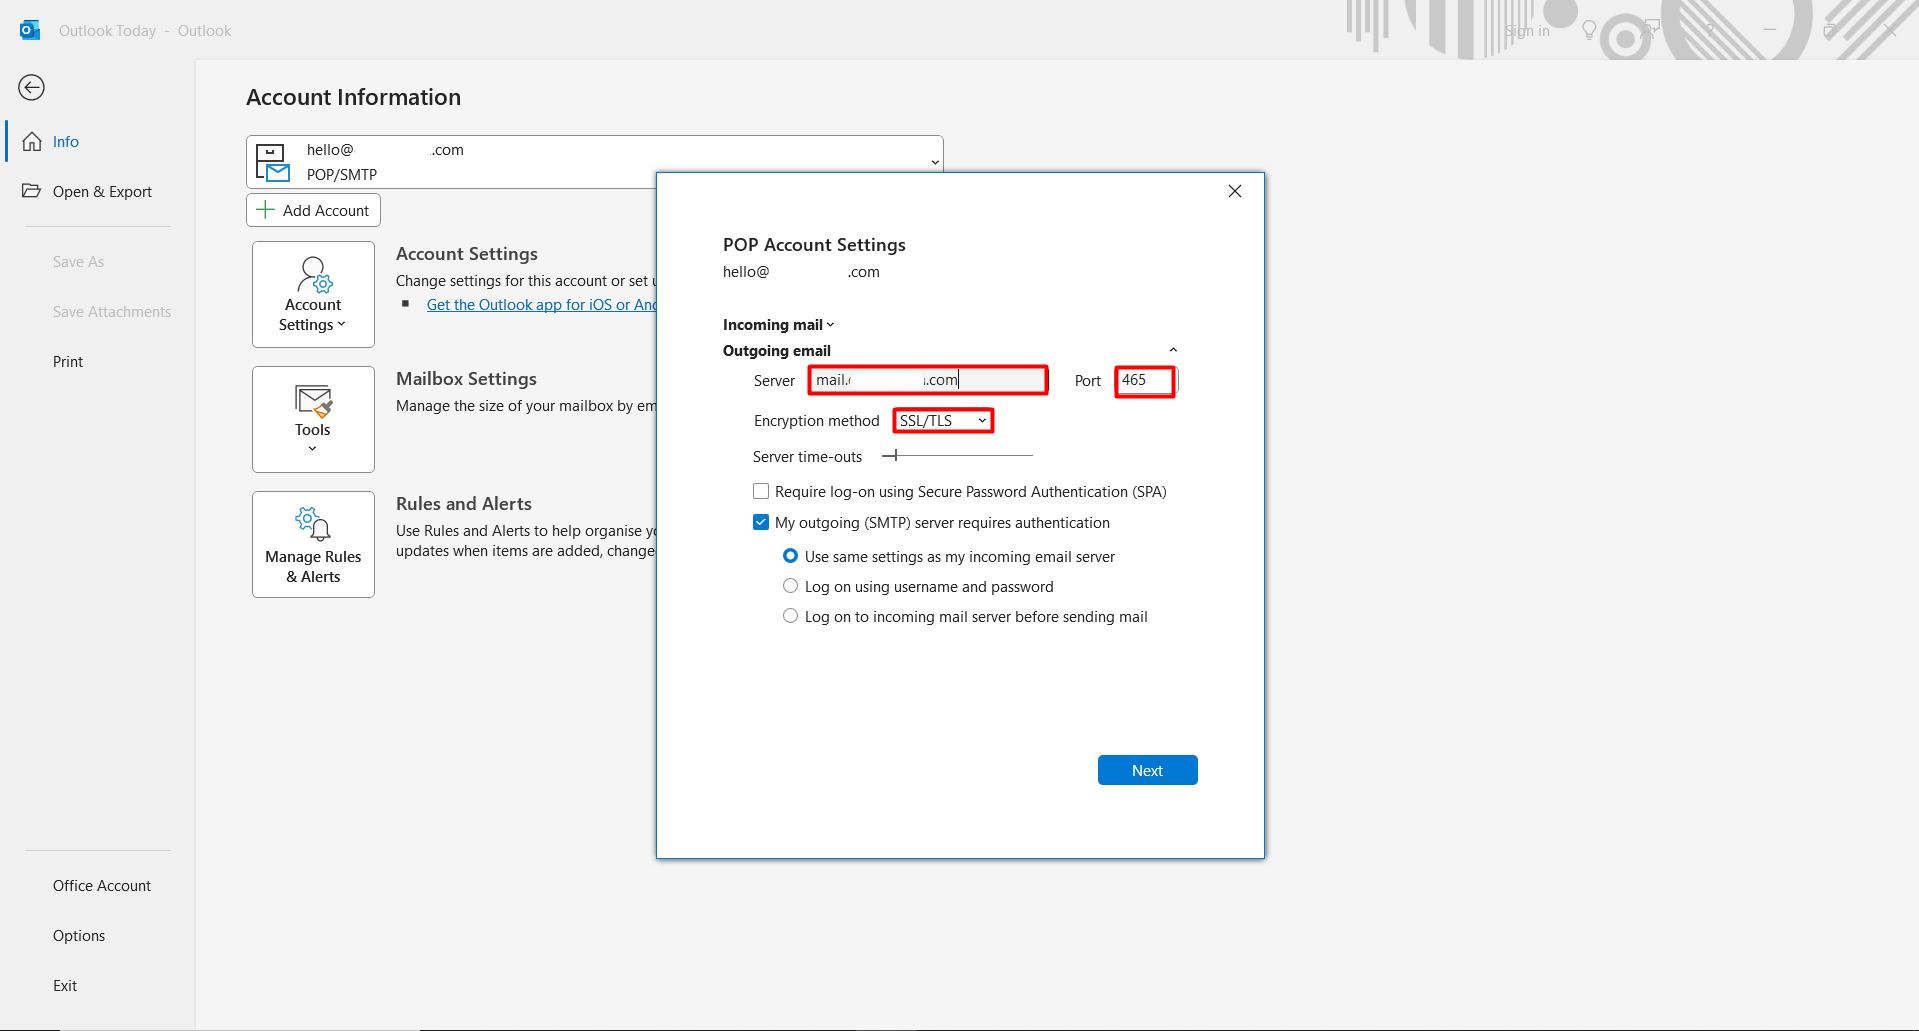
- The Outgoing Mail settings are as follows:
- Server: mail.domain.extension
- Port: 465
- Encryption method: SSL/TLS
- The Incoming Mail settings are as follows:
- After entering the settings, click the “Next” button.
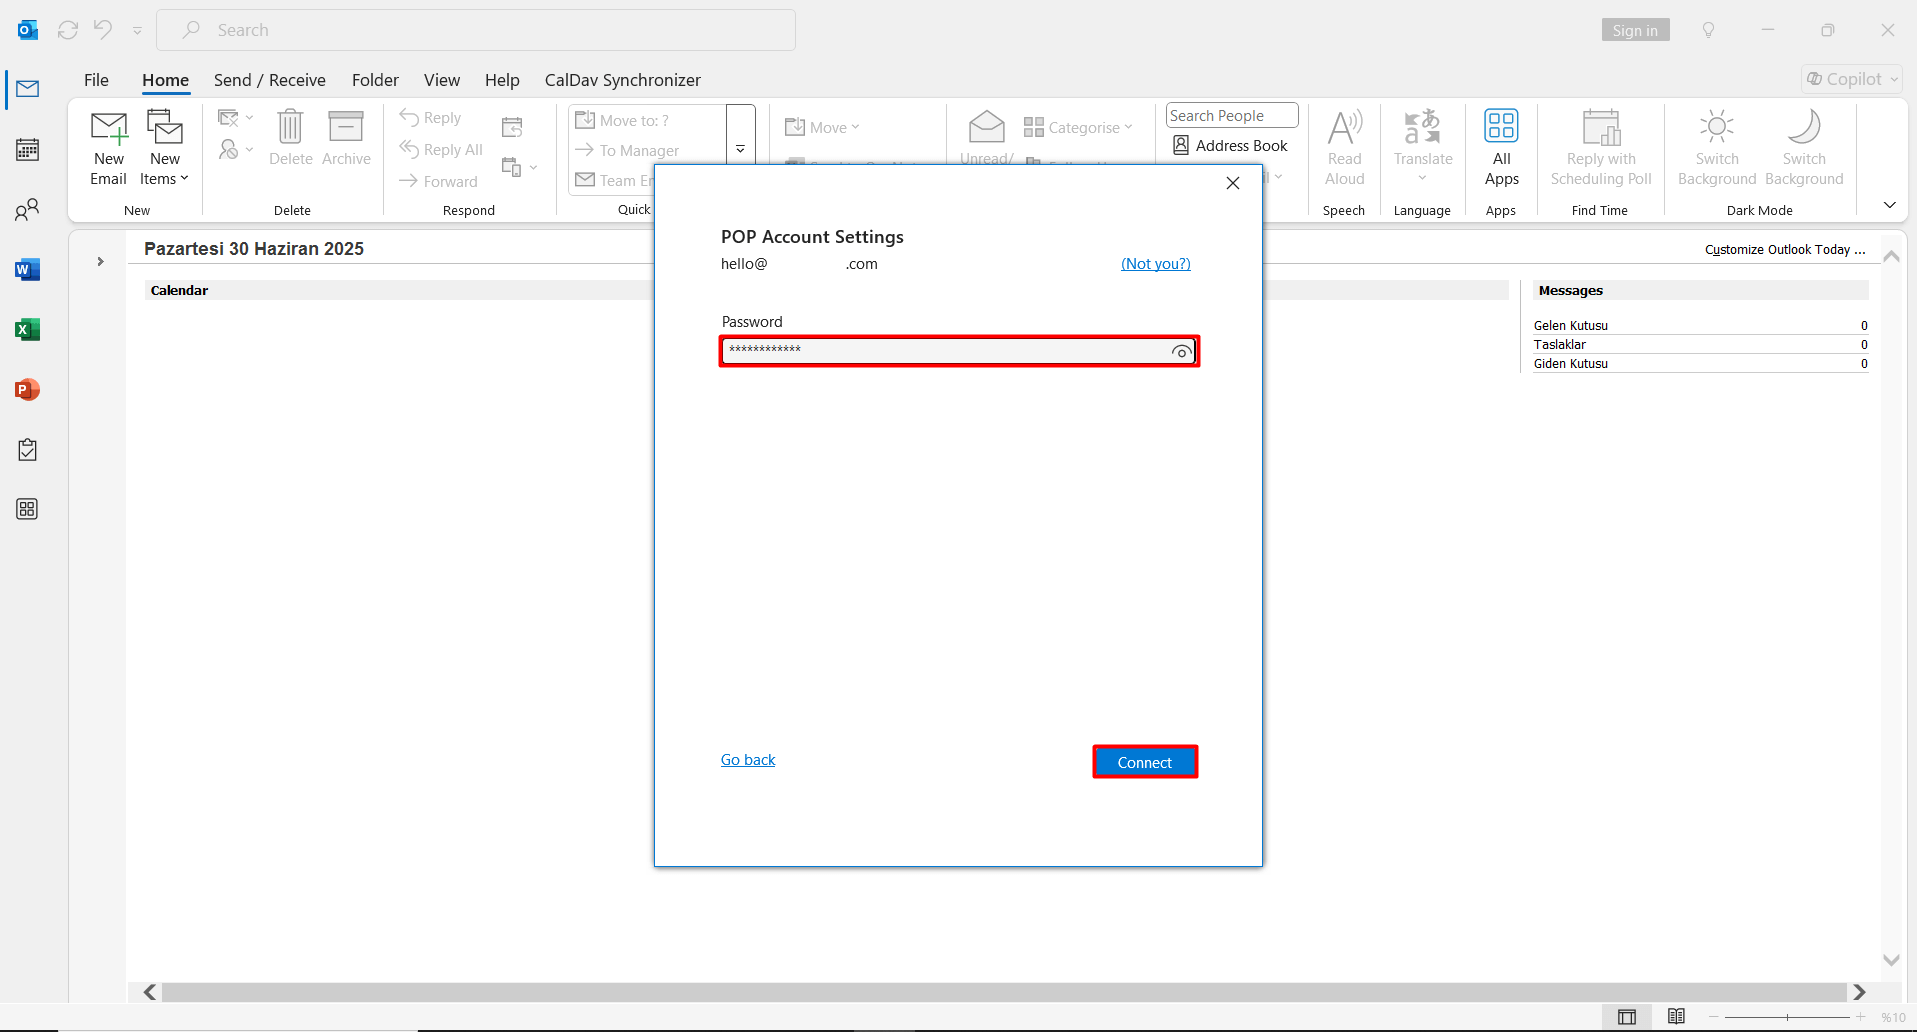
- Enter your email password in the “Password” field and click the “Connect” button.
- This will successfully complete your email setup.
Some users may find that after performing the POP setup, the above information is not requested, and only the password is asked to complete the setup automatically. If you encounter this situation, you can follow the steps below.
- Enter your email password in the “Password” field and click the “Connect” button.
- After completing these steps, your email will be set up as an POP account. However, it is recommended to check if there are any errors in the mail settings after the automatic setup. You can follow the steps below for this process.
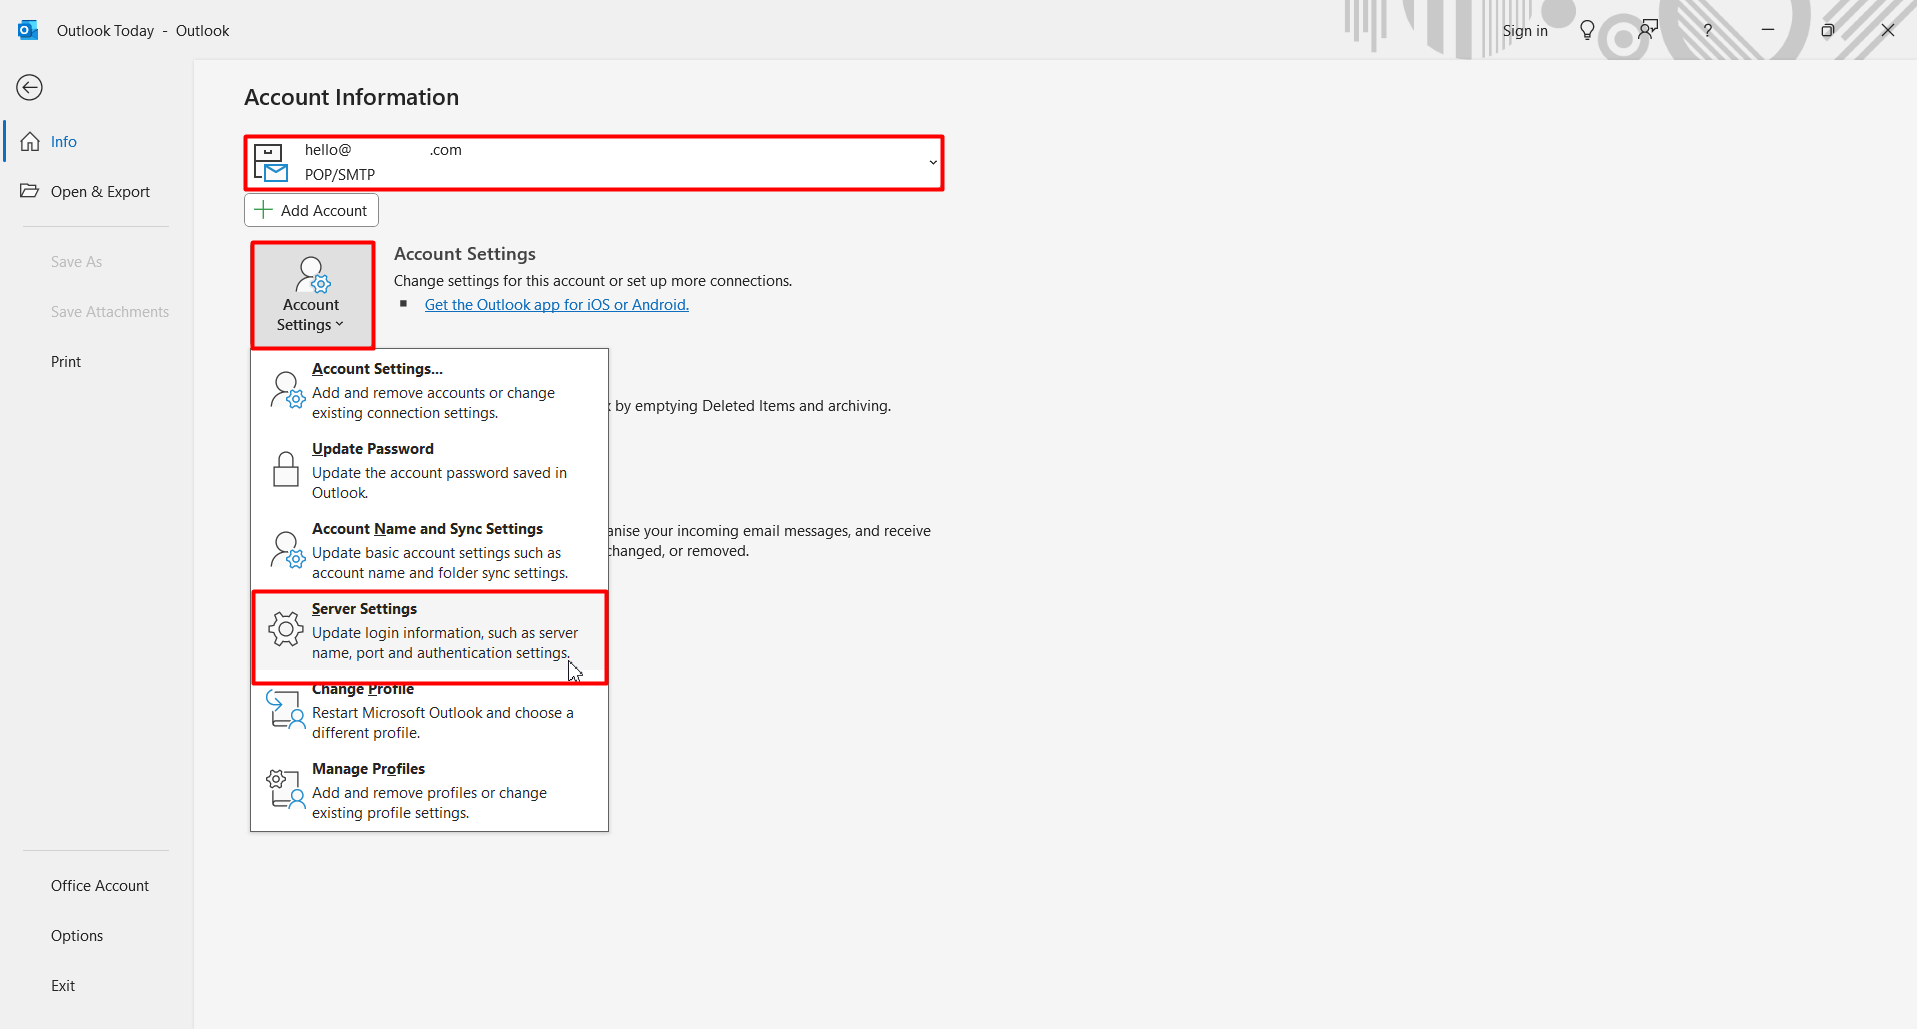
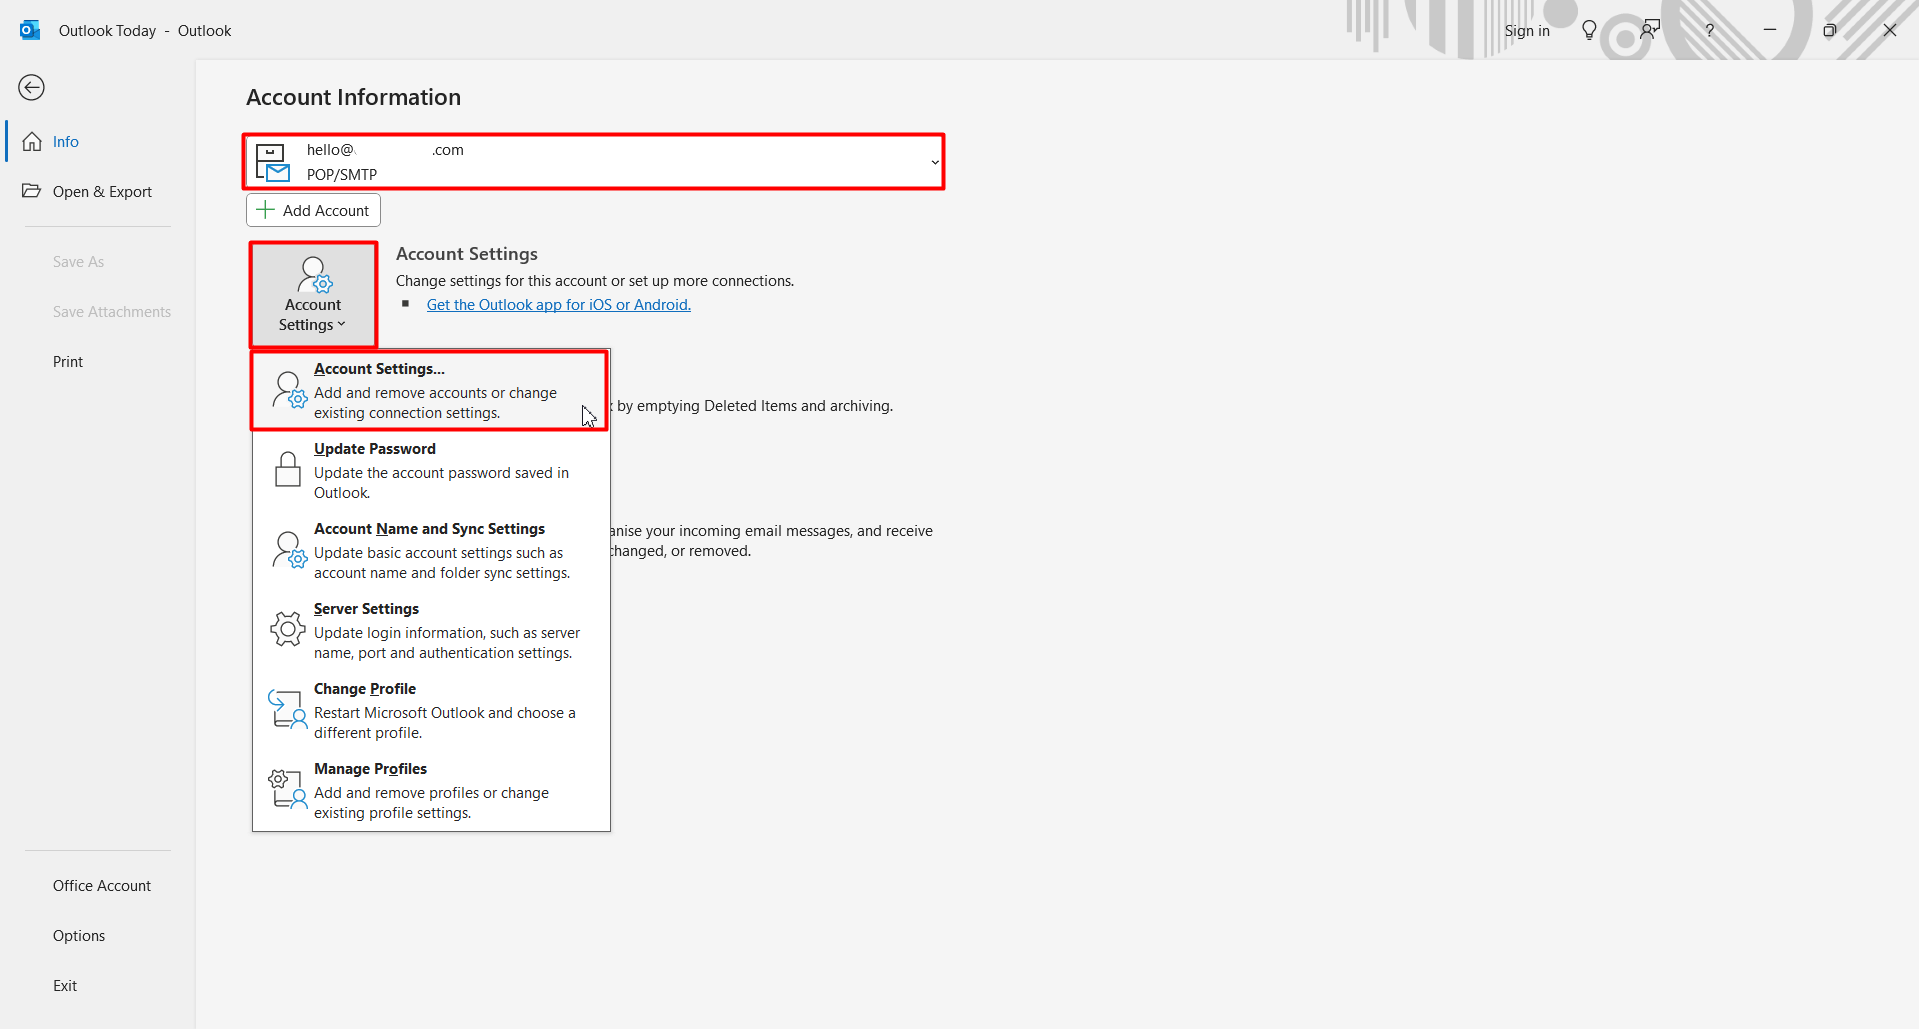
- Click the “File” button.
- Select Account and then click the “Account Settings > Server Settings” button.
- The Incoming Mail settings are as follows:
- Username: Your full email address must be entered (including the domain and extension).
- Password: Your email password must be entered.
- Server: mail.domain.extension
- Port: 995
- Encryption method: SSL/TLS
- The Outgoing Mail settings are as follows:
- Server: mail.domain.extension
- Port: 465
- Encryption method: SSL/TLS
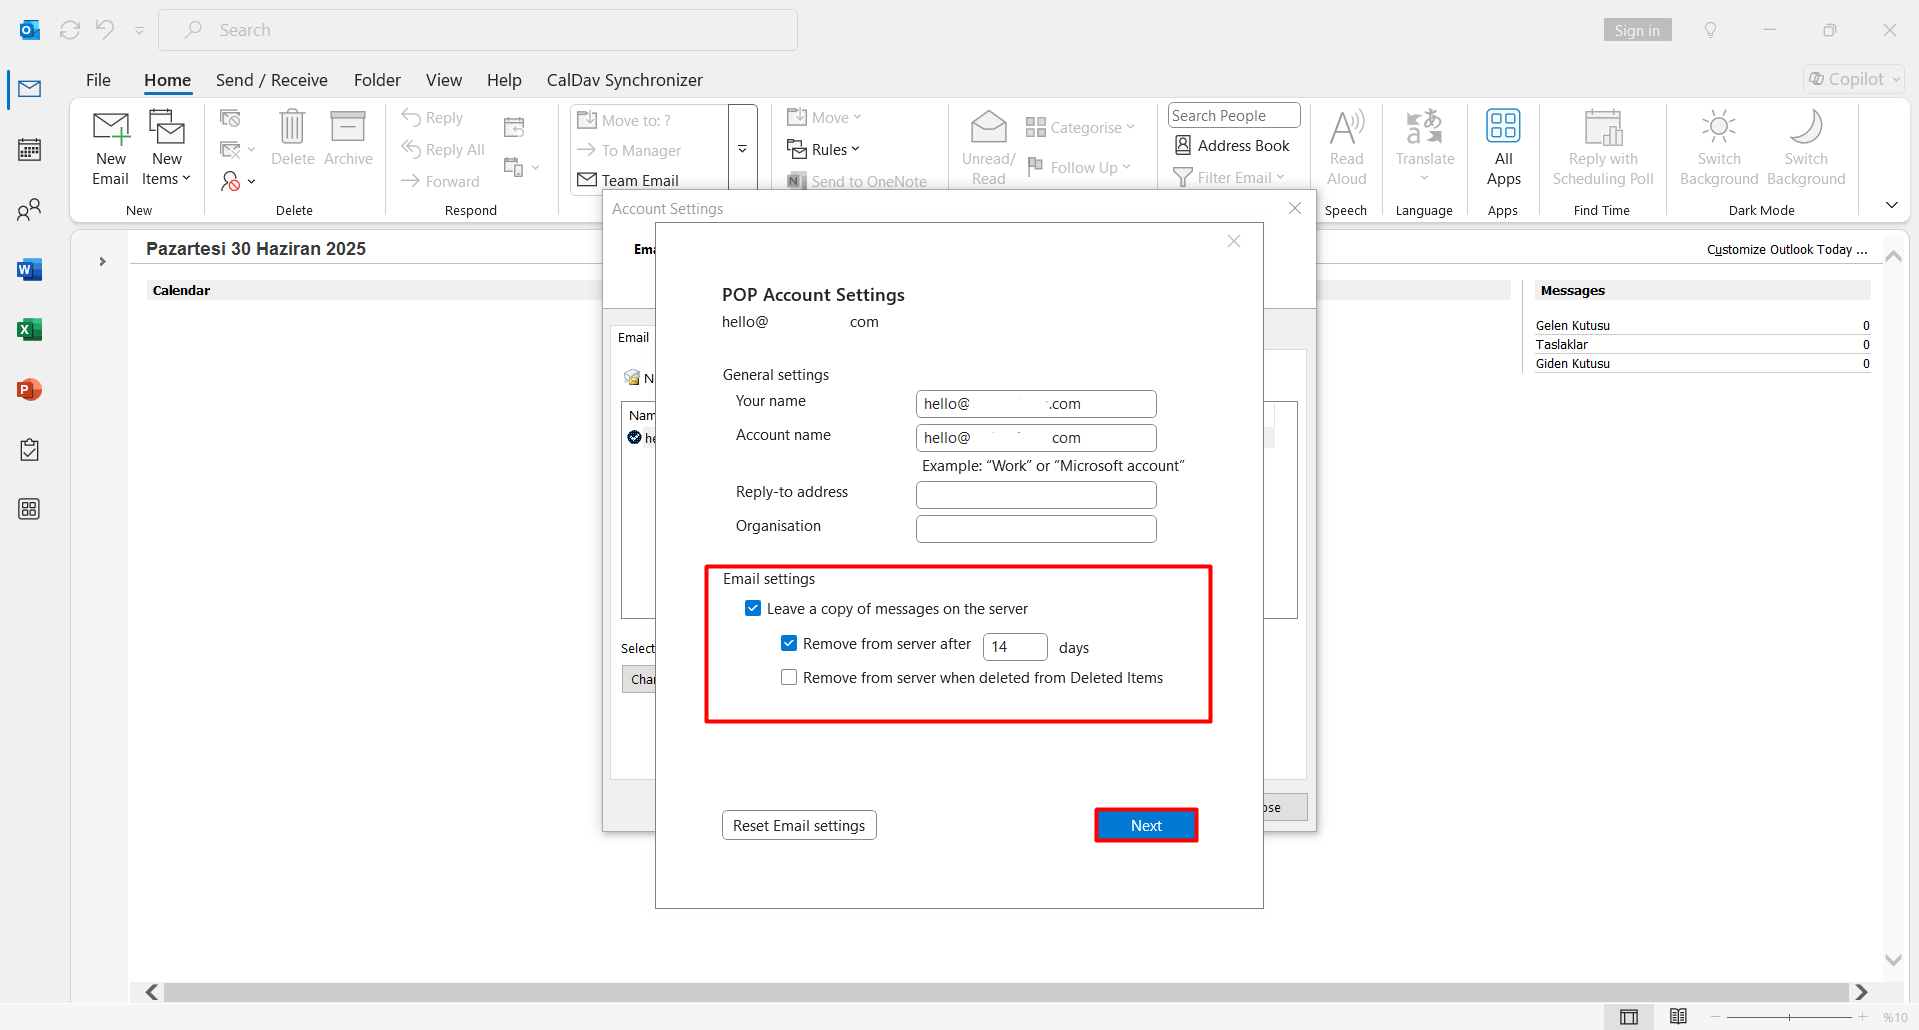
In older versions of Outlook, during the setup process, you could configure advanced settings such as whether to leave a copy of emails on the server and how many days later they should be deleted. However, in the latest versions, these settings may appear only after the setup is completed. To access options related to leaving a copy on the server, removing it, or deleting it after a certain number of days, you can follow the steps below.
- Click the “File” button.
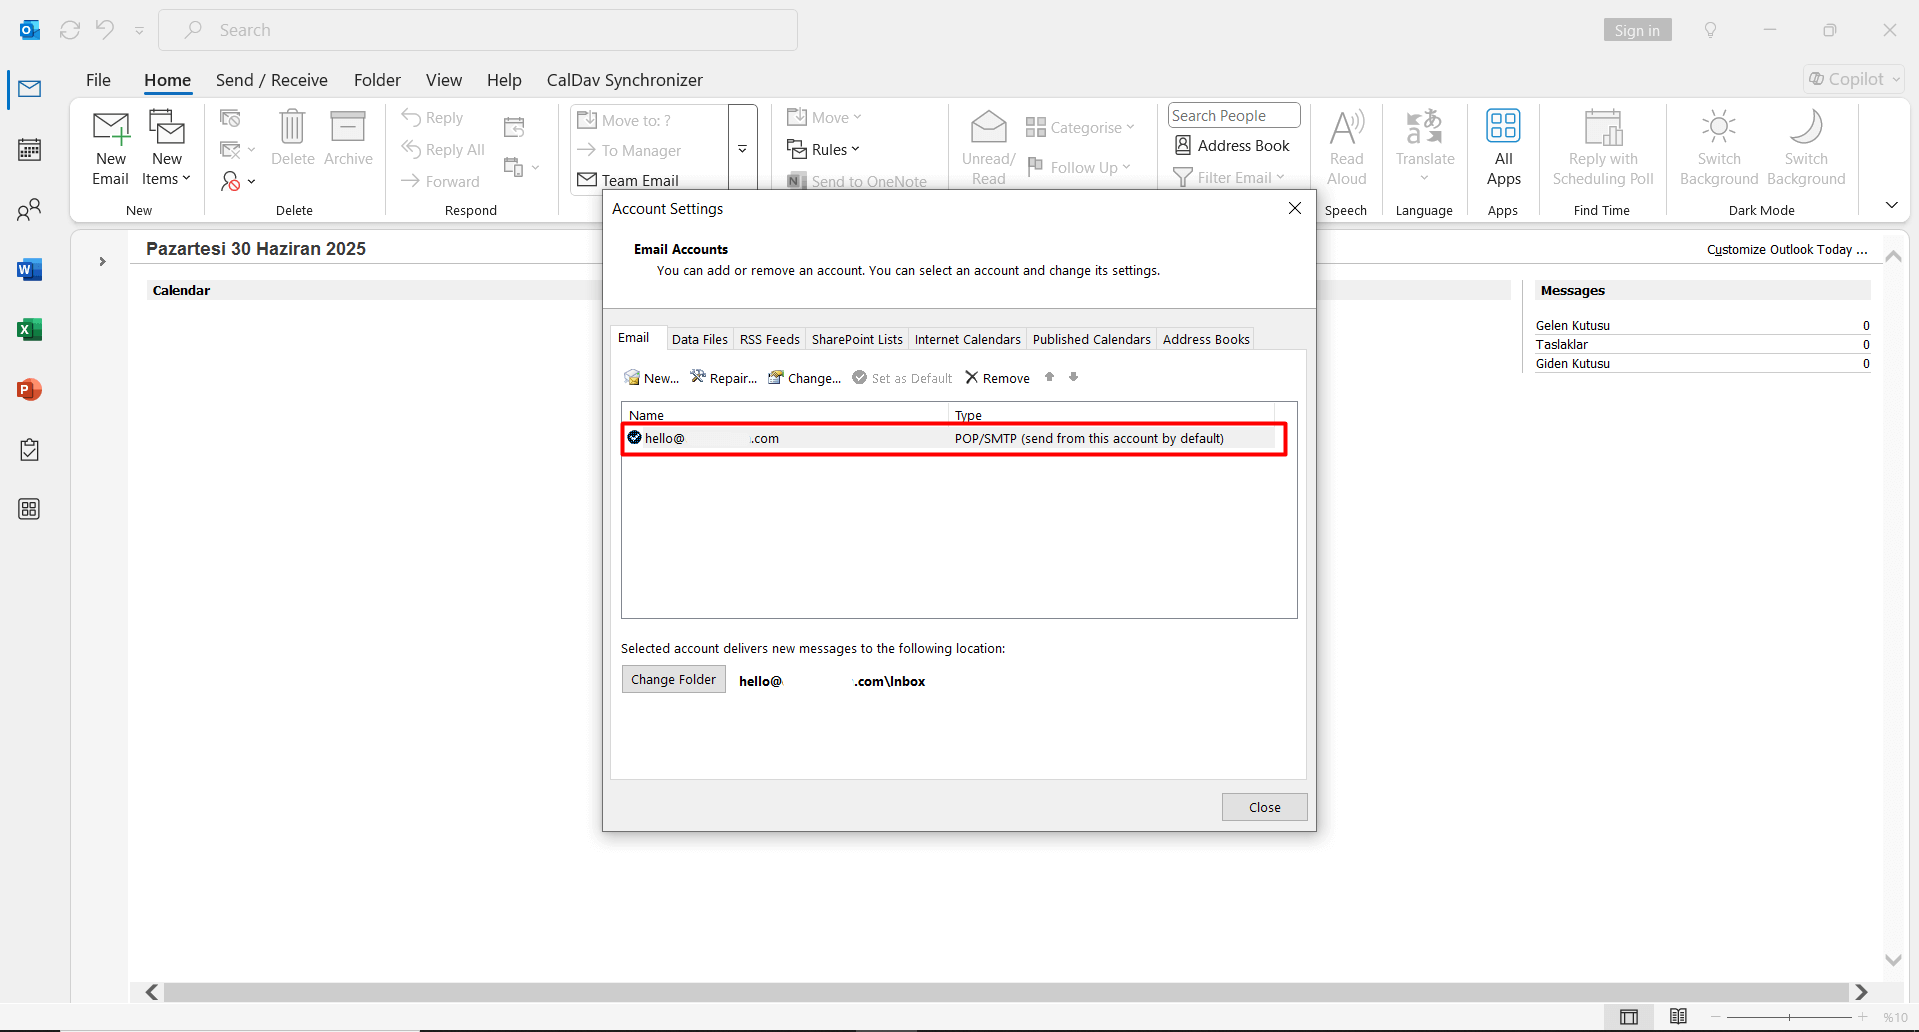
- Select Account and then click the “Account Settings > Account Settings” button.
- Double-click on your email user.
- On the page that opens, you will find the “Email Settings” section. From here, you can choose to leave a copy of your emails on the server and set how many days emails should be kept before deletion. You can also opt not to keep any copies on the server. After making your preferred settings, click the “Next > Done” button to save.


 .CO.UK Domain
 Linux Hosting
 Windows Hosting


