If you have designed a website using the Website Builder service offered by FastPanda and would like to use a contact form on your site, you can follow the steps below to add or configure the form.
- Access the Website Builder admin panel. Click here to read our article if you want to learn more about accessing the admin panel.
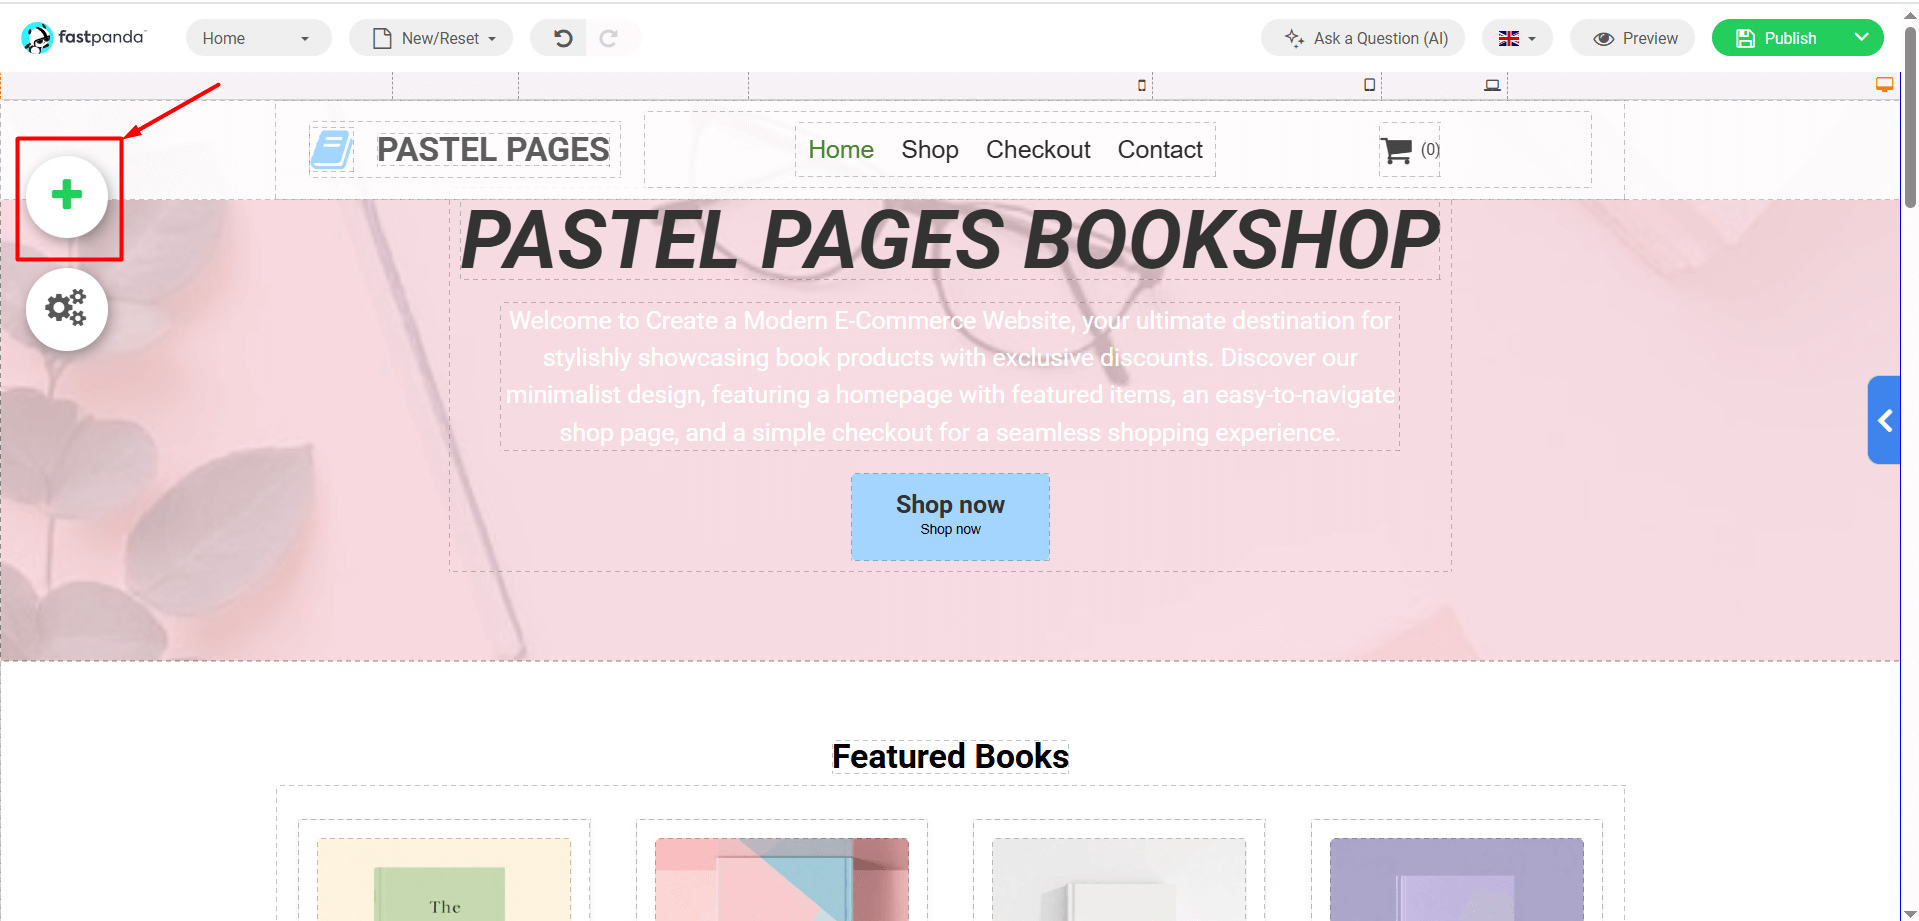
- Check whether the template you are using already includes a contact form. If there is a contact form, you can simply configure its settings. If there is no contact form, click the “plus (+)” icon to add one.
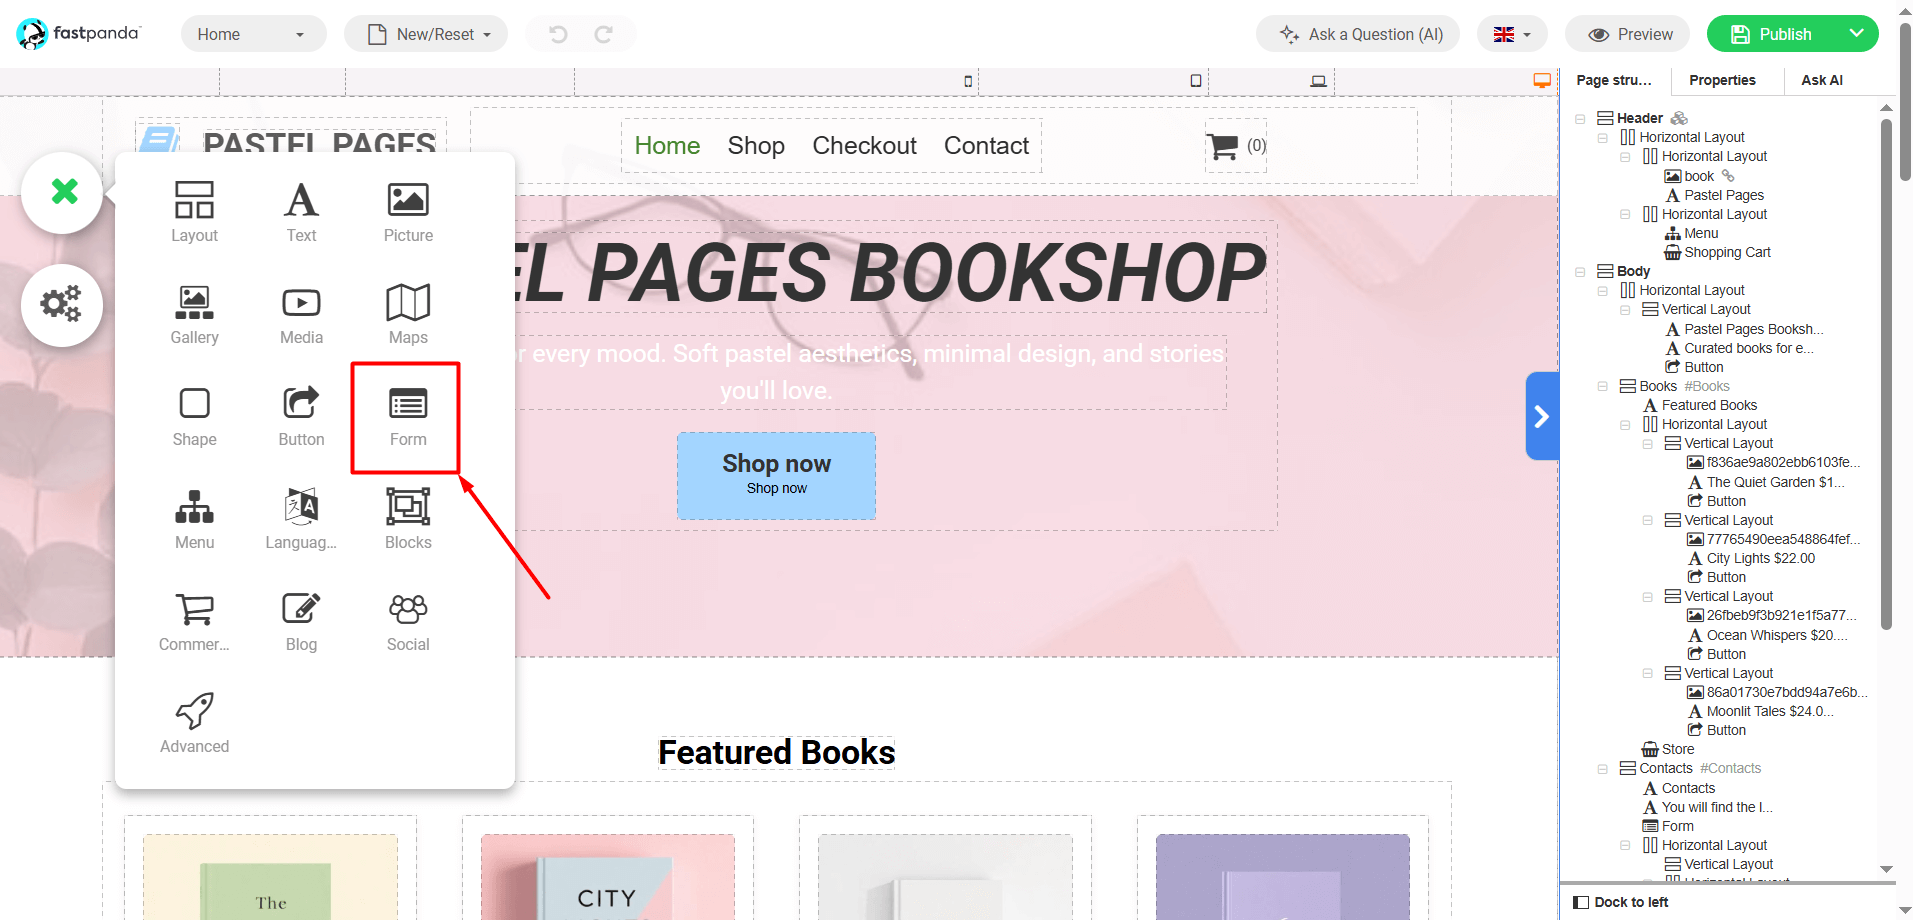
- In the window that opens, you will see the components you can add. Click the “Form” button.
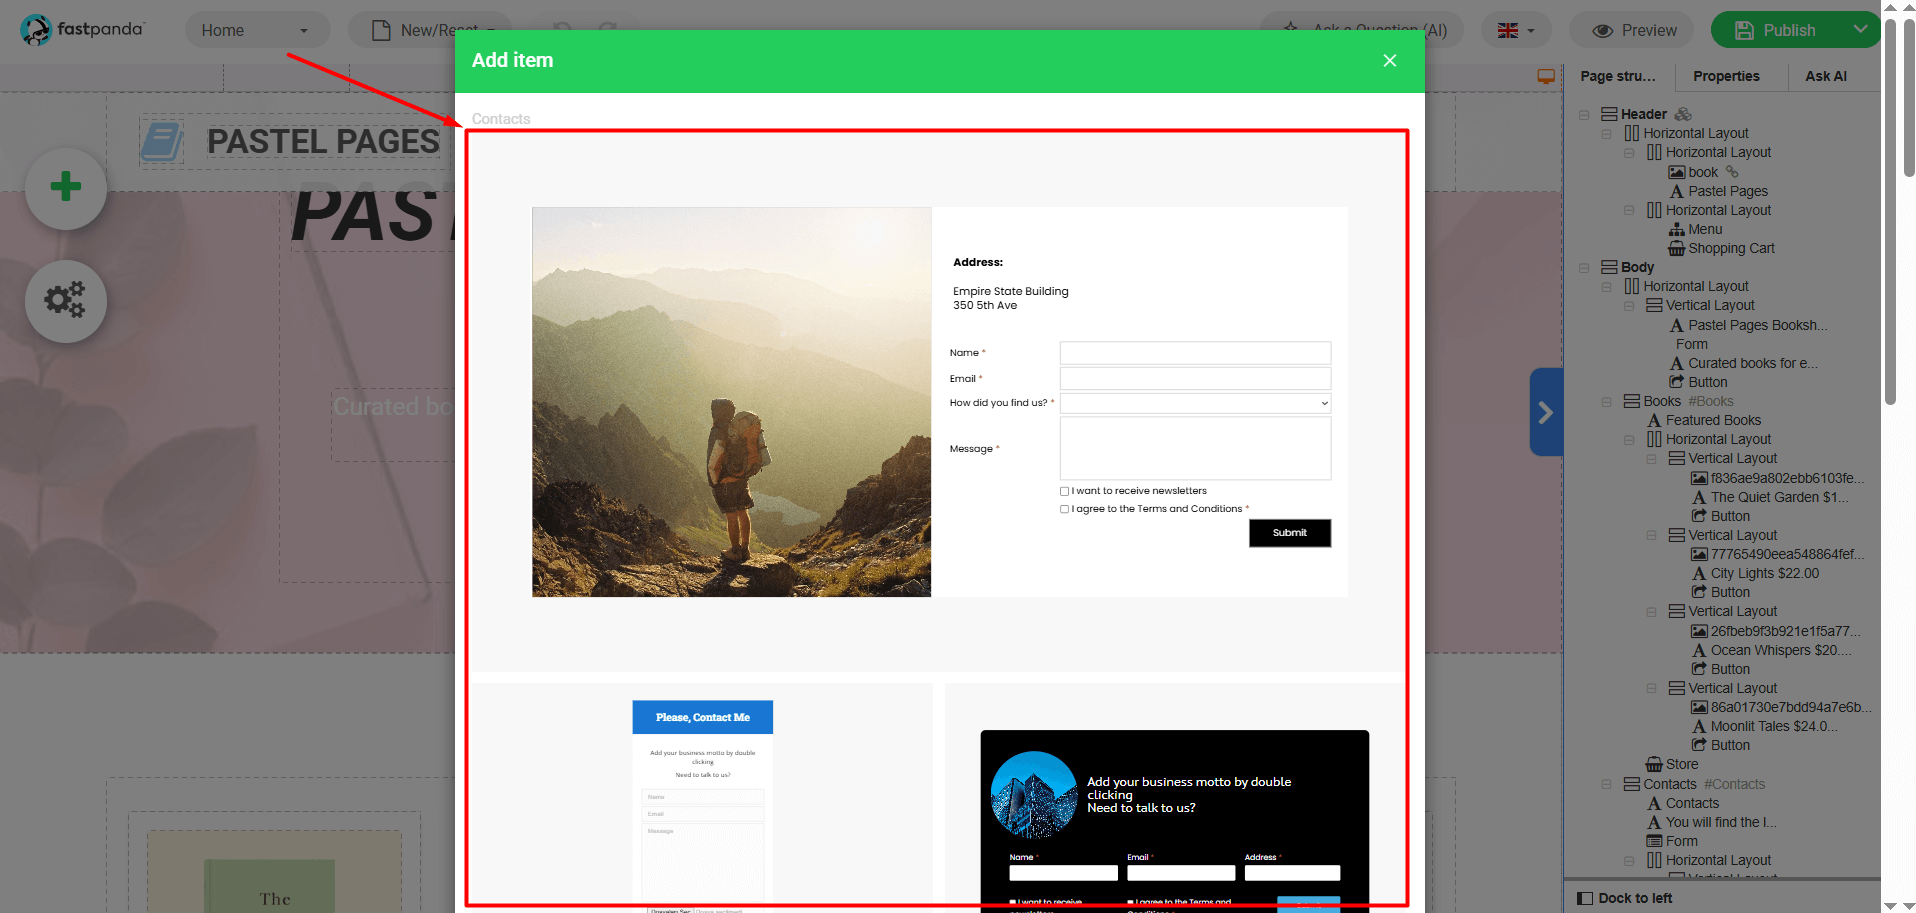
- In this way, you will be able to access the available contact forms. Click on the form you like. Once you click on it, the form will be added to your website.
- Click on the form that has been added to your site. The form editing panel will open in the toolbar on the right.
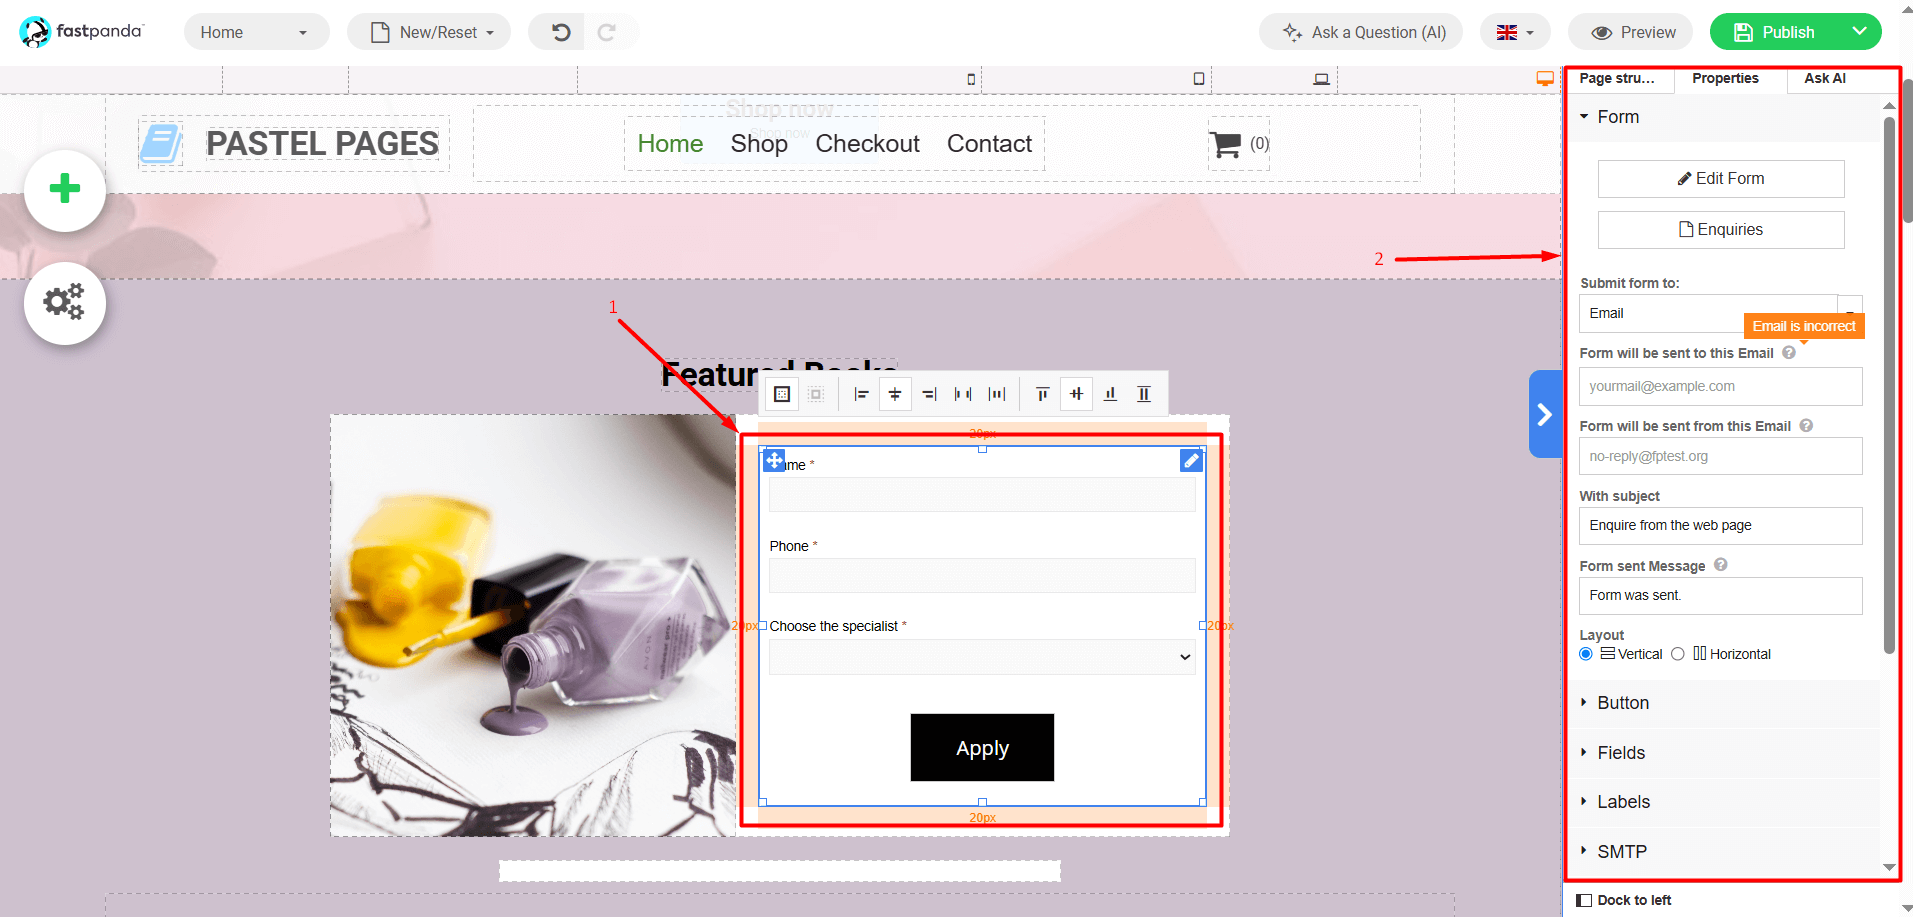
- The primary settings and adjustments you can make for the form are as follows.
- By clicking the “Edit Form” button, you can update the text in the form, add new fields, mark required fields, or change their order. To complete the edits, click the “Apply” button.
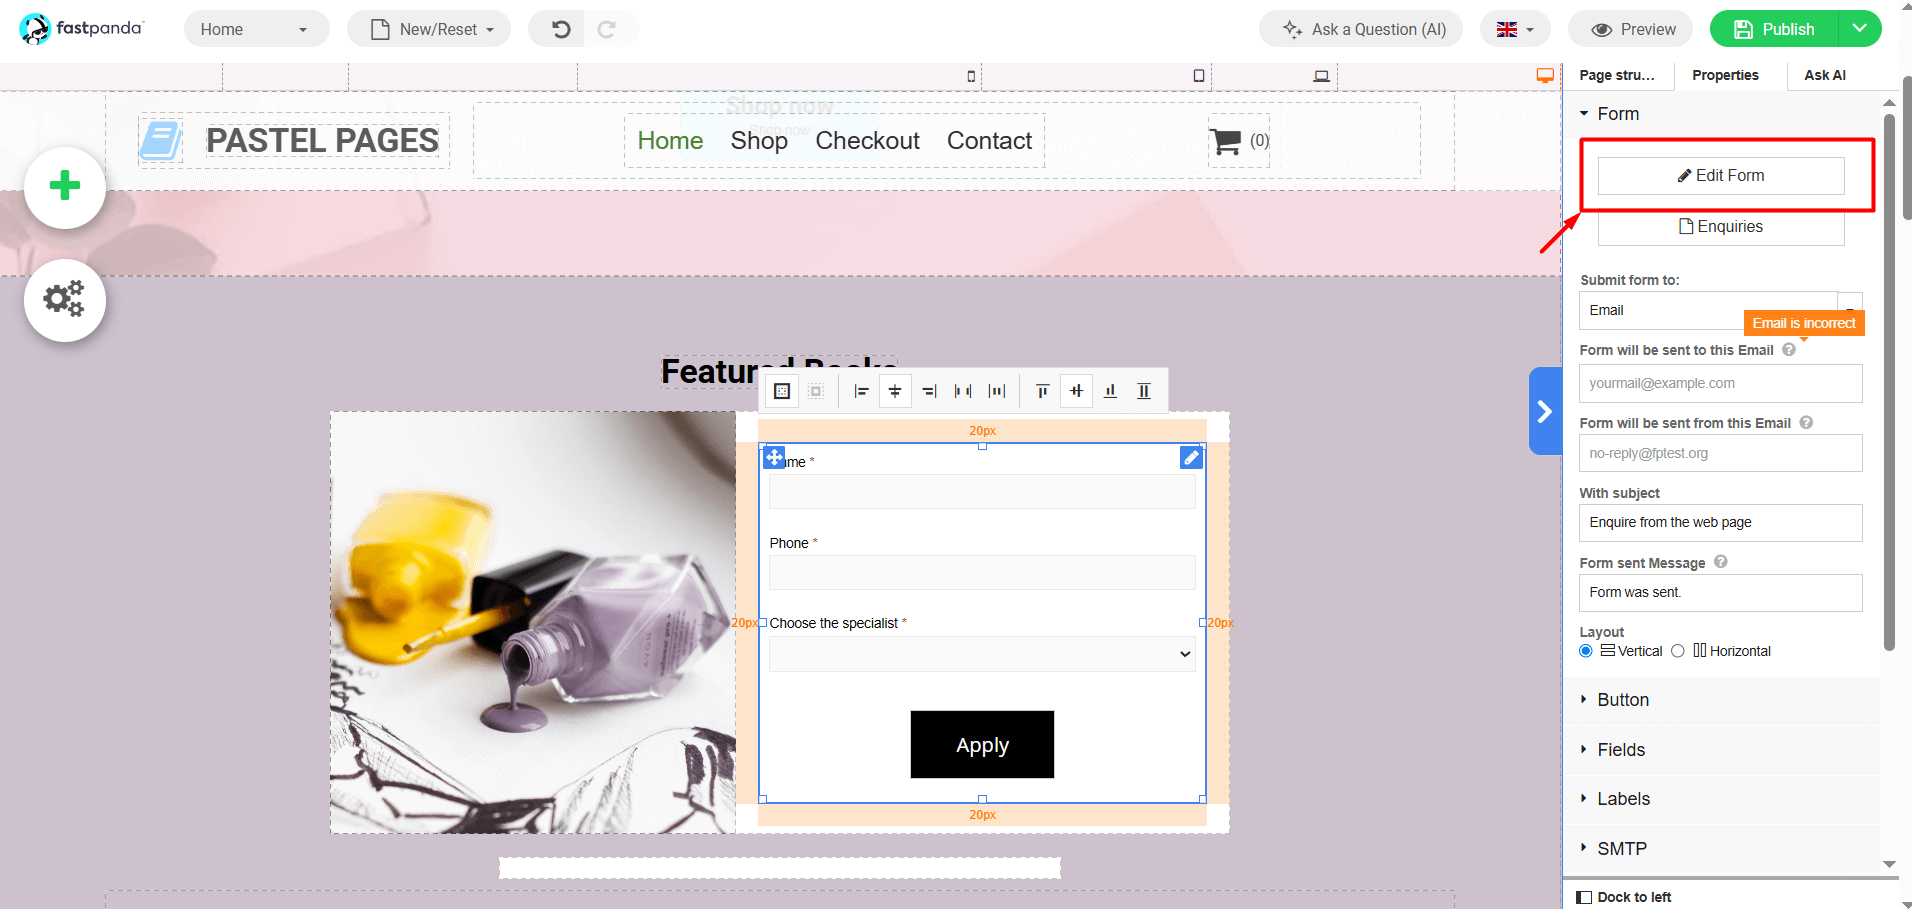
- Enter your contact email address, including the domain and extension, in the “Form will be sent to this Email” field (example: [email protected])
- Enter your contact email address, including the domain and extension, in the “Form will be sent from this Email” field as well (example: [email protected])
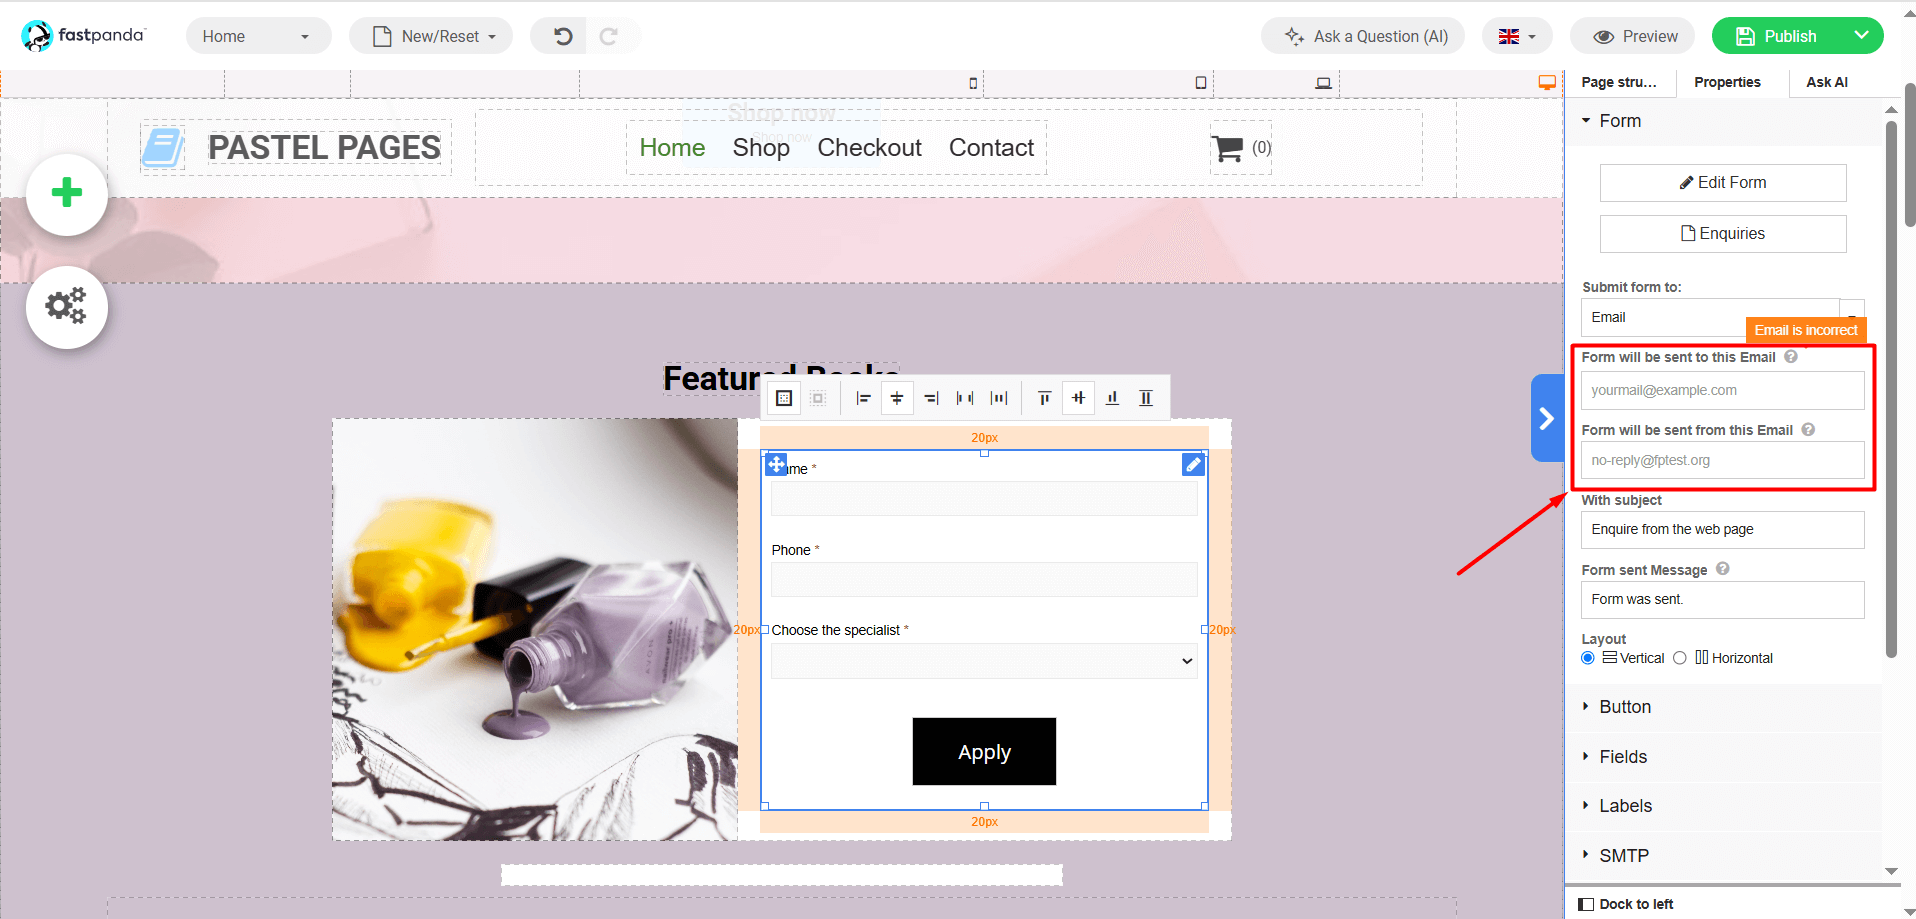
- In the “Button” section, you can change the text of the Submit (Apply) button and make adjustments related to the button.
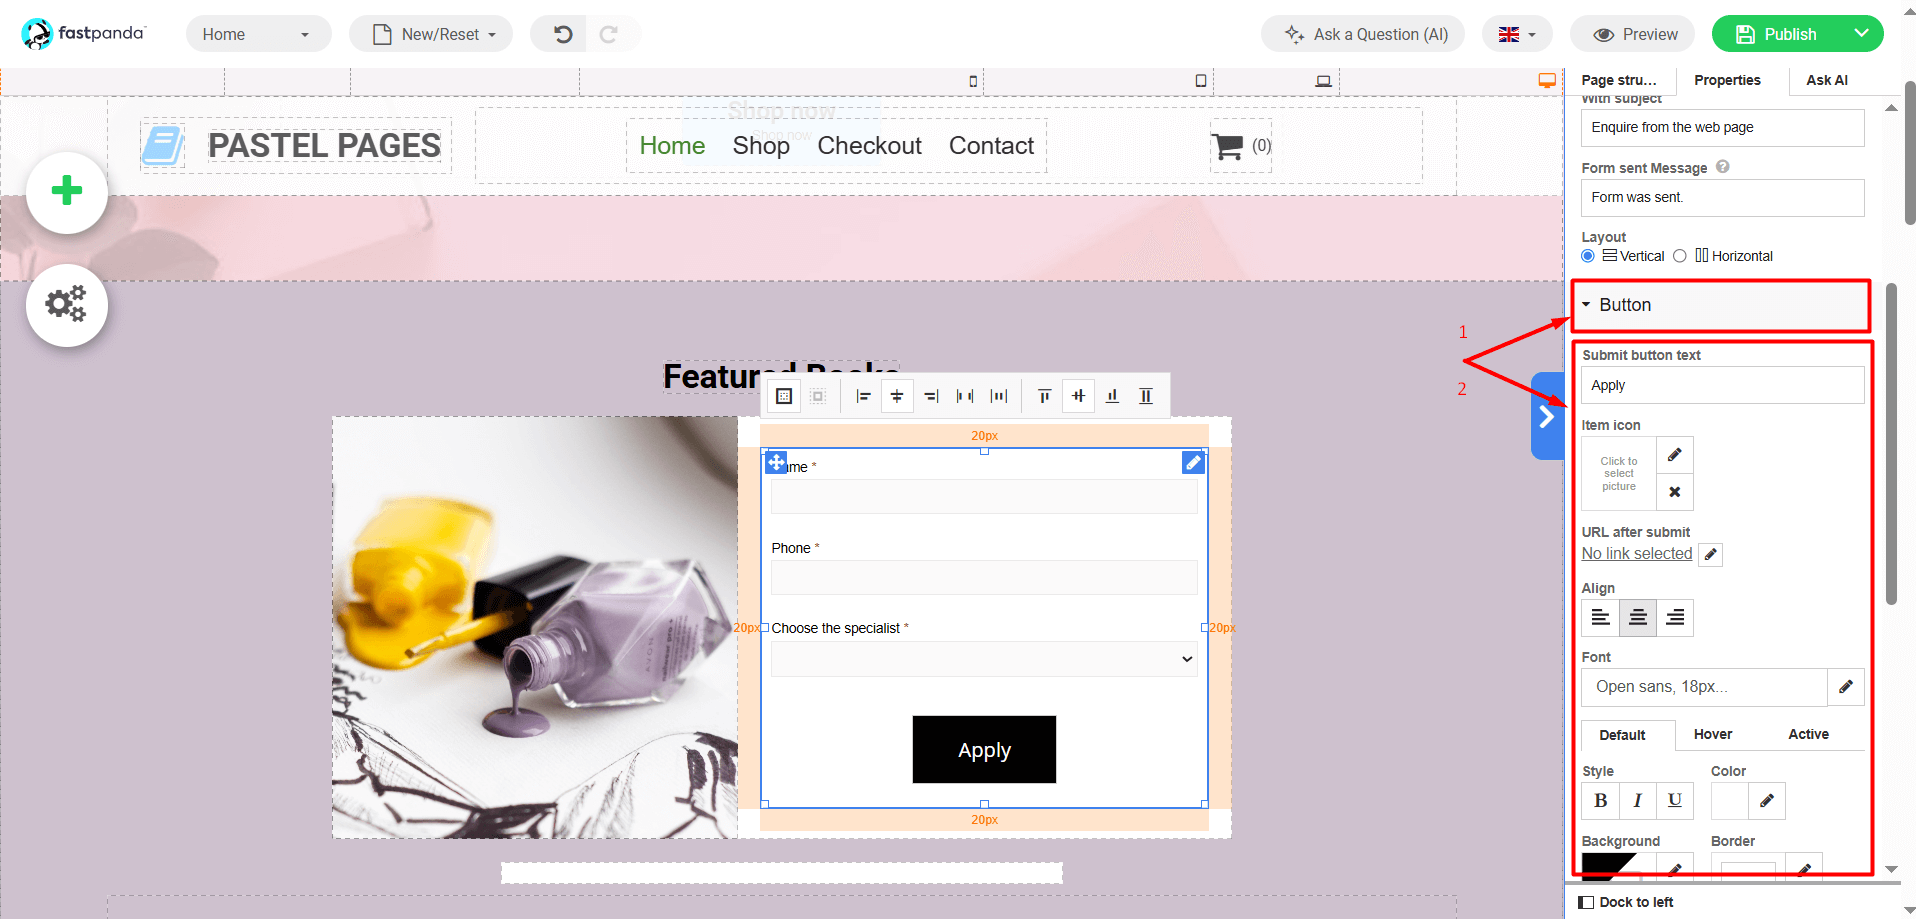
- Go to the “SMTP” section and check the “SMTP Enable” box.
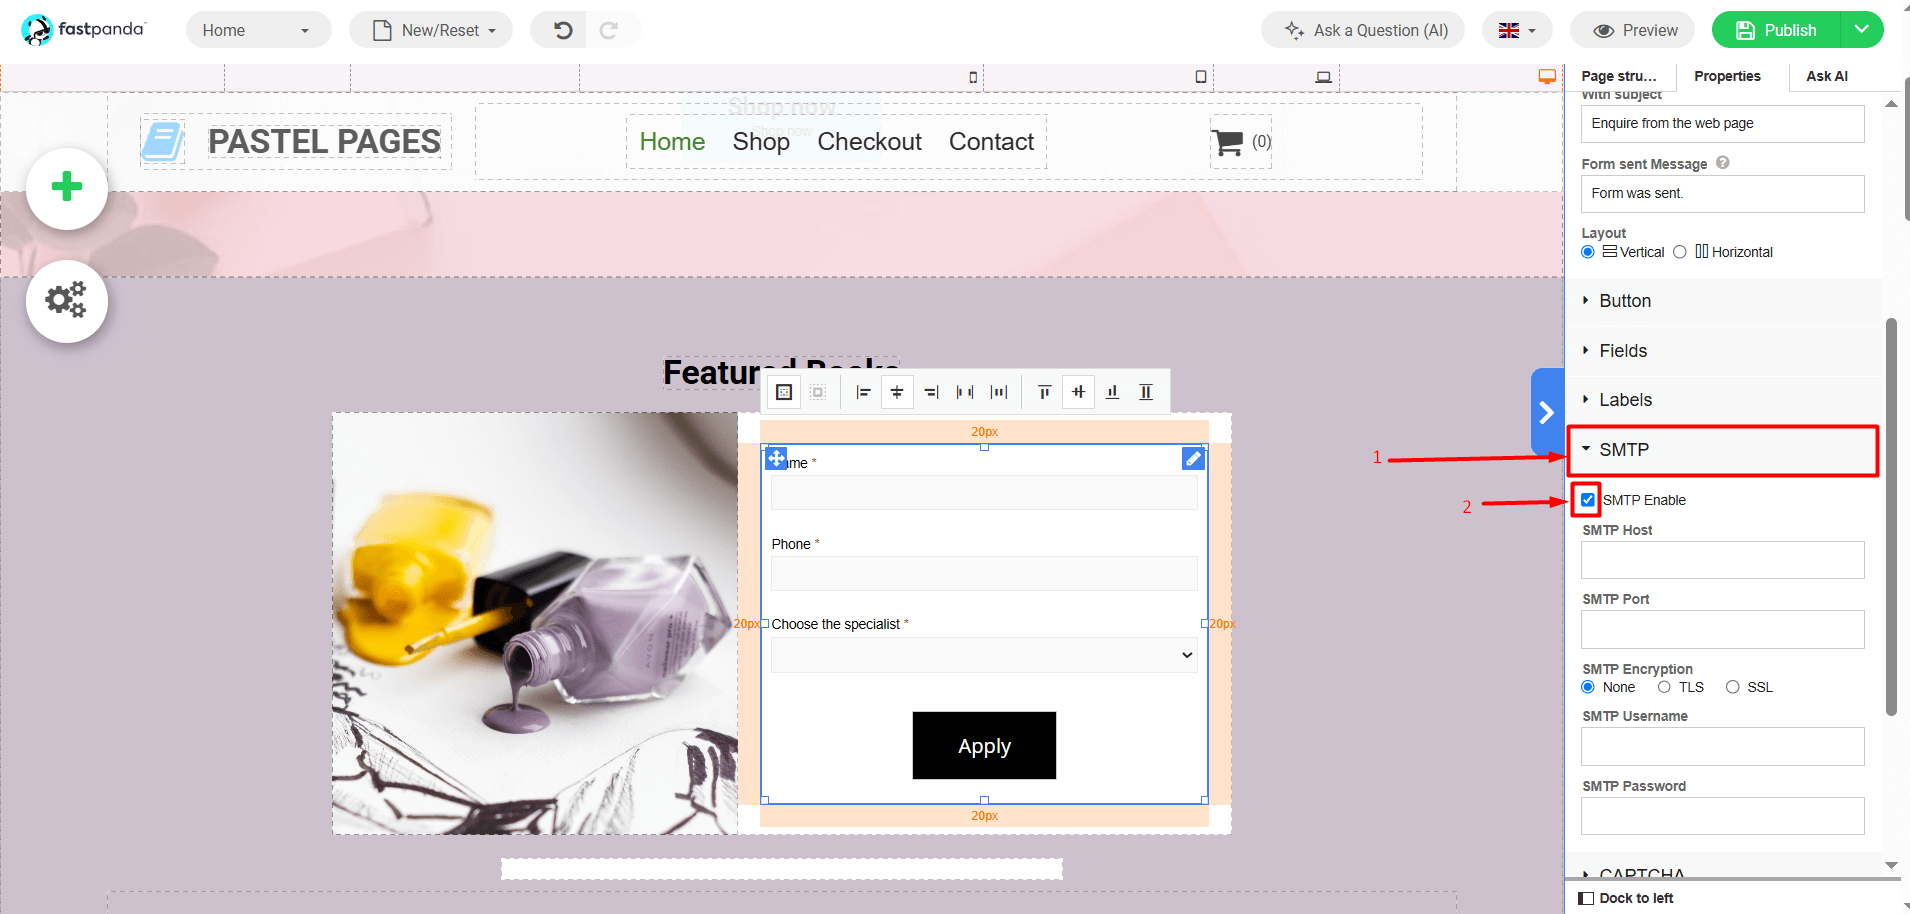
- Before entering the SMTP settings, check where your email is hosted.
- If your email service is hosted on a standard web hosting package at FastPanda or within the Website Builder, your settings should be as follows
- Enter “mail.domain.extension” (Write according to your own domain. For example: mail.xxx.com) in the “SMTP HOST” field.
- Enter “465” in the “SMTP Port” field.
- Select “SSL” in the “SMTP Encryption” field.
- Enter your contact email address, including the domain and extension (example: [email protected]), in the “SMTP Username” field.
- Enter the password for your contact email address in the “SMTP Password” field.
- If your email service is hosted on a Business Email Hosting package at FastPanda, your settings should be as follows.
- Enter “pico.fastpanda.com” (This information may vary. Please check the Incoming Server and Outgoing Server details from your client panel by navigating to: Email Hosting > Manage > Email Configuration.) in the “SMTP HOST” field.
- Enter “465” in the “SMTP Port” field.
- Select “SSL” in the “SMTP Encryption” field.
- Enter your contact email address, including the domain and extension (example: [email protected]), in the “SMTP Username” field.
- Enter the password for your contact email address in the “SMTP Password” field.
- If your email service is hosted outside of FastPanda, you can obtain the email settings from the relevant provider and enter them accordingly.
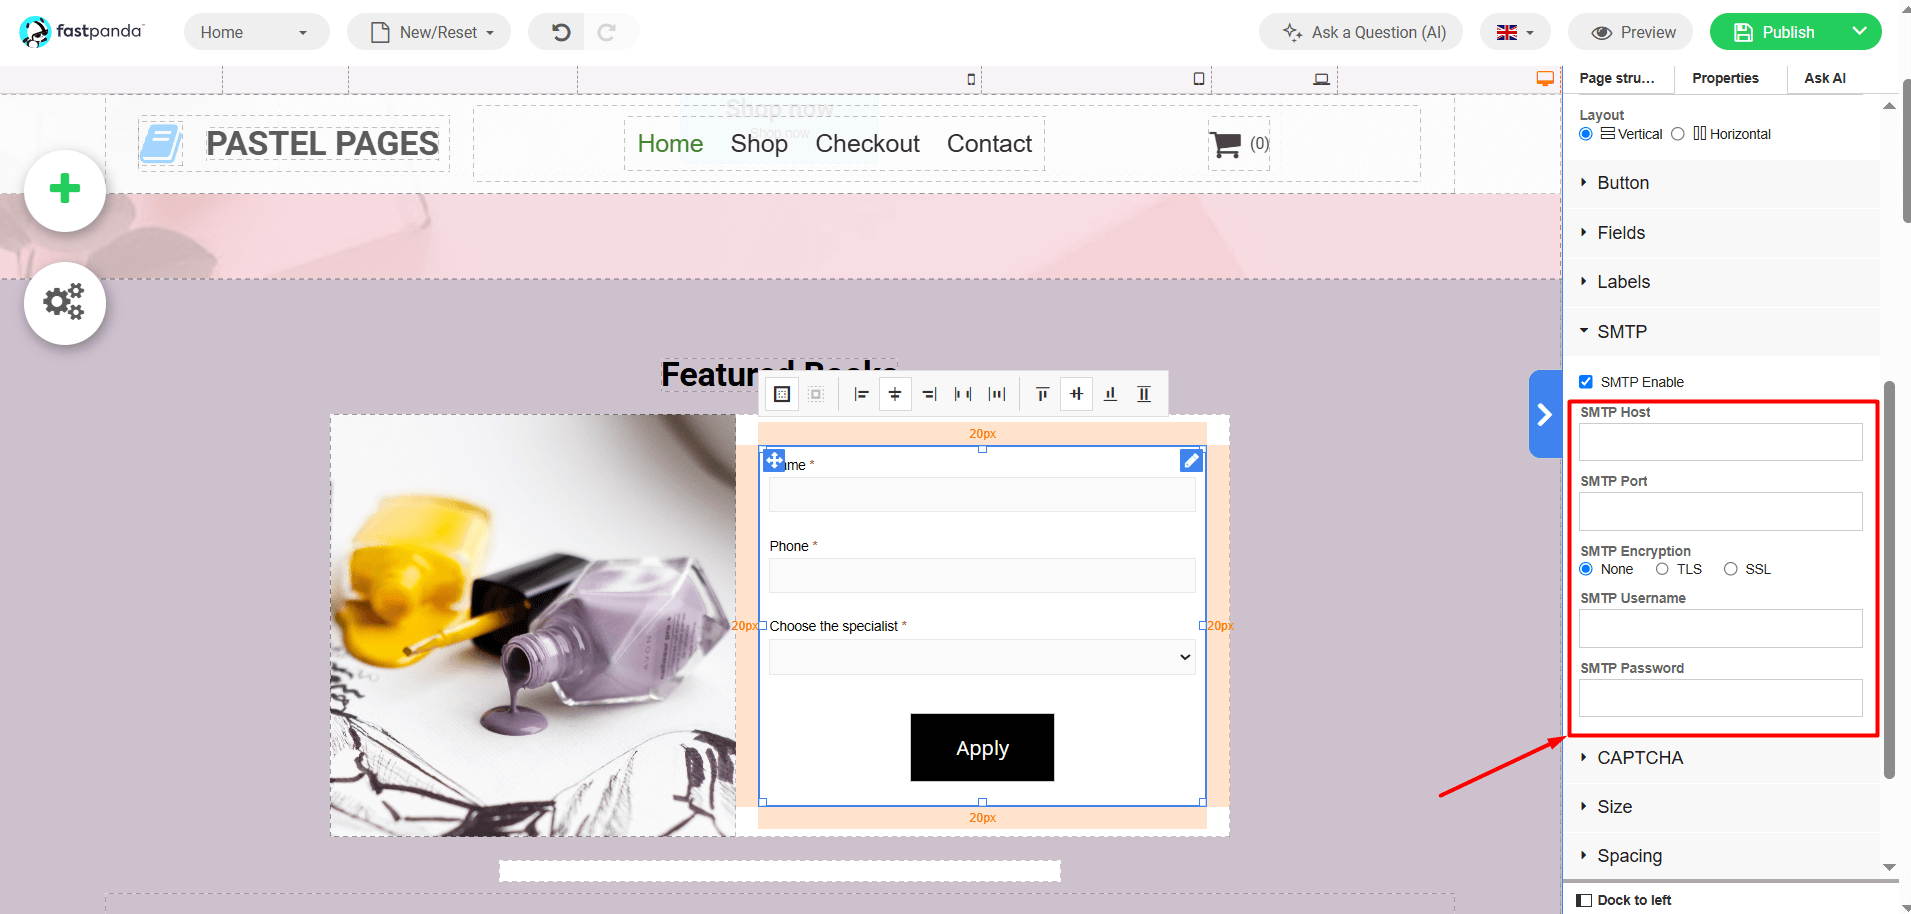
- If your email service is hosted on a standard web hosting package at FastPanda or within the Website Builder, your settings should be as follows
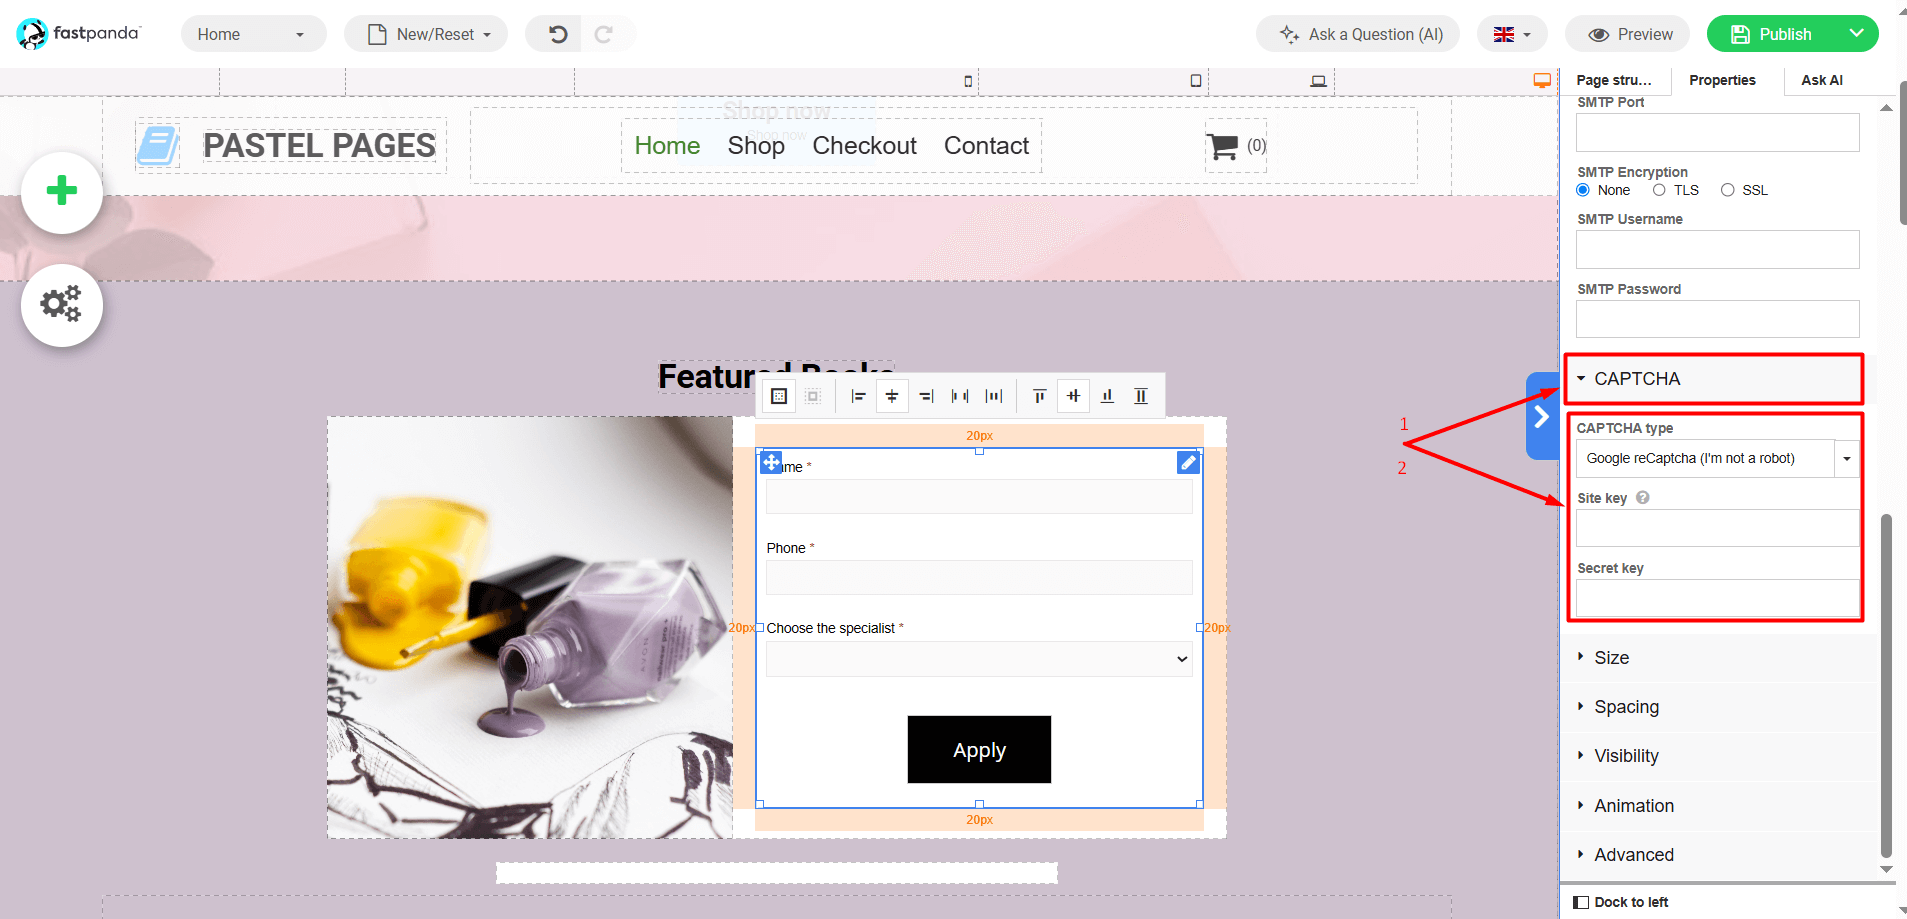
- If you want to add a CAPTCHA to the contact form, go to the “CAPTCHA” section. You will be asked for the “Site Key” and “Secret Key”. If you have previously registered for reCAPTCHA, you can enter the information. However, if you have not registered before, you can register by visiting the Google reCAPTCHA website. Click here to register.
- By clicking the “Edit Form” button, you can update the text in the form, add new fields, mark required fields, or change their order. To complete the edits, click the “Apply” button.
- If you have made edits to the form, you can click and drag the added form to reposition it anywhere on the page according to your preference. To make the form appear on your website, simply click the “Publish” button located in the top right corner of the page.


 .CO.UK Domain
 Linux Hosting
 Windows Hosting