What are the default folders in Business Email?
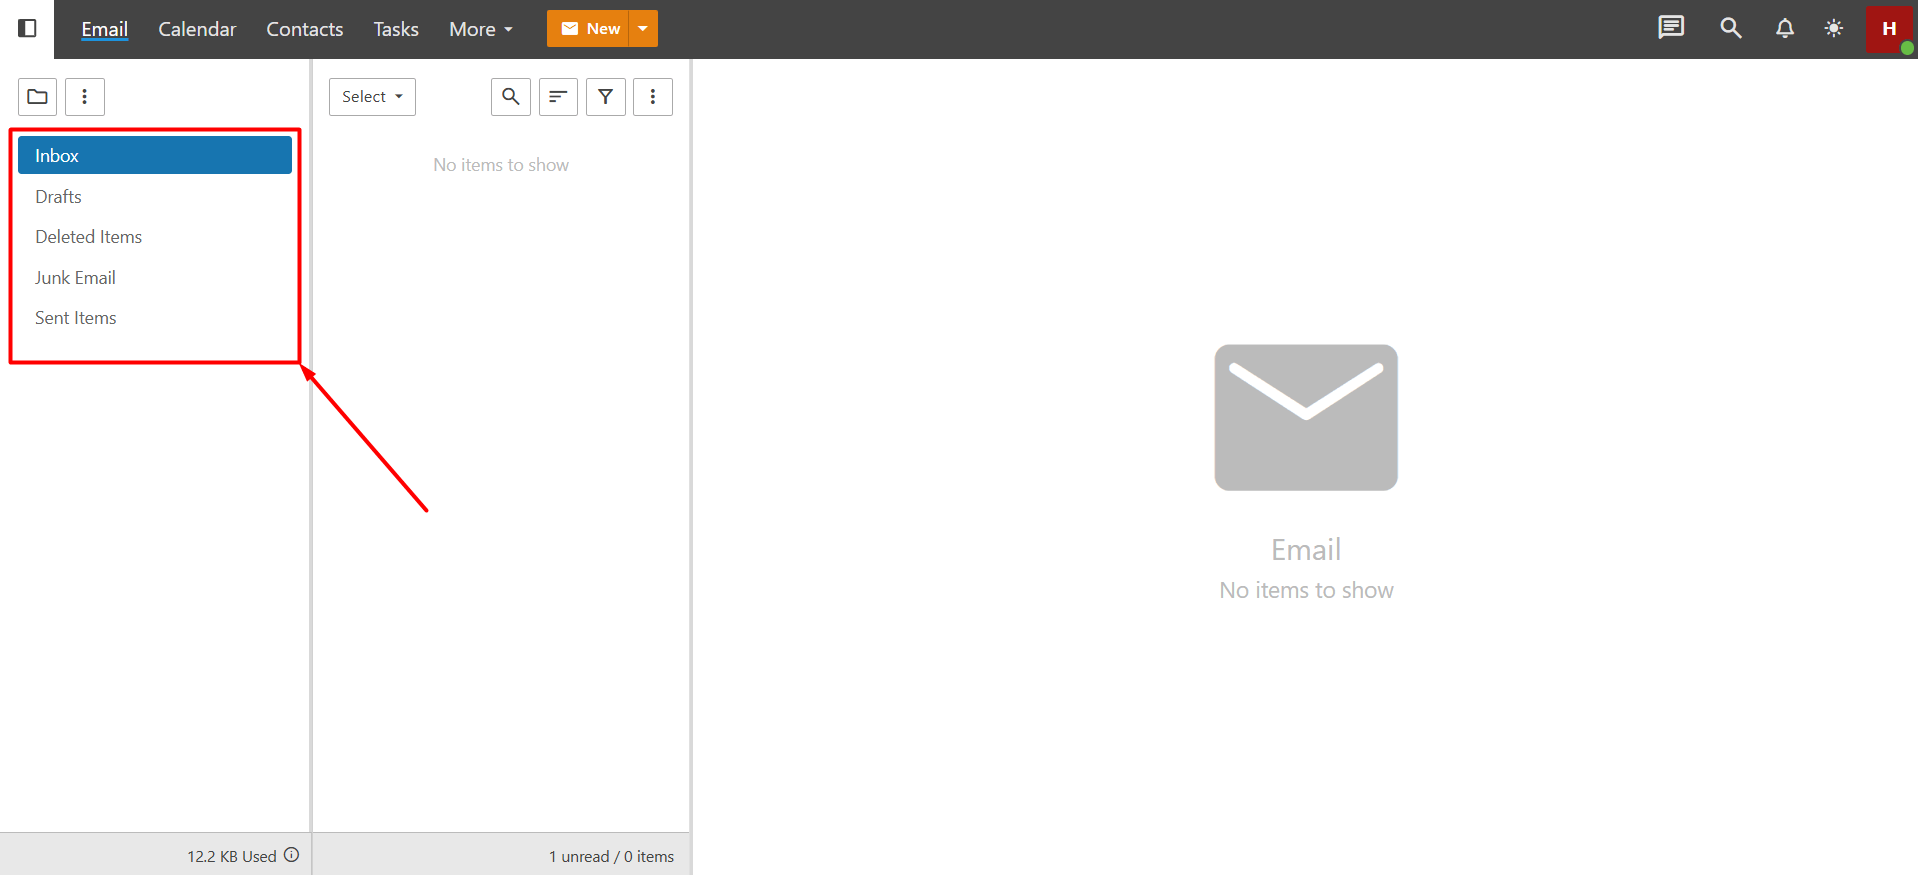
If you have purchased a Business Email service from FastPanda, you can see several default folders when you access your webmail. You can review the information below to learn more about these folders and their functions.
- Inbox: Unless you have set up a specific filter, all incoming emails are collected here. New emails received in your account are shown as unread. You can read, delete, or move incoming emails to another folder.
- Drafts: Emails that you’re working on but haven’t sent yet are stored here. You can save them until you’re ready to send and complete them later.
- Deleted Items: Unless you have set up a specific filter, when you delete messages, they are moved to the Deleted Items folder by default.
- Junk Email: The webmail system automatically moves suspicious or unwanted emails to this folder. This helps protect you from harmful or promotional messages. However, sometimes important emails may also end up here. Therefore, it’s a good idea to check this folder from time to time. If you find an email that isn’t actually spam, you can click the three-dot icon and mark it as ‘trust sender.’ You can also drag and drop the email into another folder.
- Sent Items: The emails you send are stored in this folder. You can use it to review or forward the messages you’ve previously sent.
How to add a new folder in Business Email?
If you want to create a new folder other than the ones listed above, you can follow the steps below.
- Click on the folder icon located in the top-left corner.
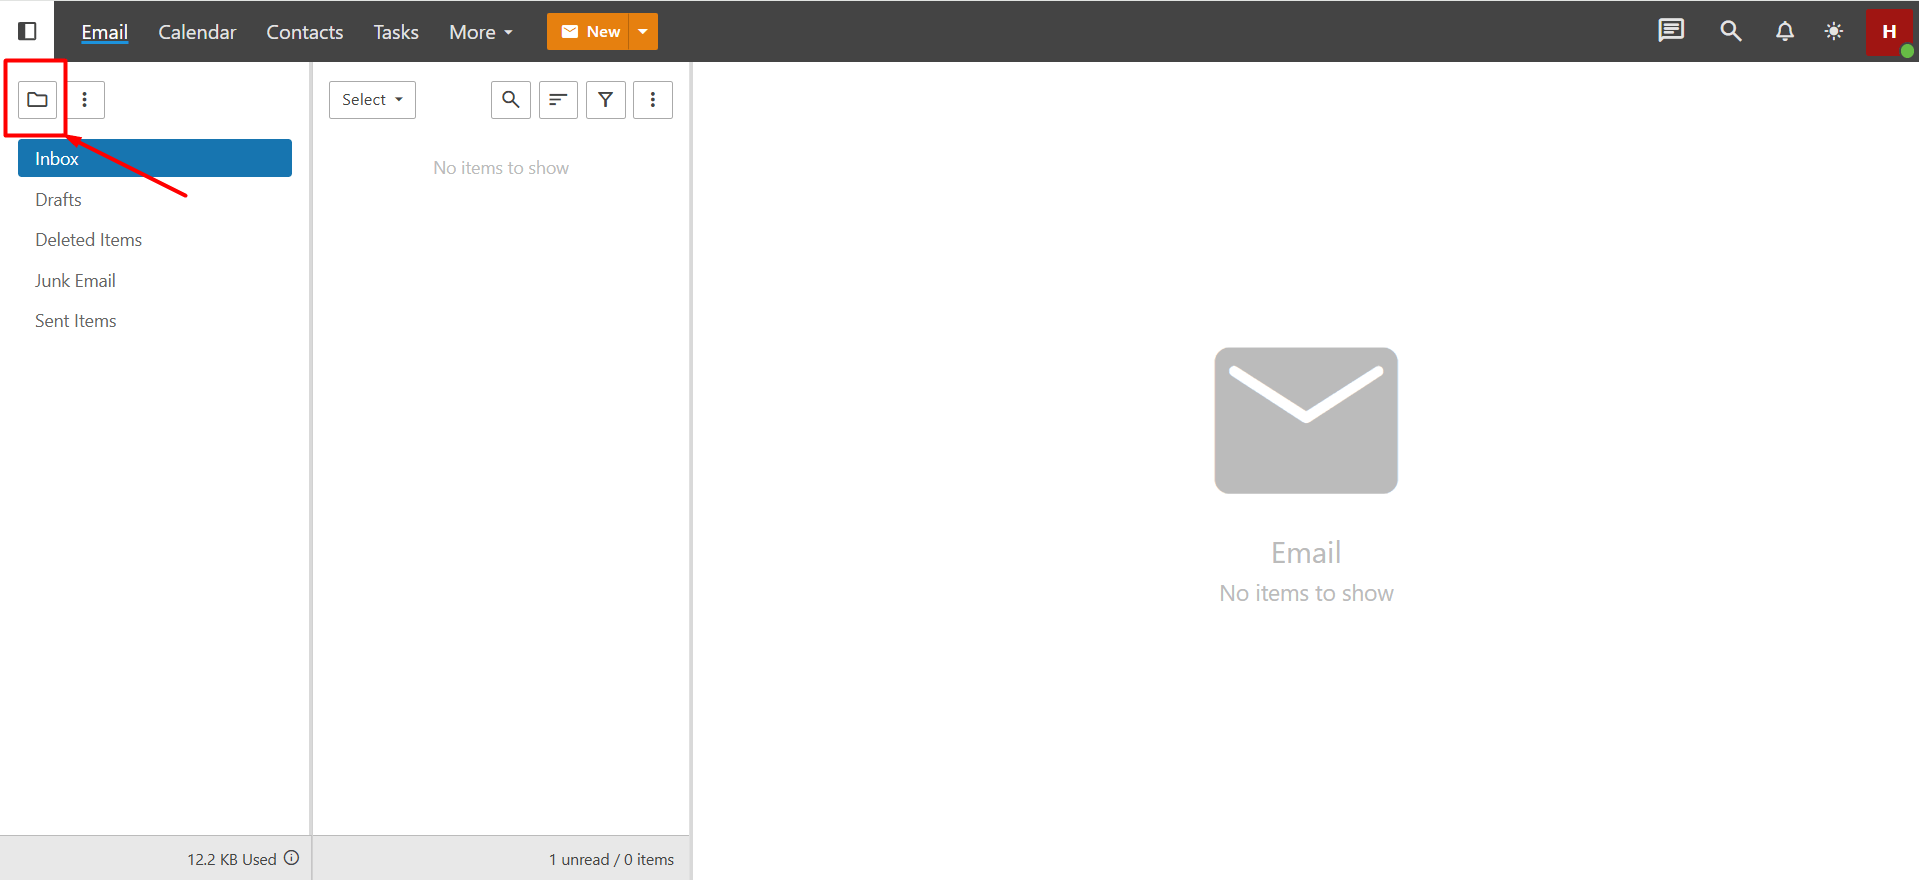
- From the list that appears, click the “New Folder” button.
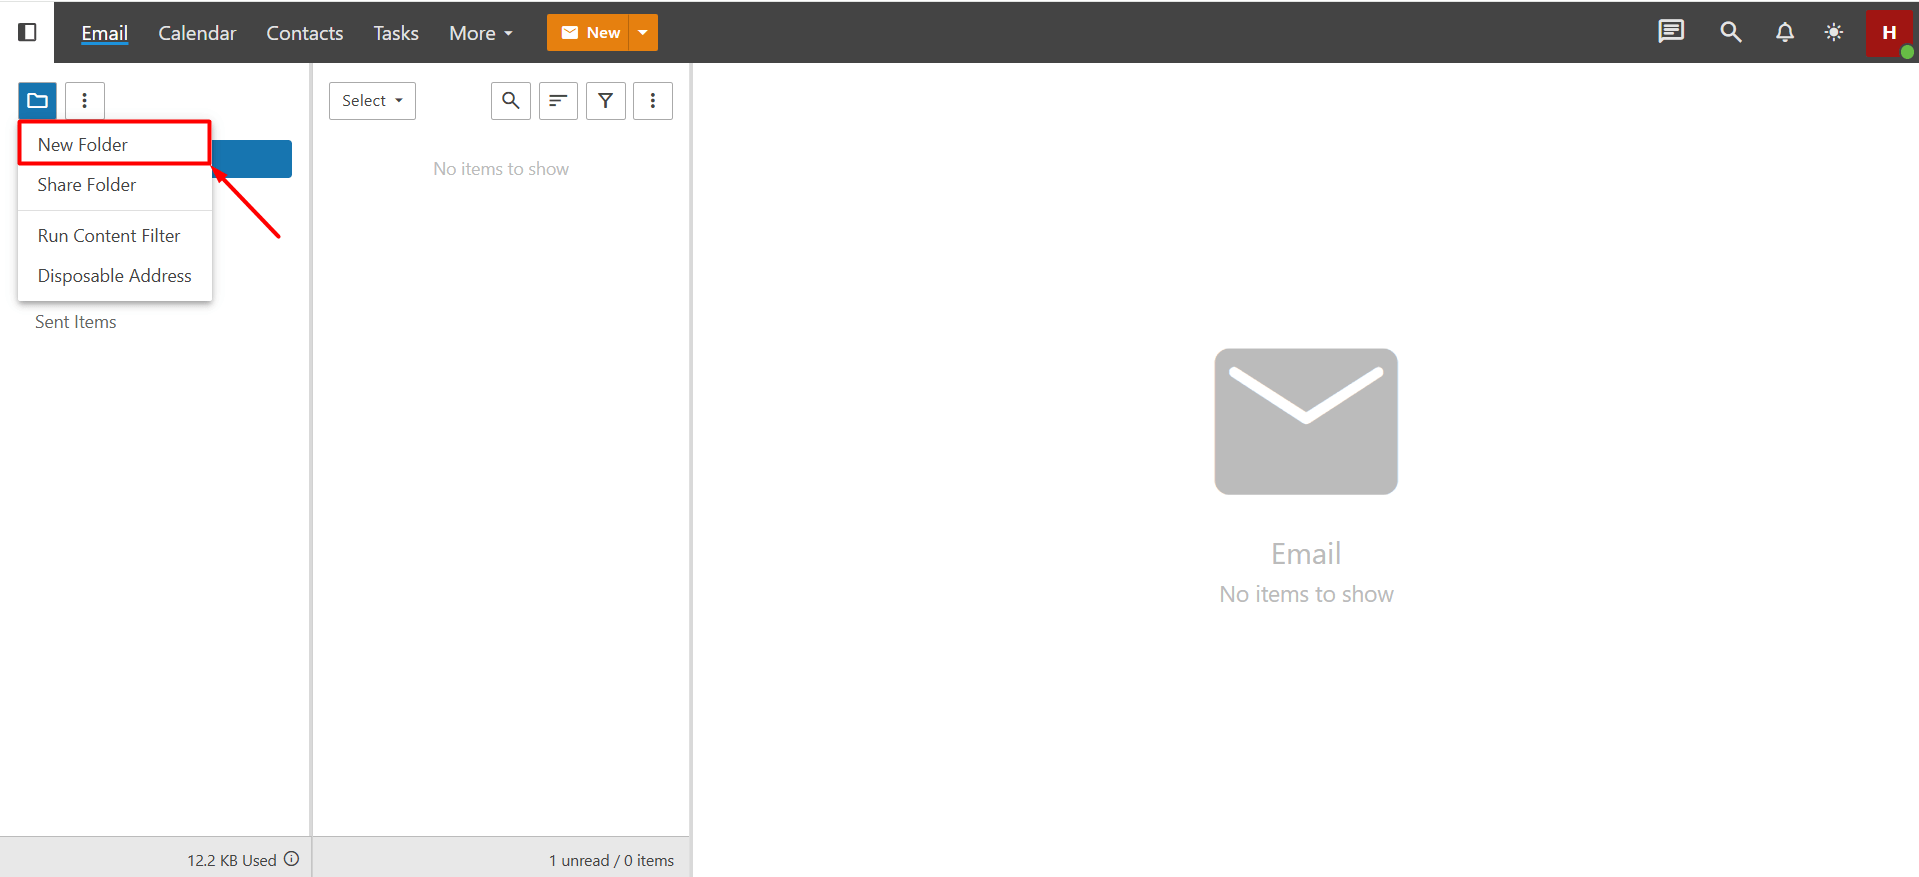
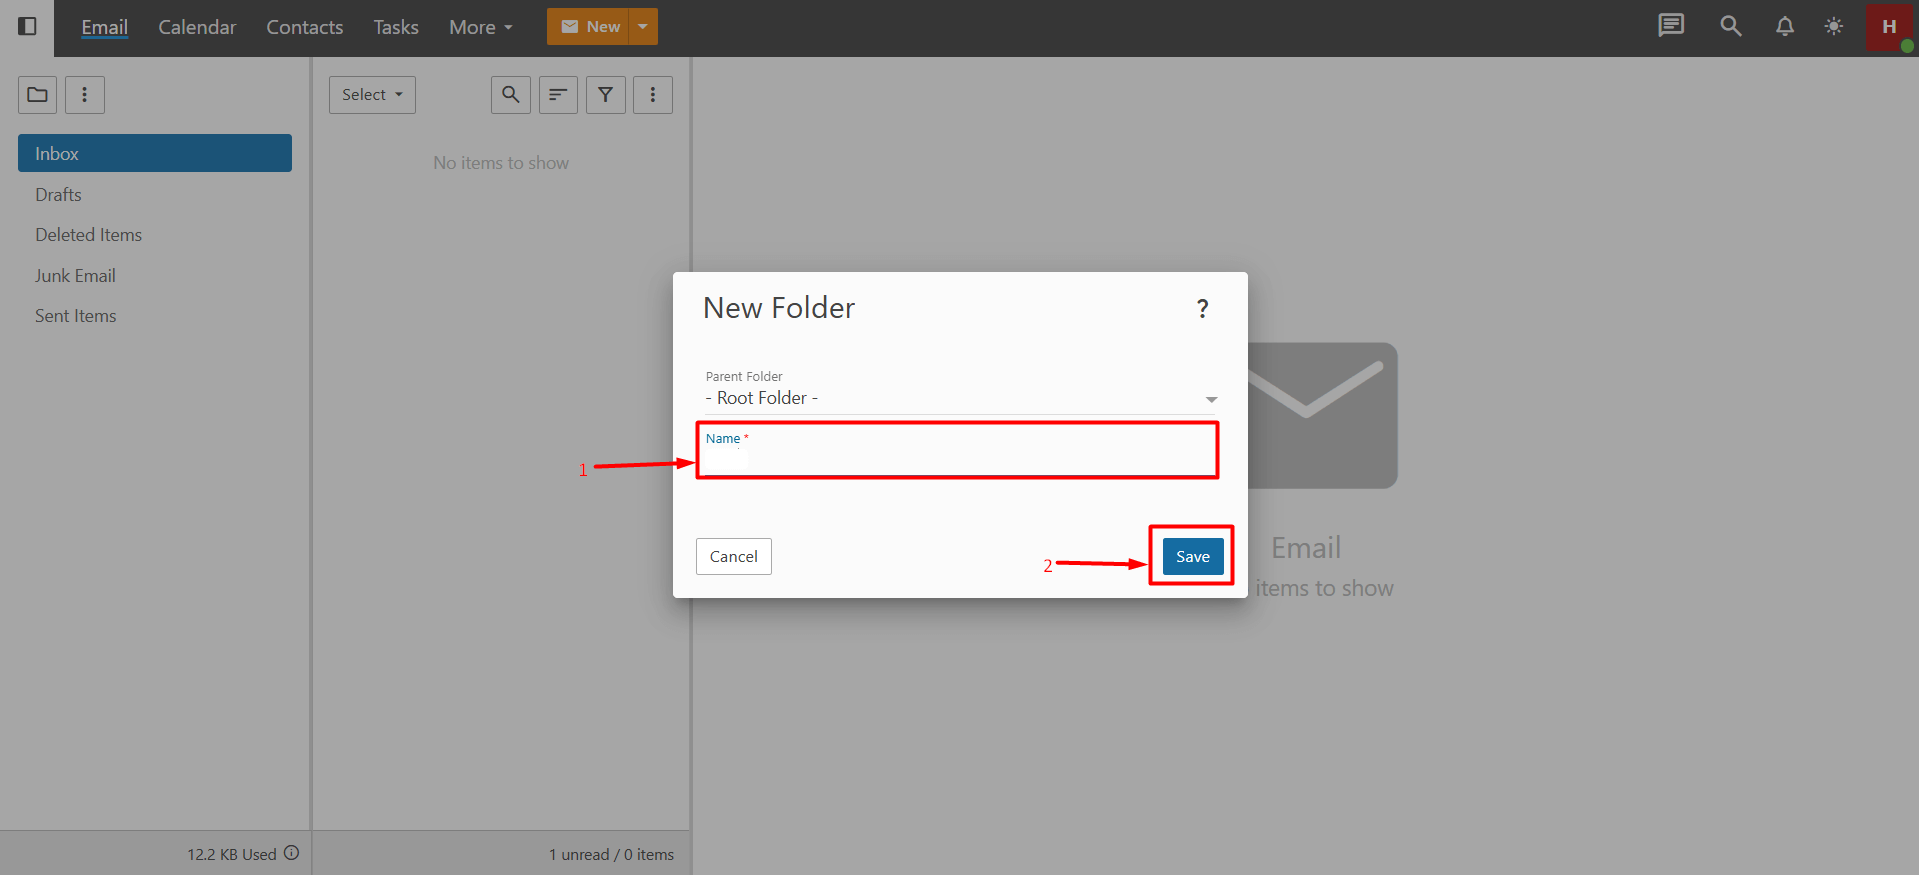
- If the folder you are creating will be a main folder, you can leave “Root Folder” selected in the “Parent Folder” list. However, if you are creating a subfolder under a main folder, you need to select a main folder from the dropdown list in the “Parent Folder” section.
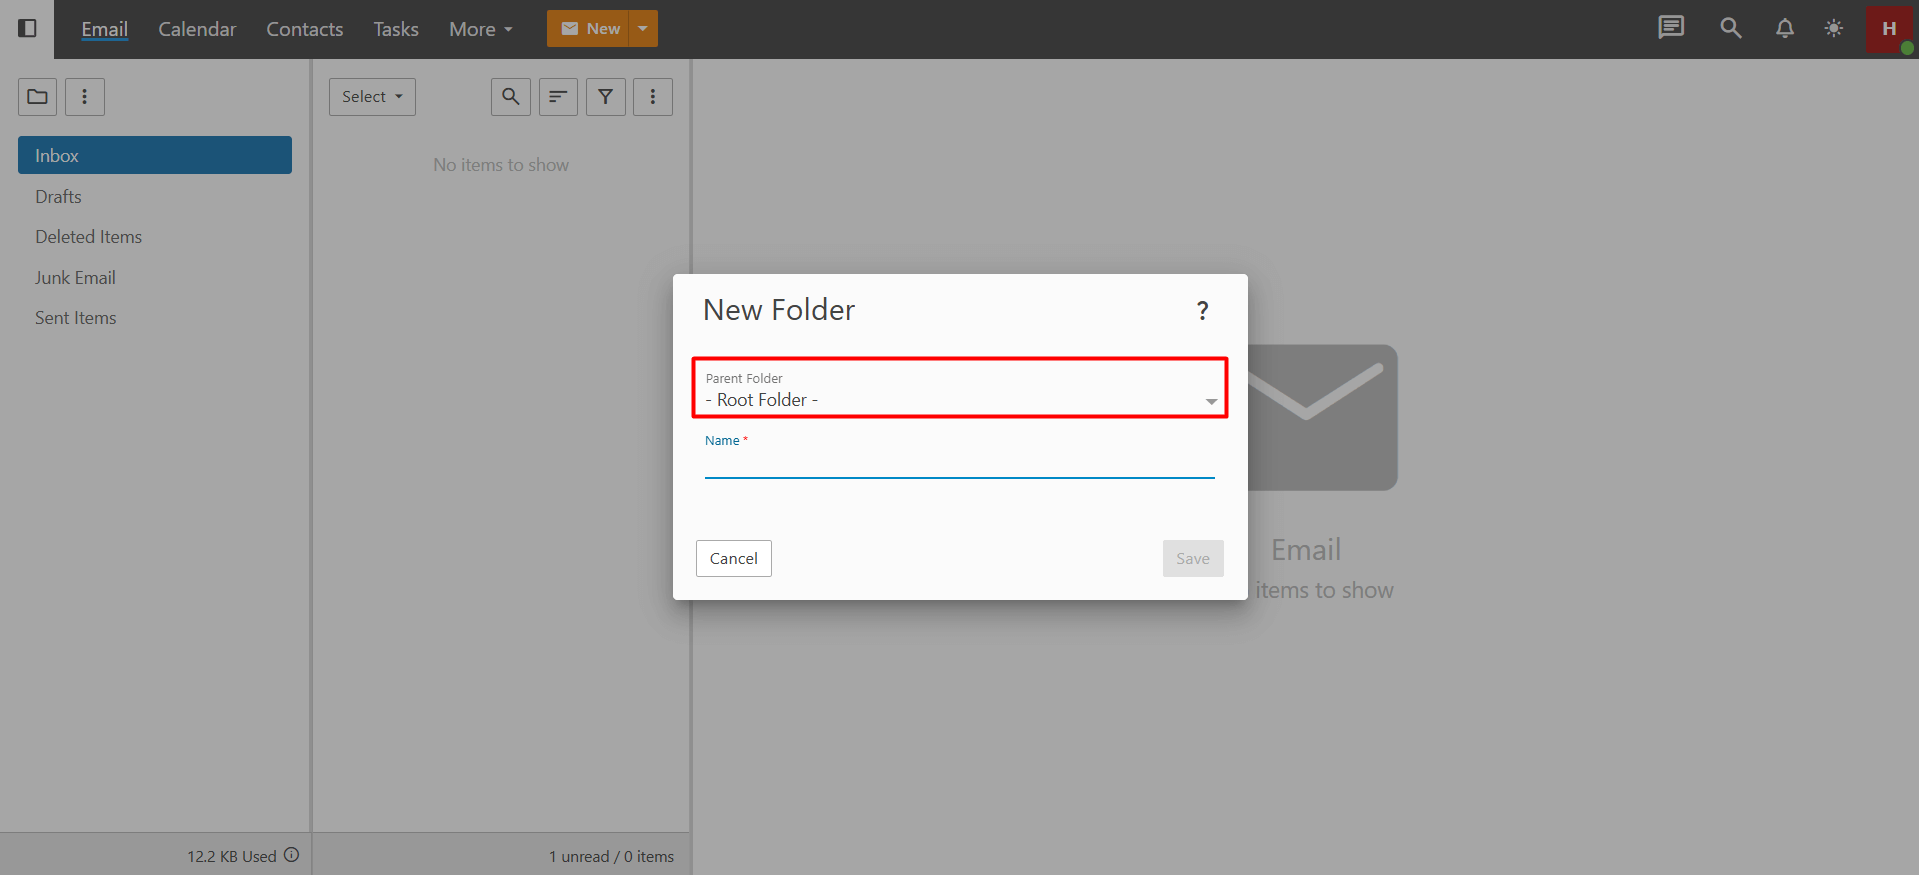
- Enter the name of your new folder in the “Name” field and click the “Save” button. Important Information:
- When creating new folders, you can create subfolders under your Inbox, but many third-party email clients and most mobile devices may not be able to synchronize subfolders that are part of the Inbox. This is because the IMAP standard does not implement folder structures exactly the same way across all clients. Having subfolders inside the “Inbox” can especially cause issues. It is generally safer to create subfolders outside the Inbox (i.e., in the root directory).
- To ensure that your folders synchronize properly, it is recommended to use IMAP or Exchange setups rather than POP.
- If you want to rename a folder you created, right-click on the folder name and click the “Edit Folder” button. Enter the new folder name in the window that appears and click “Save” to confirm. Note that you cannot rename default folders; renaming is only possible for folders created by the user.
- If you want to delete a folder you created, right-click on the folder name and click the “Delete Folder” button. Please note that deleting a folder will permanently remove all emails inside it. If you have important emails, you can either back them up before deleting the folder or move the emails to another folder. Deleting is not possible for default folders; it can only be done for folders created by the user.
- Once you have completed the steps above, your new folder will be listed in the menu on the left-hand side.
How to move emails to a new folder in Business Email?
You can move emails to a new folder either manually or automatically.
- Manuel
- To move an existing email into a new folder, click on the email and drag it into the desired folder using the drag-and-drop method.
- If you want to move multiple emails to another folder, first click on the folder containing the emails. The emails will be listed on the right side of the page. Click the “Select” button above the emails and choose “Enable Select Mode” from the dropdown list. Click on the emails you want to move to select them, then click the three-dot (actions) icon. From the dropdown list, click on “Move”.In the window that appears, select the folder you want to move the emails to and click the “Move” button again.
- Automatic
If you want incoming emails to be automatically moved to a folder you’ve created by setting up a specific filter, you can follow the steps below.- In the webmail interface, click on the “More” > “Settings” button.
- Click on the “Content Filtering” button.
- Click the “New” button.
- Enter a name for the filter you are creating for automatic email moving.
- Set the match type to “All conditions must be met”.
- Click on the “+New condition” button.
- Click the “+ New condition” button.
- From the dropdown list, select “Address” as the rule type.
- In the newly opened window, set the “Field” section to “From specific addresses”.
- Set the “Comparison” section to “Matches”.
- In the “From specific addresses” section, enter the email addresses of the senders whose emails you want to move to the designated folder, with one address per line.
- Click the “+ New Action” button.
- In the window that appears, select “Move Message”.
- From the “Folder” section, select the folder where you want to move the emails and click the “Save” button.
- To save and activate the filter you’ve set up, click the “Save” button at the top-left. This way, any emails sent from the specified email addresses will be automatically directed to the new folder.
The filter described above is for directing emails from specific addresses to the designated folder. On the same page, you can also create new filters according to your preferences. Additionally, if you want to delete this filter, go back to the “Content Filtering” section. Check the box next to the filter you created and click the “Delete” button. This will deactivate the filter.


 .CO.UK Domain
 Linux Hosting
 Windows Hosting