The default RDP (Remote Desktop Protocol) port can be changed by server administrators for various reasons. The main reasons for changing the port are as follows:
- Security Precaution
Default RDP ports are constantly scanned by bots on the internet. This makes systems using the standard port vulnerable to frequent brute-force password attacks. To enhance security, server administrators may change the RDP port to reduce the risk of such attacks. - Network Restrictions
In some organizations or networks, the use of standard ports may be blocked for security reasons. In such cases, a different port may need to be selected to establish an RDP connection. - Preventing Port Conflicts
If another service on the server is using the same port, the RDP connection port can be changed to avoid conflicts.
For the reasons mentioned above or similar ones, if you also want to change your RDP port, you can follow the steps below to perform the port change safely.
- Log in to the server via RDP. If you are not familiar with the steps to access the server, click here to check out our article.
- Once you have connected to the server, type “regedit” in the search bar of the Start menu, or right-click the Start button and select the “Run” option, then type “regedit” in the prompt to access the registry editor.

- Once Regedit is open, follow the steps below in order.
HKEY_LOCAL_MACHINE > System > CurrentControlSet > Control > Terminal Server > WinStations > RDP-Tcp
Alternatively, you can copy the path written below, paste it into the path field, and press Enter to reach the relevant section.
HKEY_LOCAL_MACHINE\System\CurrentControlSet\Control\Terminal Server\WinStations\RDP-Tcp
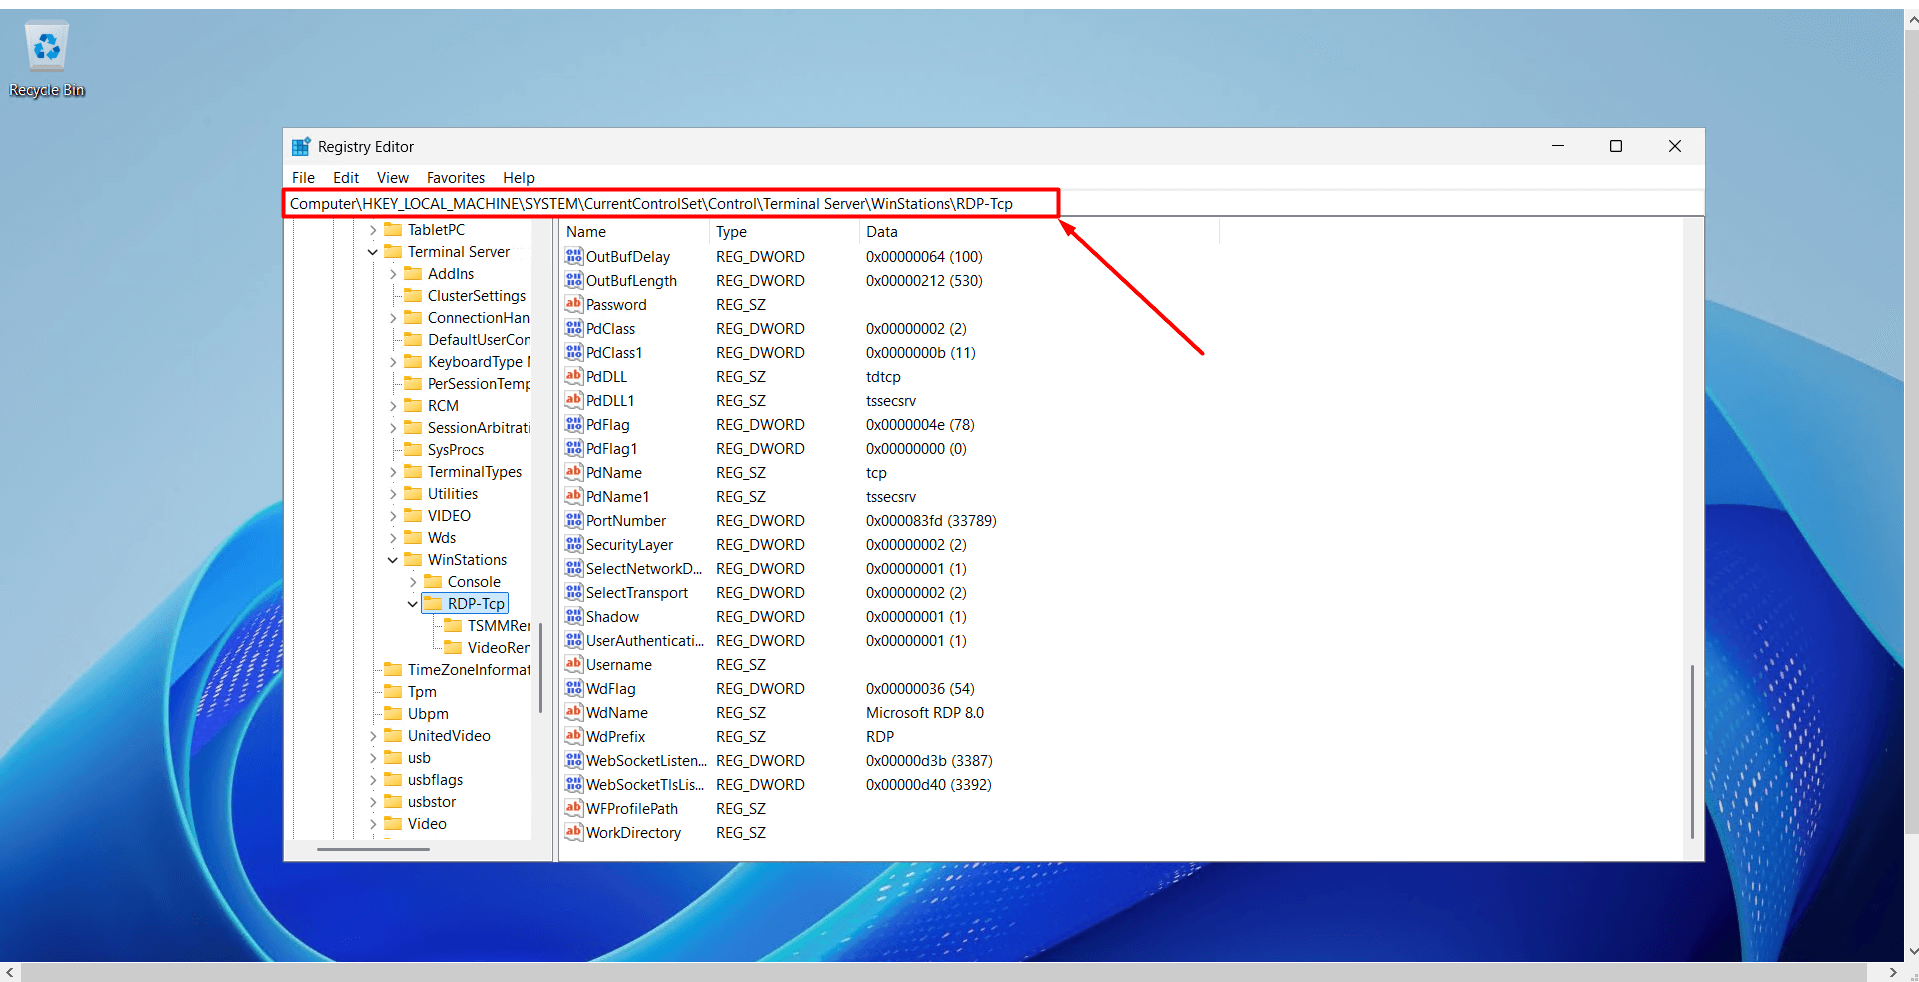
- On the right side, find the entry named “PortNumber” and double-click on it.
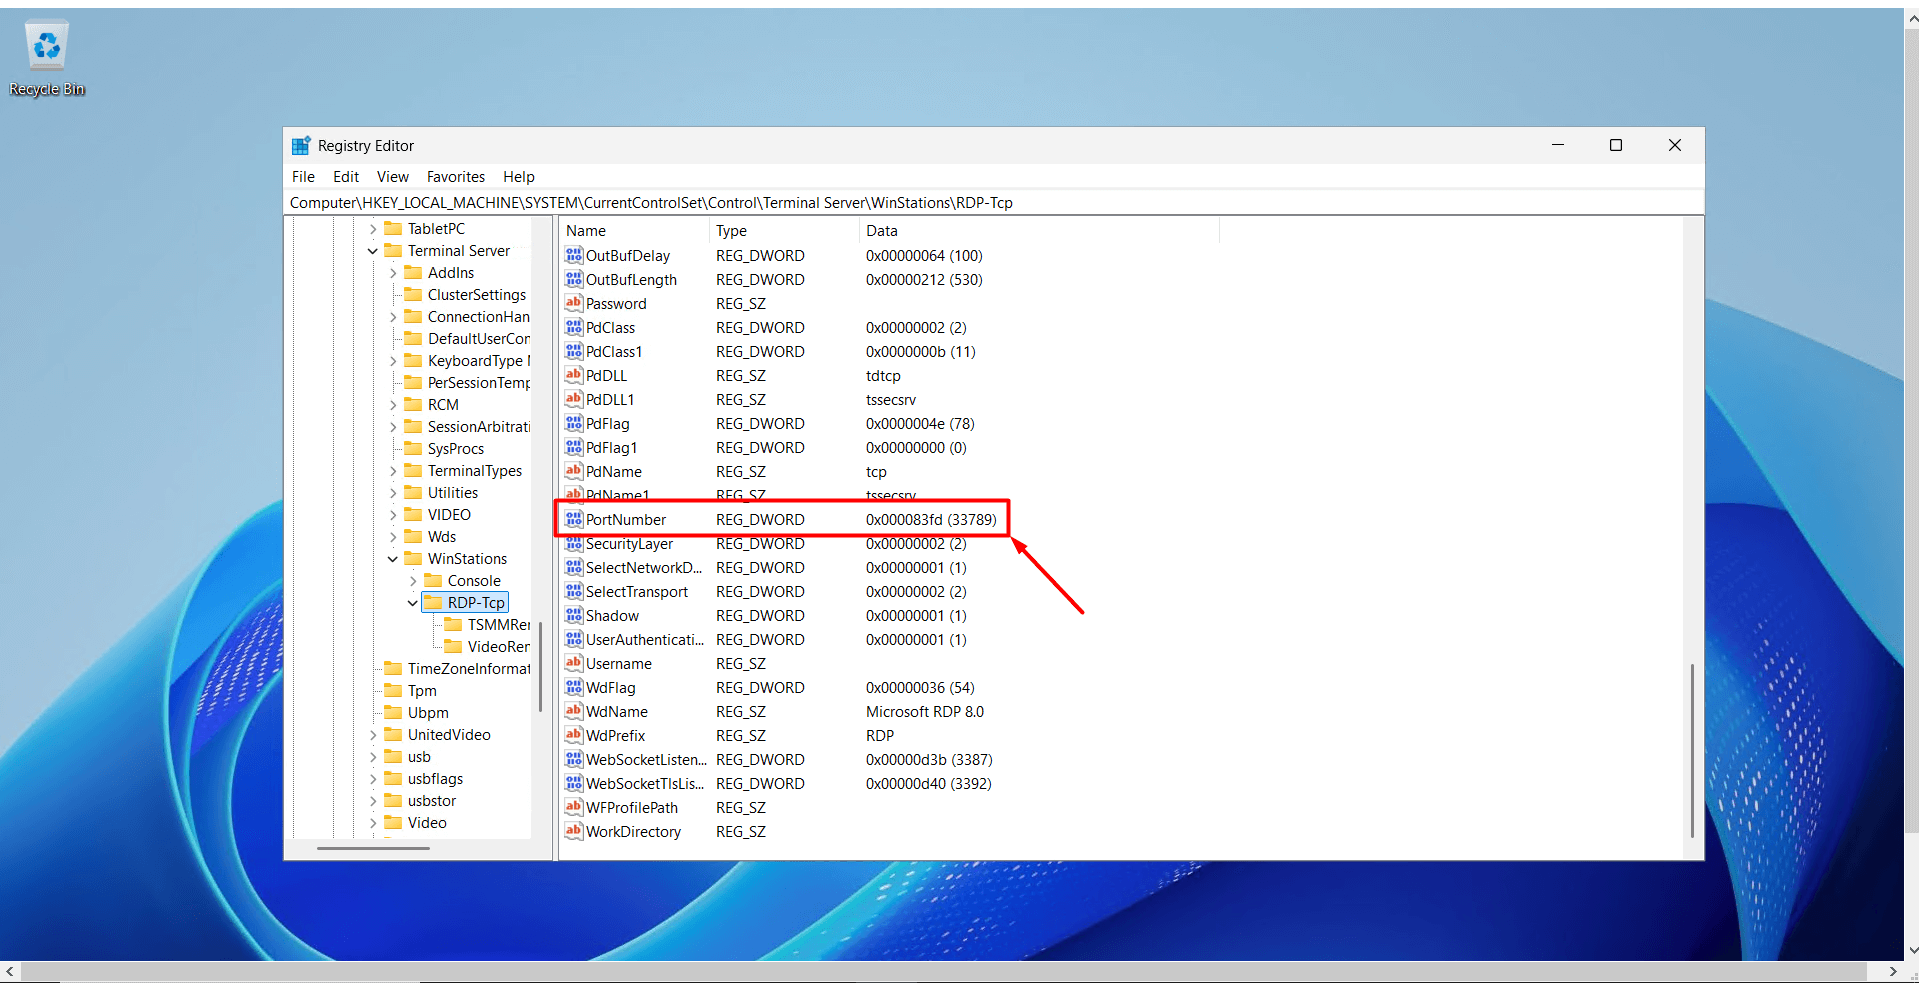
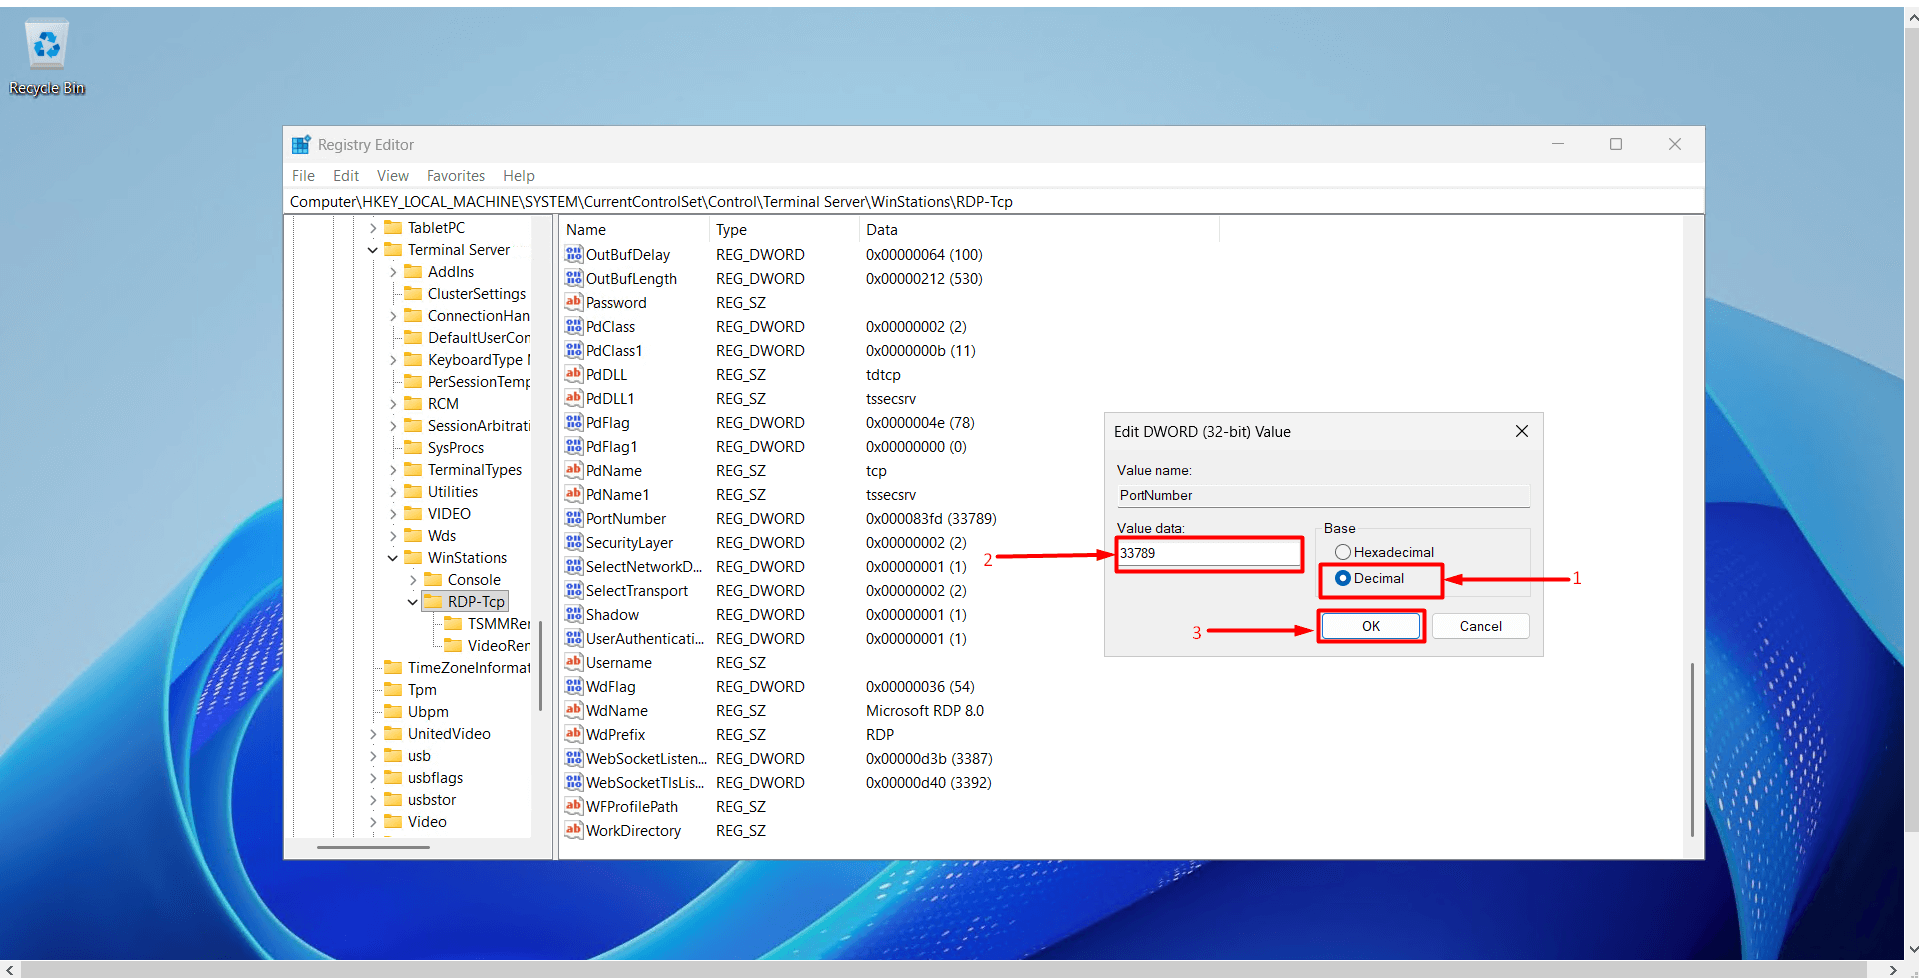
- In the window that appears:
- Set the “Base” option to “Decimal”.
- Enter the new port number in the “Value data” field. Important Information:
- Valid range: 0 – 65535
- 0 – 1024 → System ports (e.g., HTTP:80, HTTPS:443, DNS:53) – may conflict with other services.
- 3389 and 33789 are the default RDP ports.
- It is not recommended to use common service ports such as 1433, 3306, or 8080.
- The range 49152 – 65535 is usually free; you can choose one from this range.
- After entering your port information, click “OK” to save.
- After saving the port information, you need to add the new port to the Windows Firewall.
Add the new port to the Windows Firewall
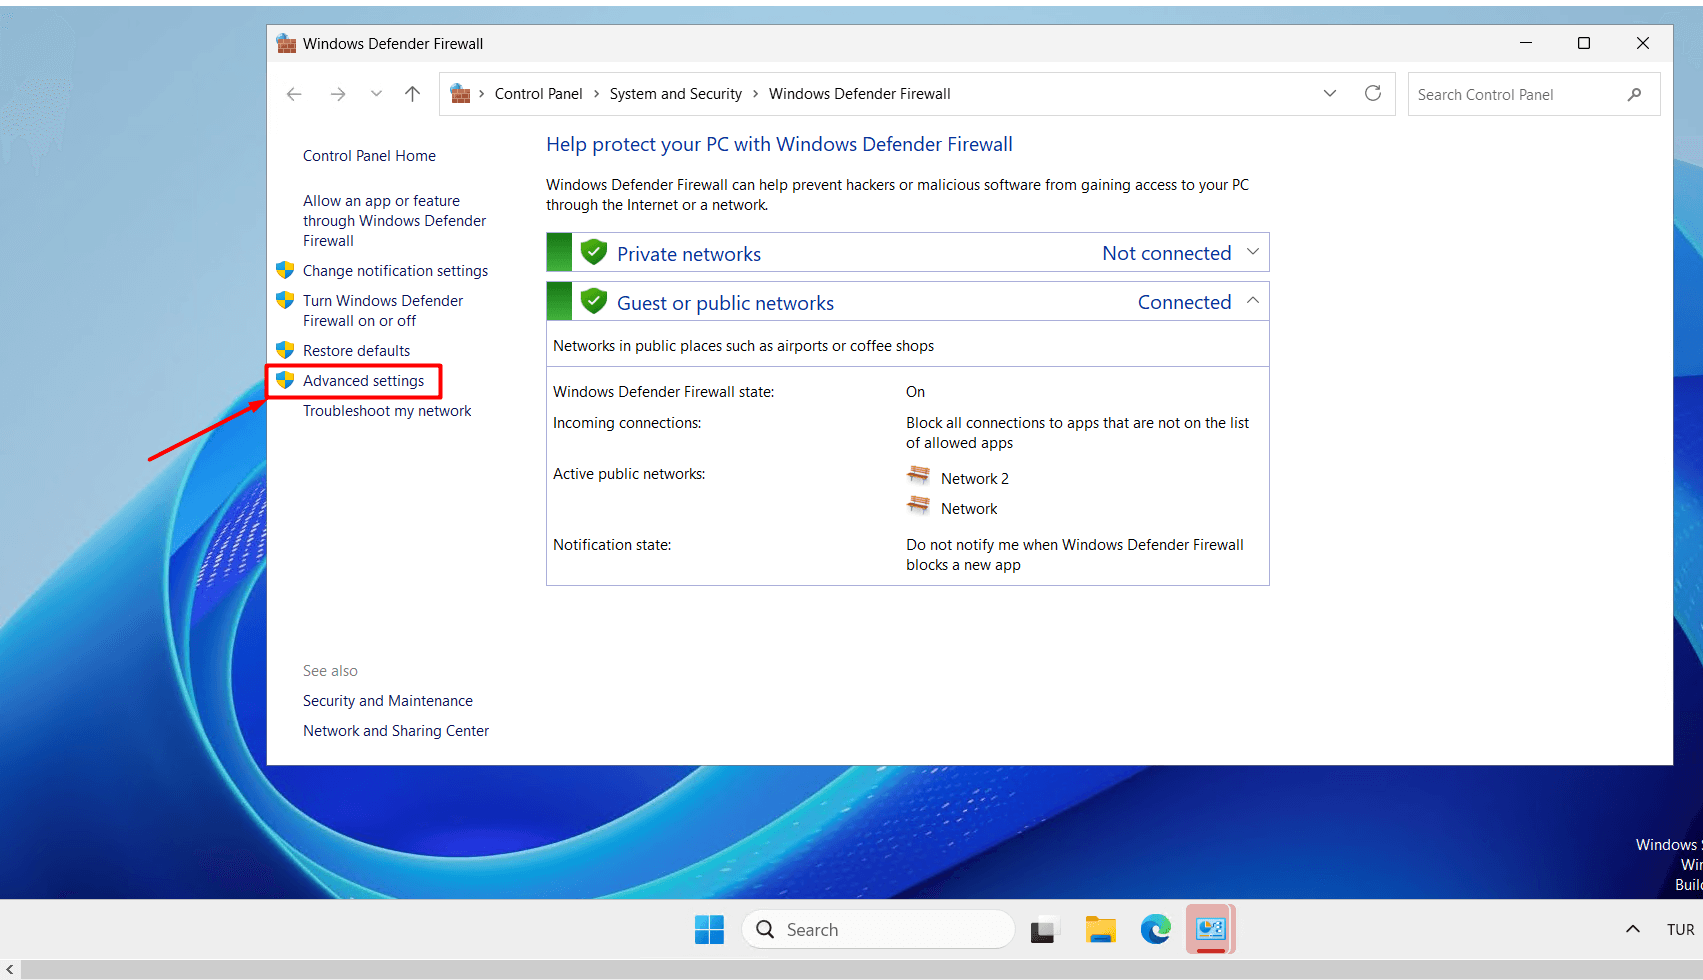
- Type “Windows Defender Firewall” into the Start menu search bar and click on Windows Defender Firewall.
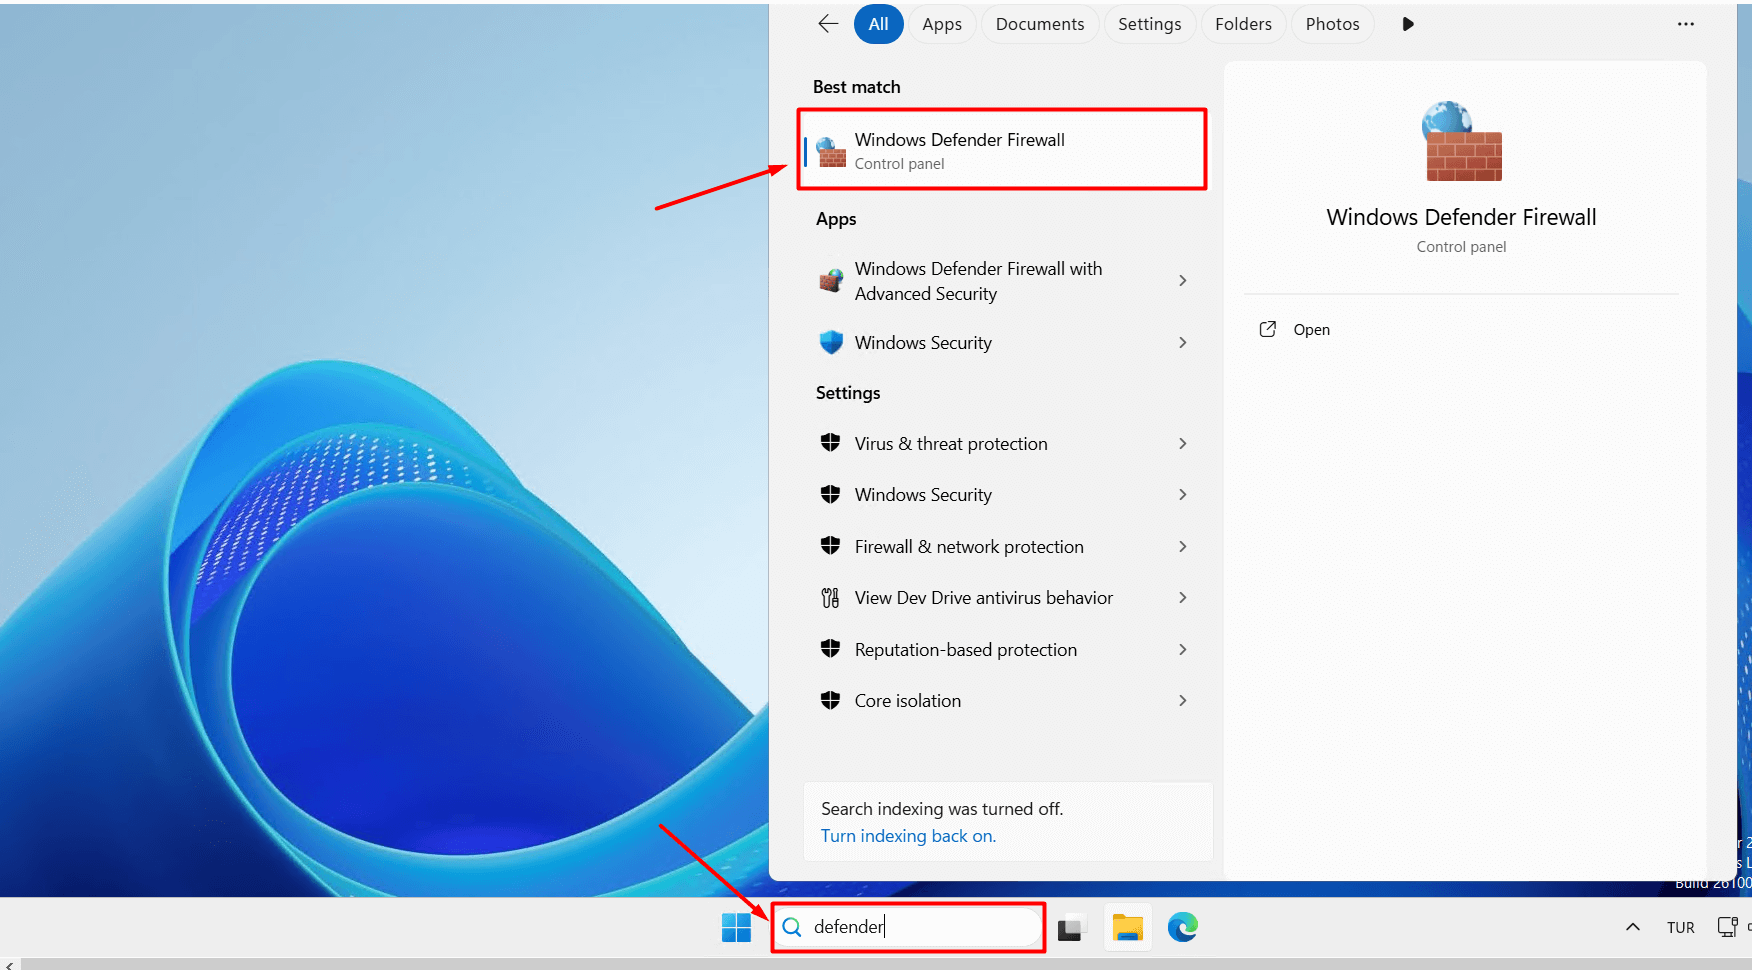
- Click on the “Advanced Settings” button.
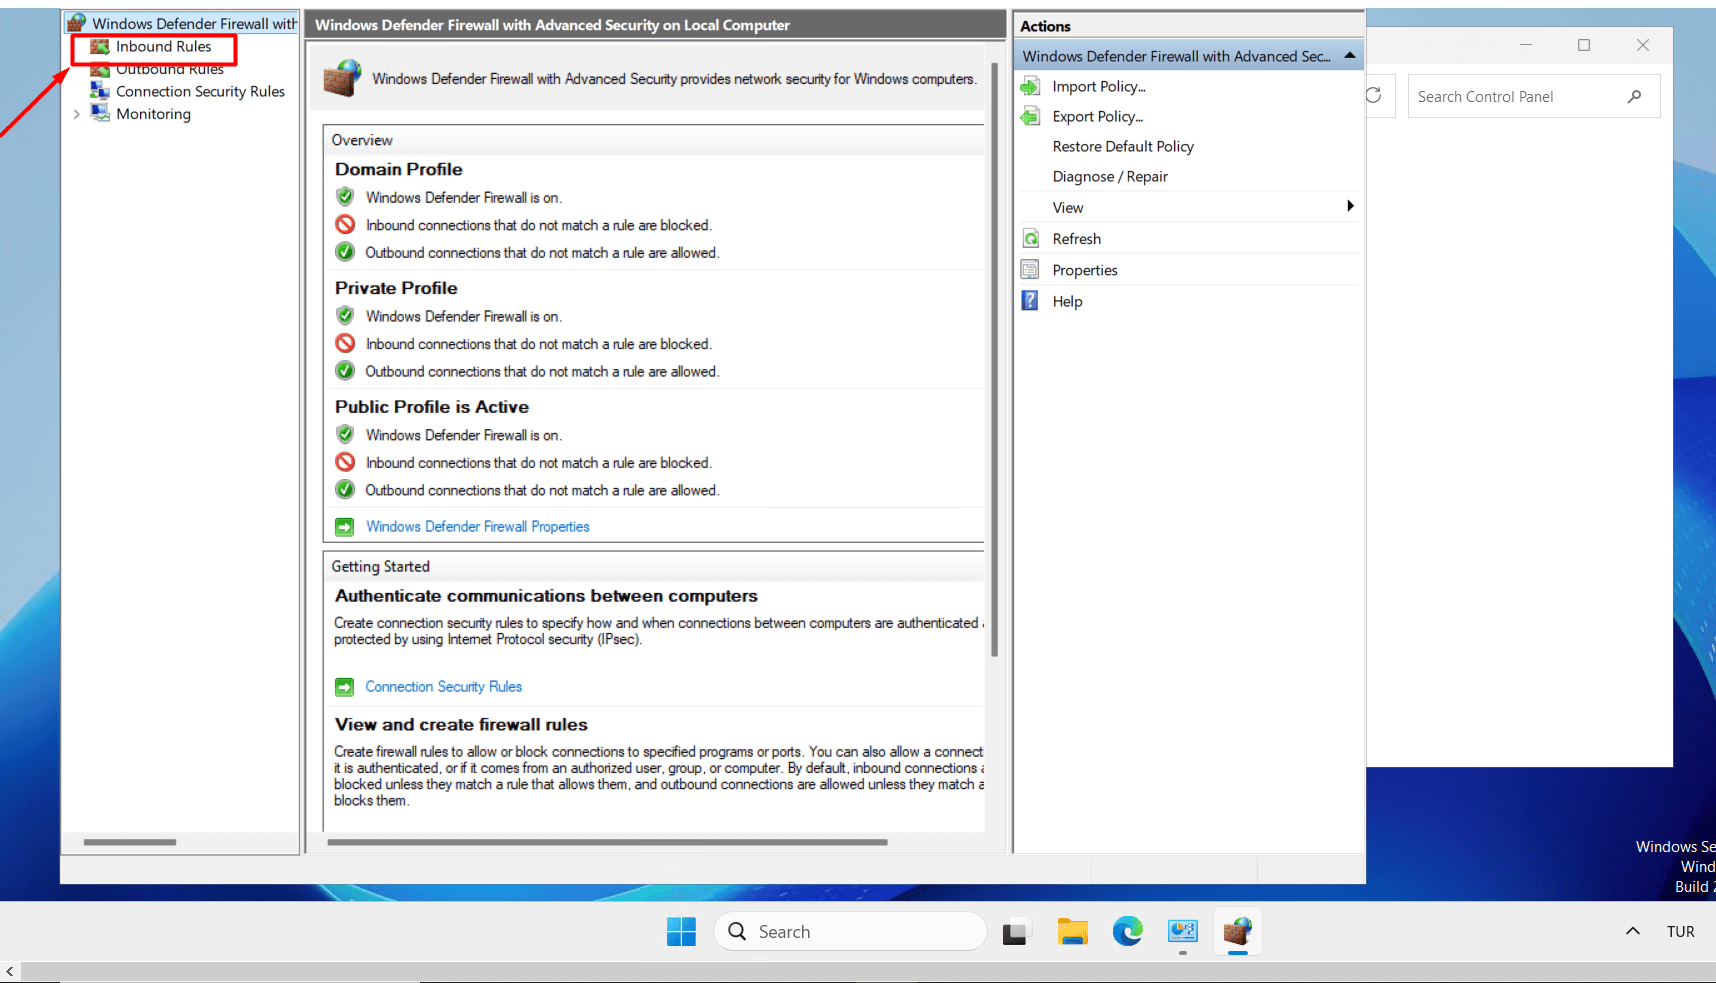
- Click on “Inbound Rules” in the left menu.
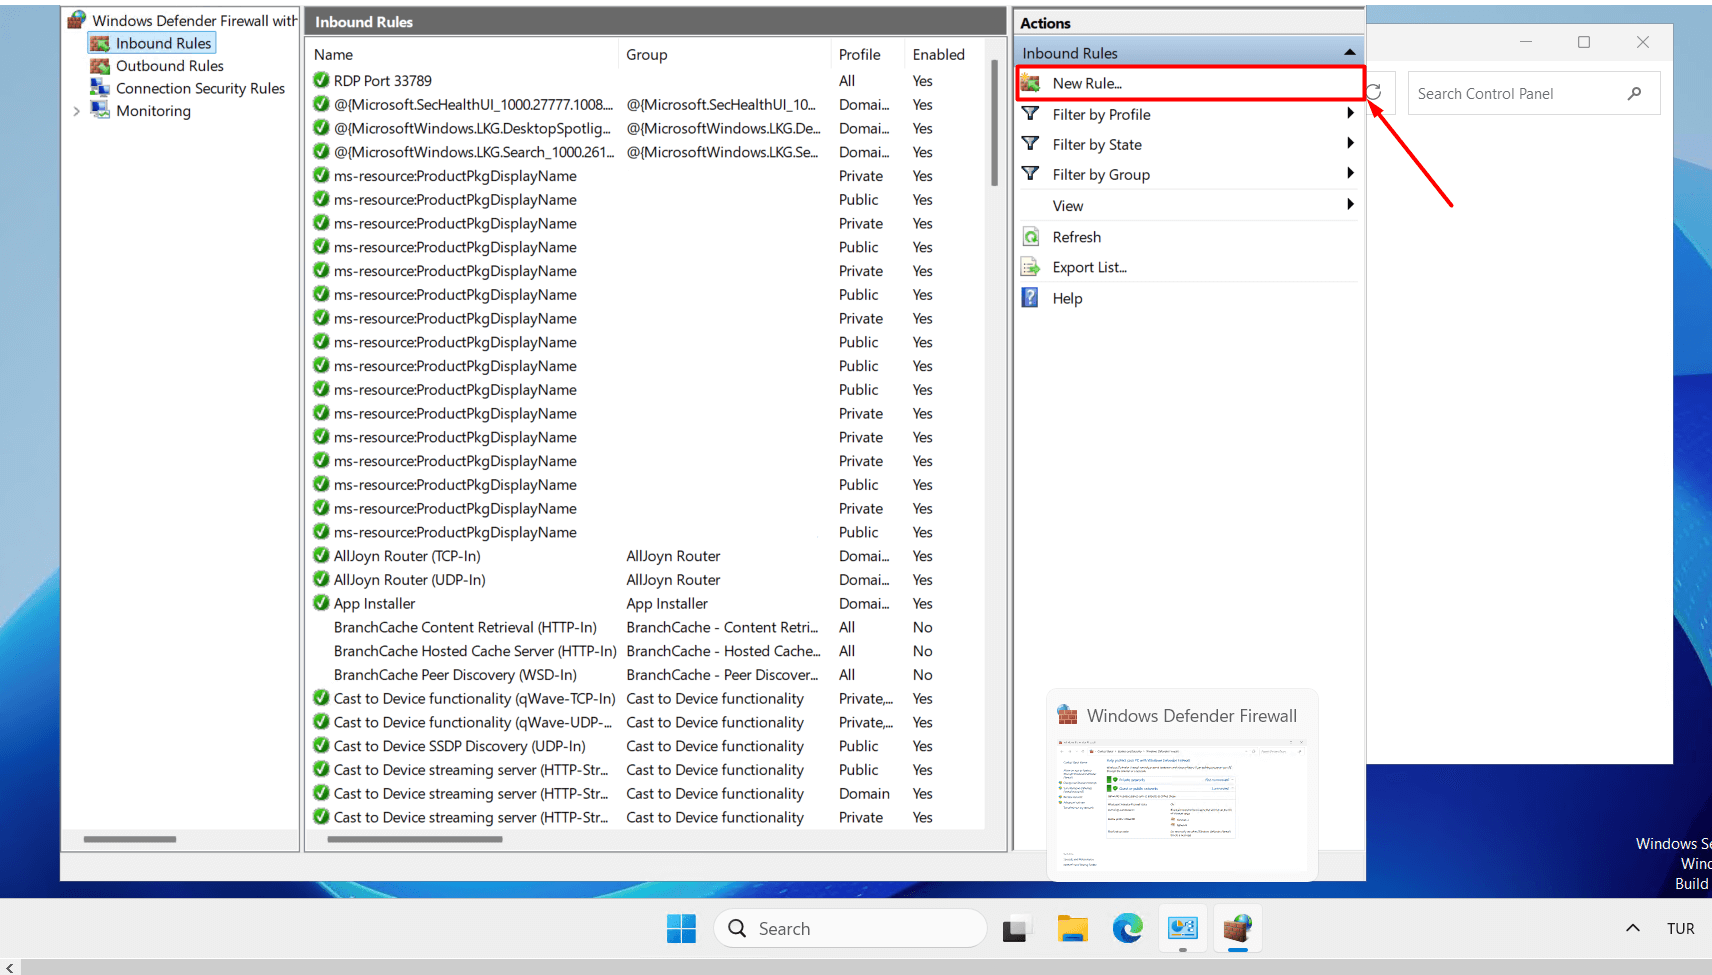
- Click on the “New Rule” button in the right panel.
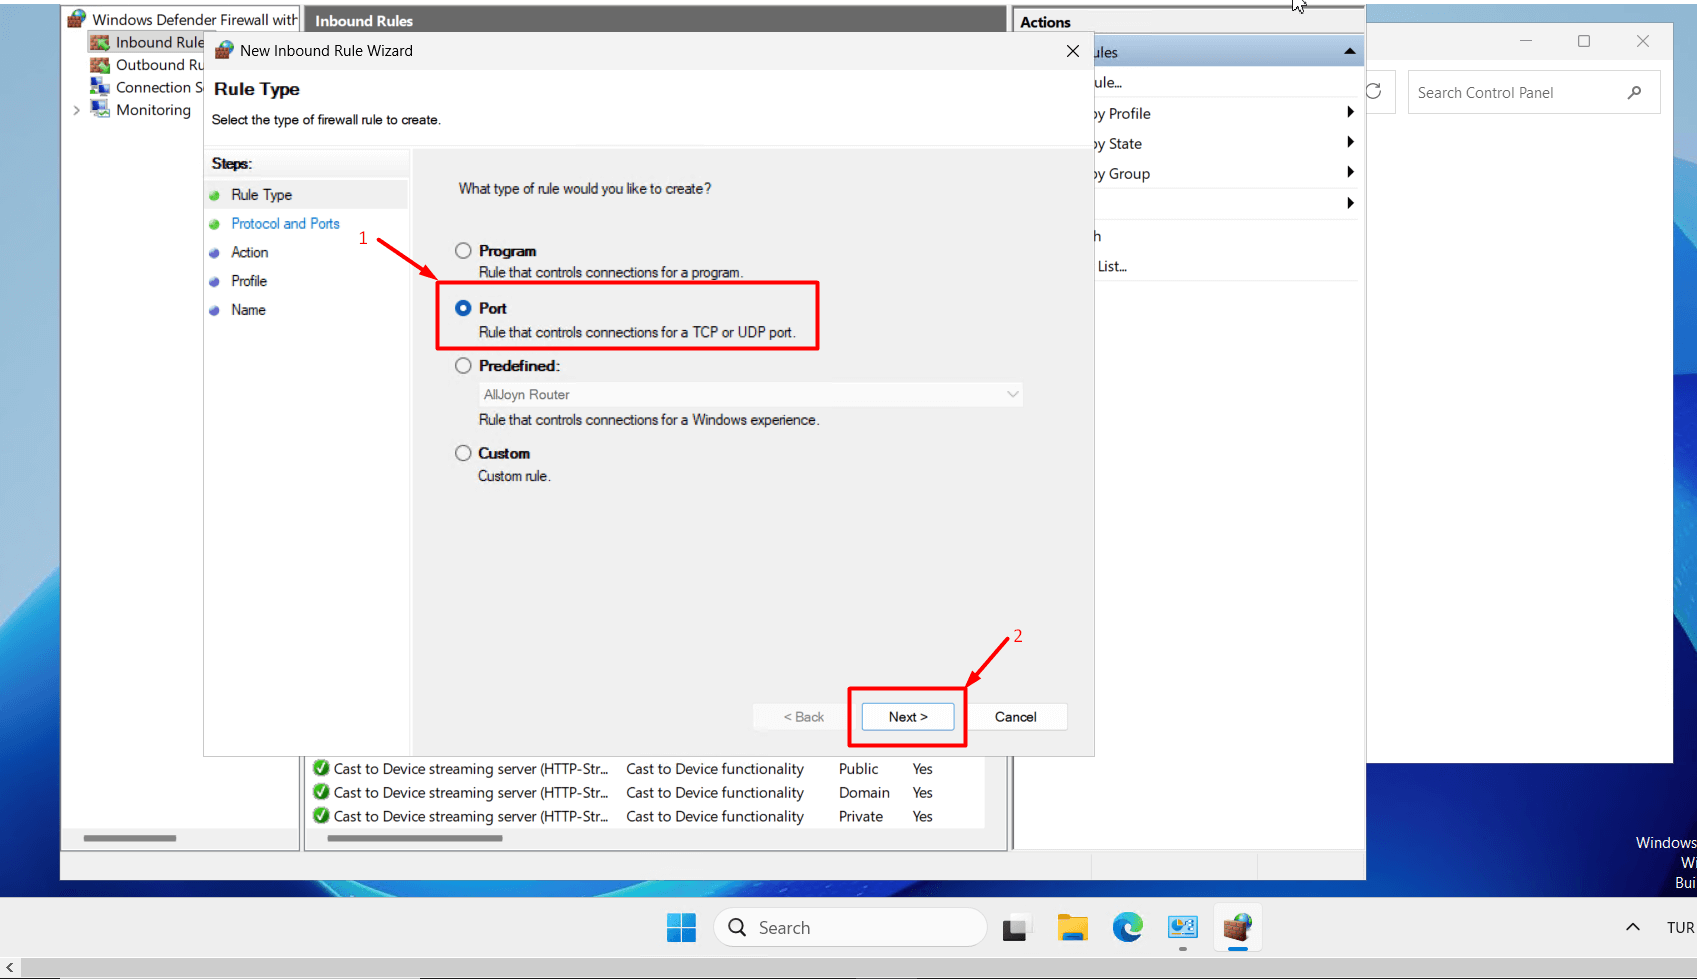
- Select “Port” as the rule type and click the “Next” button.
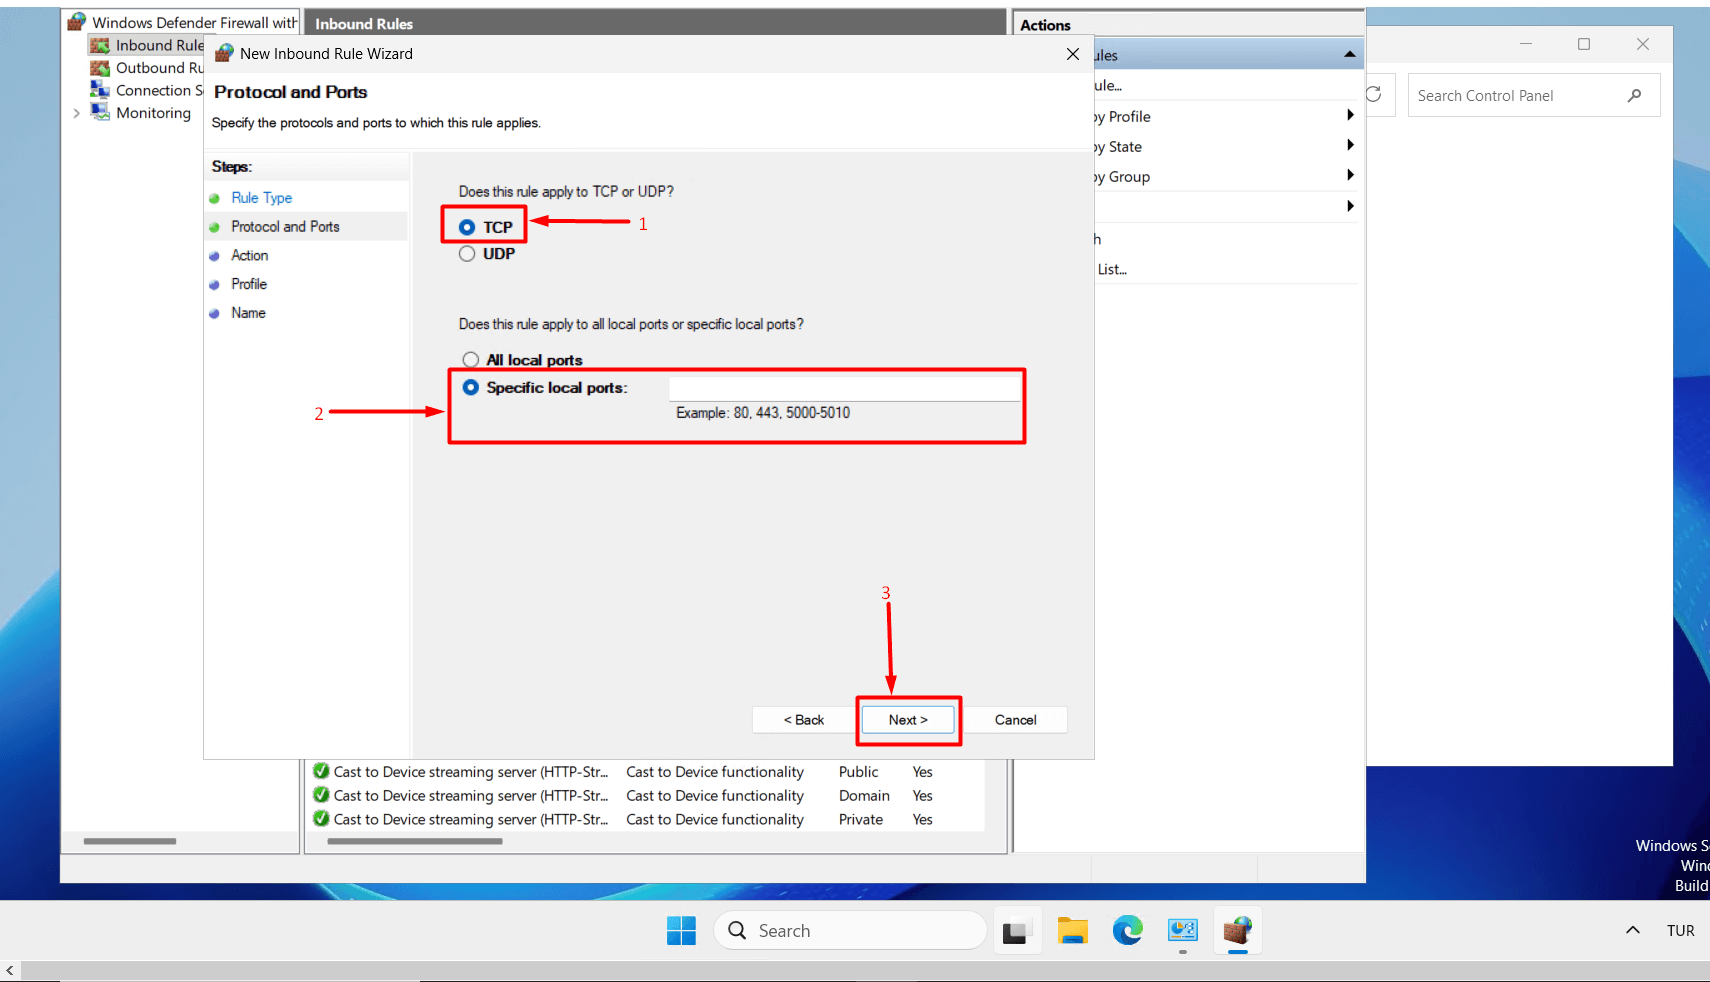
- Keep “TCP selected, enter your new port in the “Specific local ports” field, and click the “Next” button.
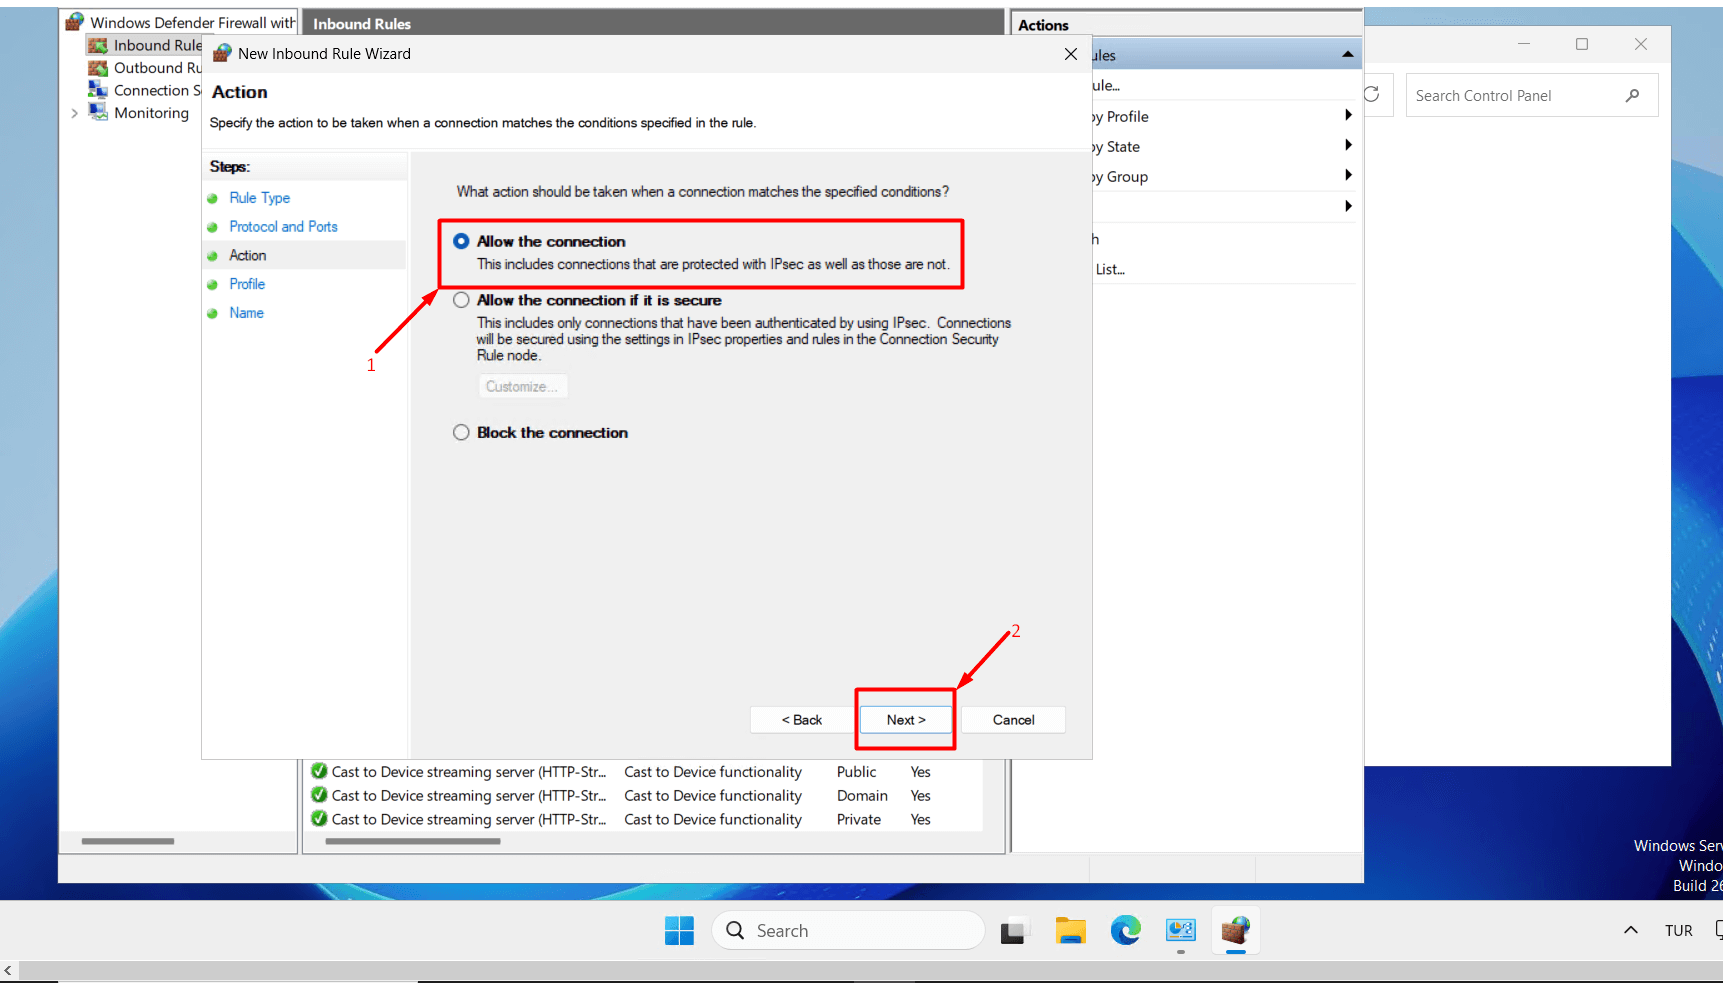
- Select “Allow the connection” and click the “Next” button.
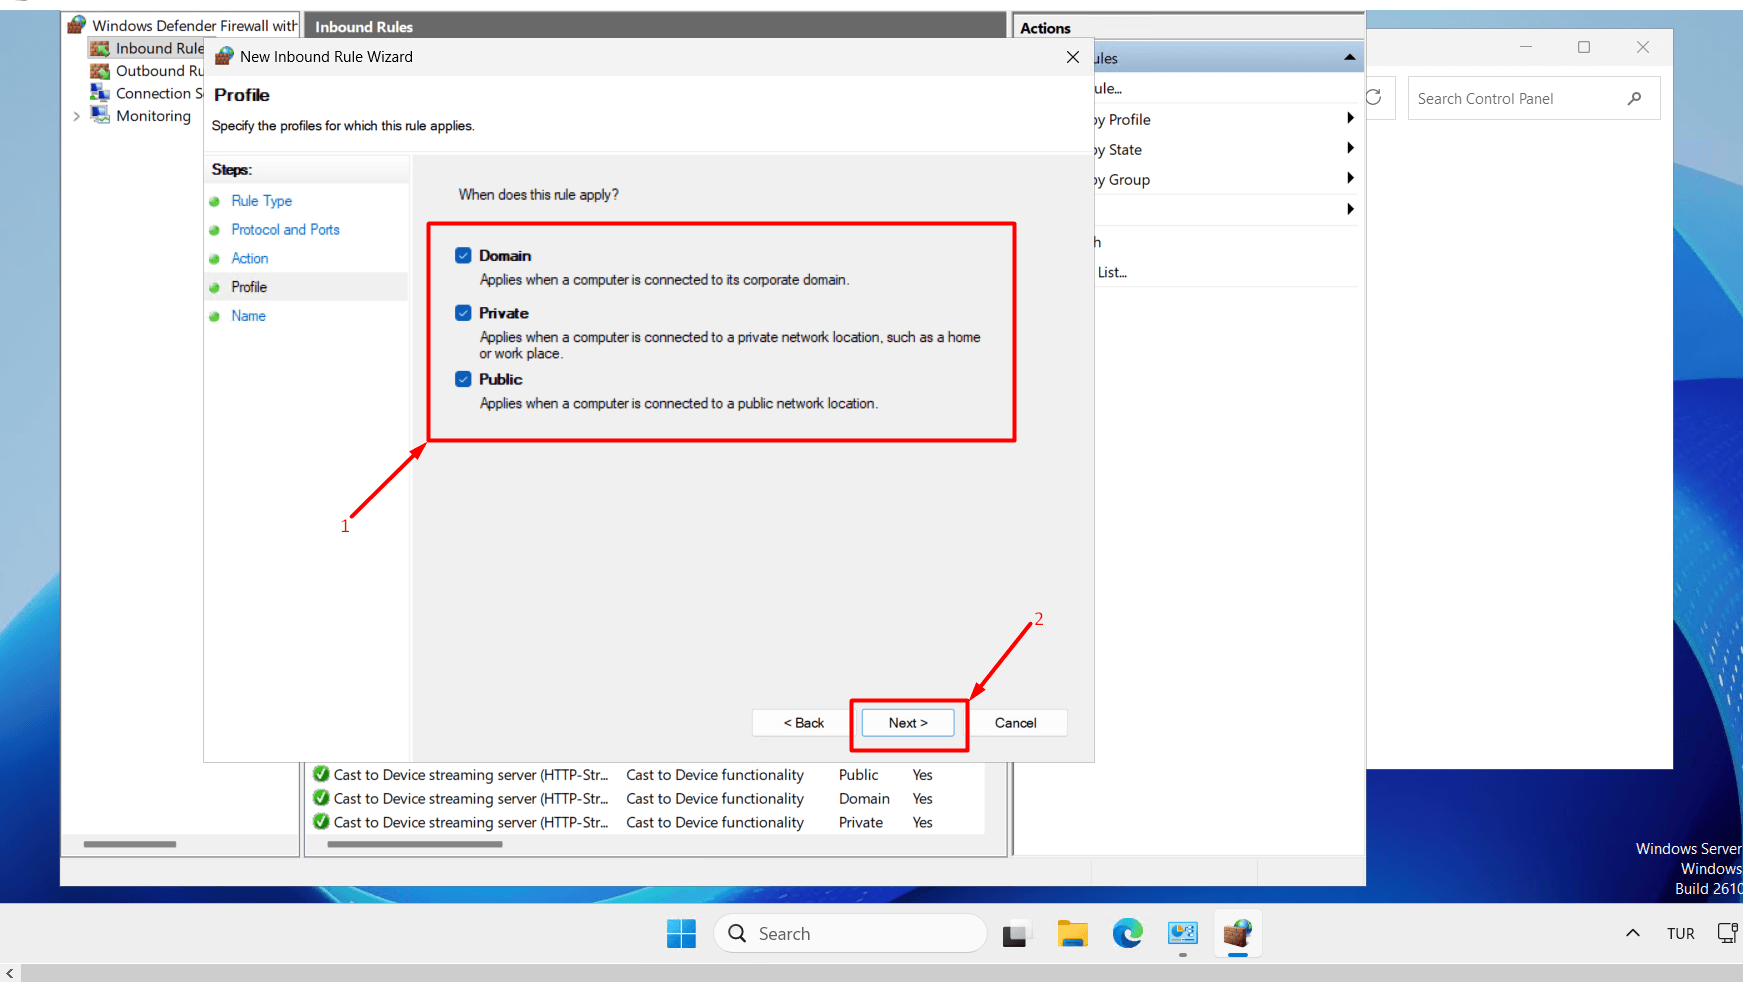
- Select “Domain, Private, Public” and click the “Next” button.
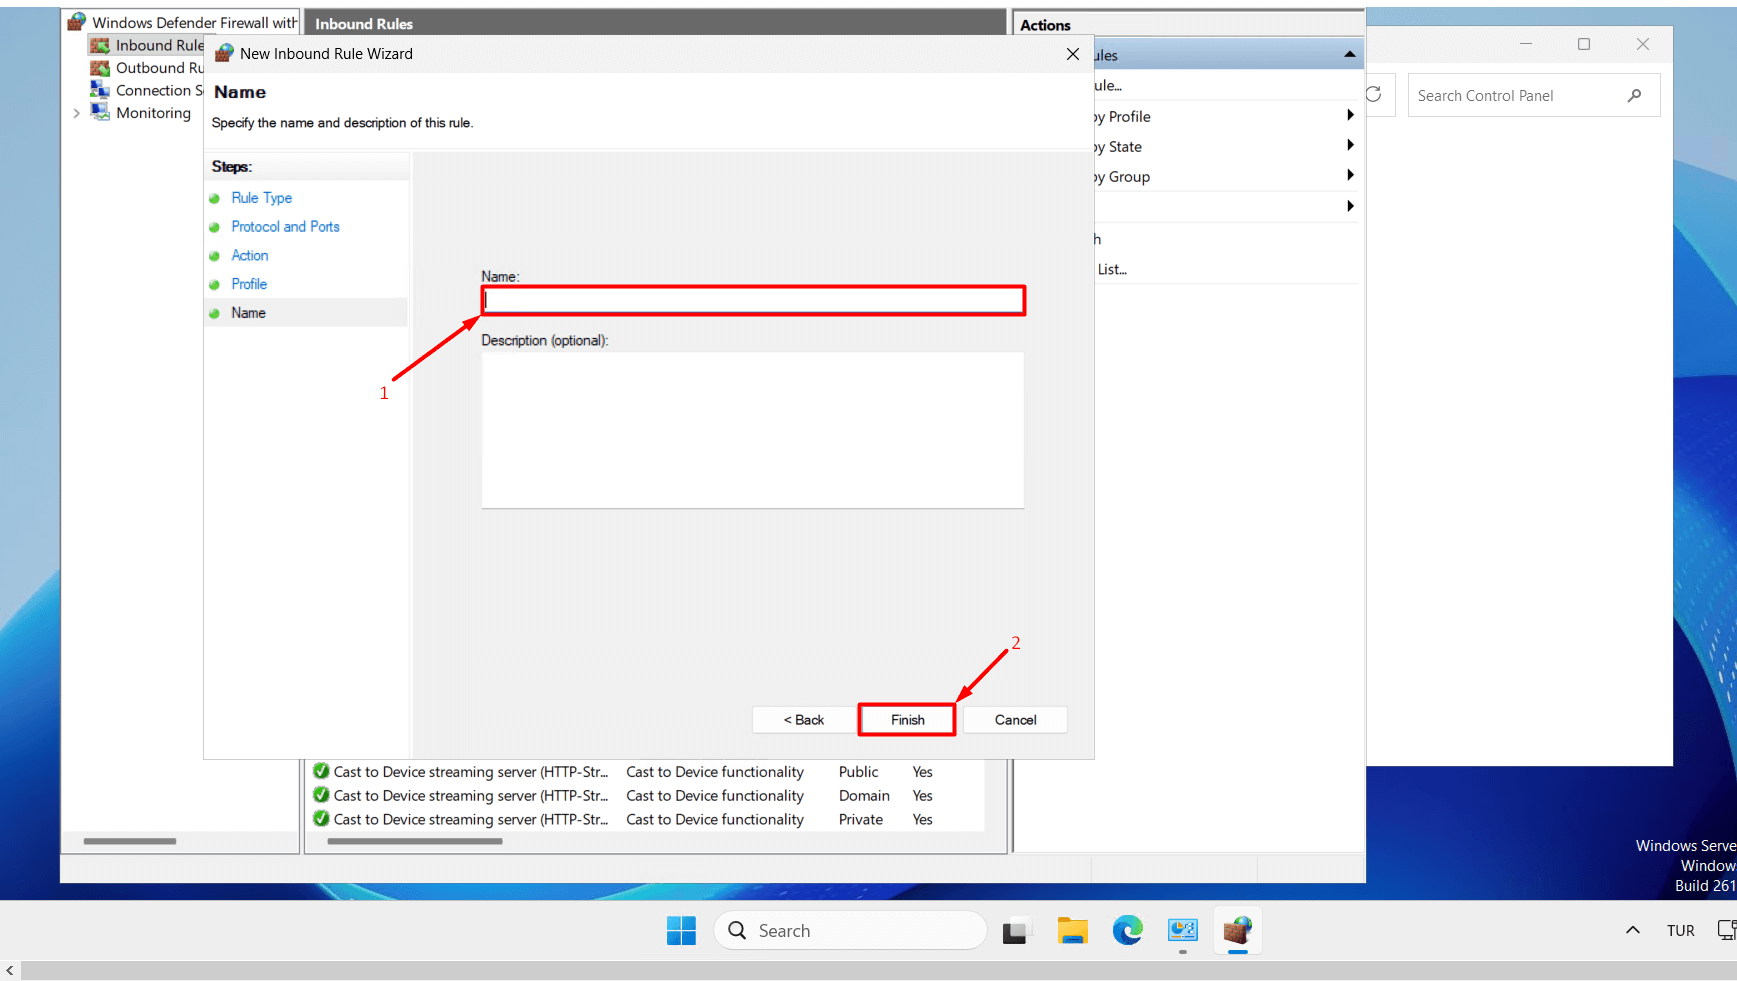
- Give your new rule a name (e.g., “RDP New Port”) and click the “Finish” button. For now, do not delete the old port rule. In case of any access issues, you can still connect using the old port. You can delete the old port after testing access to the server.
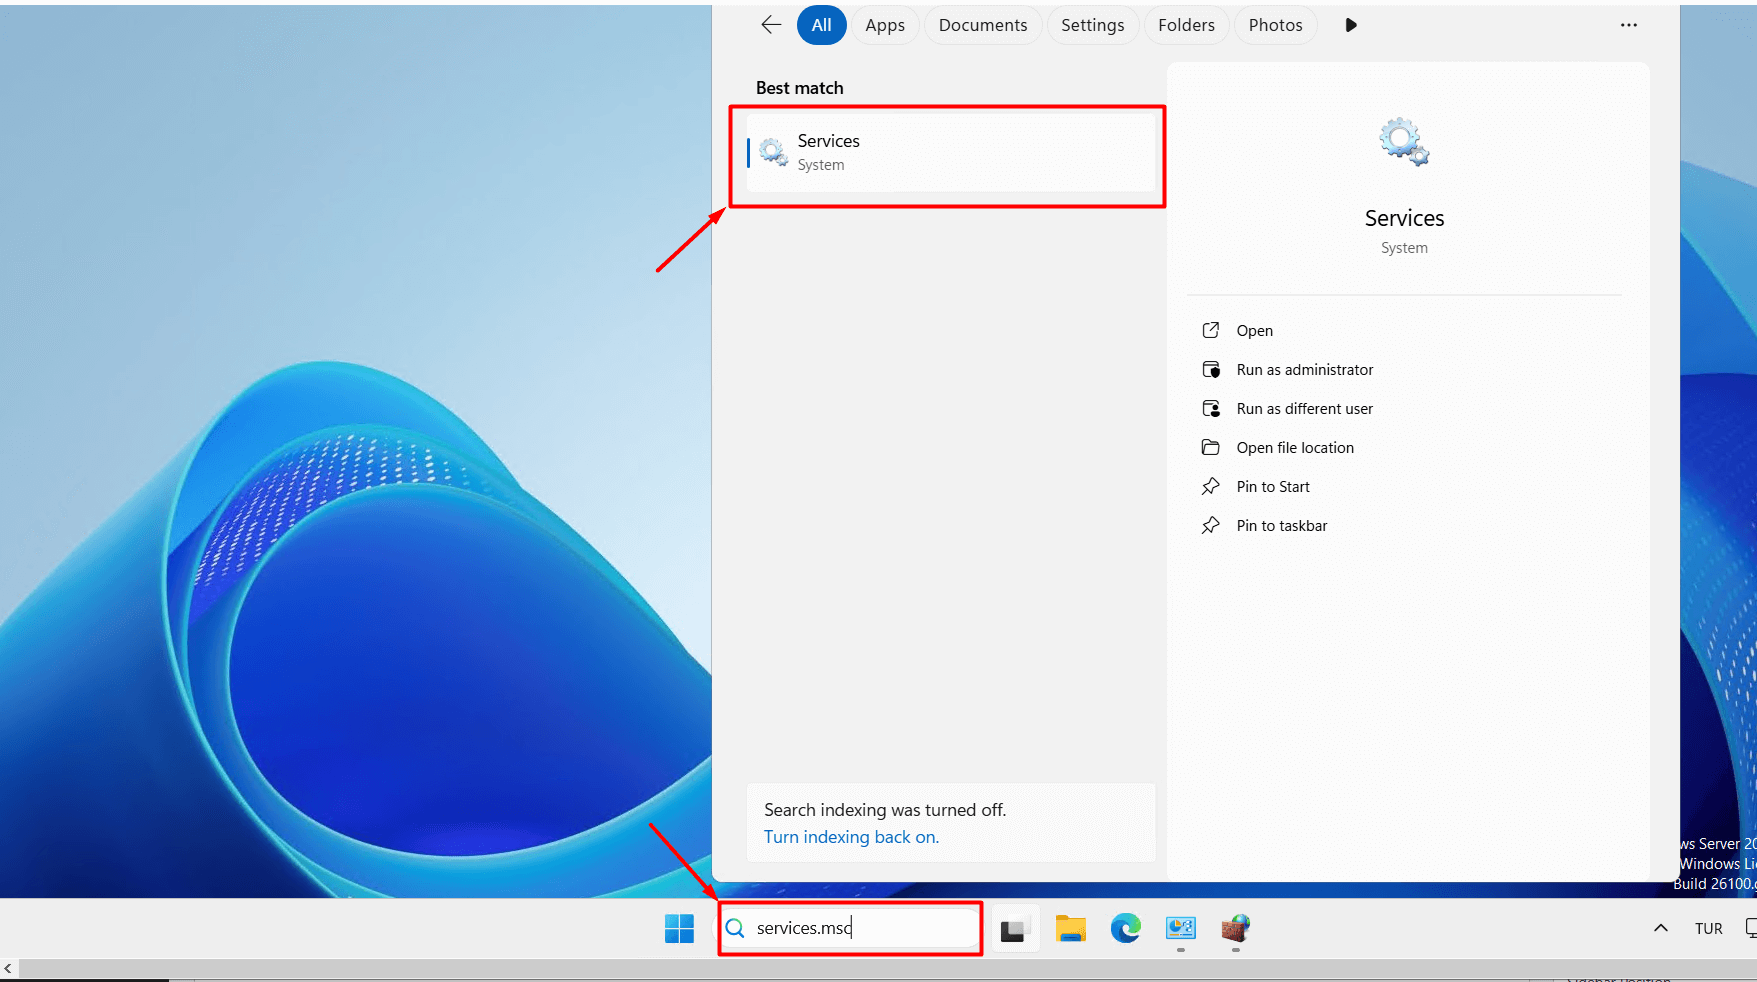
- To apply the new port rule, type “services.msc” in the Start menu and click on it.
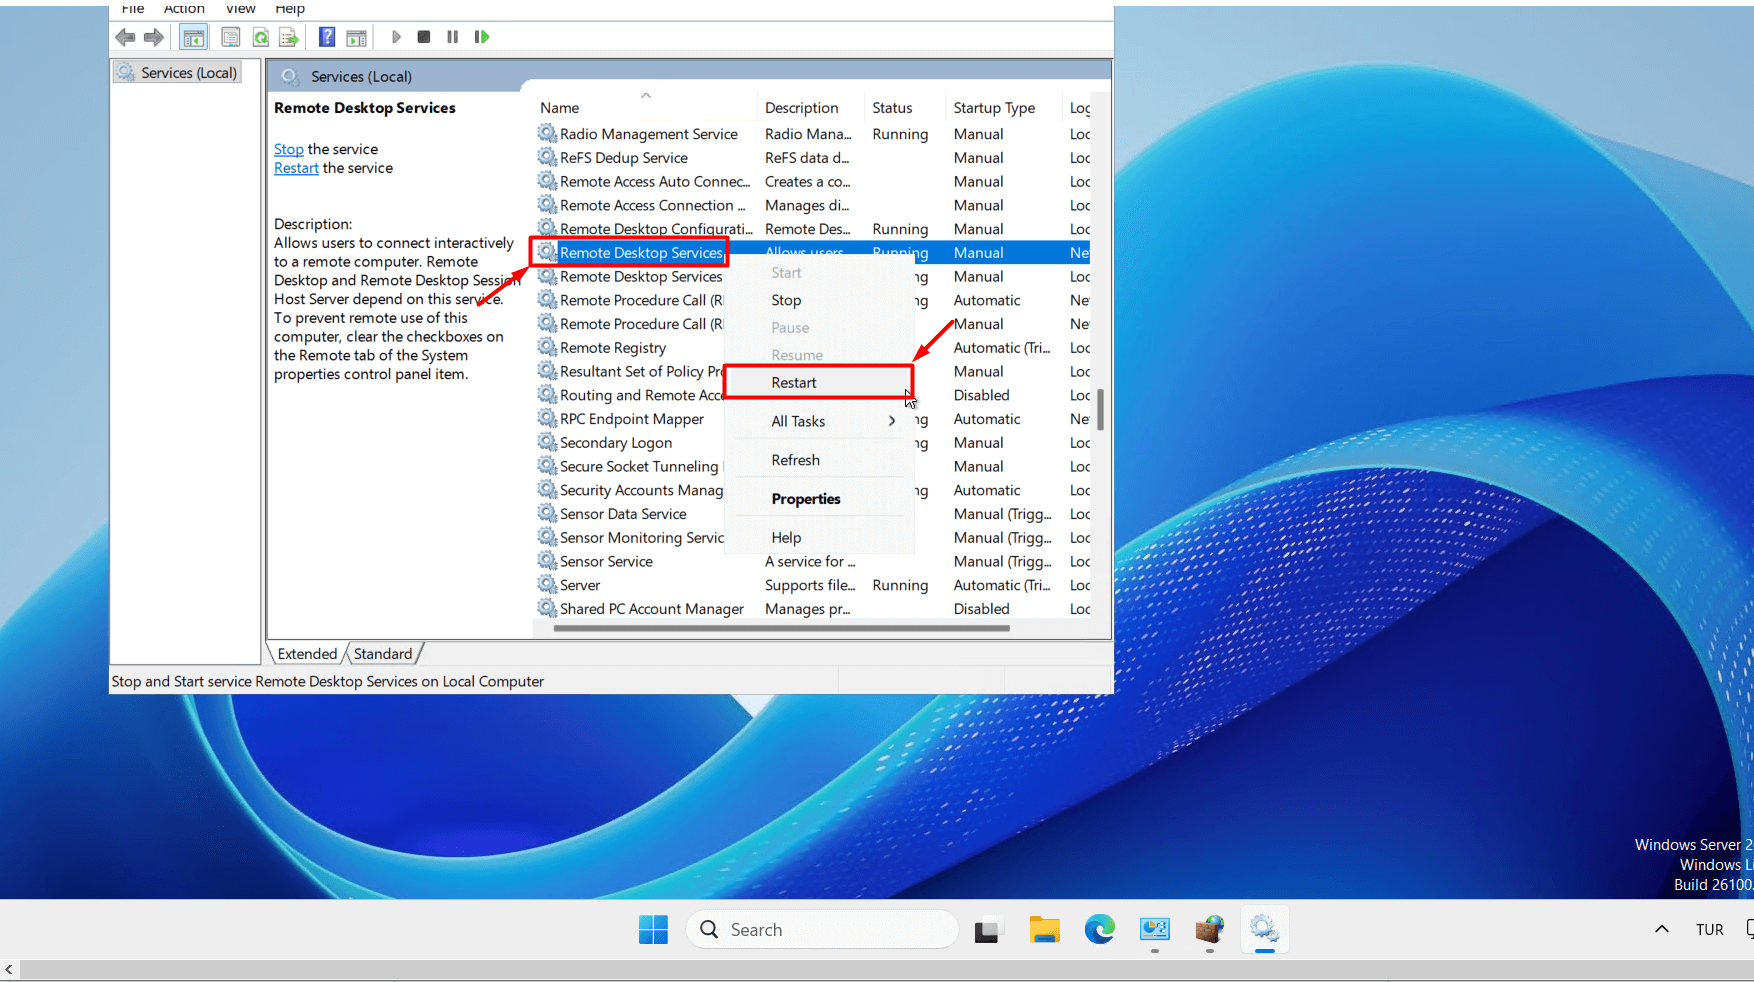
- In the window that opens, locate “Remote Desktop Services.” Right-click on it with your mouse and click the “Restart” button.
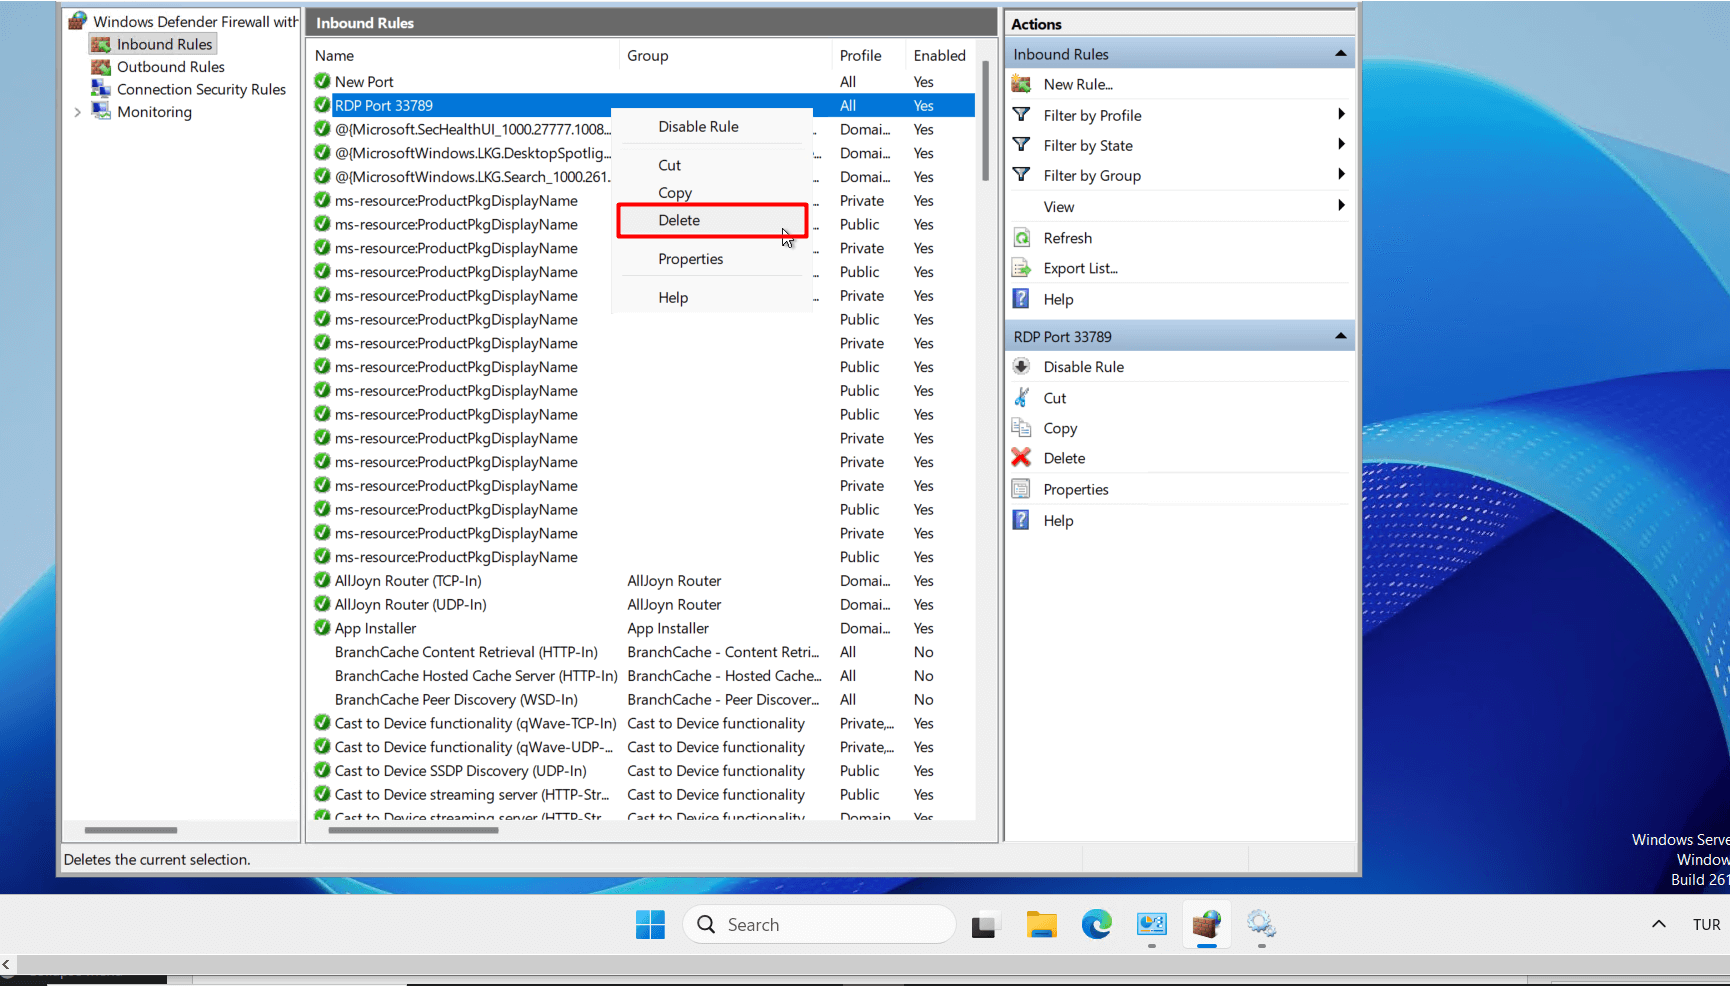
- After completing the steps above, your connection to the server will be disconnected. You can try to log in to the server using the new port you set. If you can access the server successfully with the new port and no longer need the old port, you can right-click the old port in Windows Defender Firewall and delete it by clicking the “Delete” button.


 .CO.UK Domain
 Linux Hosting
 Windows Hosting