A mail alias is an additional, non-existent email address that forwards messages to your main email account. It doesn’t have its own inbox, but any emails sent to the alias will arrive in your primary mailbox.
For example:
- You have the domain fastpanda.com.
- You have an email address: [email protected].
- Without creating a new email user for the fastpanda.com domain, you also want to receive emails sent to [email protected].
In this case, the process is quite simple. You can add [email protected] as a mail alias to [email protected]. This way, any emails sent to [email protected] will appear in the [email protected] mailbox.
You can follow the steps below to add a mail alias.
- Access the website www.fastpanda.co.uk
- Click on the “Sign In” button on the opened page, enter your customer panel information, and click the “Log in” button to log in to your account.
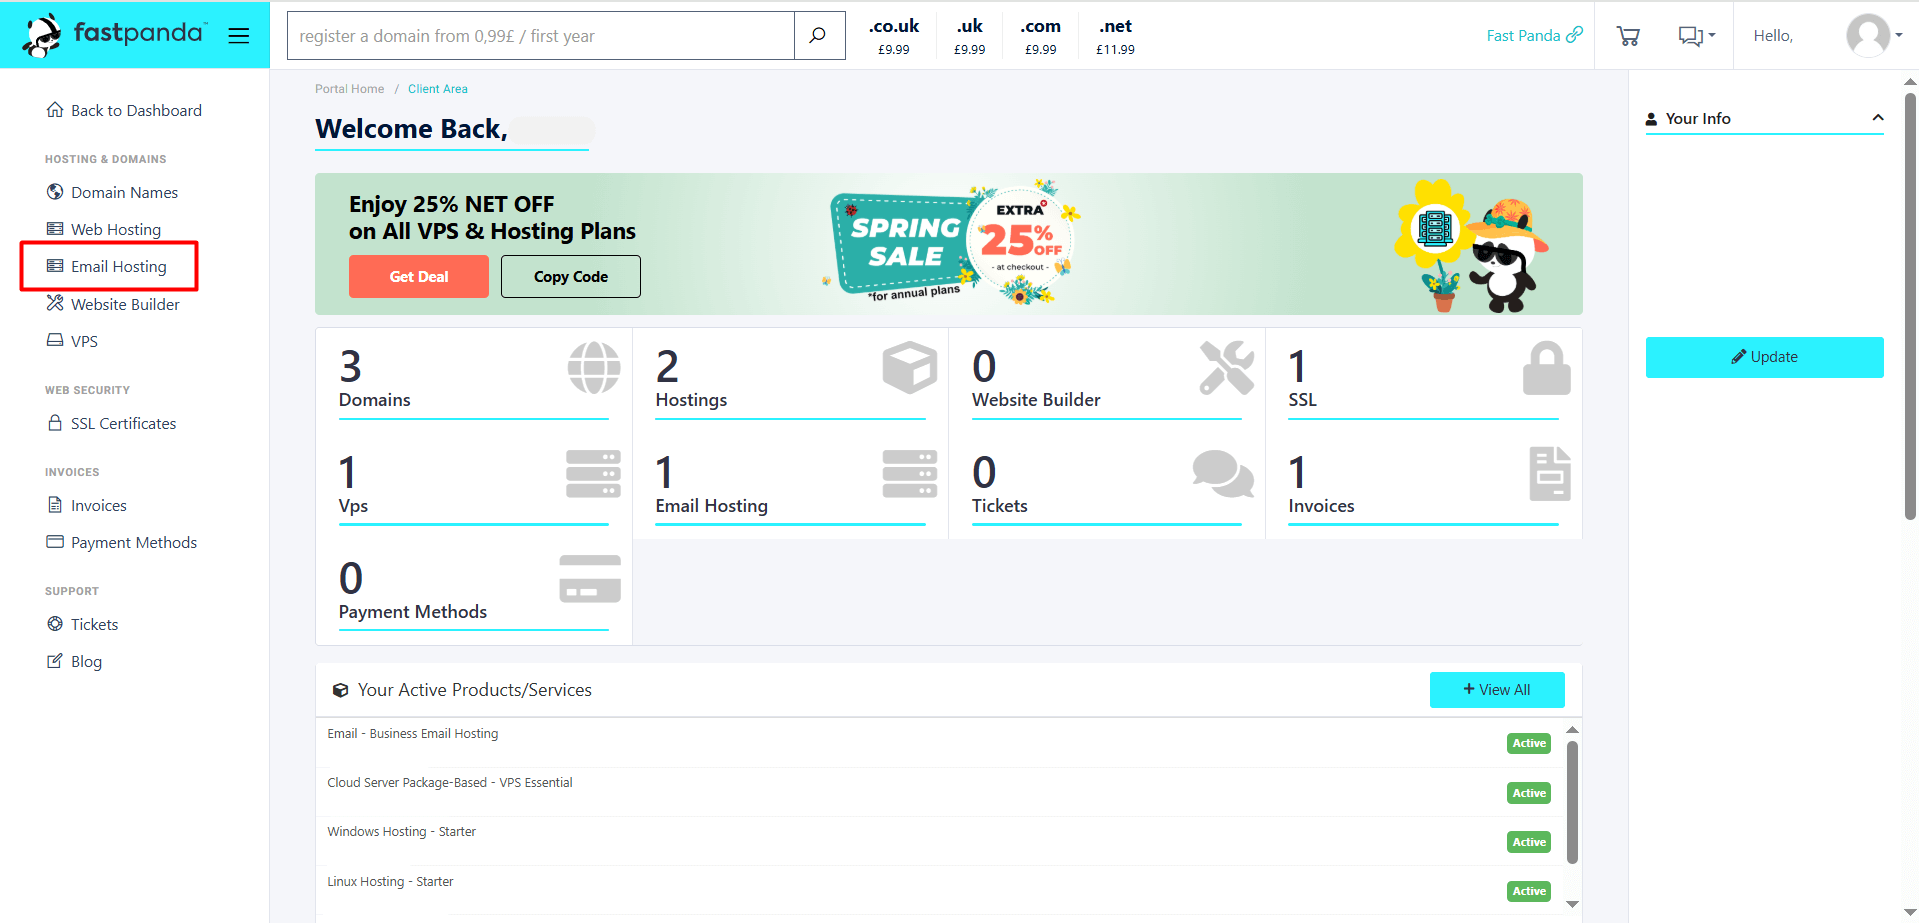
- Click on the “Email Hosting” option in the left menu.
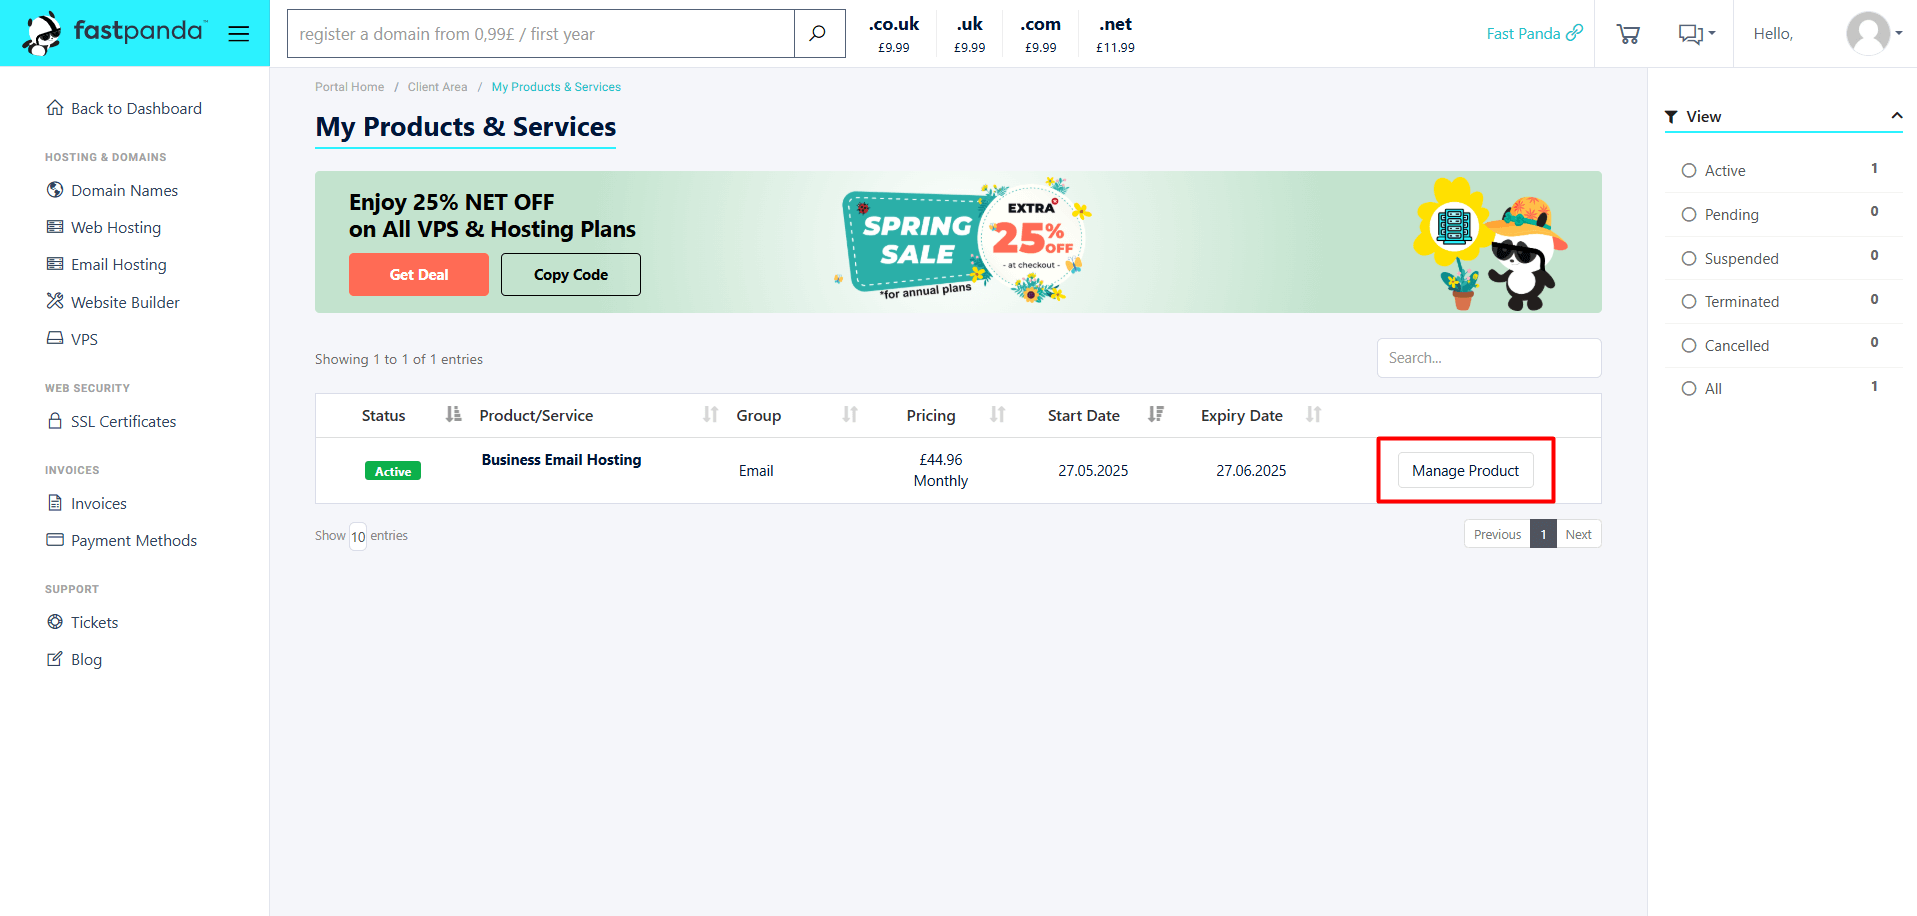
- On the page that opens, you will see your existing Business Email Hosting packages. Click the “Manage Product” button next to the service where you want to add a Mail Alias.
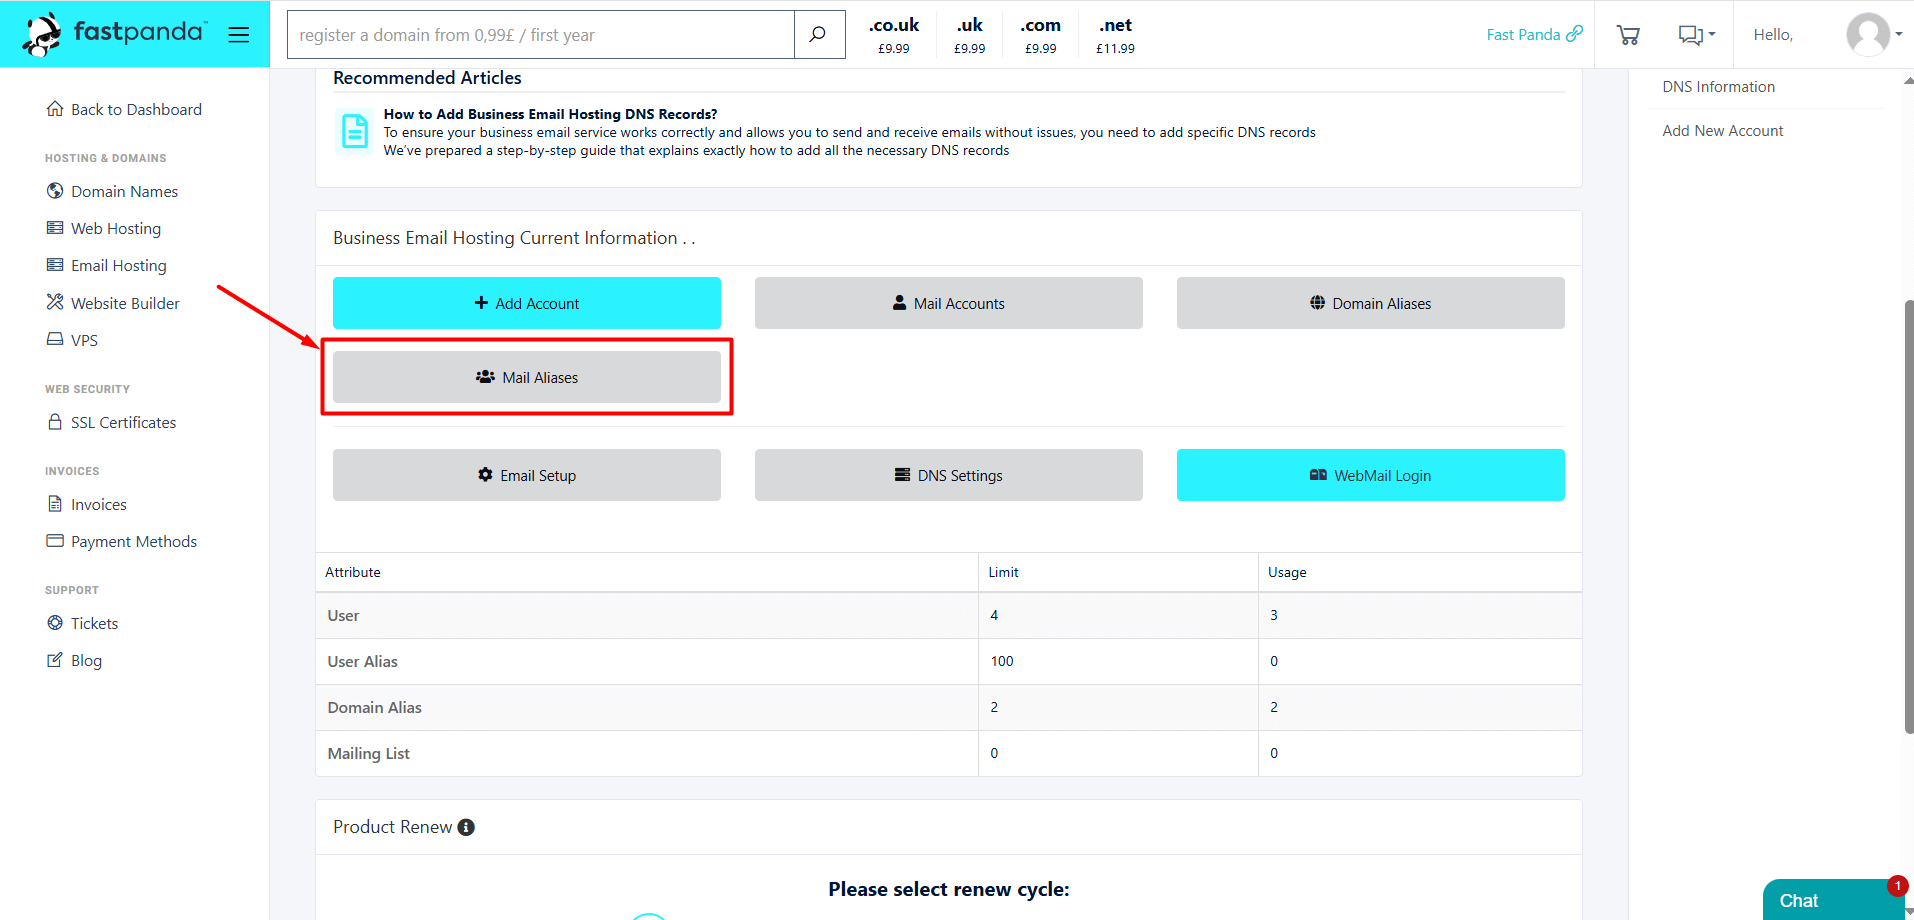
- Click the “Mail Aliases” button.
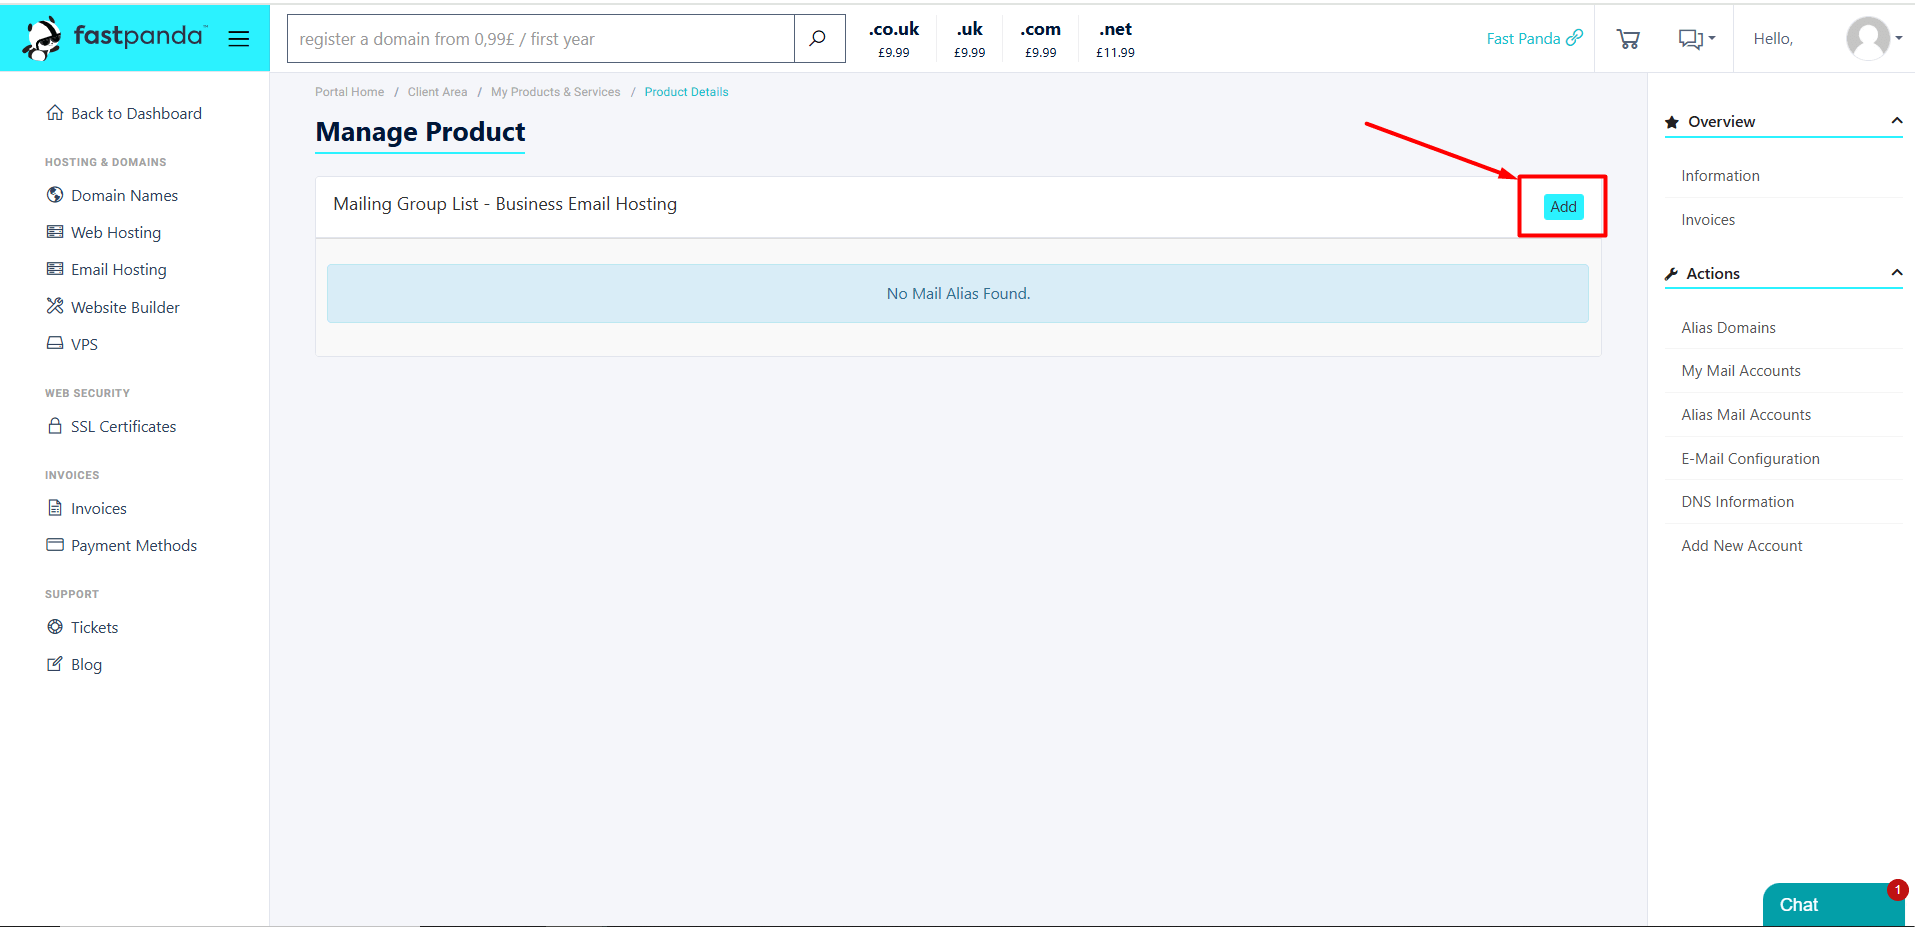
- Click the “Add” button.
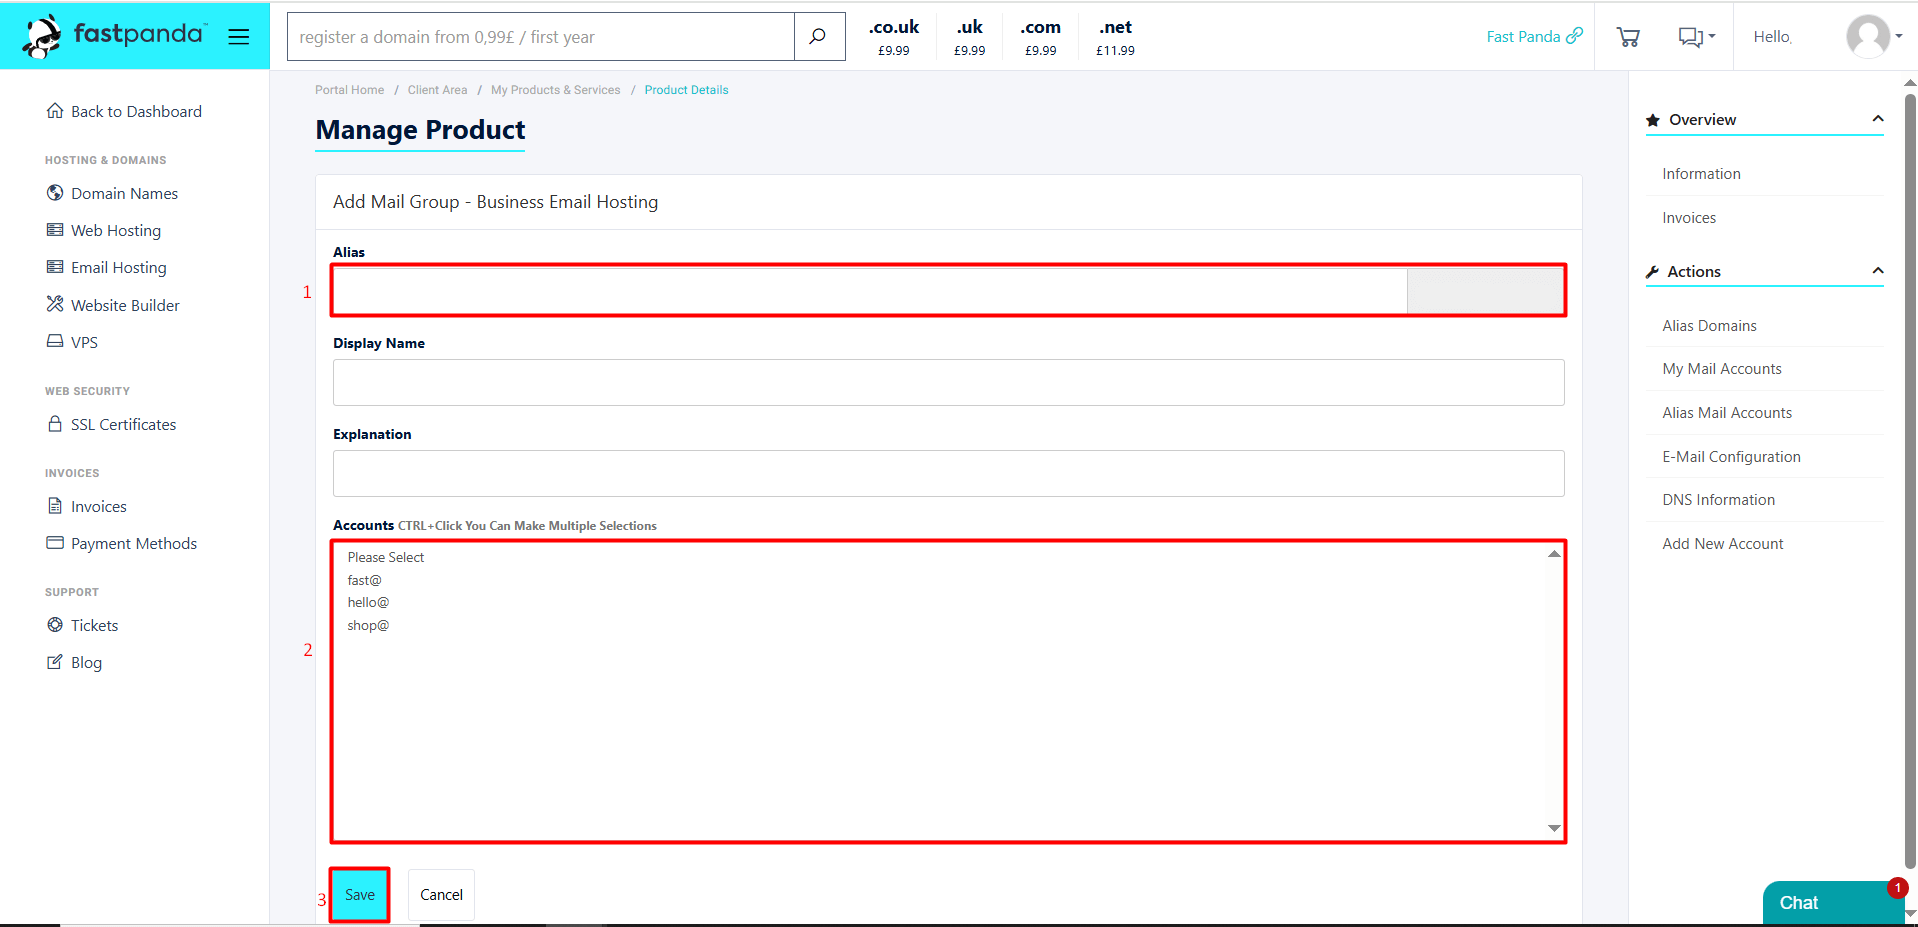
- Enter the name you want to create as an alias. For example: info, support, or sales.
Important Information:- If a real email address already exists with the name you are trying to add as an alias, the system will not allow it. You must choose a name that doesn’t already exist.
- If an alias with the same name already exists in the system, it cannot be created again. You can add an alias with a different name.
- When adding an alias, a different domain extension cannot be used. Mail aliases are only valid for the same domain extension.
- In the “Accounts” section, your existing email accounts will be listed. Click on an account to select the destination email address. You can also select multiple email accounts when defining a Mail Alias. This way, emails sent to [email protected] will be forwarded not only to [email protected] but also to any other email accounts you select, allowing you to use it as a group email. To select multiple accounts, hold down the “CTRL” key while making your selections.
- Click the “Save” button to save the alias.
If you have successfully completed the steps above, you can now send an email to the alias address you added and check the inbox of the primary account you selected.


 .CO.UK Domain
 Linux Hosting
 Windows Hosting

