To publish your website or use your email service, companies may sometimes ask you to add DNS records (such as A, MX, CNAME, TXT, SRV, etc.). If you’re using Plesk Panel, you can add them by following the steps below.
Important Information:
If your domain’s NS (Name Server) records are pointed to Fast Panda, the DNS records you add by following the steps below will become active shortly. However, if your NS records are pointed to another provider (such as your domain registrar or a custom server), you will need to add the DNS records through that provider’s control panel. Otherwise, the changes you make will not take effect.
Steps to Add, Delete, and Update DNS Records in Plesk Panel
- First, log in to your customer panel and then access Plesk Panel. Click here to learn how to log in to Plesk Panel.
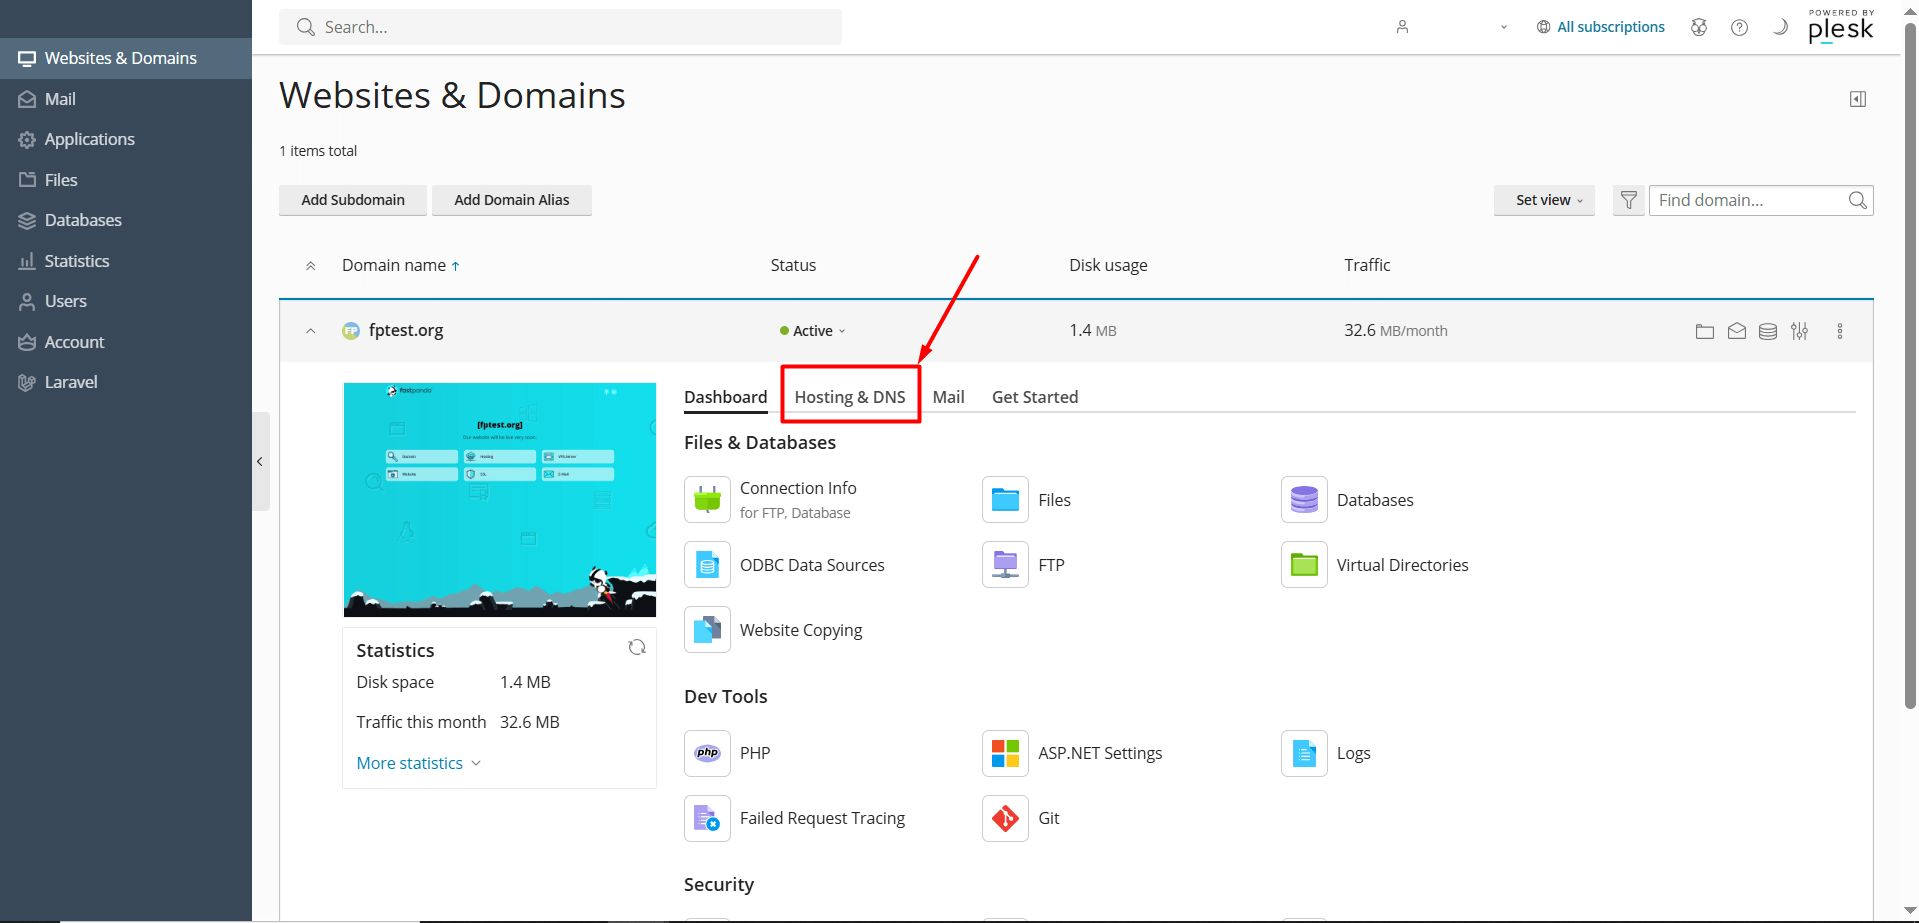
- When you access the Plesk Panel, click the “Hosting & DNS” button next to your service.
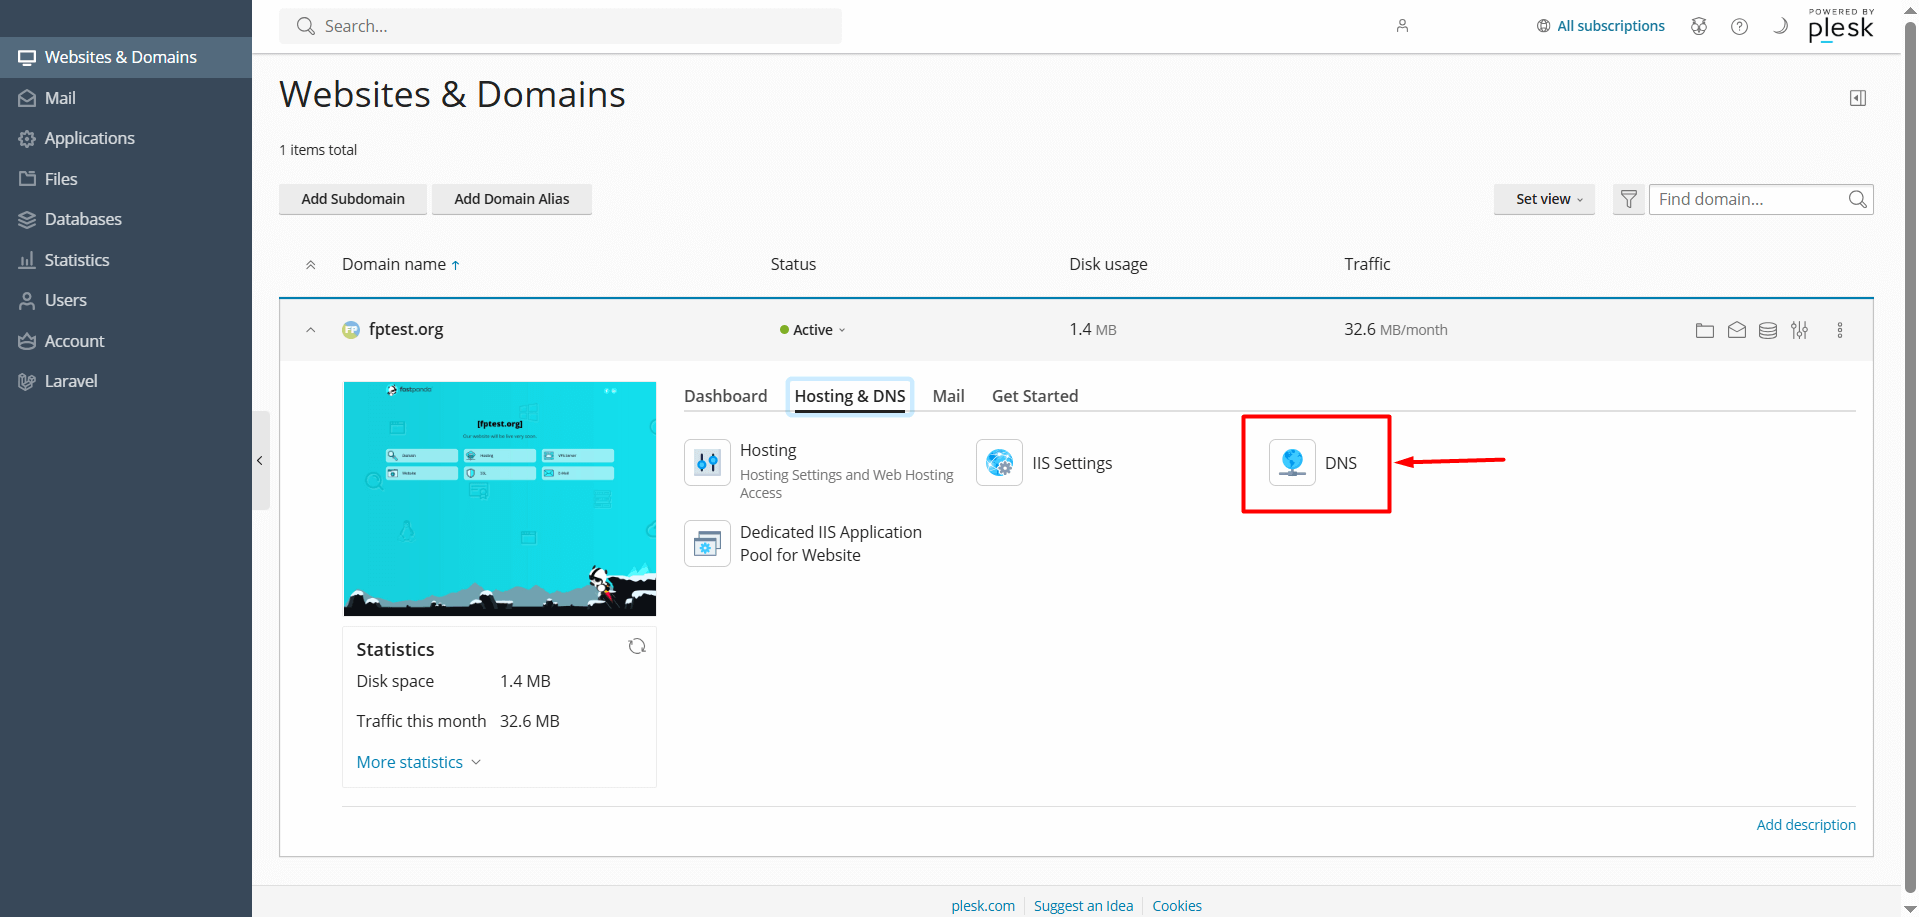
- Click on the “DNS” button.
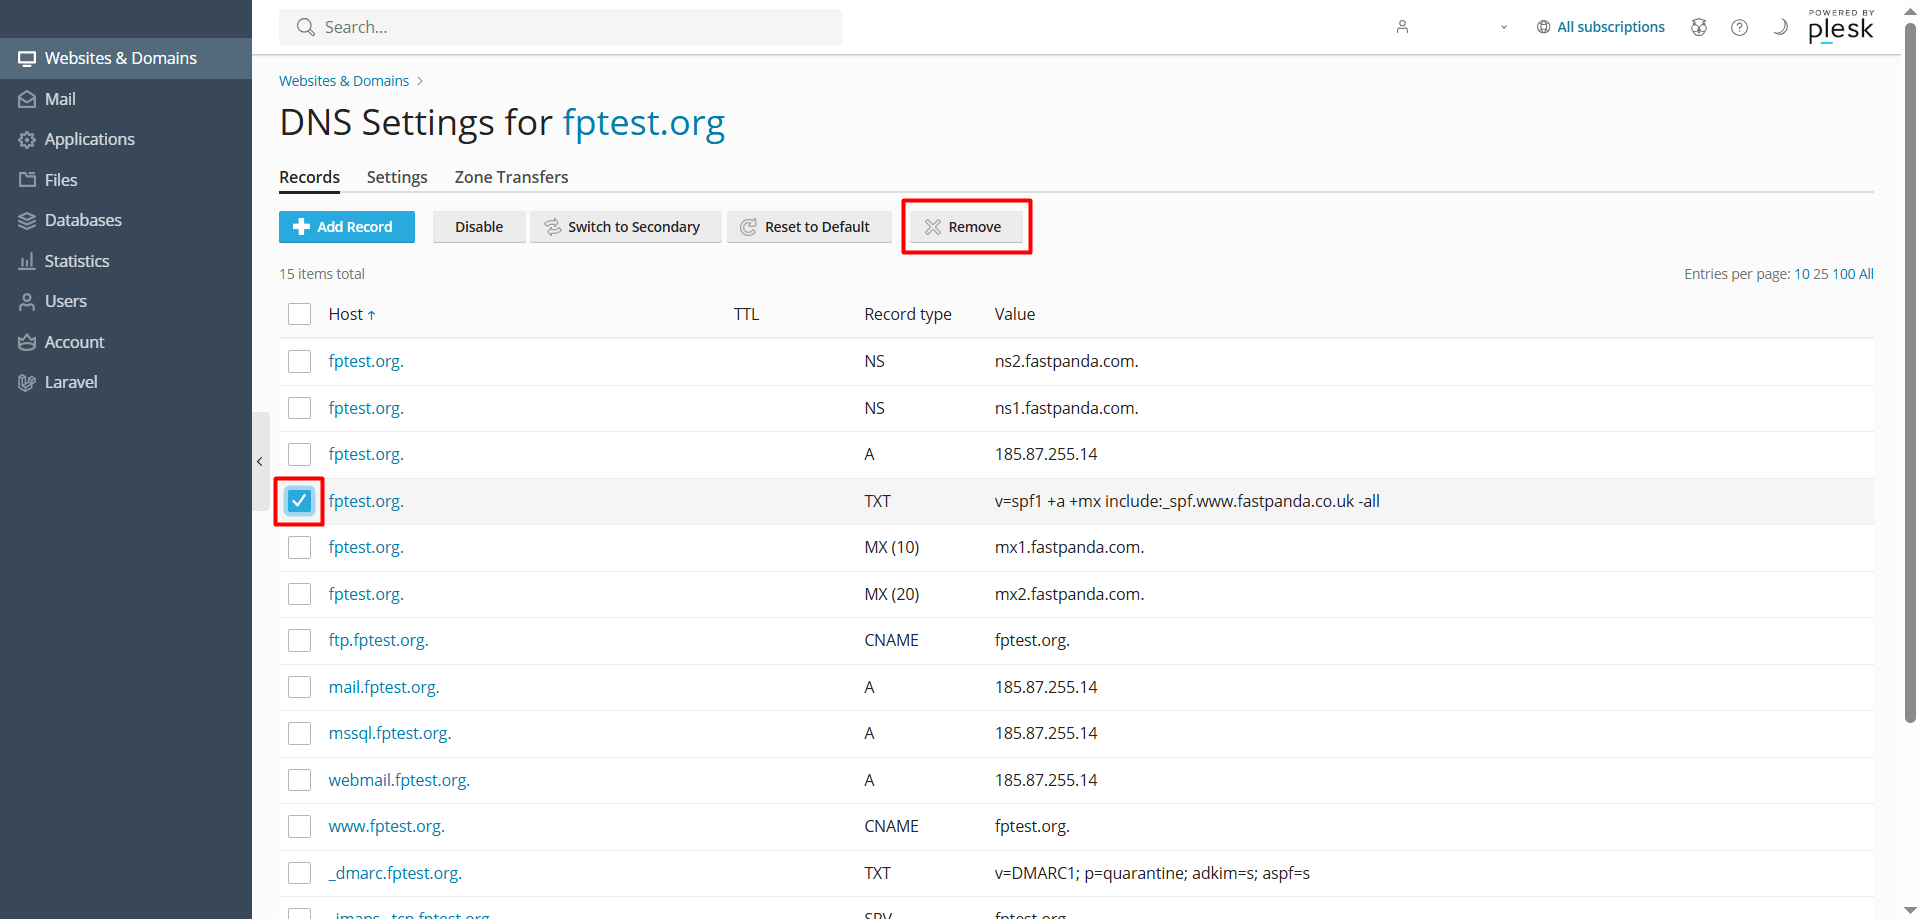
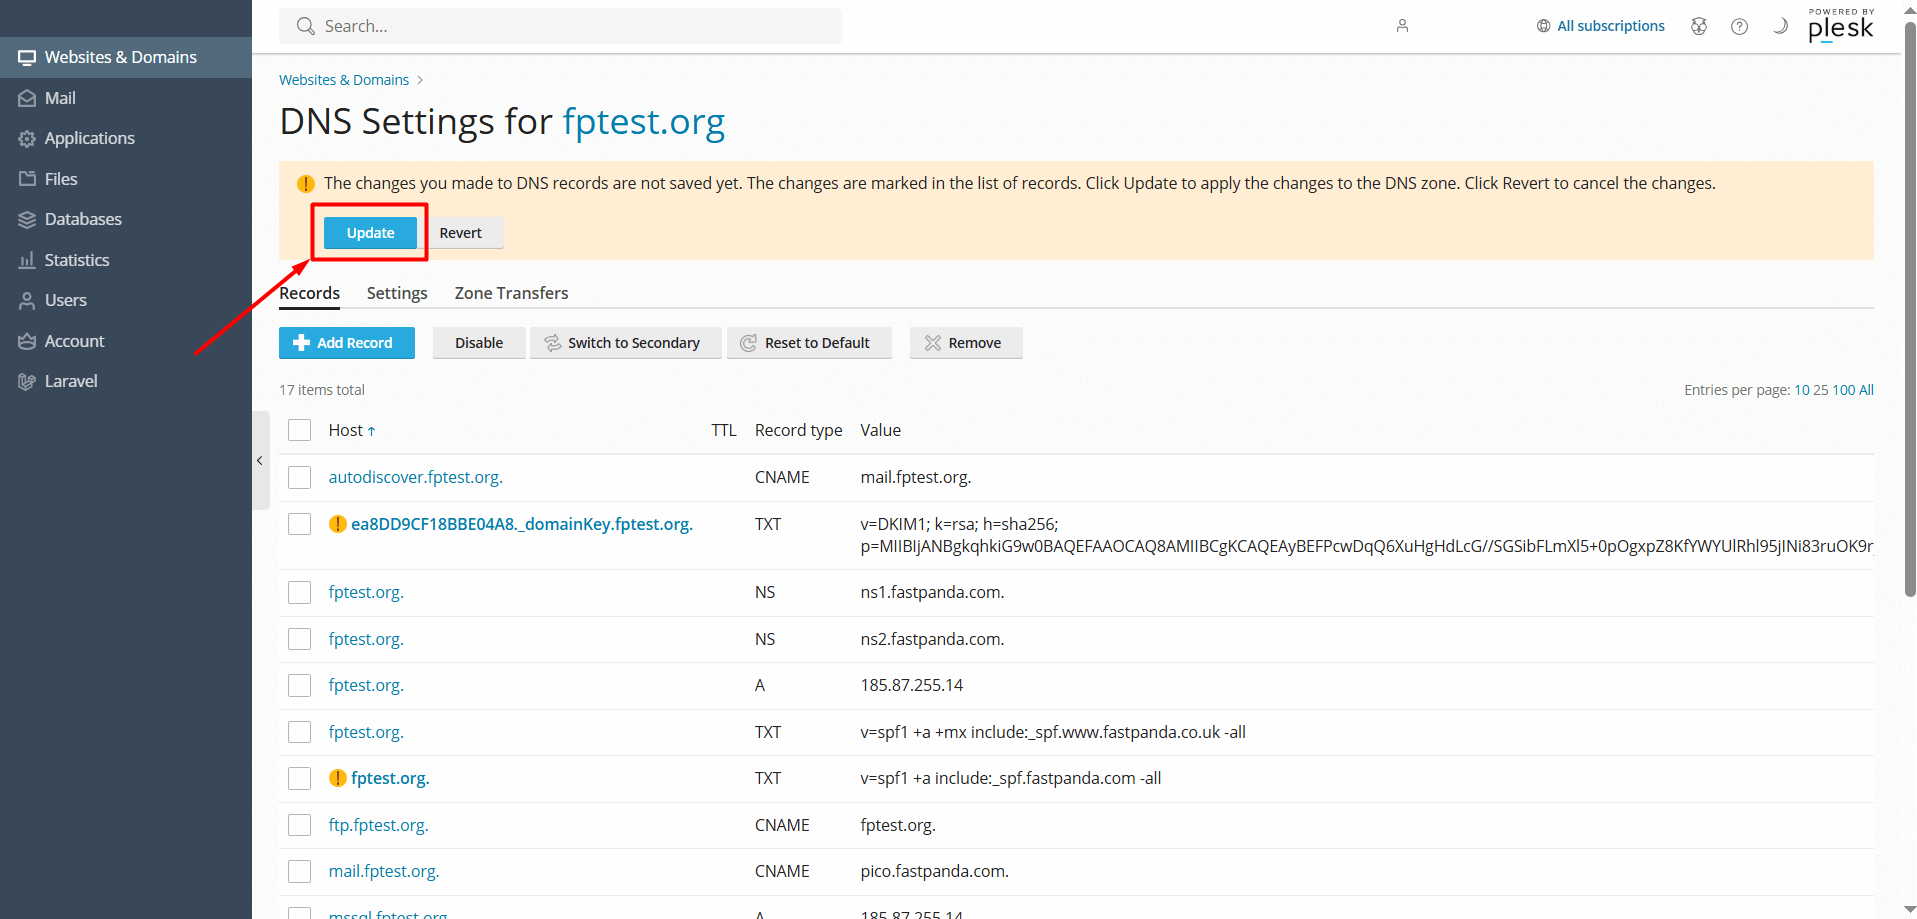
- On the page that opens, you will see your existing DNS records. If there are any existing records with the same type and name combinations as the new web site or email records you are about to add, it is recommended to delete them to avoid conflicts. However, if you are not experienced in this area, it’s best to consult a specialist or get support from our technical team to avoid making any mistakes.
- To delete an old record, check (tick) the box next to the record, then click the “Remove > Yes, remove” button.
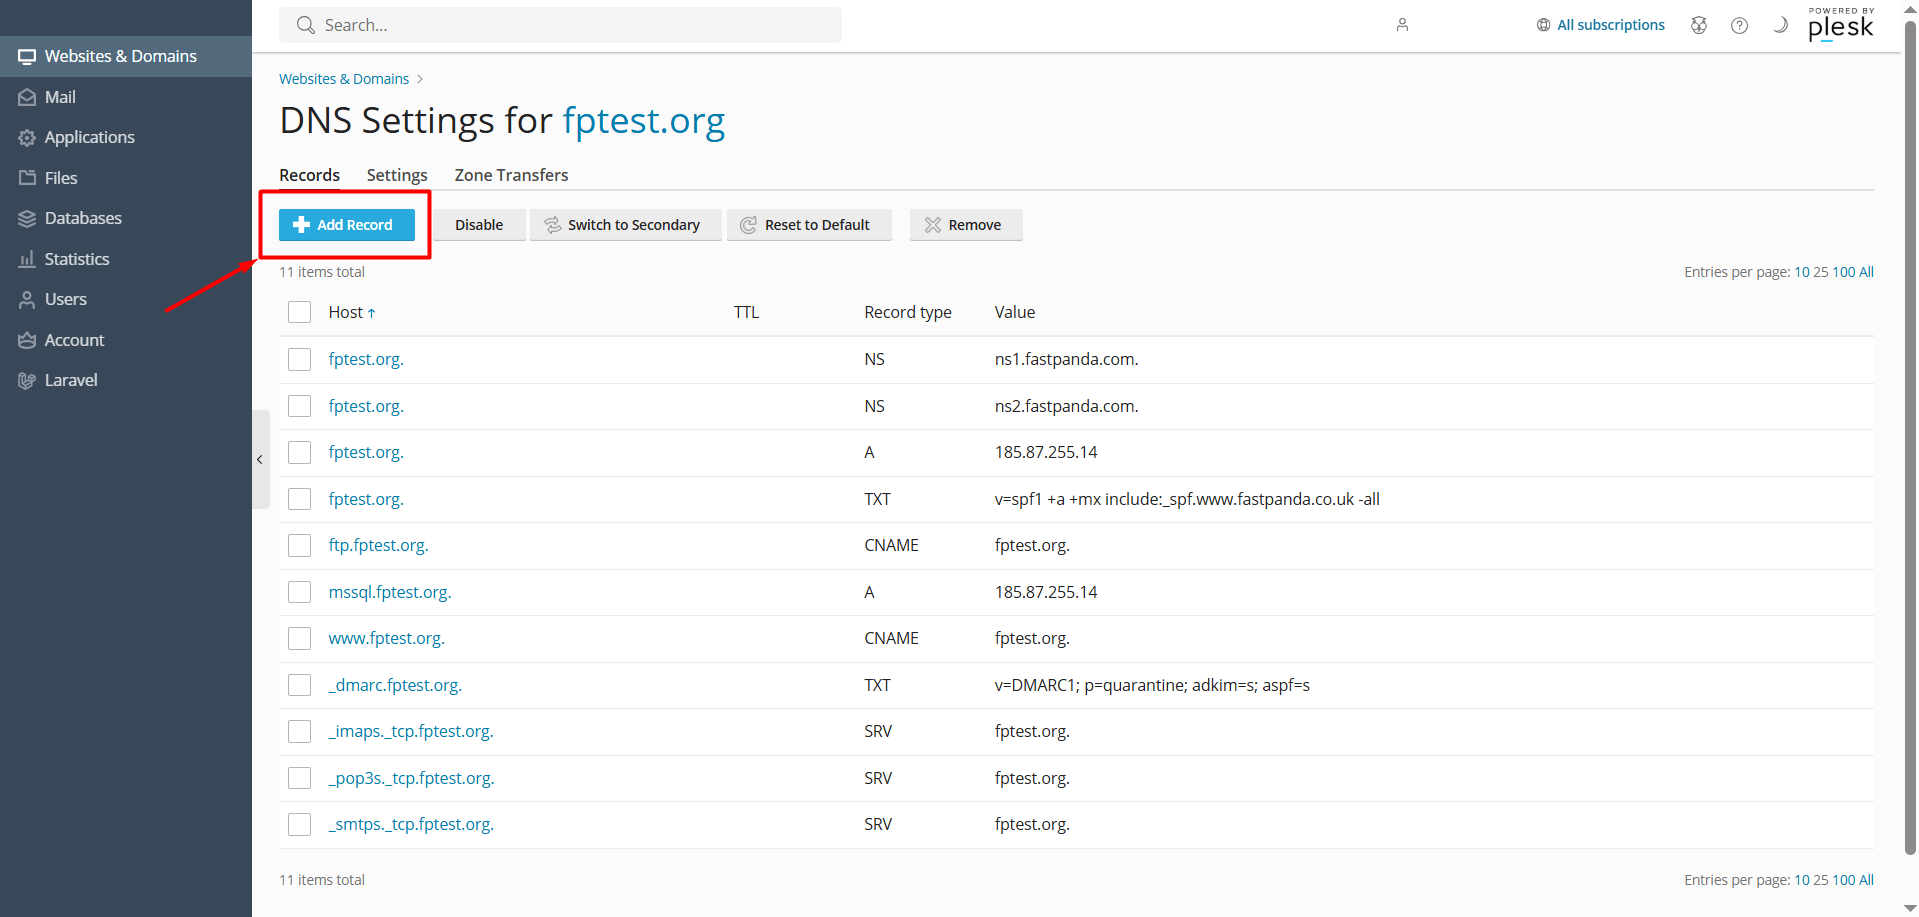
- To add a new record, click the “+ Add Record” button.
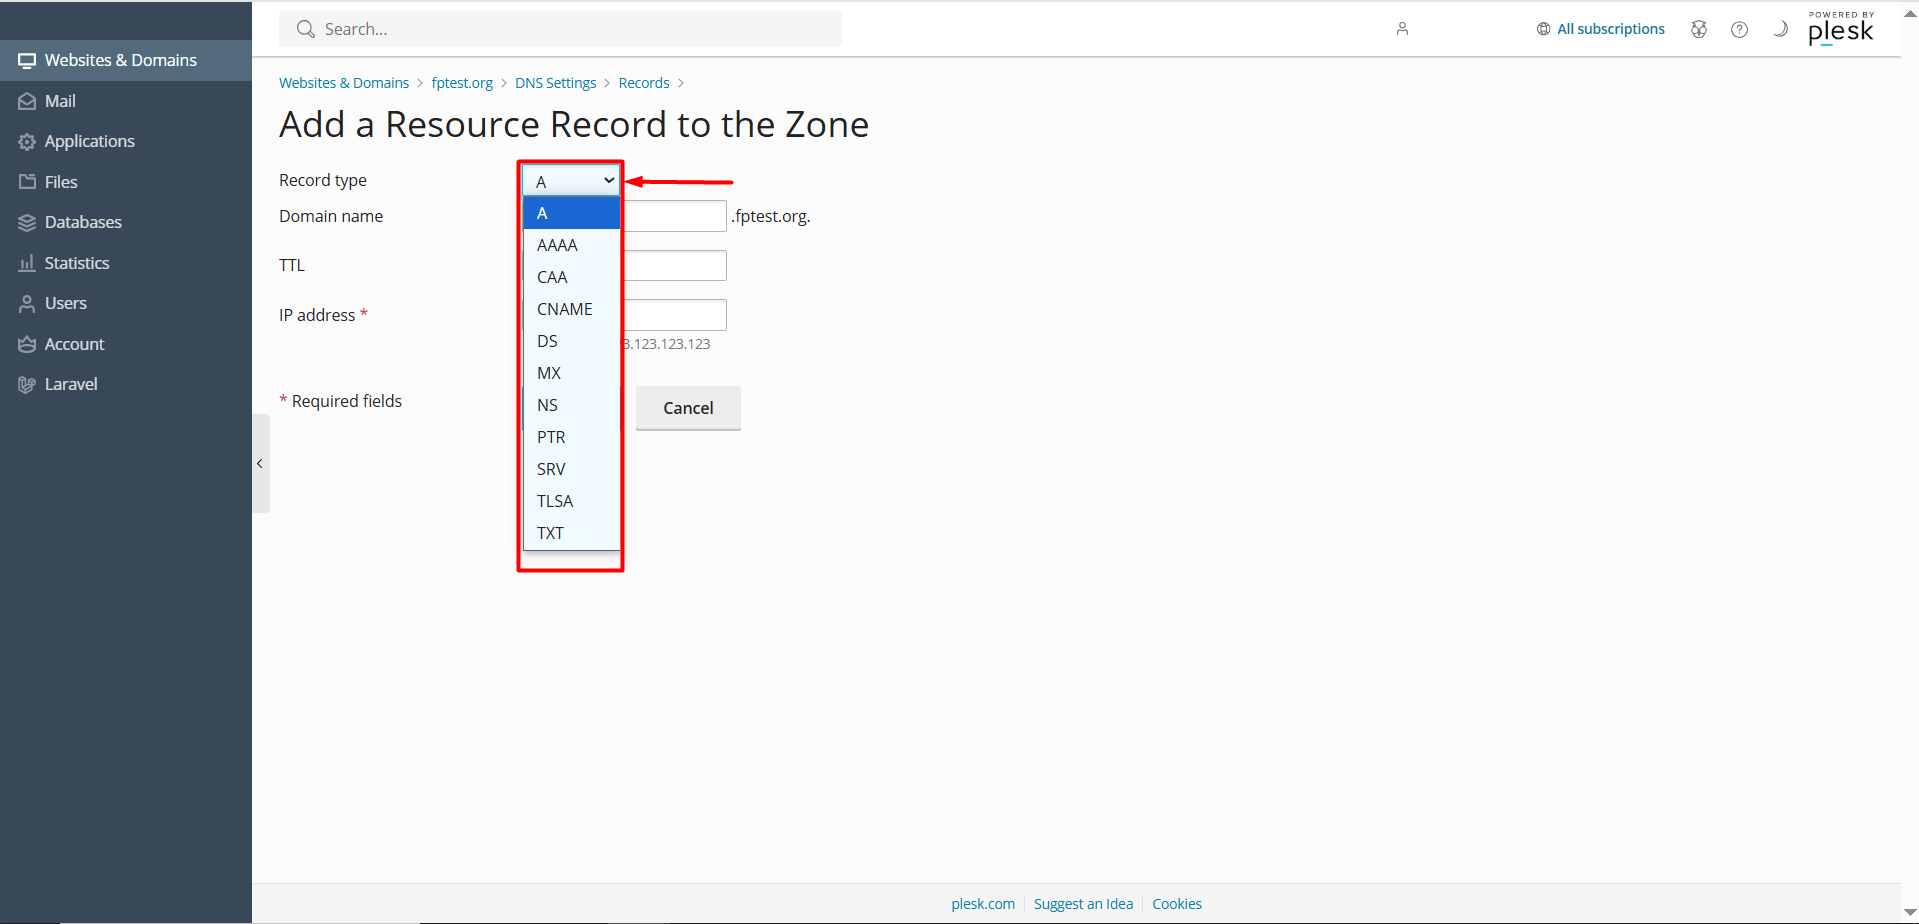
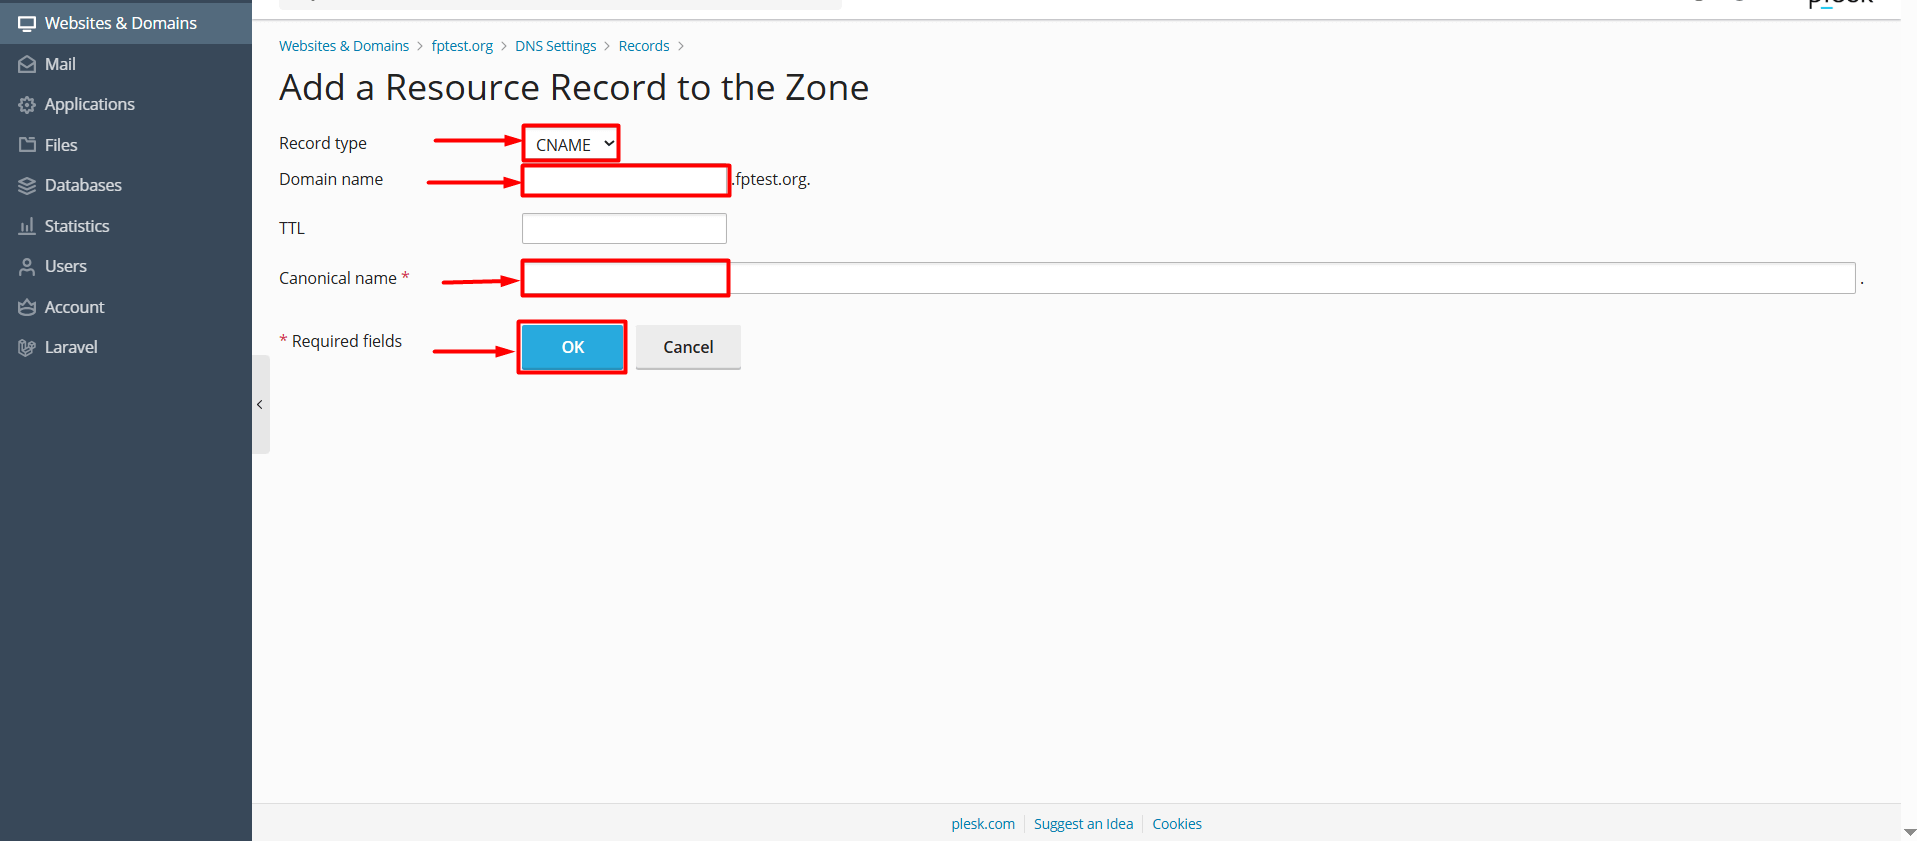
- In the “Record Type” field of the opened section, select the type of record you want to add. (MX, CNAME, TXT, etc.)
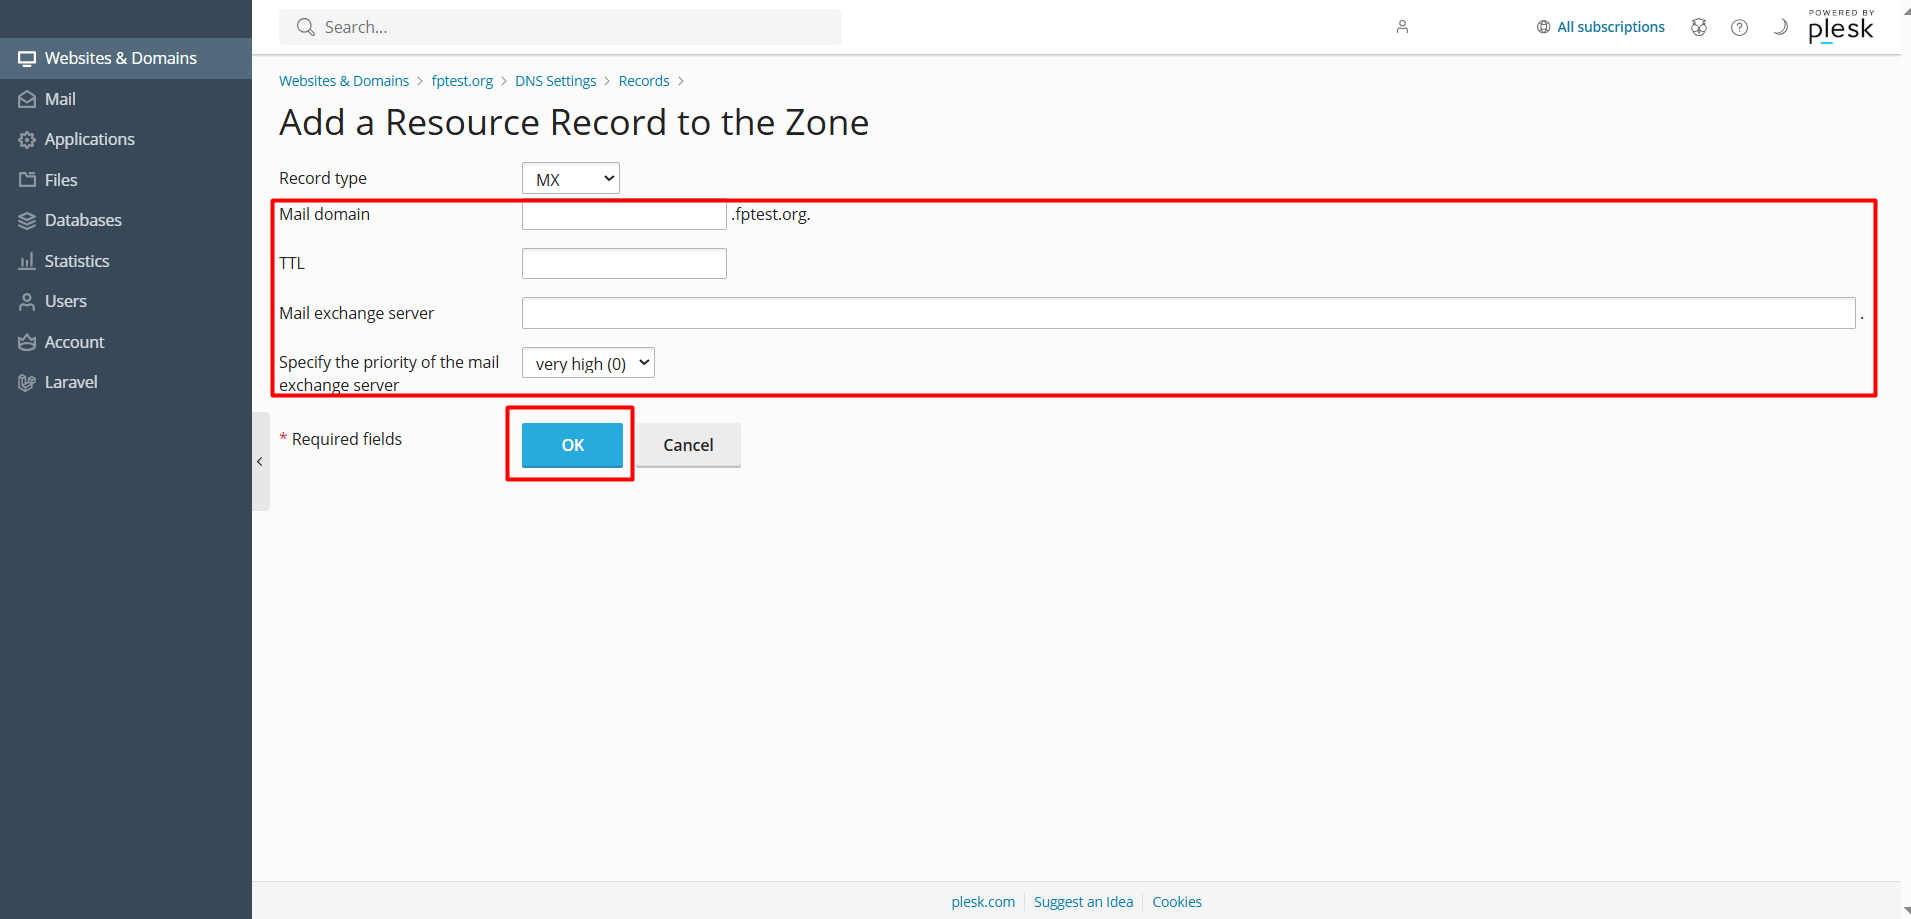
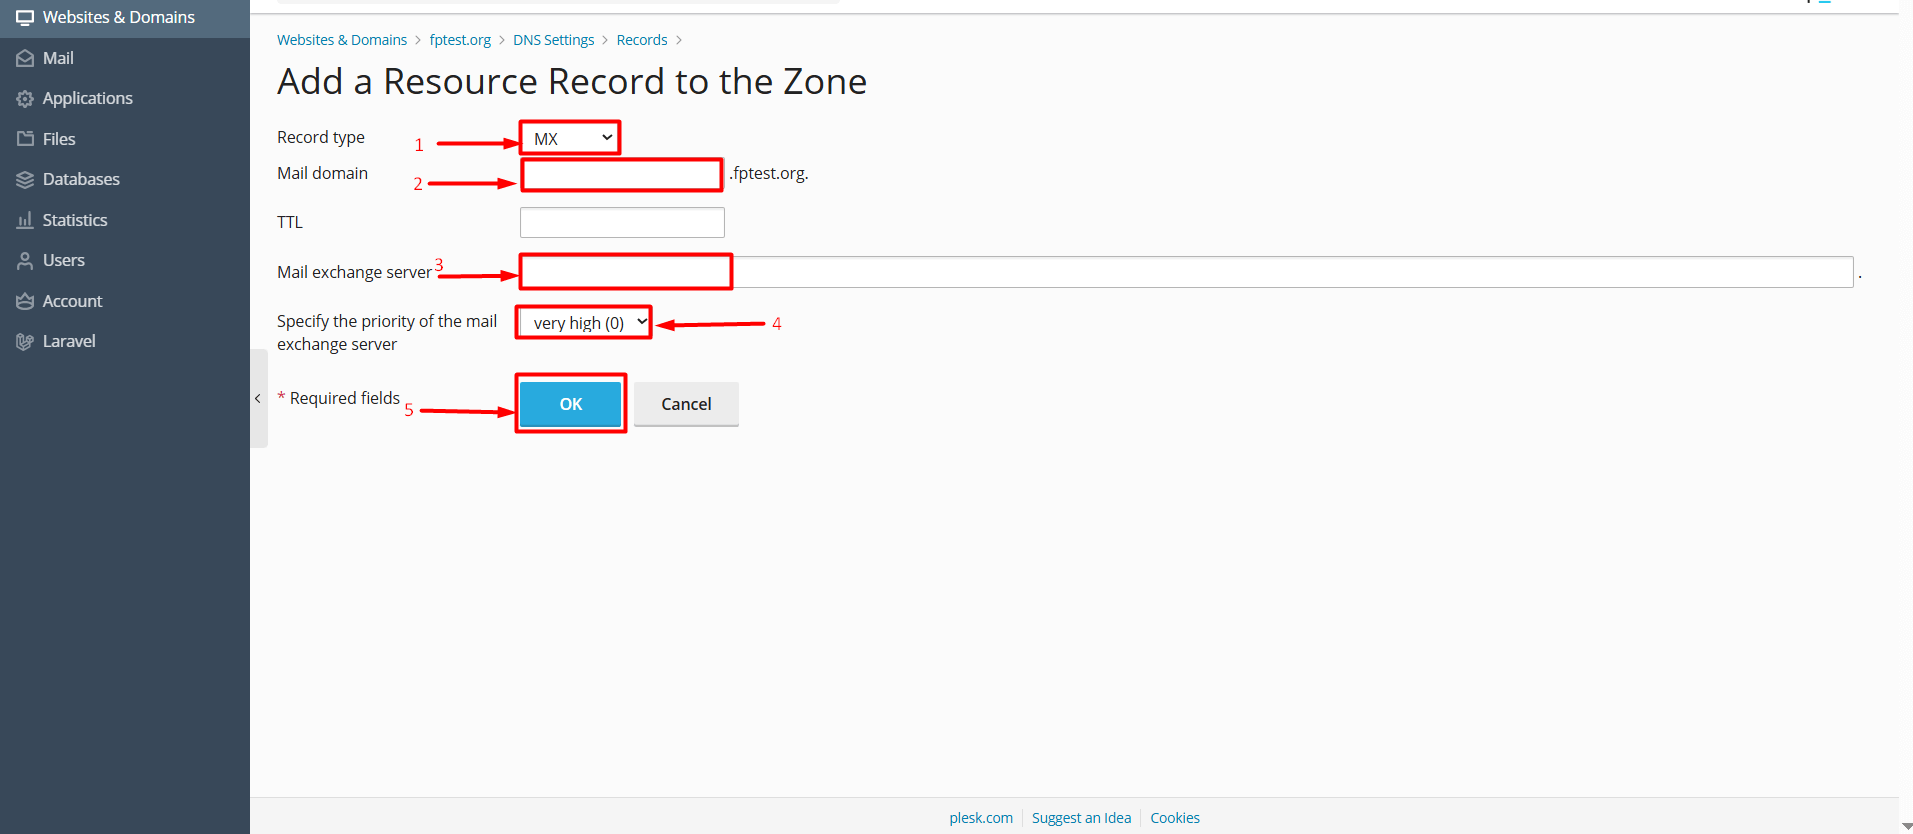
- Enter the DNS details one by one. If you are sure the information is correct, click the “OK” button.


 .CO.UK Domain
 Linux Hosting
 Windows Hosting