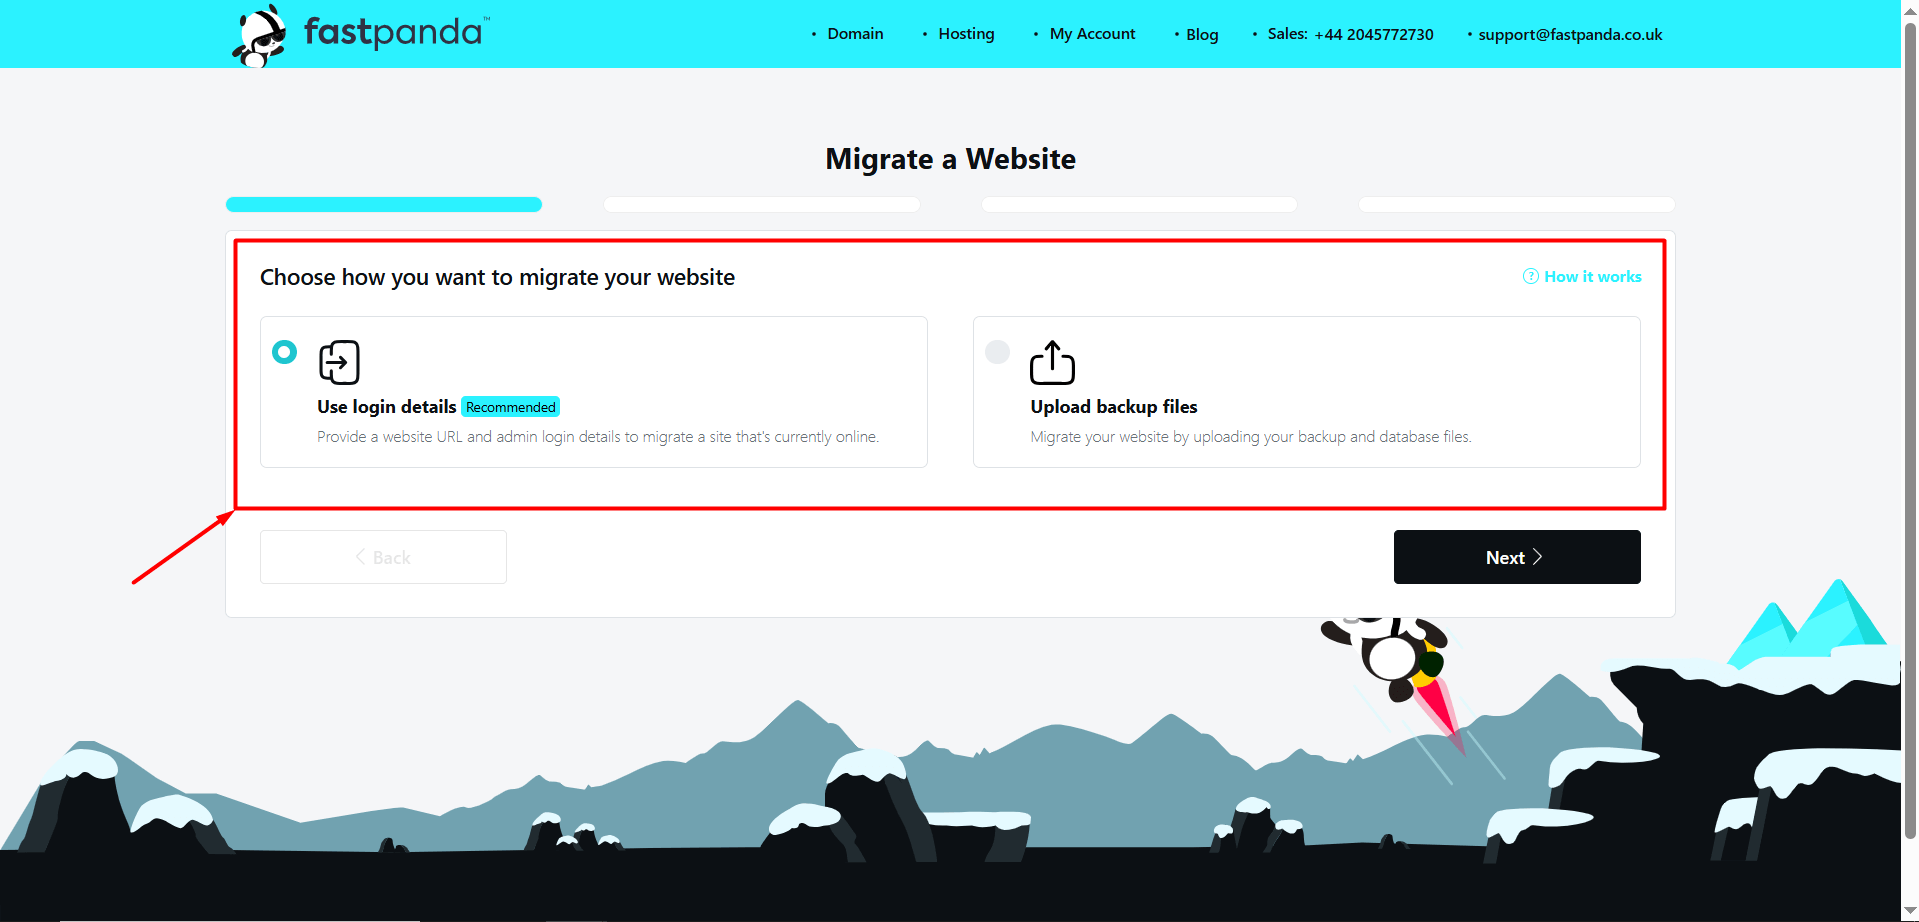
Migration refers to transferring your website files, databases, and configurations from your current hosting provider to Fast Panda servers. You may want to move your website from another company to Fast Panda due to reasons such as:
- Better performance
- Cost advantages
- Technical issues
In such cases, the Fast Panda team can assist you with the migration process. If you have purchased a hosting service from Fast Panda and want to request a migration, you can follow the steps below
- First, log in to the customer panel. Click here for more detailed information about logging in to the customer panel.
- After logging in to the customer panel, click the “Web Hosting” button located in the left menu.

- On the page that opens, you will see your existing web hosting packages. Click the “Manage Product” button for the service you want to request a migration for.

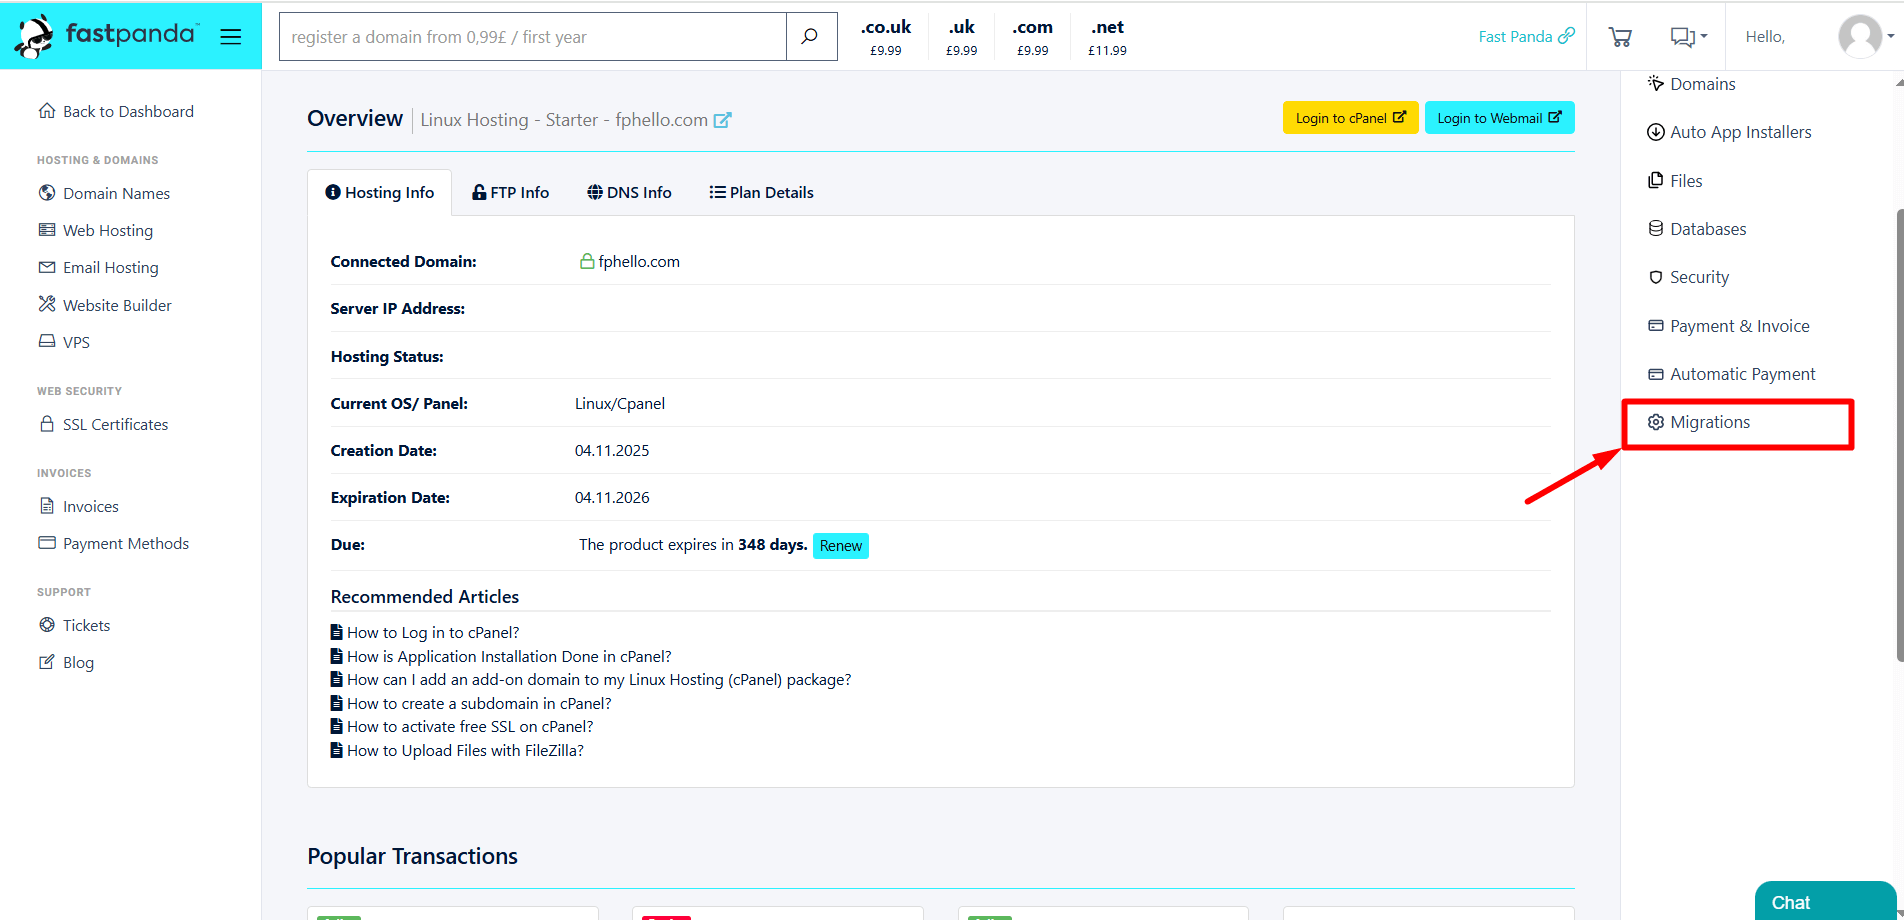
- Click the “Migrations” button located in the menu on the right side of the hosting management page.
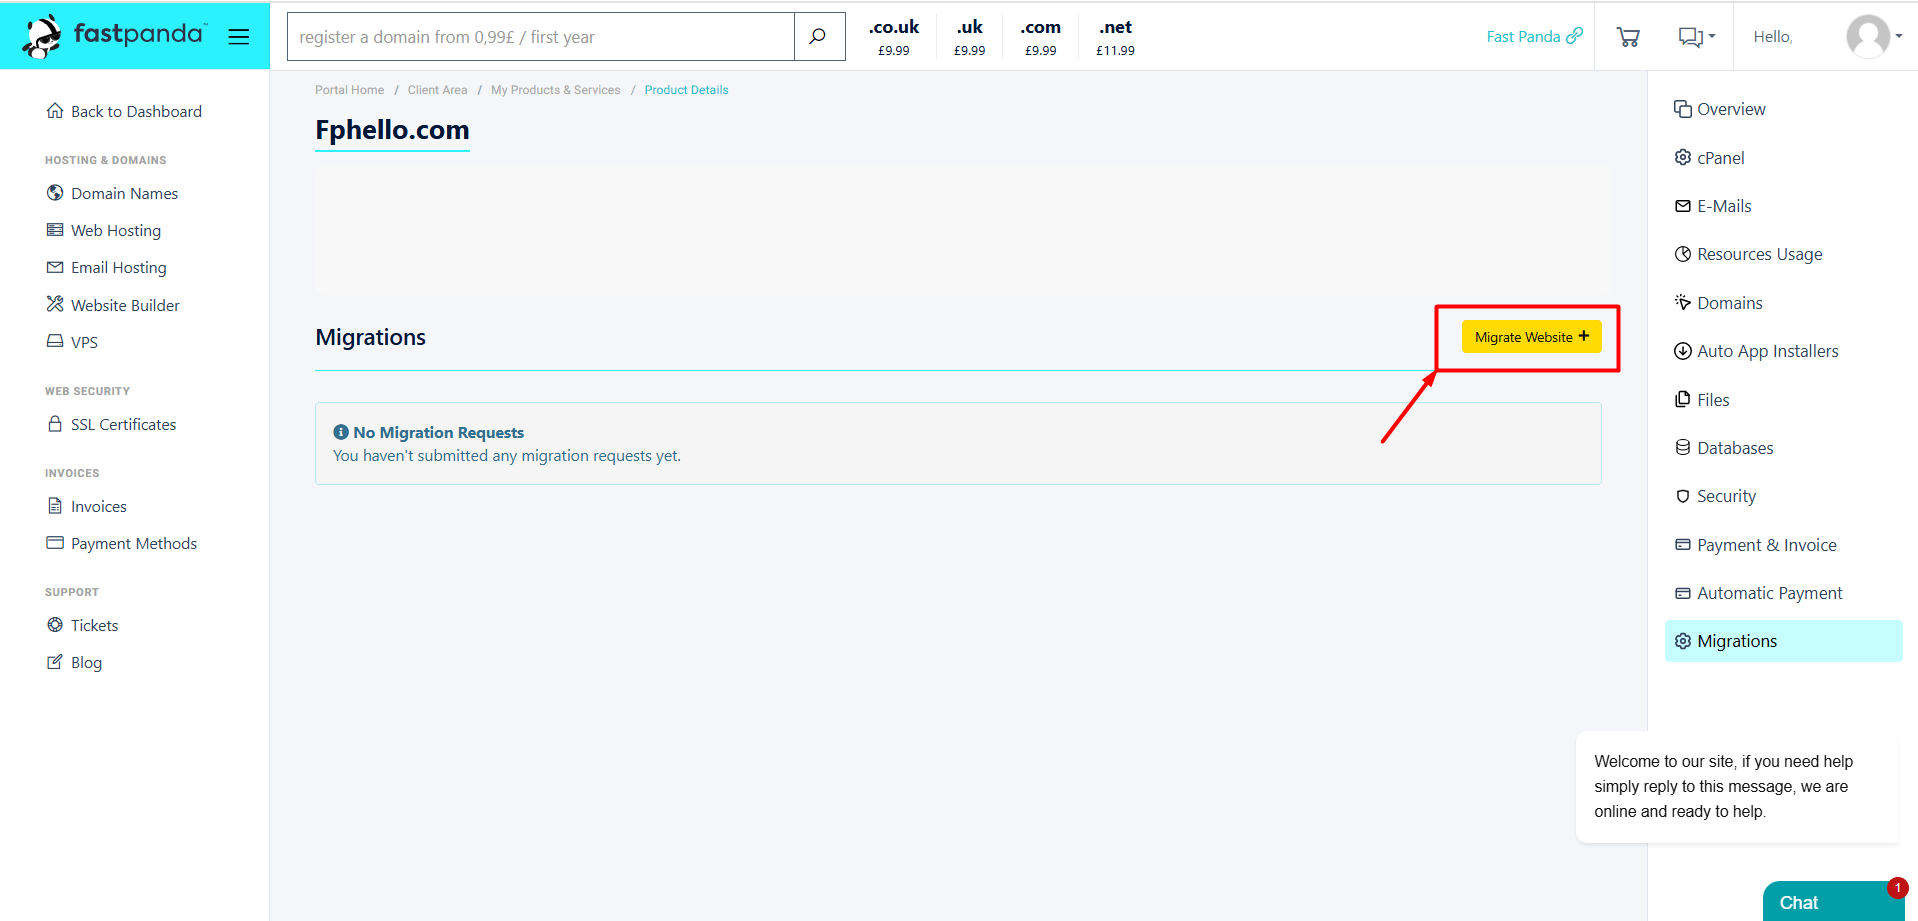
- Click the “Migrate Website +” button located at the top right.
-
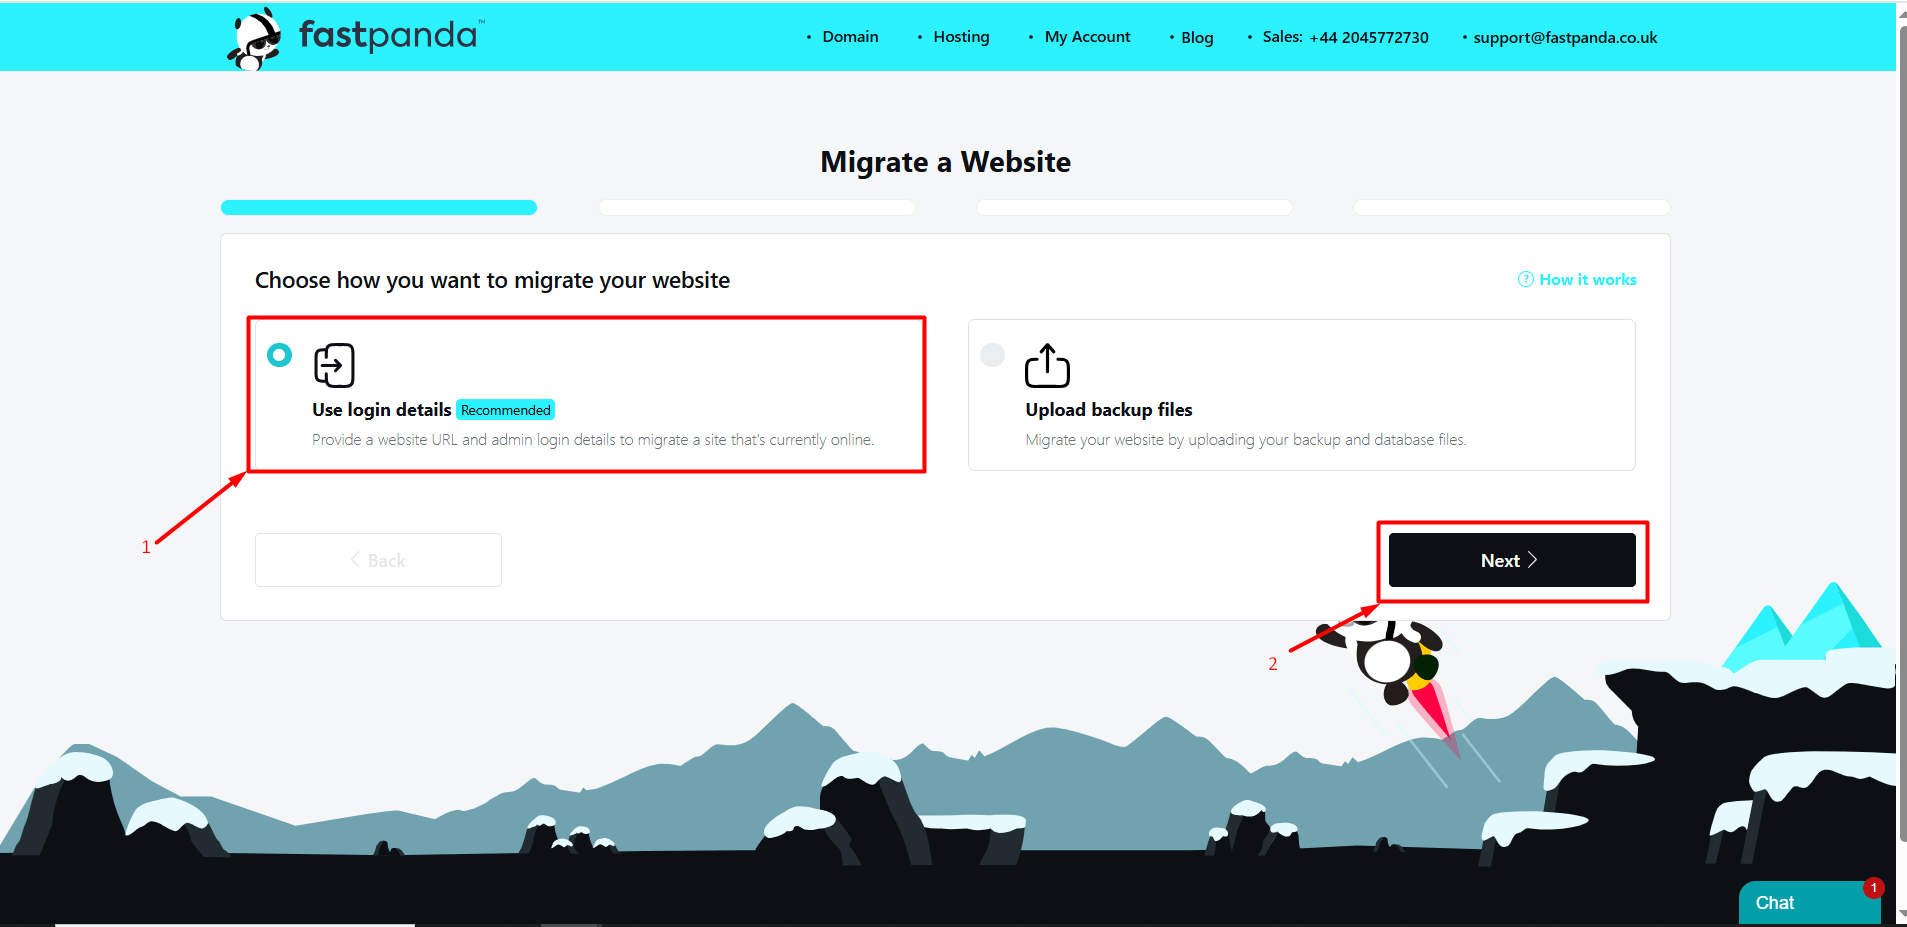
Two options will appear. You can review the detailed explanations of both options, choose the one that suits you, and submit your migration request.
How Can I Submit a Migration Request Using Login Details?
- When you select the Use login details option, you must provide a website URL and administrator login details to migrate a site that is currently online. If this option is suitable for you, click on “Use login details” and then click the “Next” button.
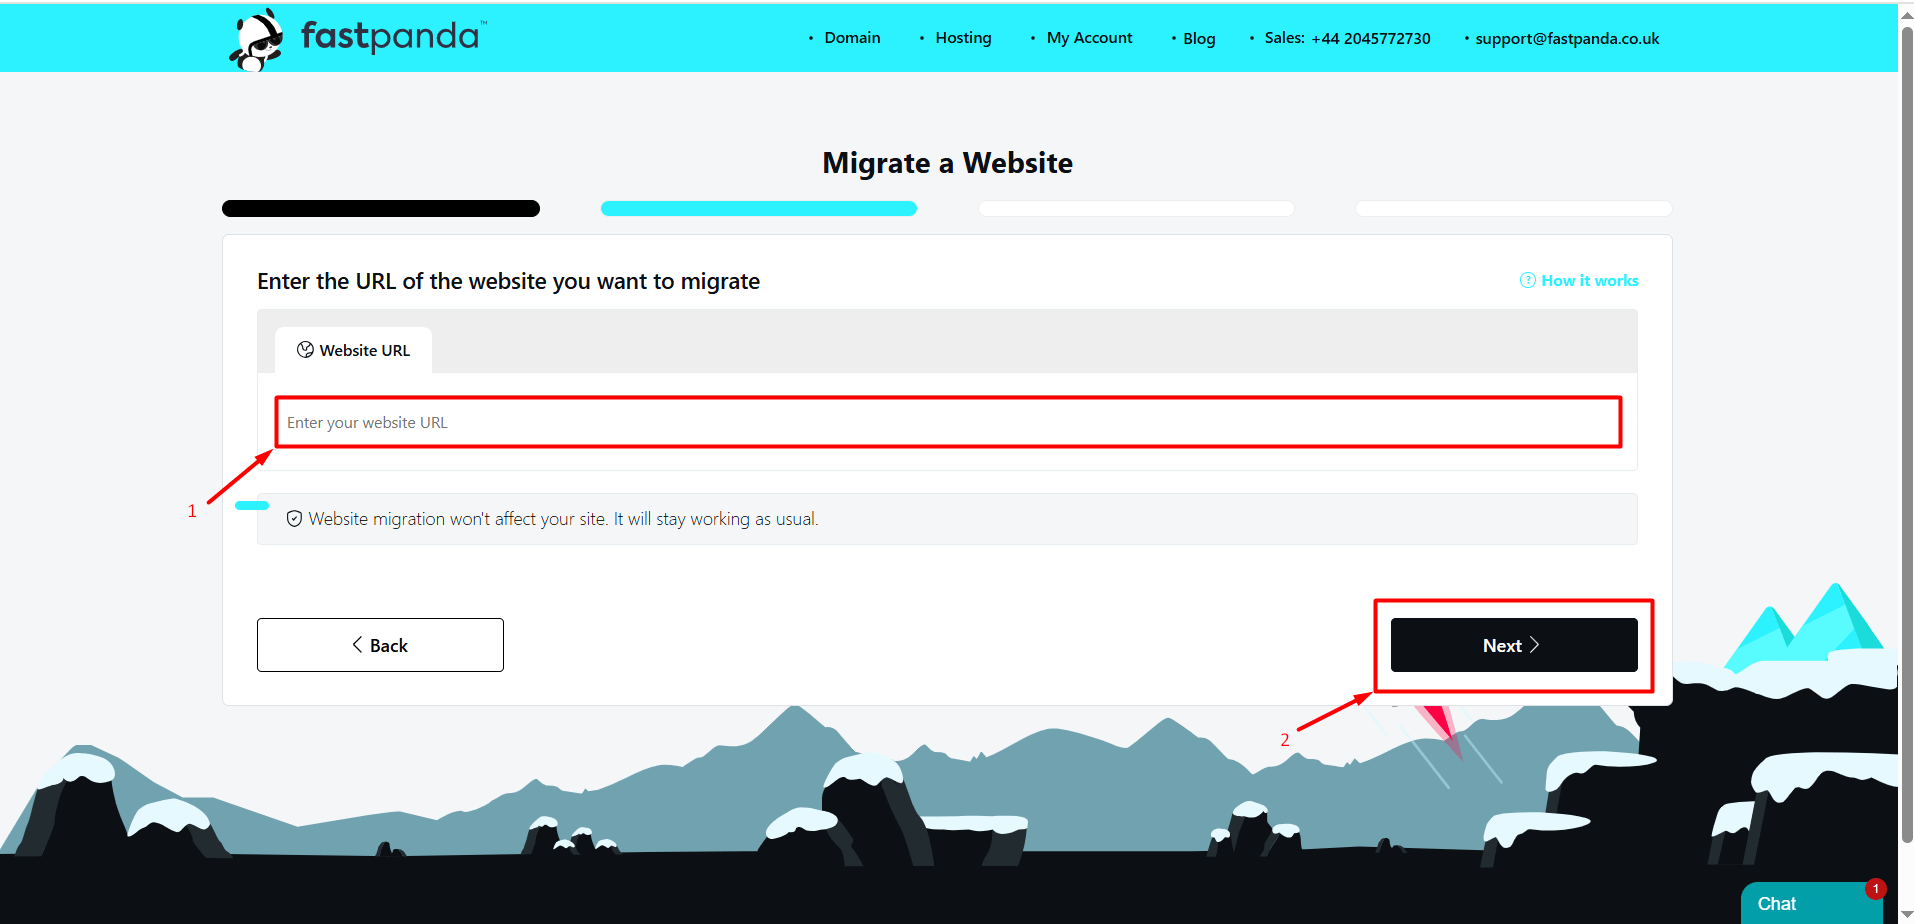
- Paste the URL of the website you want to migrate into the “Website URL” field and click the “Next” button.
- In the window that opens, click on the option that suits your website: “WordPress”, “cPanel”, or “Other”, and then click the “Next” button.
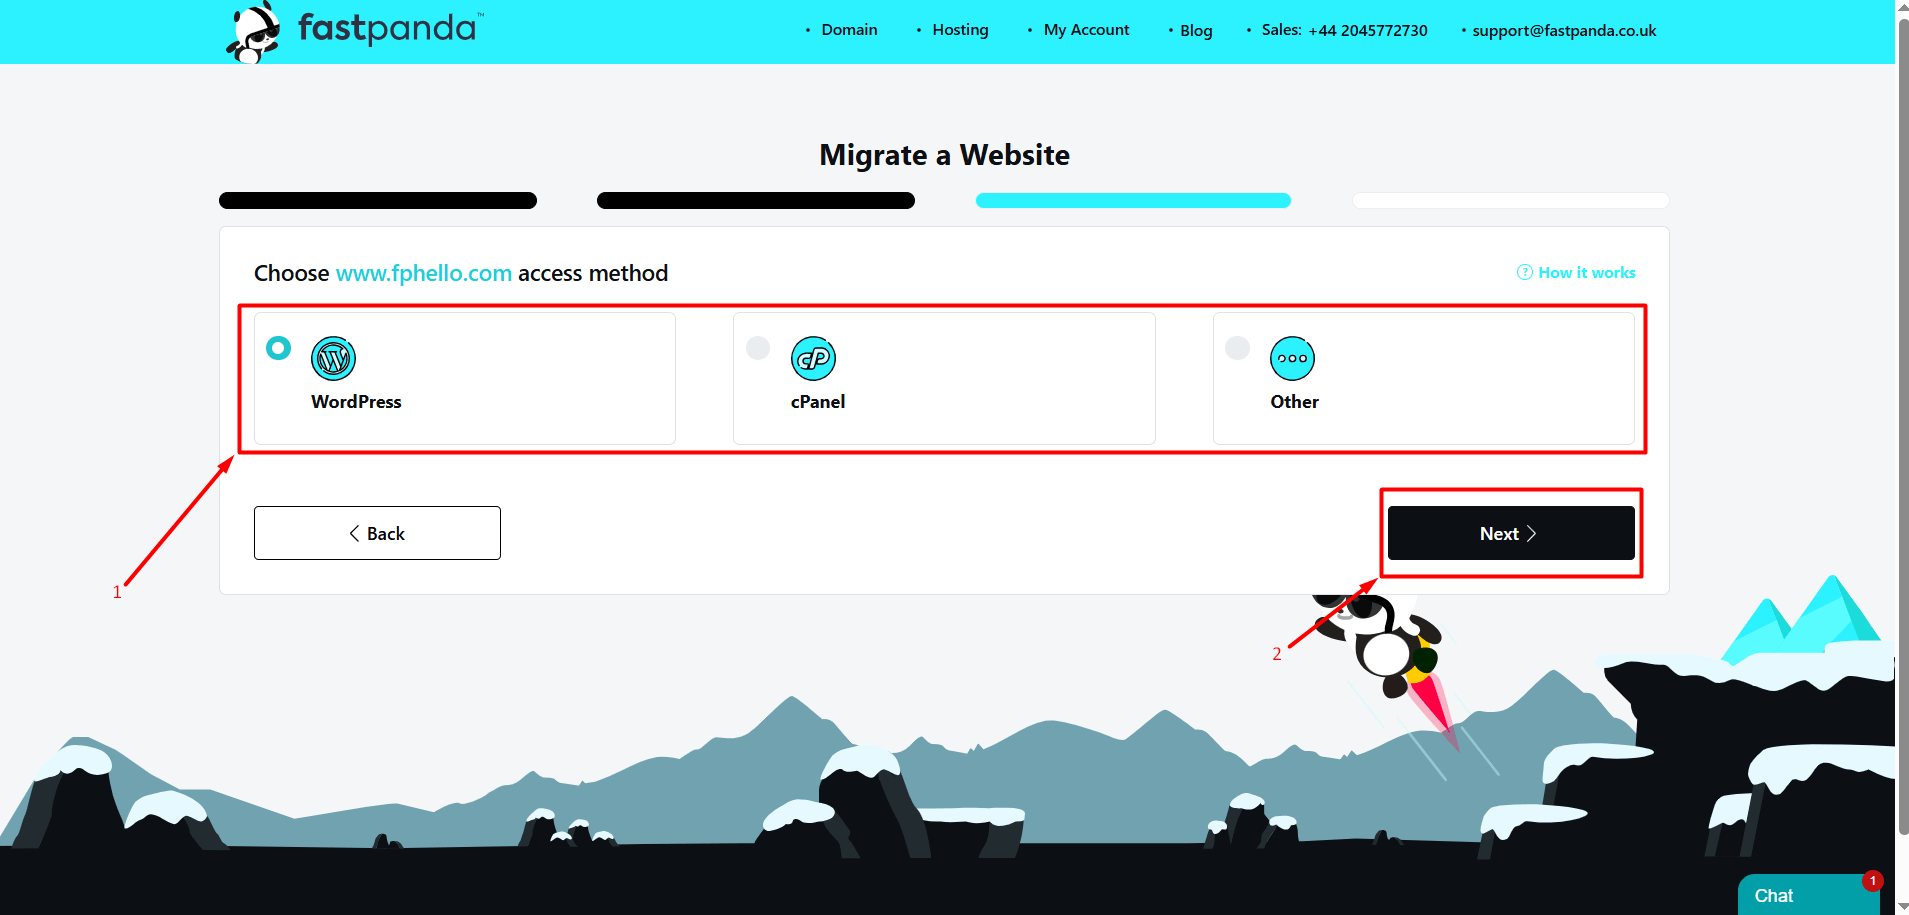
- Your website:
- If it is WordPress and you proceeded by clicking the “WordPress” button, you will be asked for your WordPress login details. Enter your information accurately and completely to ensure the migration is successful, then click the “Next” button.

- If it is cPanel and you selected cPanel, the screen that opens will ask for your cPanel admin login details. Enter your information accurately and completely to ensure the migration is successful, then click the “Next” button.

- If your website is neither WordPress nor cPanel, you can select “Other”. In the window that opens, enter your website’s admin login URL, username, and password. If you want to provide additional information, you can write it in the “Additional notes for the migration team (optional)” field. After entering this information, click the “Next” button.

- If it is WordPress and you proceeded by clicking the “WordPress” button, you will be asked for your WordPress login details. Enter your information accurately and completely to ensure the migration is successful, then click the “Next” button.
- Click the “Submit Request” button to send your migration request.
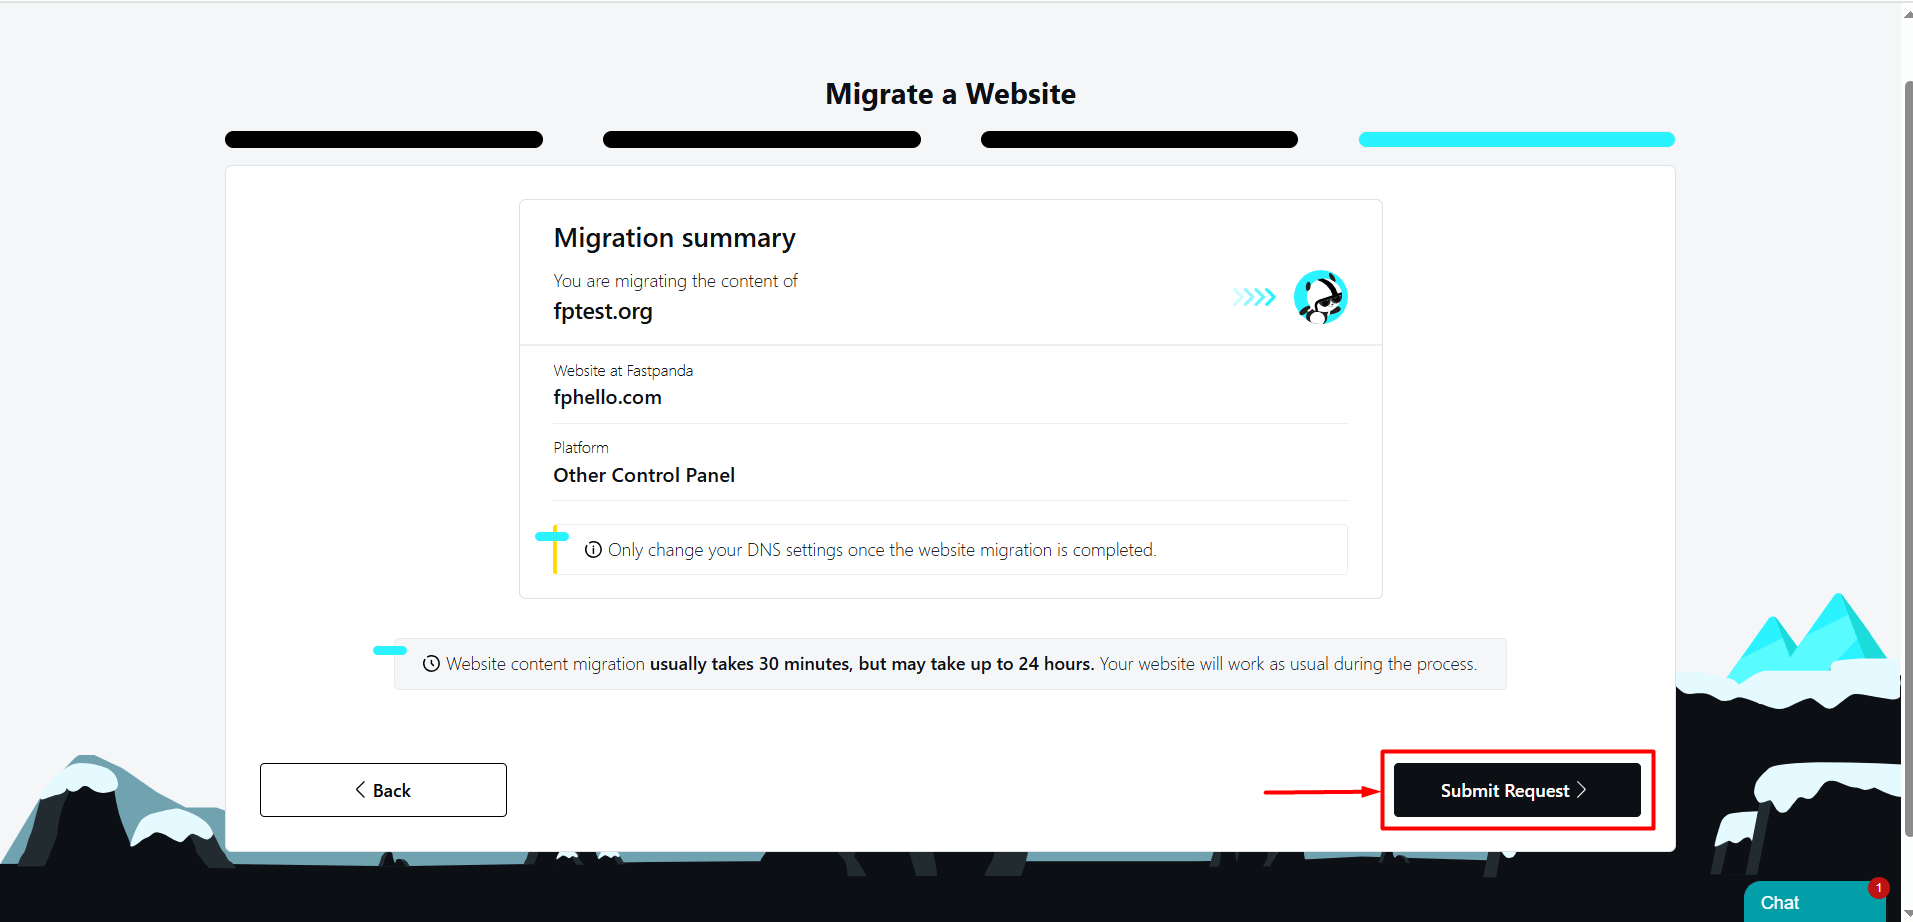
- Once you have successfully followed the steps above, your migration request will be processed. Website content migration usually takes 30 minutes, but it may take up to 24 hours. You can monitor the migration process in the “Migration” section on the management page of your hosting service.
How Can I Submit a Migration Request by Uploading Backup Files?
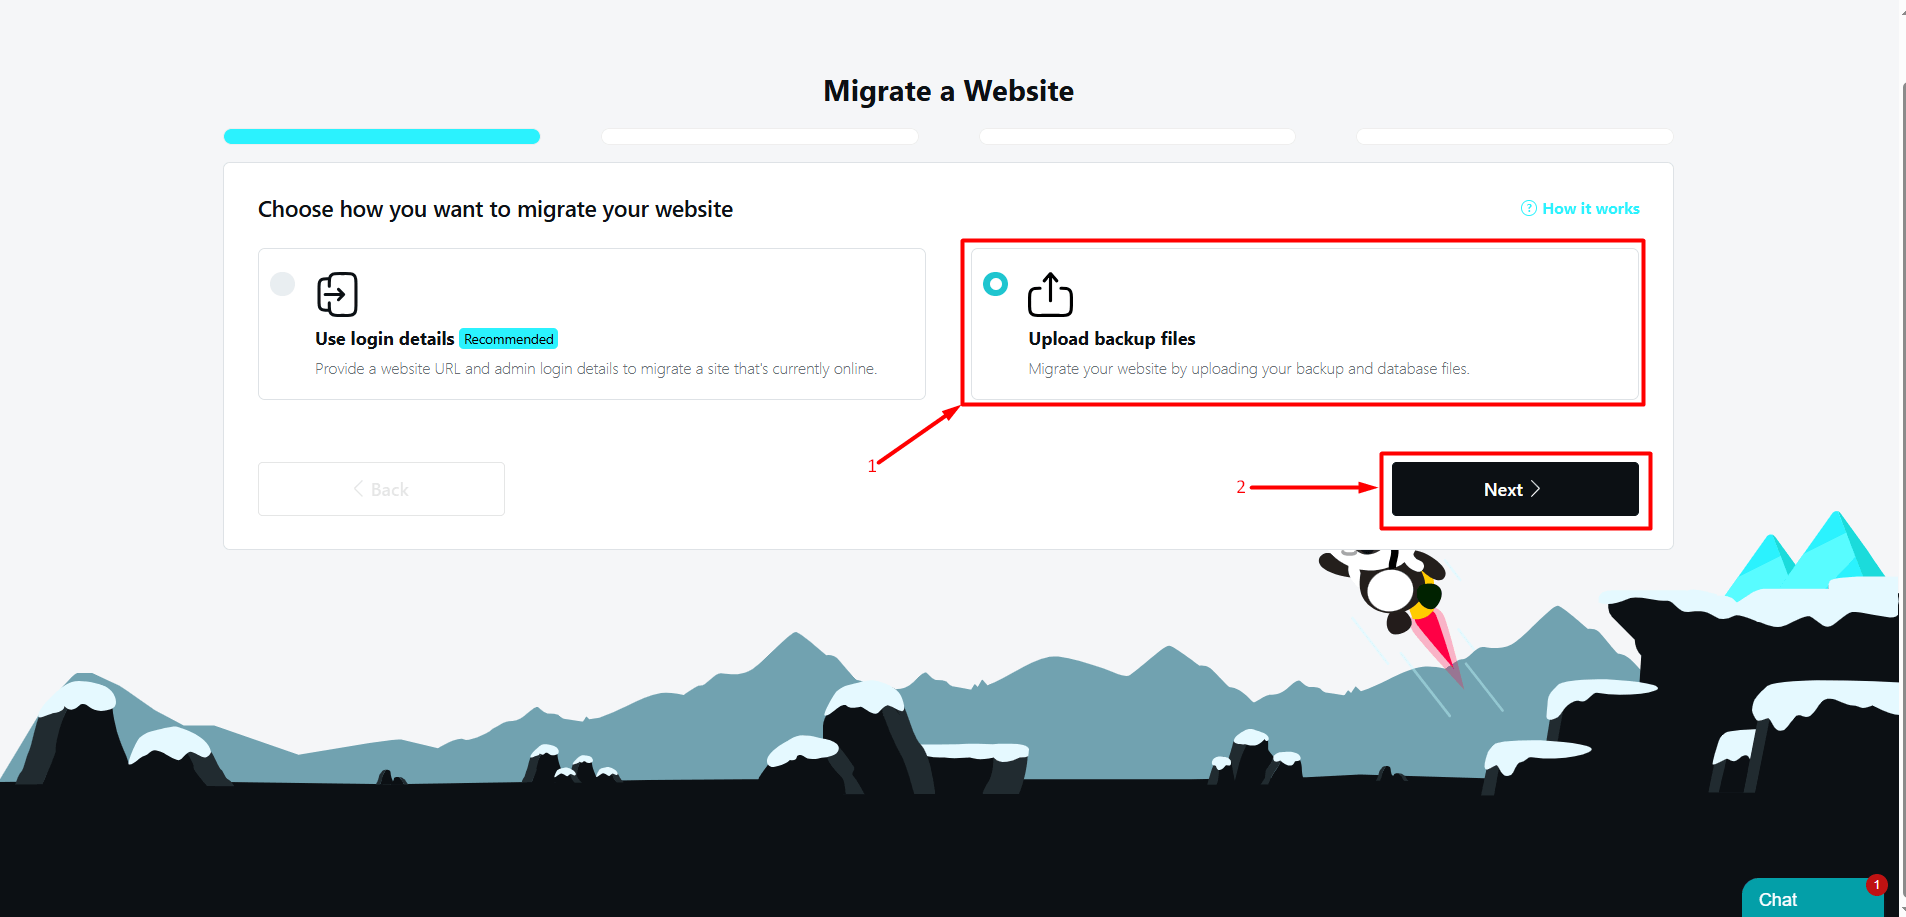
- When you select the “Upload backup files” option, you can migrate your website by uploading your backup and database files. If you have backups, click on the “Upload backup files” option and then click the “Next” button.
- Paste the URL of the website you want to migrate into the “Website URL” field and click the “Next” button.

- In the window that opens, you will be asked to upload your backup file. You can drag and drop your backup from your computer into this area or click on the backup upload area to select it from your computer. After uploading your backup, click the “Next” button.

- Click the “Submit Request” button to send your migration request.

- Once you have successfully followed the steps above, your migration request will be processed. Website content migration usually takes 30 minutes, but it may take up to 24 hours. You can monitor the migration process in the “Migration” section on the management page of your hosting service.


 .CO.UK Domain
 Linux Hosting
 Windows Hosting