To set up your Business Email account on your macOS, follow the steps below.
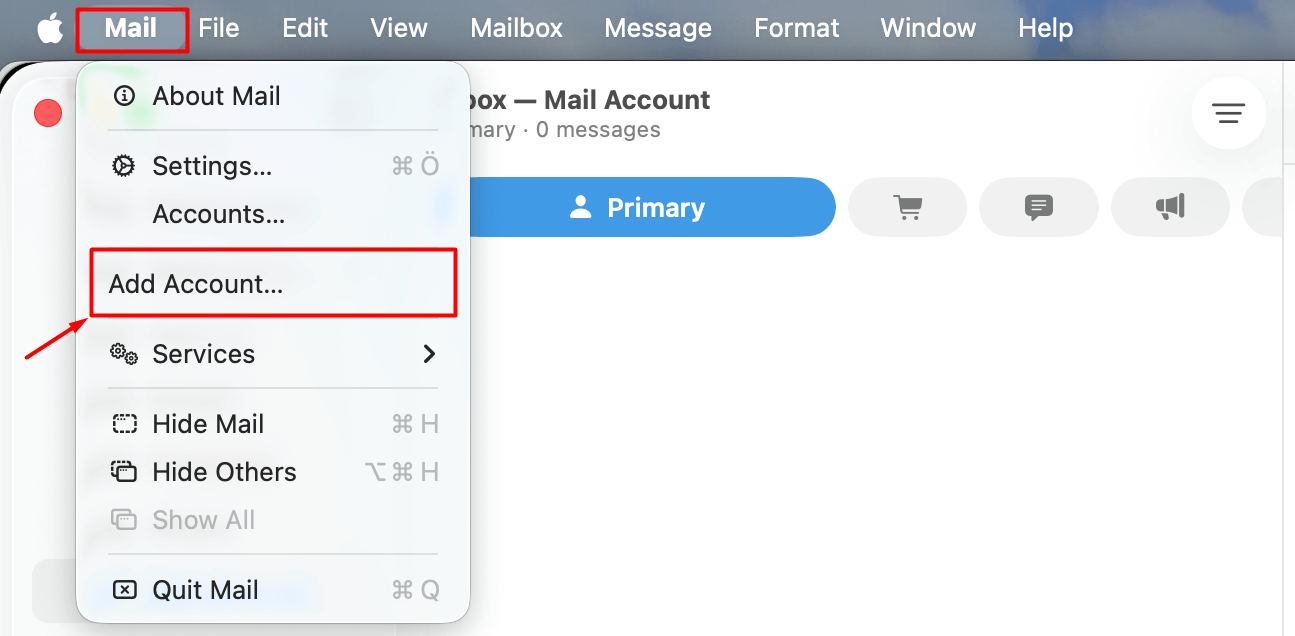
- Open the “Mail” app on your Mac device.
- Click on “Mail > Add Account”.
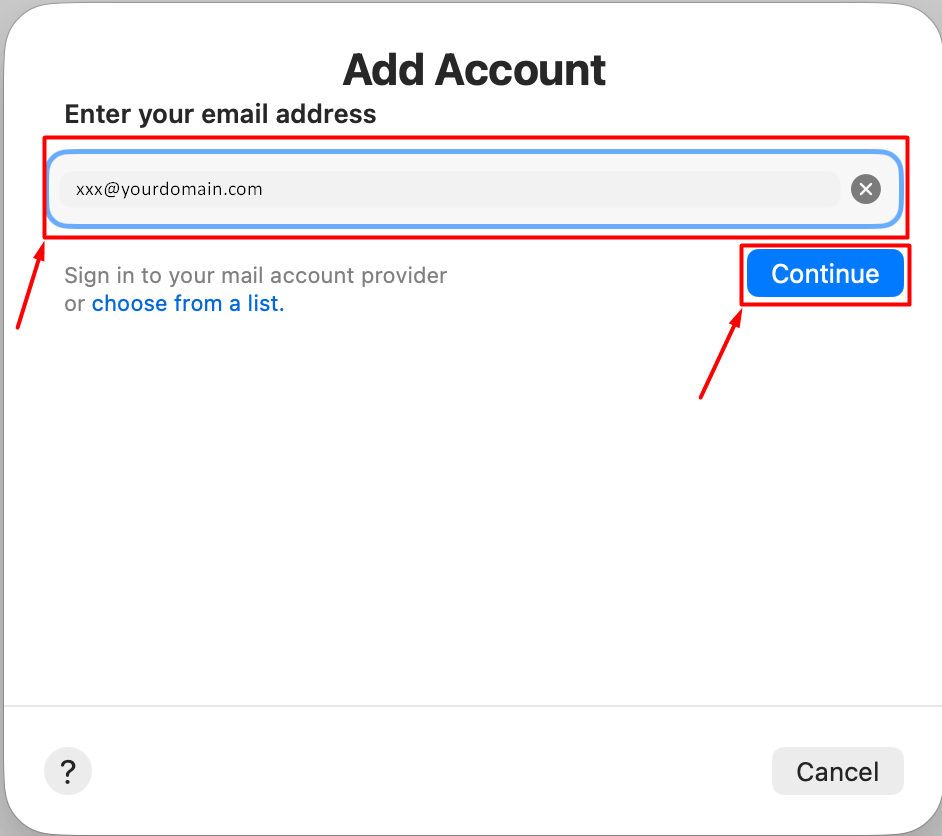
- Enter the email address you want to create. Make sure to include the complete domain after the username. Example: [email protected]
- Click the “Continue” button.
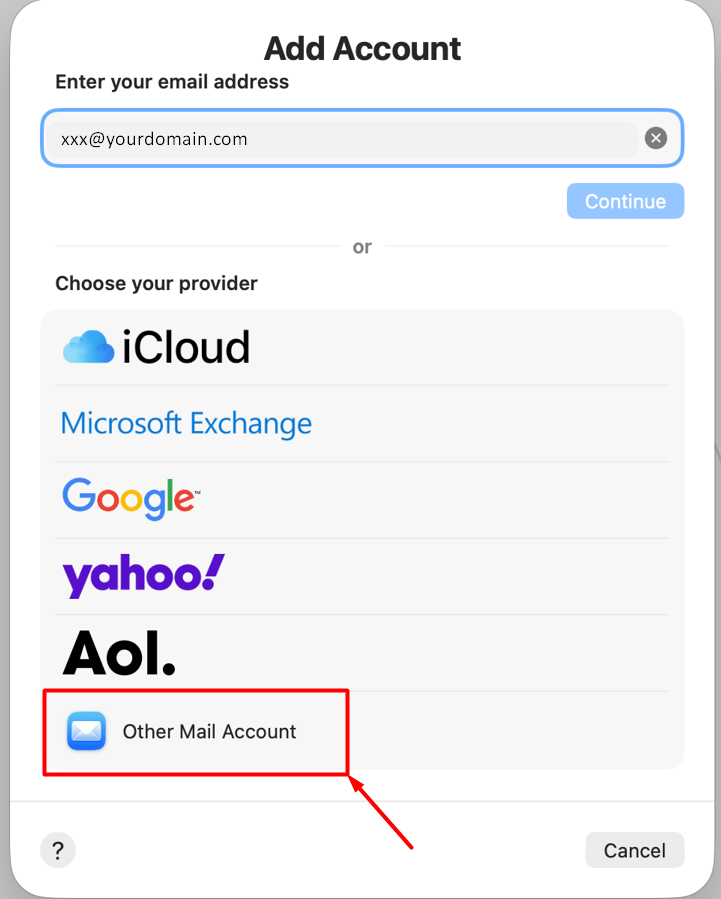
- In the window that appears, you will see services like Gmail and iCloud. Click on the “Other Mail Account” option at the bottom.
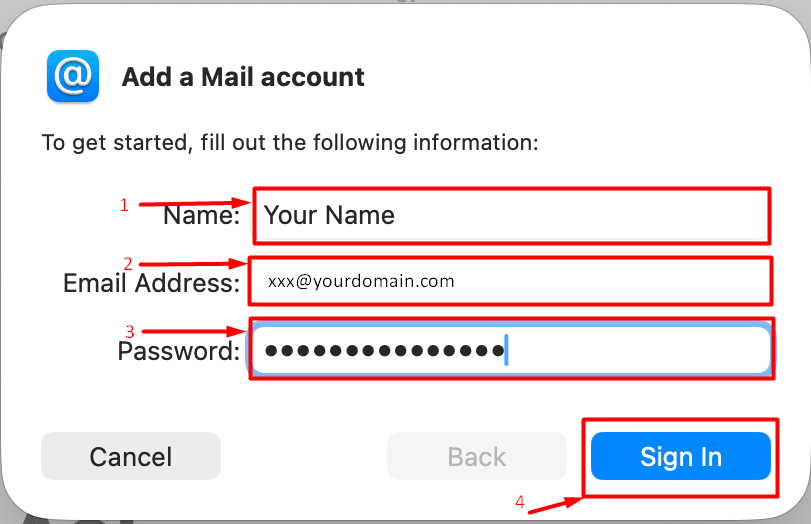
- On the screen that appears, you will be asked for information about the account you want to set up.
- Name: This is the name that recipients will see when you send an email. You can enter your own name, your department, or your company name.
- Email Address: Enter the full email address you want to set up. Make sure to include the complete domain after the username. Example: [email protected]
- Password: Enter the password for the email account you want to set up.
- After filling in all the information completely, click the “Sign In” button.
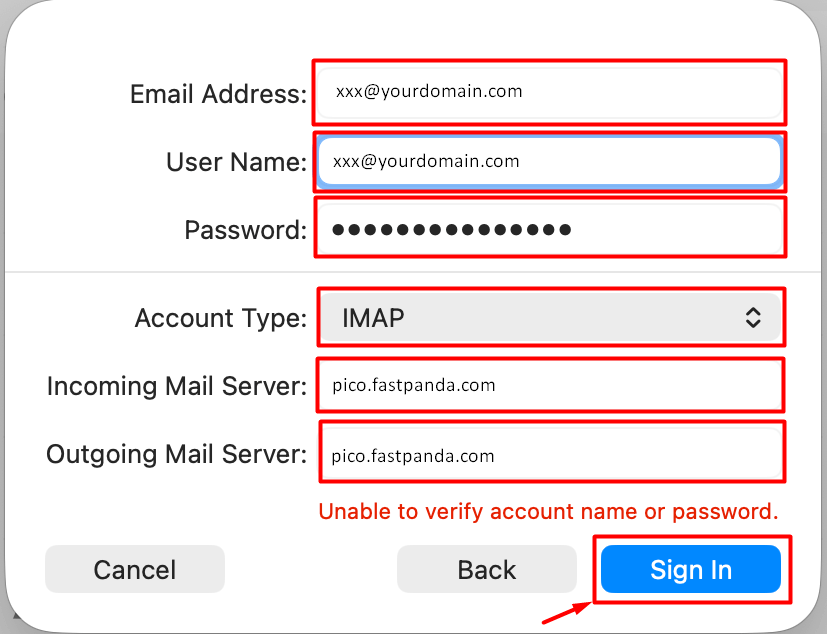
- Some information will be requested on the opened page. Please fill it in as follows.
- In the “Account Type” section, select “IMAP”.
- Email Address: Enter the full email address you want to set up. Make sure to include the complete domain after the username. Example: [email protected]
- Username: Enter the full email address you want to set up. Make sure to include the complete domain after the username. Example: [email protected] Important Information: When you enter the server name, the Username field above will change to “Automatic”. However, you need to enter the full email username in that field.
- Password: Enter the password for the email account you want to set up.
- Incoming Mail Server: pico.fastpanda.com (This information may vary. Please check the Incoming Server and Outgoing Server details from your client panel by navigating to: Email Hosting > Manage > Email Configuration.)
- If a port number is requested, you can enter “993”.
- If asked whether to use SSL, you can enable the SSL option.
- Outgoing Mail Server: pico.fastpanda.com (This information may vary. Please check the Incoming Server and Outgoing Server details from your client panel by navigating to: Email Hosting > Manage > Email Configuration.)
- If a port number is requested, you can enter “465”.
- If asked whether to use SSL, you can enable the SSL option.
- After entering the information, you may see the message “Unable to verify account name or password” below. This is normal. Click the “Sign In” button. This will successfully set up your business email. You can now try sending and receiving emails.
If you encounter errors when sending or receiving emails after following the steps above, you may need to review the automatically configured settings. To check the Mail settings, go to “Mail > Settings > Accounts.” Select the email account you set up from the left panel. On the page that opens, go to the “Server Settings” tab. Here you will see the Incoming Mail Server and Outgoing Mail Server information. At this point:
- Check that the “Username” field contains the correct email address you want to set up.
- Make sure your email password is correct in the “Password” field.
- Ensure that the server address is correct in the “Host Name” field. Server name: pico.fastpanda.com (This information may vary. Please check the Incoming Server and Outgoing Server details from your client panel by navigating to: Email Hosting > Manage > Email Configuration.)
- If the “Automatically manage connection settings” box is checked, uncheck it and verify the port information.
- Incoming Mail Server (IMAP): enter 993 and check the SSL box.
- Outgoing Mail Server (SMTP): enter 465 and check the SSL box.
- After completing the steps above, you can test sending and receiving emails again.


 .CO.UK Domain
 Linux Hosting
 Windows Hosting