Users who are accustomed to the Gmail interface may find it difficult to manage different Business Email addresses from separate panels. In this case, they can add their Buesiness Email accounts to the Gmail interface to collect all emails in one screen. If you also want to add your Business Email account from Fastpanda.co.uk to Gmail, you can follow the steps below.
Outgoing Mail Settings
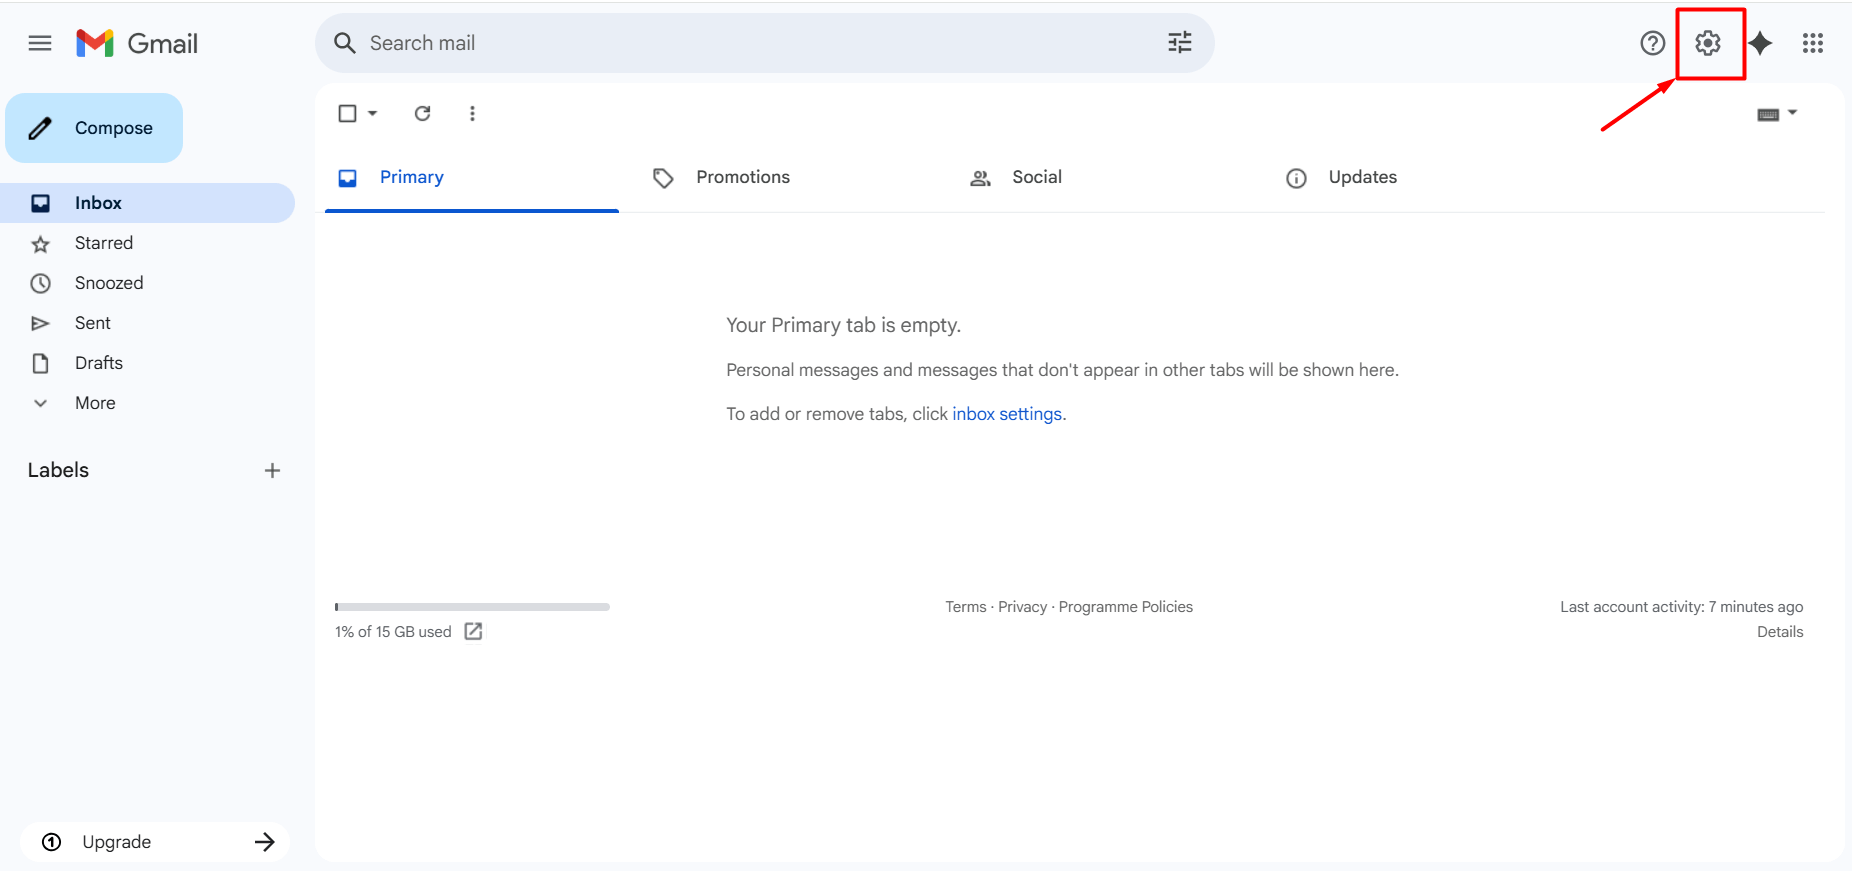
- Log in to your Gmail account and click the gear icon (Settings) in the top right corner.
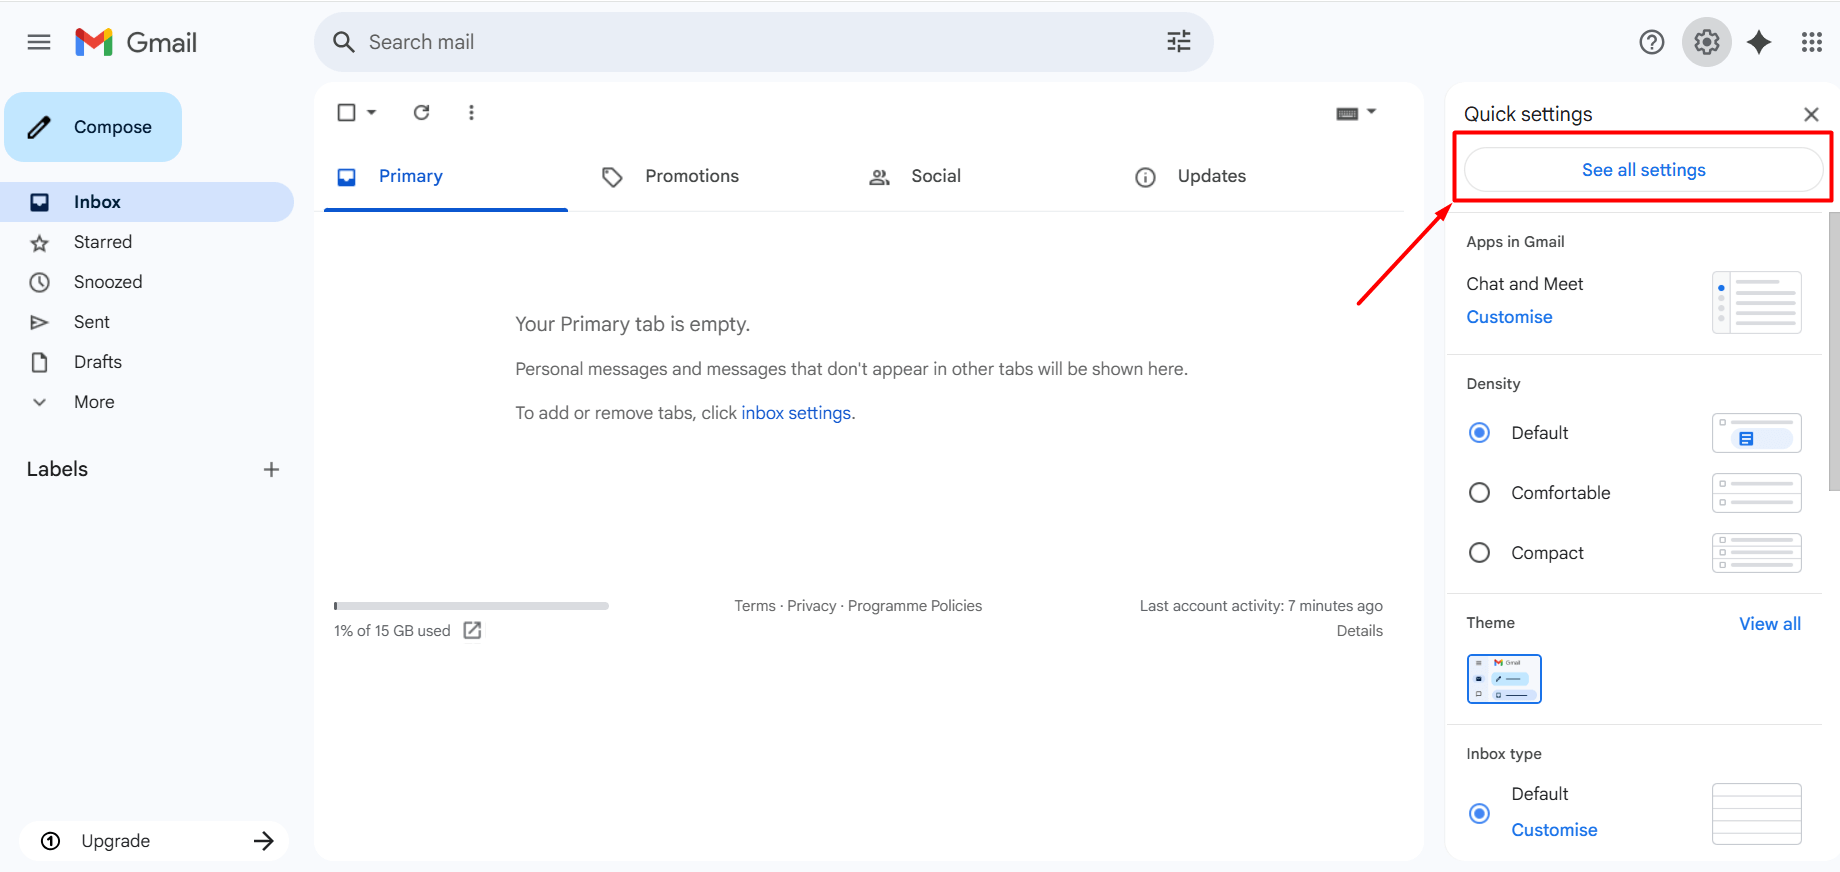
- Click on the “See all settings” button.
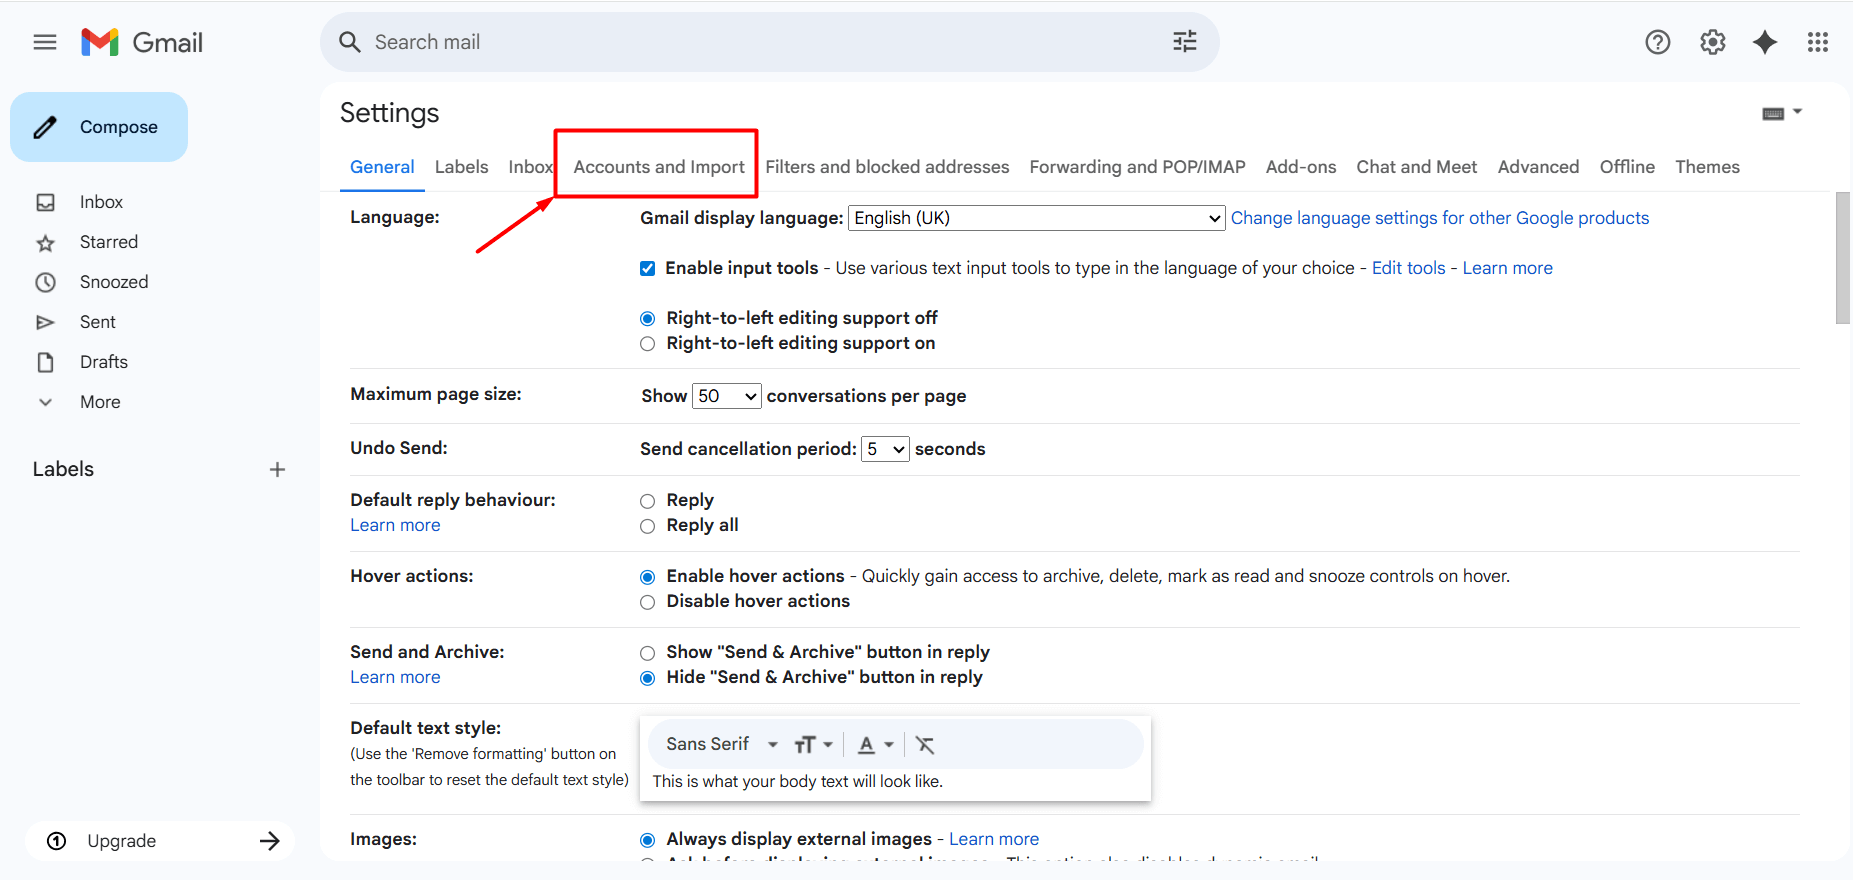
- Go to the “Accounts and Import” tab.
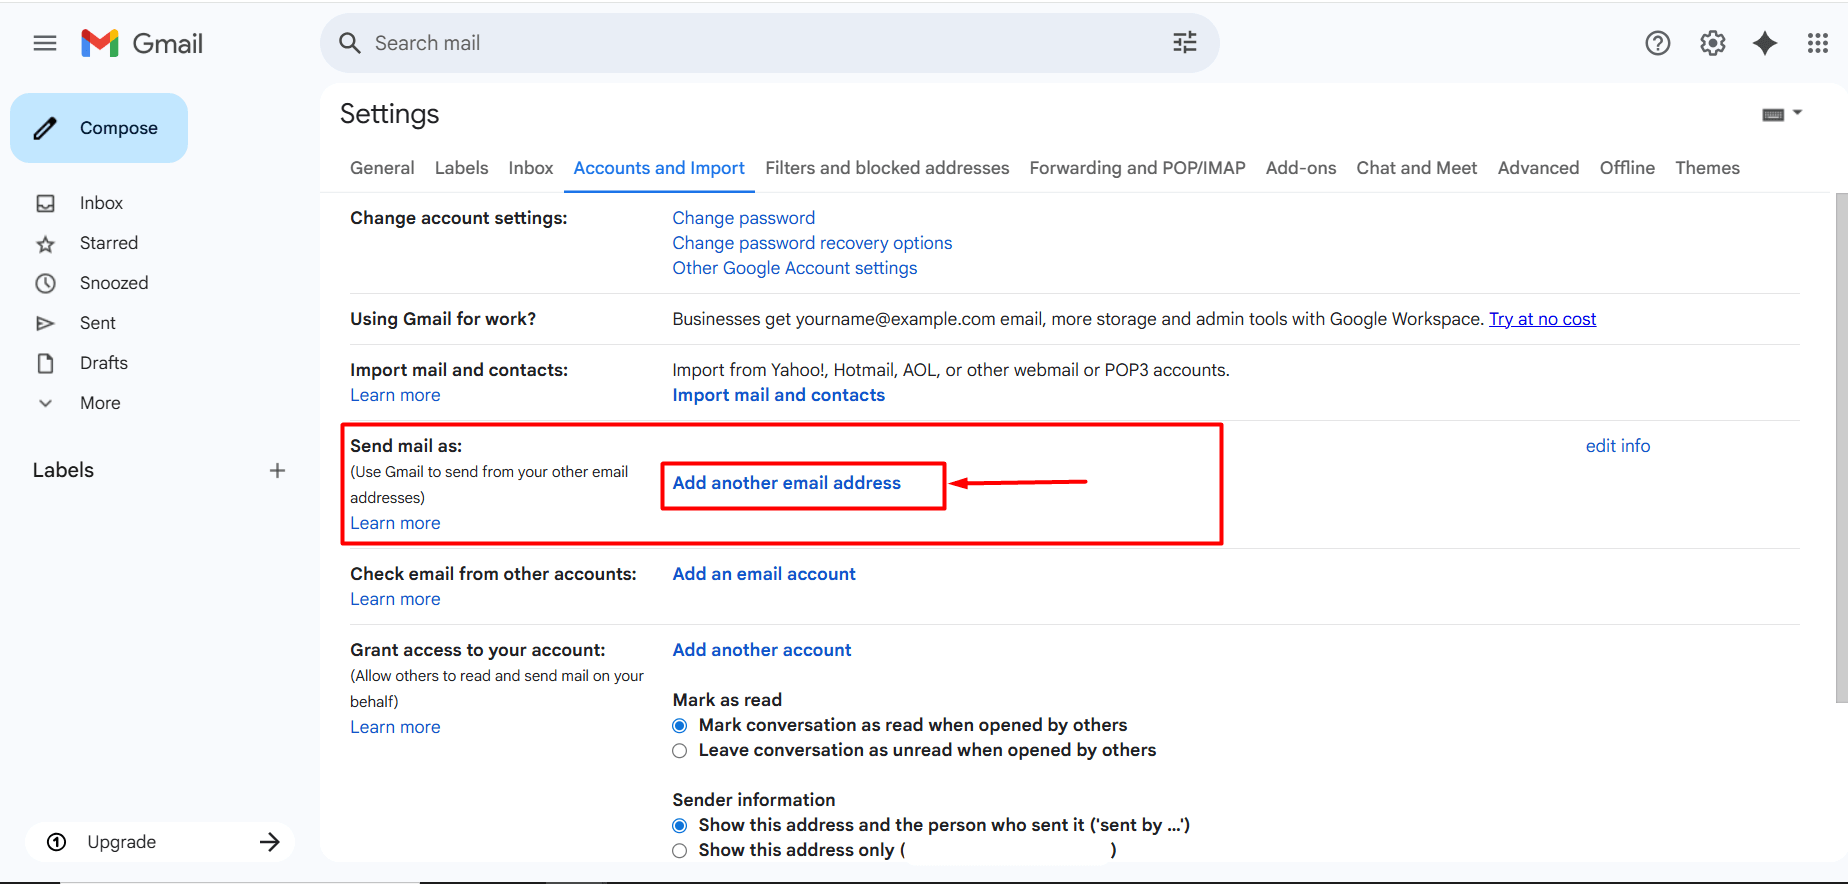
- In the “Send mail as:” section, click the “Add another email address” button.
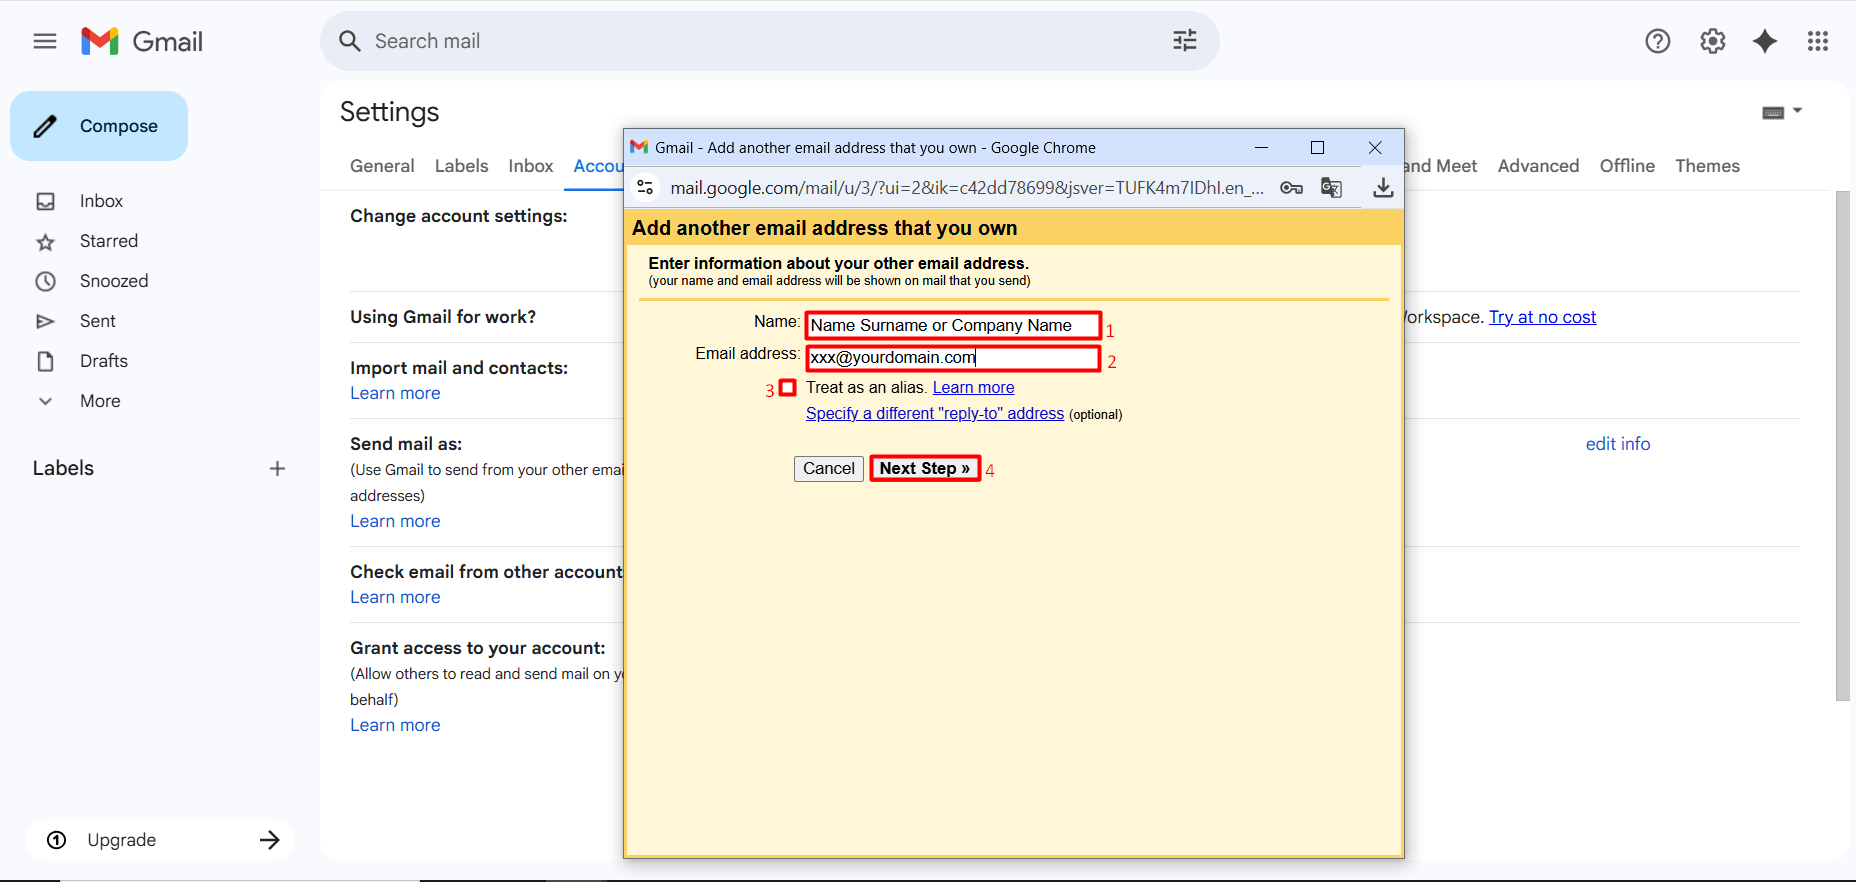
- A window will appear on the screen. In this window, you will need to configure the outgoing mail settings. Incorrectly entered information may cause issues with sending emails. For a correct setup, you can fill in the information as shown below.
- Name: This is the name that recipients will see when you send an email. You can enter your own name, your department, or your company name.
- Email Address: Enter the full email address you want to set up. It is important to include the complete domain after the username. Example: [email protected]
- Treat as an alias: If you want to use it as a real email, uncheck the “Treat as an alias” box. (Recommended)
- After filling in the information, click the “Next Step” button.
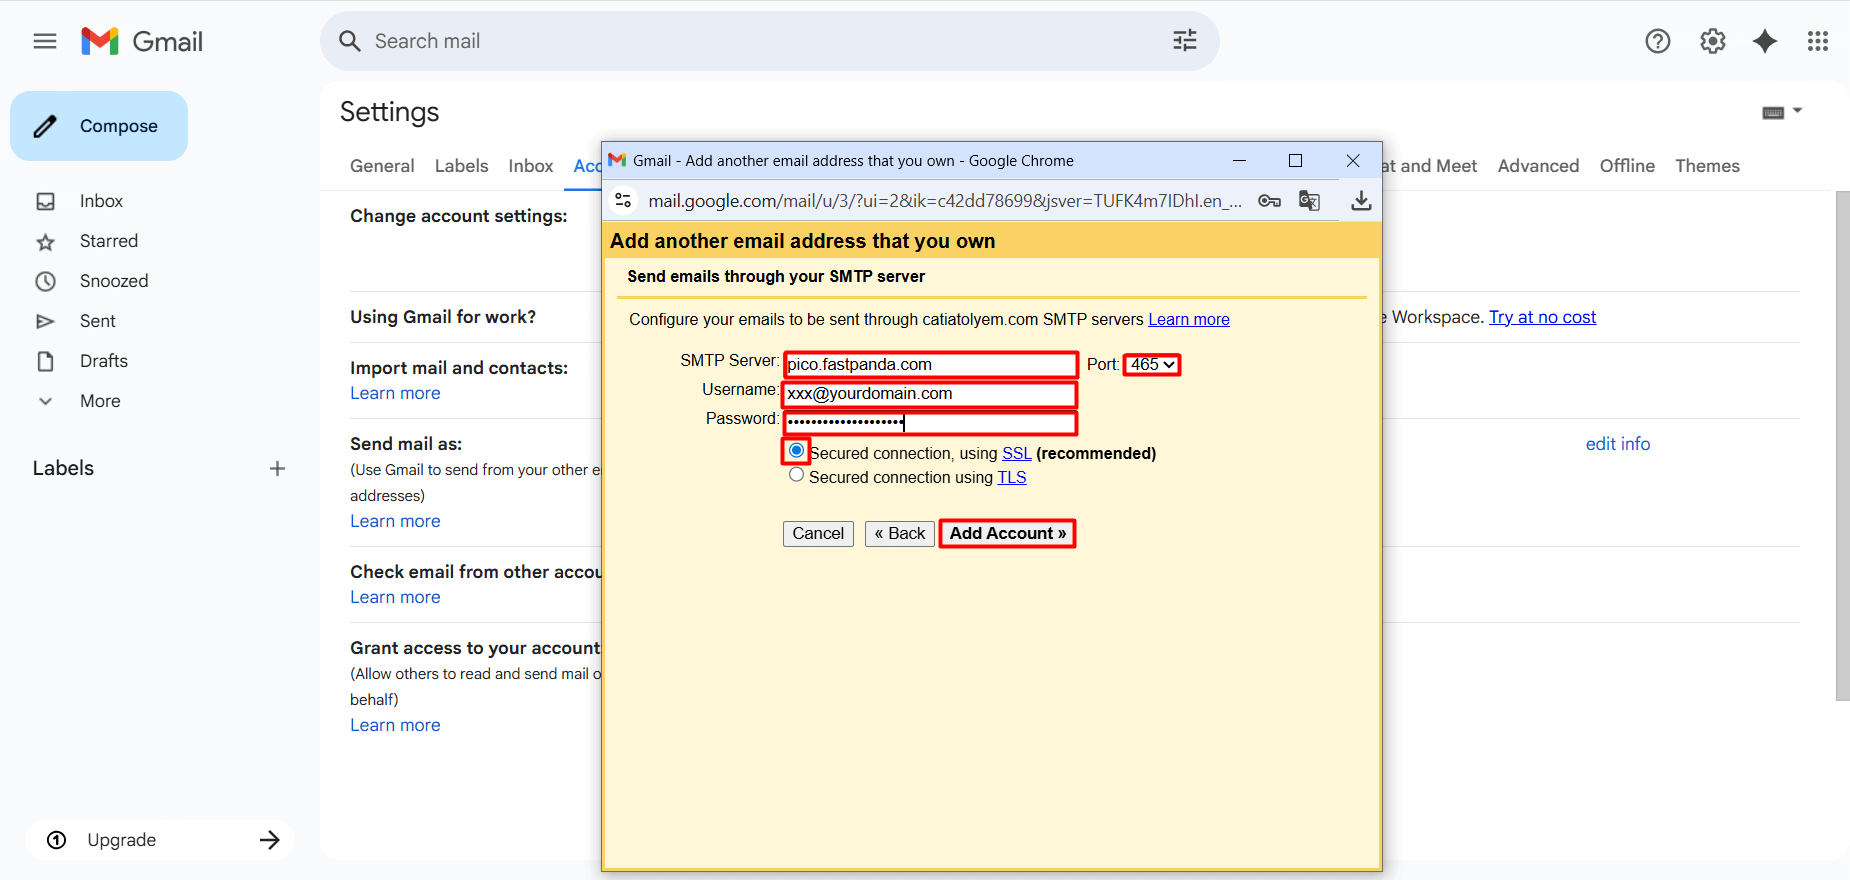
- On the page that opens, you will be asked to enter some information for the outgoing mail settings. Incorrectly entered information may cause issues with sending emails. For a correct setup, you can complete the information as shown below.
- SMTP Server: pico.fastpanda.com (Server names may vary. You can check by logging into your customer panel: Email Hosting > Manage Product > Device Connect Settings > Recommended apps > Gmail > Desktop.)
- Username: Enter the full email address you want to set up. It is important to include the complete domain after the username. Example: [email protected]
- Password: Enter the password for the email account you want to set up.
- SSL / TLS: Select SSL (Secured connection, using SSL)
- Port: Set the port to 465
- After filling in the information, click the “Add Account” button.
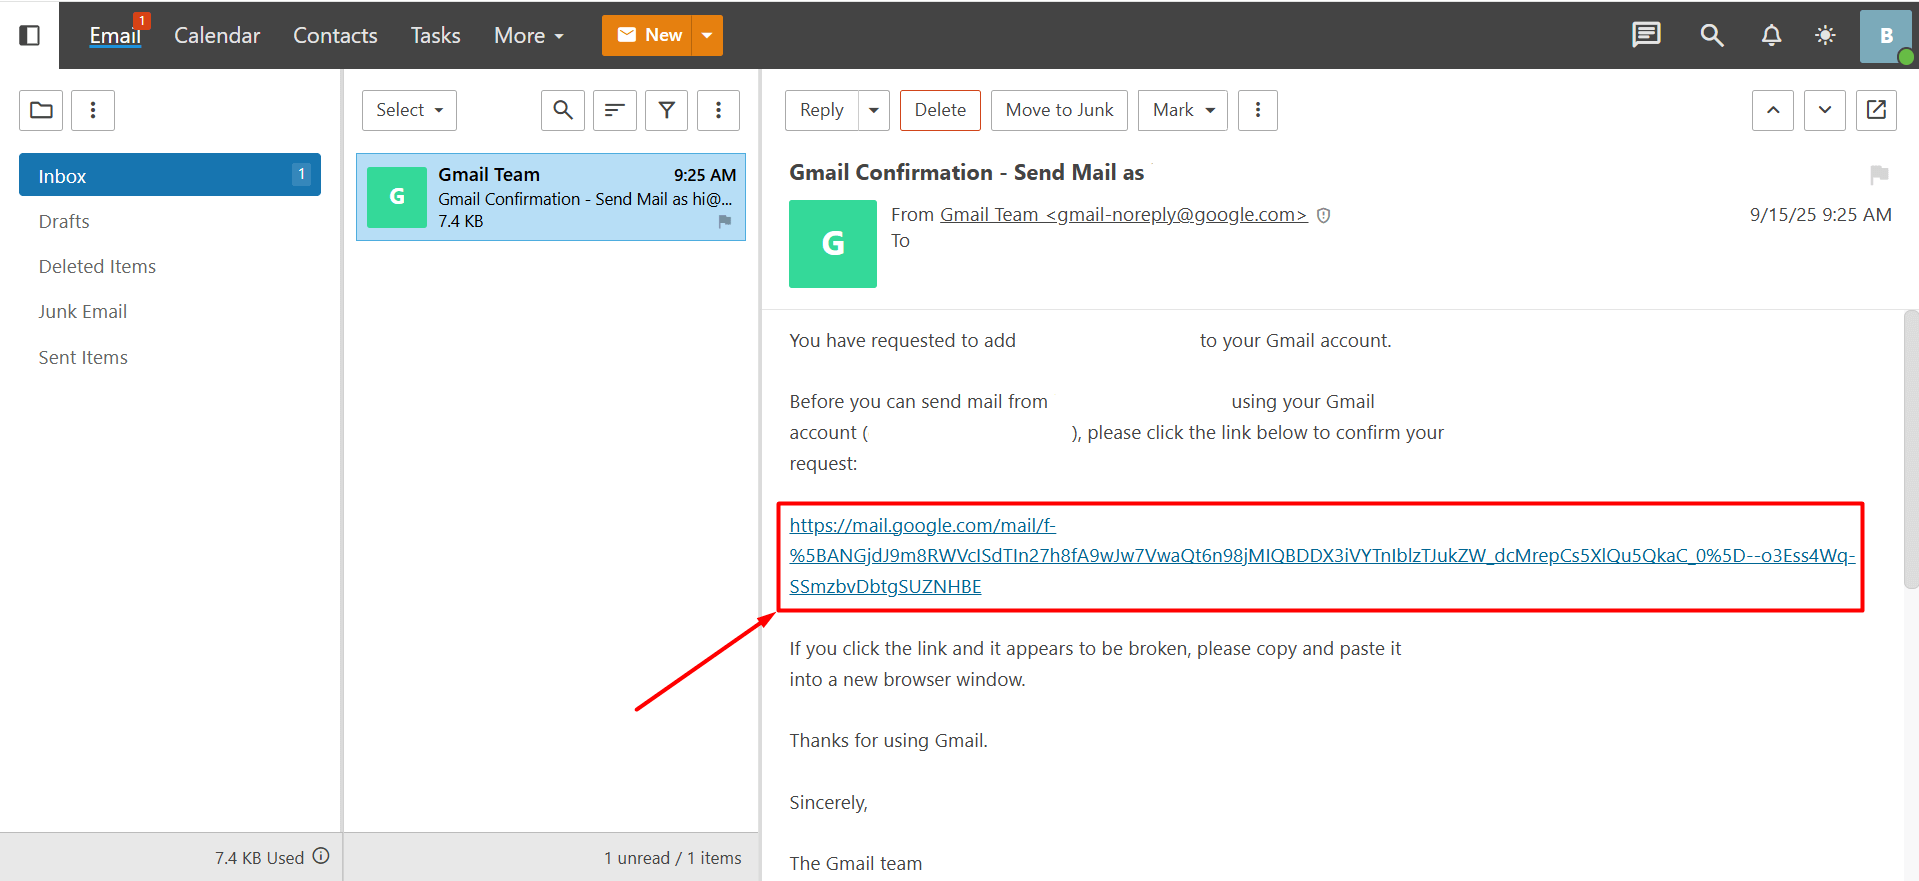
- After completing the steps above, a confirmation email will be sent to the Business Email account you want to add. You need to click the link in this email to confirm. Example:
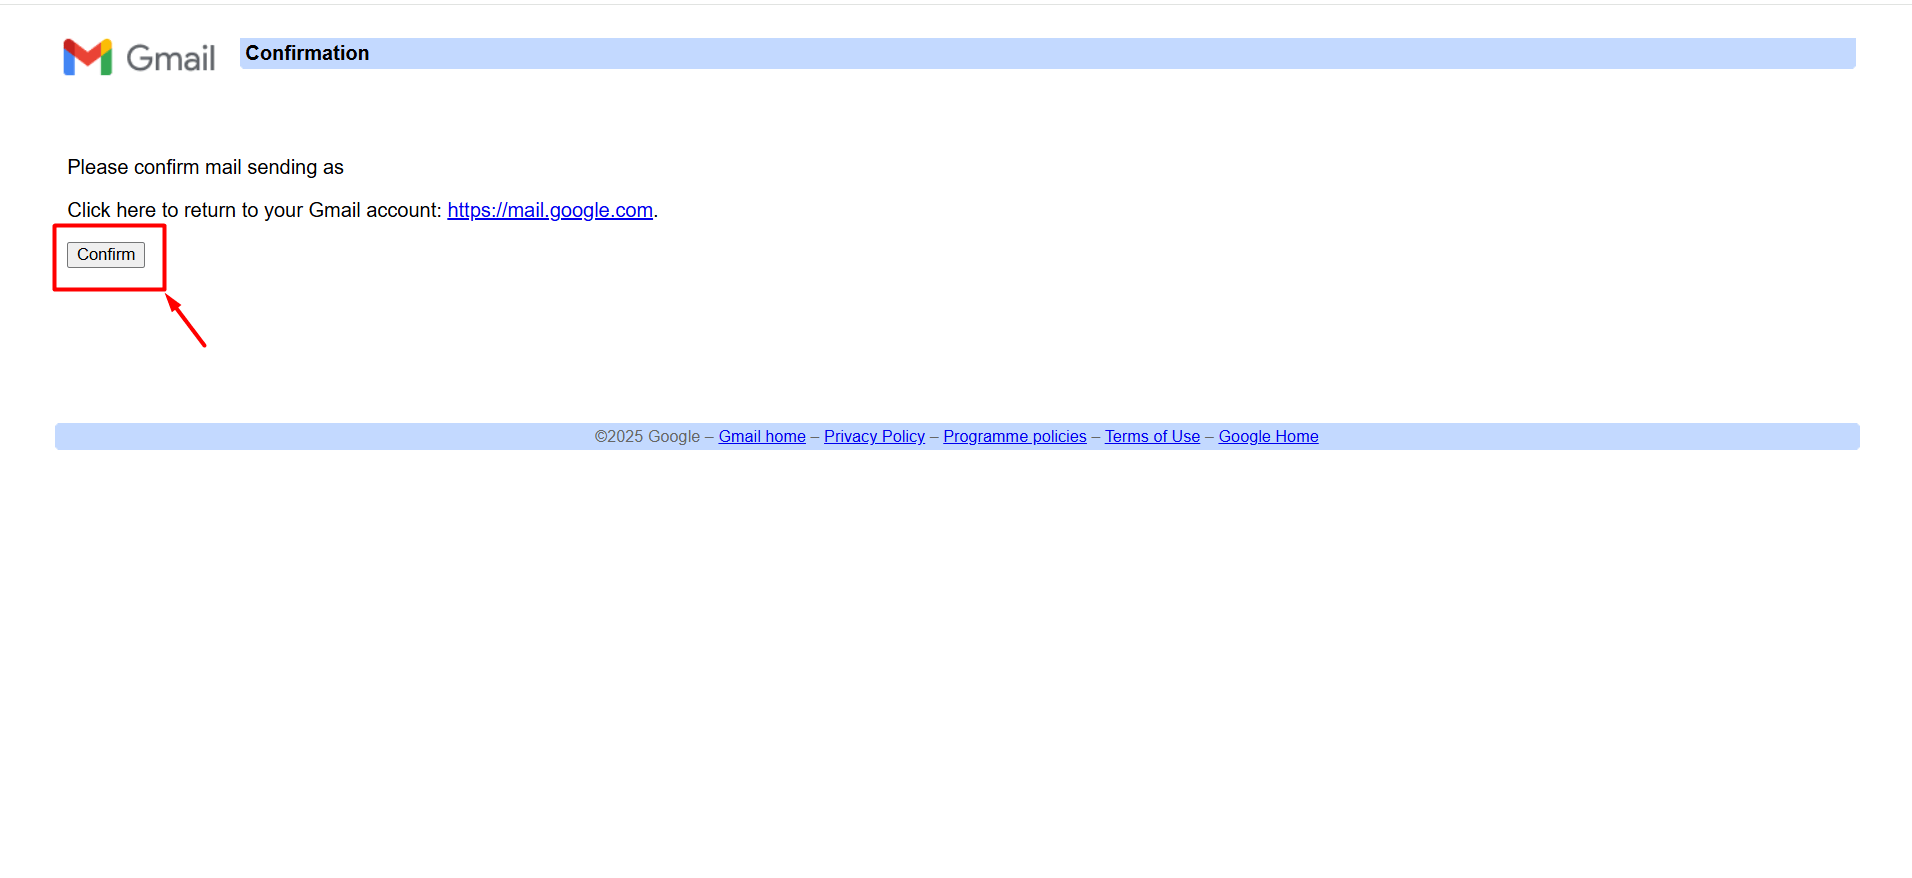
- Once the confirmation process is completed, you can continue with the steps below to configure the incoming settings.
Incoming Email Settings
- Log in to your Gmail account and click the gear icon (Settings) in the top right corner.

- Click on the “See all settings” button.

- Go to the “Accounts and Import” tab.

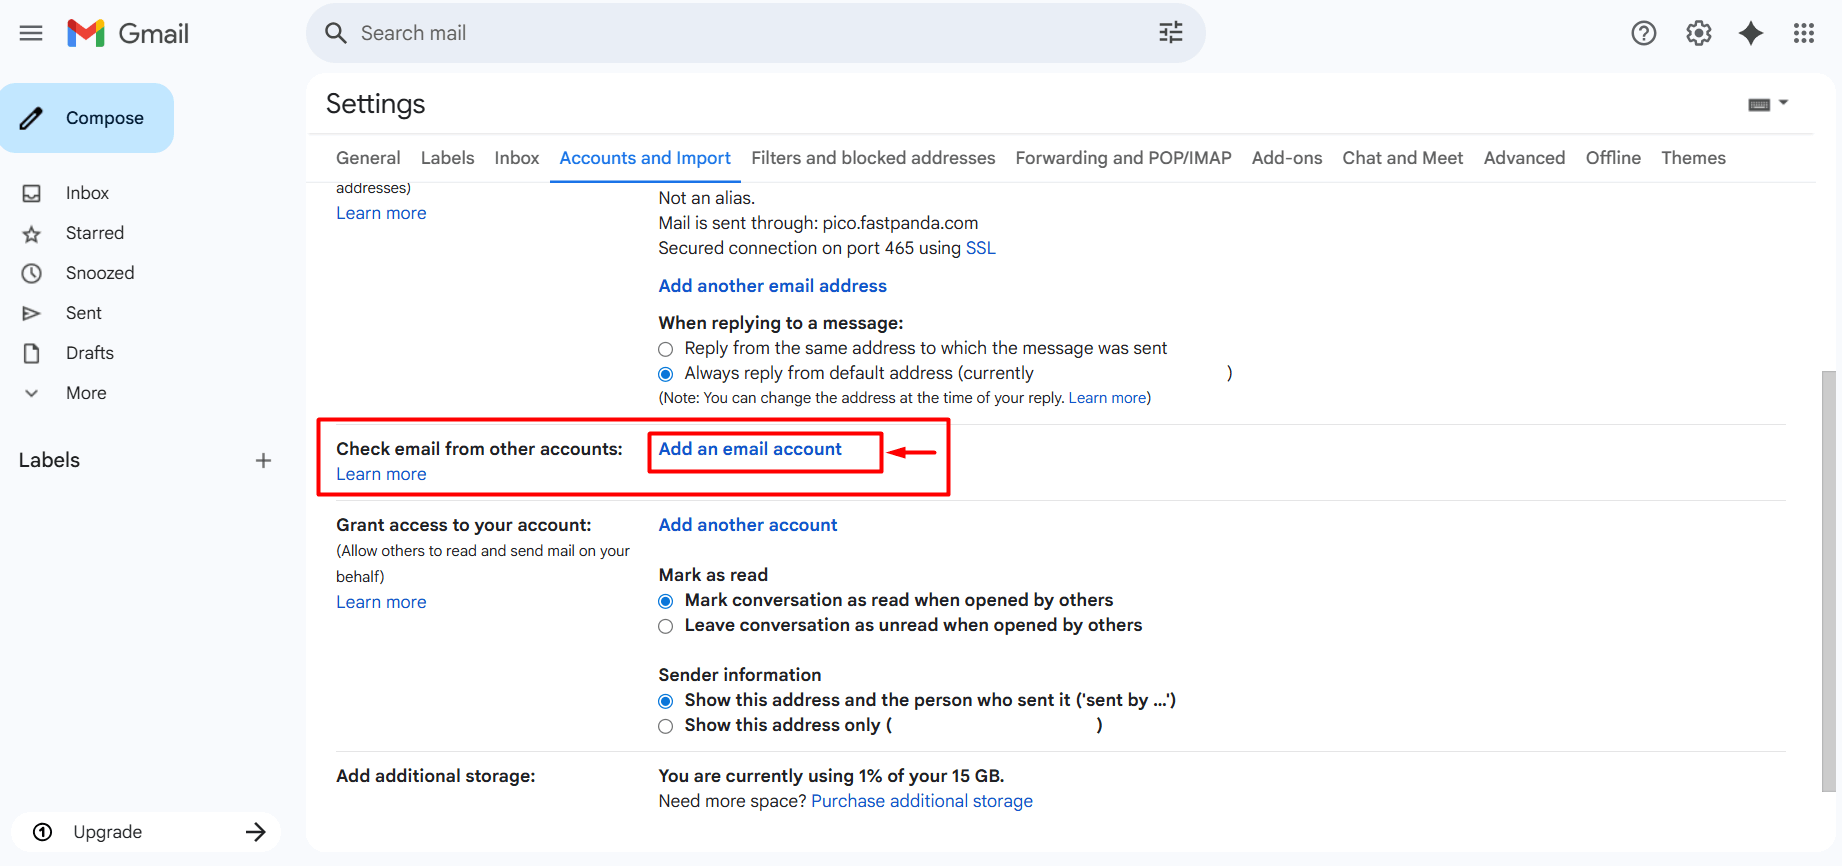
- In the “Check email from other accounts” section, click the “Add an email account” button.
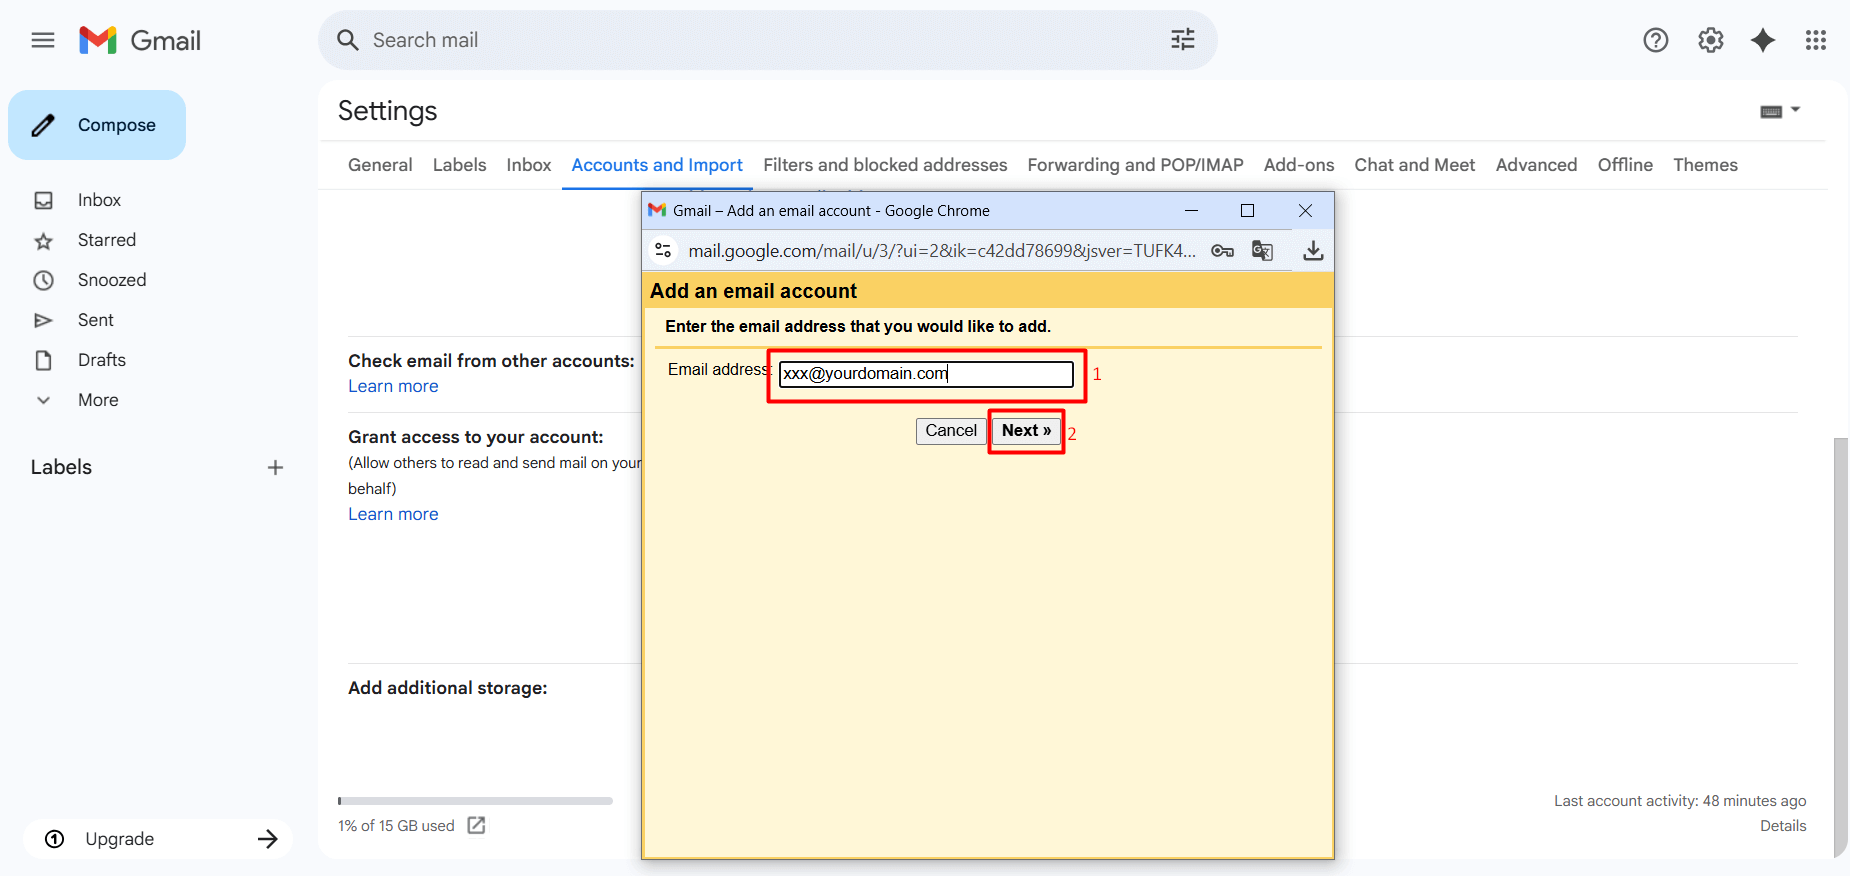
- A new window will appear on the screen, asking you to enter your email address. Enter your full Business Email address, including the domain and extension (e.g., [email protected]). After entering the email address, click the “Next” button.
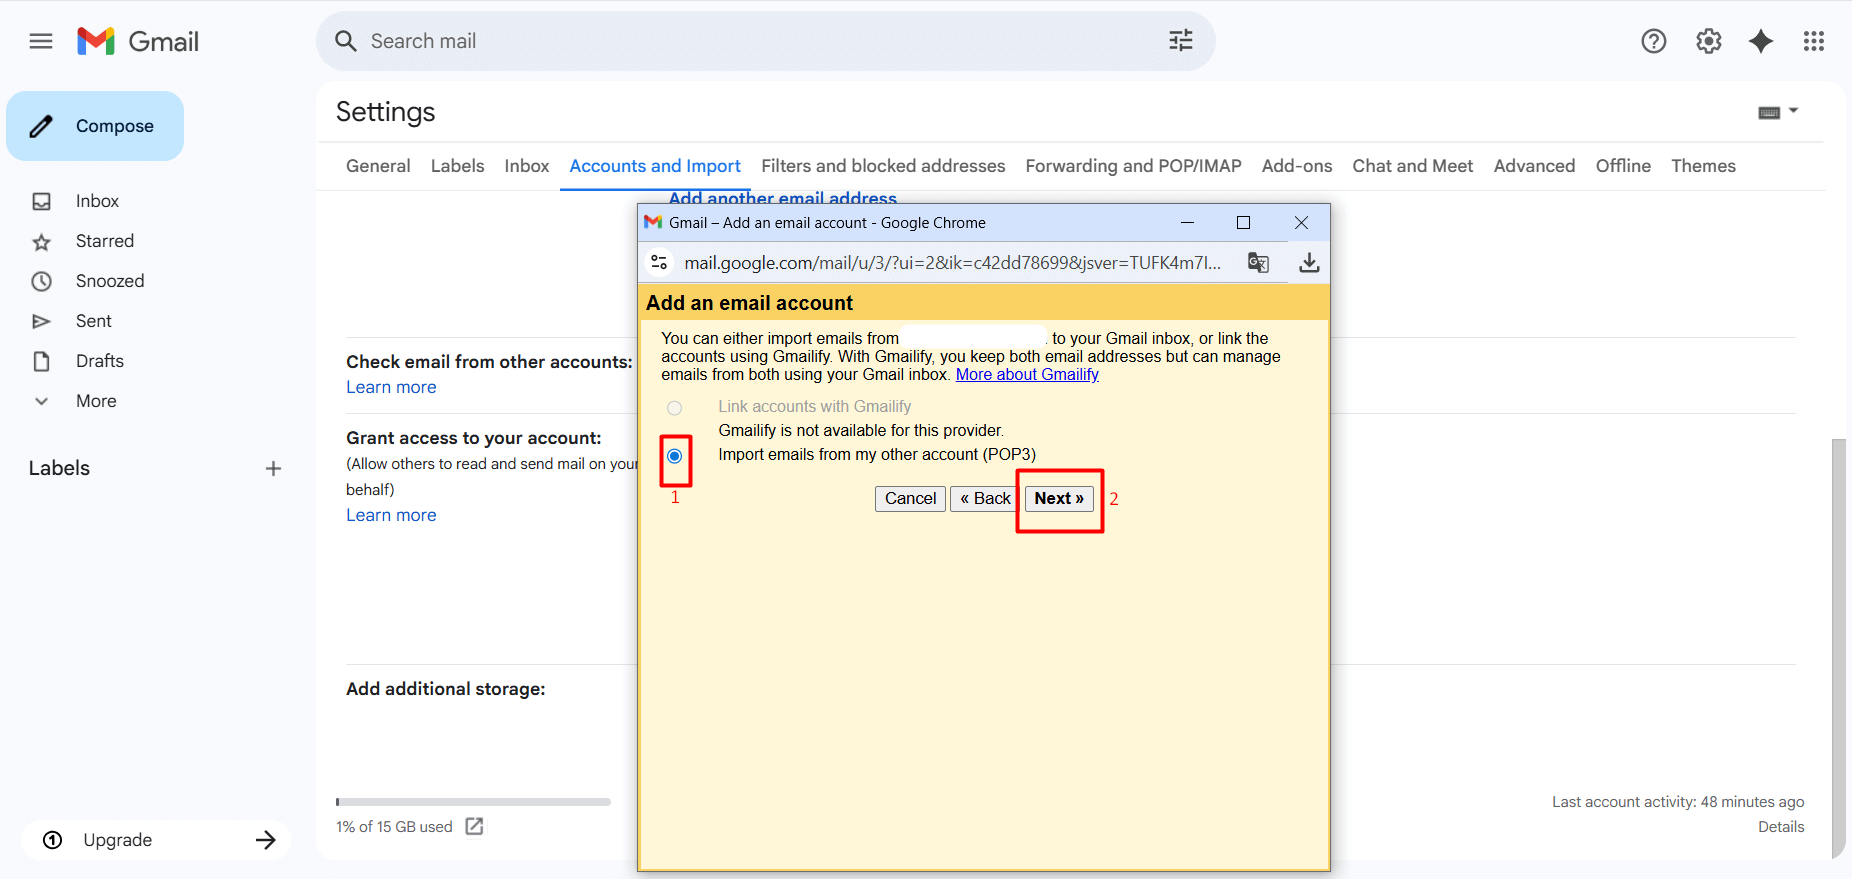
- With “Import emails from my other account (POP3)” selected, click the “Next” button.
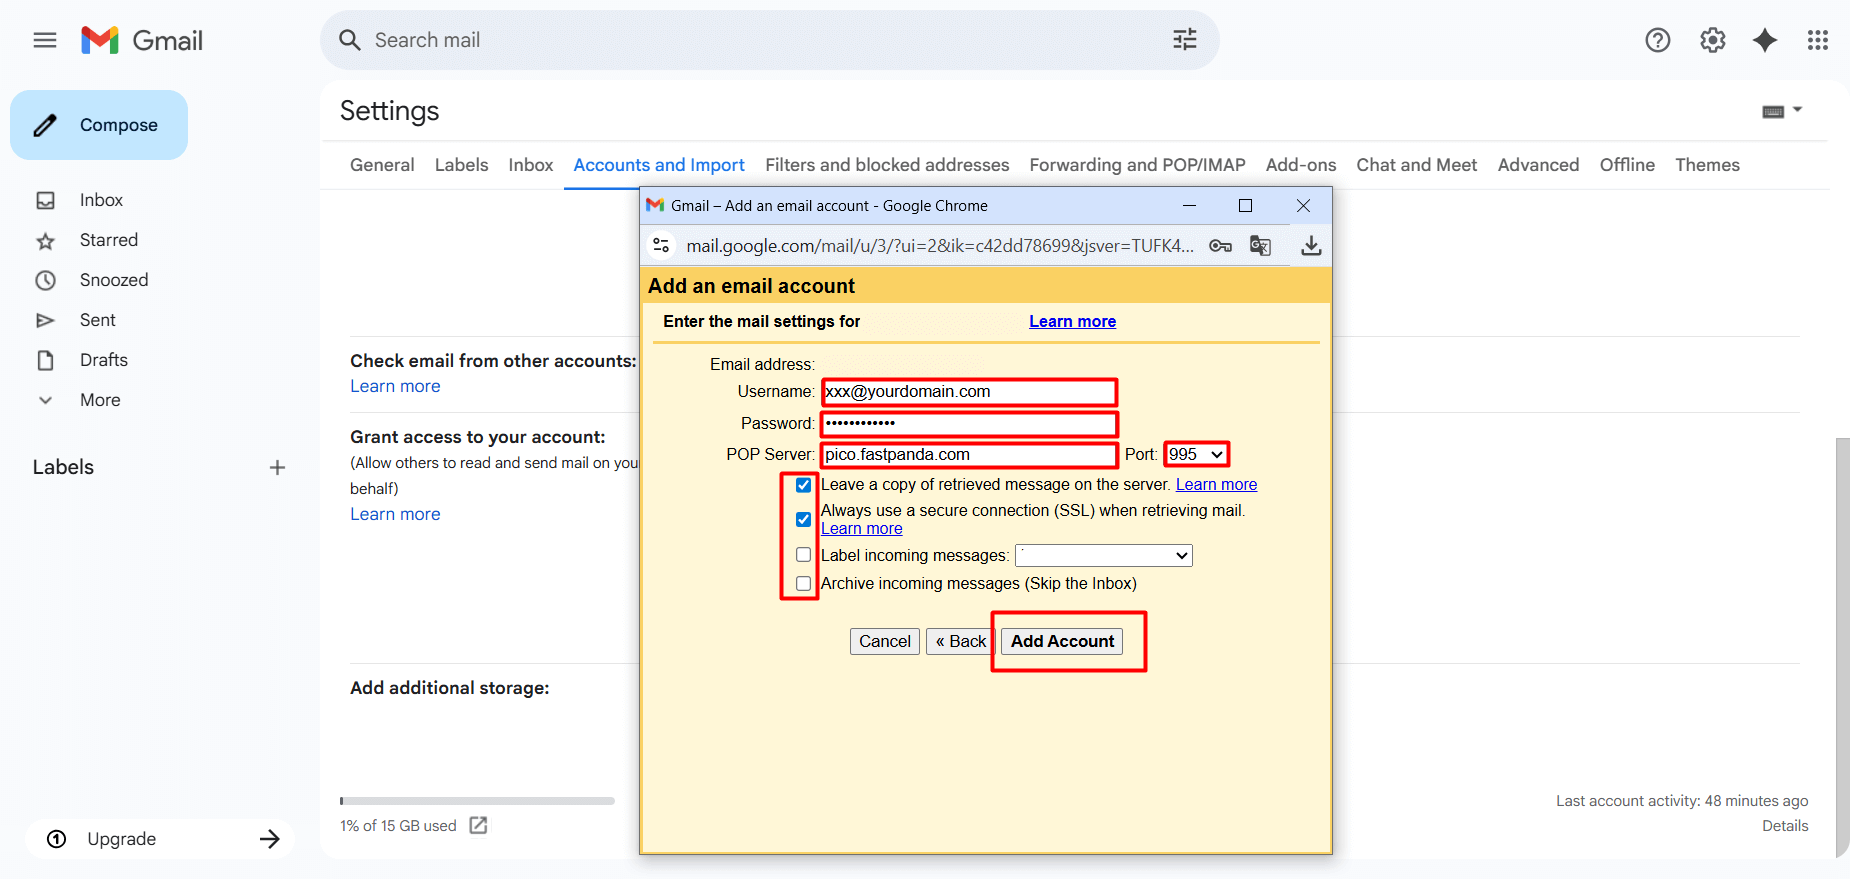
- On the page that opens, you will be asked to enter some information for the incoming mail settings. Incorrect information may cause issues with receiving emails. To ensure proper setup, you can complete the fields as shown below.
- Username: Enter the full email address you want to set up. It is important to include the complete domain after the username. Example: [email protected]
- Password: Enter the password for the email account you want to set up.
- POP Server: pico.fastpanda.com (Server names may vary. You can check by logging into your customer panel: Email Hosting > Manage Product > Device Connect Settings > Recommended apps > Gmail > Desktop.)
- Port: Set the port to 995
- If you check the “Leave a copy of retrieved messages on the server” box, emails will remain both in Gmail and on the server. This feature is generally preferred, but you can set it according to your own preference.
- Check the “Always use a secure connection (SSL) when retrieving mail” box.
- If you check the “Label incoming messages” box, Business Emails will appear separately. You can select this option based on your preference.
- If you check the “Archive incoming messages (Skip the Inbox)” box, incoming emails will be archived. You can select this option based on your preference.
- After filling in the information, click the “Add Account” button.
-
If you have correctly completed the information above, the mail setup for the incoming server will be finished. This way, the emails that already exist on the server will be transferred to your Gmail account. If there are too many emails on the server, synchronization may take some time. Additionally, after activating the account, the emails sent to you may not be synchronized instantly and may not appear in Gmail immediately. Usually, new emails are reflected in your inbox after about 15 minutes. If you want to check instantly whether a new email has arrived, you can follow these steps to force synchronization:
“Settings > See all settings > Accounts and Import > Check mail from other accounts > Check mail now”. - If you want to send an email from your Business Email account, you can select your Business Email address in the ‘From’ field when composing a new email. This way, the email will be sent from your Business Email address instead of your Gmail account.


 .CO.UK Domain
 Linux Hosting
 Windows Hosting